Service Details: Difference between revisions
(Created page with "This screen can be called only from the Job and Service screens, for enquiry, editing or adding new services. For enquiry and editing, the screen will always be passed a Job ID ...") |
(Added details to screen for UDF and Photos against services, products and activities) |
||
| (5 intermediate revisions by the same user not shown) | |||
| Line 1: | Line 1: | ||
This screen can be | This screen only can be shown from the Job and Service screens, for enquiry, editing or adding new services. | ||
The screen displays the service details of the job in a table below: | |||
[[File:EPOD-ServiceDetails.PNG|900px|border]] | |||
<br />''Service Details''<br /> | |||
The screen will display the details of the | Depending on the status of the line, the line will be coloured: | ||
* Pending - No colour | |||
* Complete - Green | |||
* Cancelled - Red. | |||
Under this table, the screen will display any details entered by the users, grouped into sections. The sections are: | |||
* ''Products''. | |||
* ''Activities''. | |||
If this screen is shown from the Services screen, the details of the service or service item selected from the Services screen will have the details displayed in these tabs. If this is shown by the Jobs screen, the screen will display the details of the first service item for this service. | |||
The screen allows none of the details in these sections to be edited. | |||
== Viewing Service Details == | |||
You can view the service details clicking the '''Select''' button against the service item in the top table - the screen will show the details in a Service Details pop-up. | |||
[[File:EPOD-ServiceDetails2.PNG|400px|border]] | |||
<br />''Service Details Pop-up''<br /> | |||
The details displayed are: | |||
* ''Job ID''. | |||
* ''Service ID''. | |||
* ''Service Type''. | |||
* ''Reg Number''. | |||
* ''Serial No''. | |||
* ''SIM Number''. | |||
* ''Mileage''. | |||
* ''Job Group''. | |||
* ''Planned Date and Time''. | |||
* ''Job Instruction''. | |||
* ''Customer''. | |||
* ''Range''. | |||
* ''Model''. | |||
You can cancel the service of an item by clicking the '''Cancel''' button. | |||
You can remove an item from the service by clicking the '''Delete''' button. | |||
There are several tabs on this pop-up, as follows: | |||
* ''Details'' - this tab shows immediately and is described above. | |||
* ''Info UDF'' - this tab shows for completed services, and shows any user-defined form entered against the service info. | |||
[[File:EPOD-ServiceDetails2-InfoUDF.PNG|400px|border]] | |||
* ''Diagnosis UDF'' - this tab shows for completed services, and shows any user-defined form entered when completing the service. | |||
[[File:EPOD-ServiceDetails2-DiagnosisUDF.PNG|400px|border]] | |||
* ''Prework UDF'' - this tab shows for completed services, and shows any user-defined form entered before starting the service. | |||
[[File:EPOD-ServiceDetails2-PreWorkUDF.PNG|400px|border]] | |||
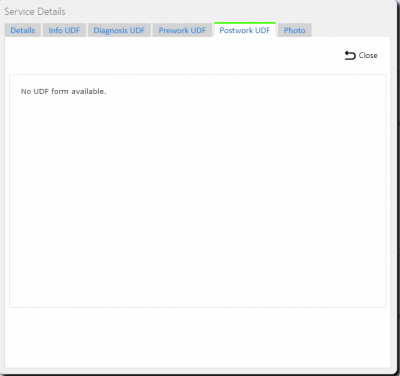
* ''Postwork UDF'' - this tab shows for completed services, and shows any user-defined form entered after completing the service. | |||
[[File:EPOD-ServiceDetails2-PostWorkUDF.PNG|400px|border]] | |||
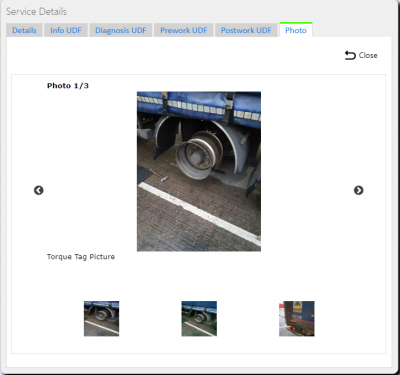
* ''Photos'' - this tab shows for completed services, and shows any phots captured against the service. | |||
[[File:EPOD-ServiceDetails2-Photo.PNG|400px|border]] | |||
== Viewing Service Item Details == | |||
You can click the '''Details''' button against the service item line in the top table to view the Parts Used and Activities against a Service. The screen will refresh the tabs below with the details against this service item. | |||
== Products Tab == | |||
The Products table displays the parts used by the engineer against the service. | |||
The table displays the following details: | |||
* ''Product'' - The ID of the part. | |||
* ''Direction'' - Used (U) or Returned/Required (R), depending on device configuration. | |||
* ''Quantity'' - the quantity of this part used. | |||
* ''Description'' - the description of the part. | |||
* ''Vehicle ID'' - the vehicle from which this part was sourced. | |||
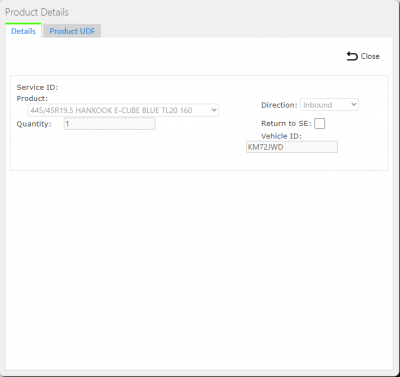
You can view further details of the part clicking the '''Select''' button against the line - the screen will show a Product Details pop-up. | |||
You can delete parts by clicking the '''Delete''' button against the line - the screen will ask you to confirm before the part is deleted. | |||
[[File:EPOD-ServiceDetails3.PNG|400px|border]] | |||
<br />''Edit Service Parts Pop-up''<br /> | |||
You can edit these details by clicking the '''Edit''' button. When changes are complete, you can click '''Save''' to save the changes, or '''Close''' to close the pop-up without saving the changes. | |||
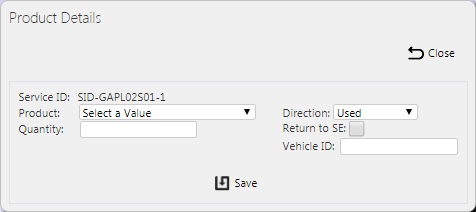
* | You can add a new Part to the service item by clicking on the '''New Product''' button provided. The screen will show a Product Details pop-up. | ||
* | |||
* | [[File:EPOD-ServiceDetails4.PNG|border]] | ||
<br />''Add Service Parts Pop-up''<br /> | |||
You can enter all details except the Service ID: | |||
* ''Product'' - A drop-down list of all the available parts configured in the system. | |||
* ''Direction'' - A drop down list of Used or Returned, depending on device configuration. | |||
* ''Quantity'' - the quantity of the part used. | |||
* ''Return to SE'' - return product to stock - an instruction to ERP. | |||
* ''Vehicle ID'' - the vehicle from which the part was sourced. | |||
When changes are complete, you can click '''Save''' to save the changes, or '''Close''' to close the pop-up without saving. | |||
For completed service products, the screen will show a tab for any user-defined forms entered against the product. Note that this is available only for a Fleet Management (Tyre) system. | |||
[[File:EPOD-ServiceDetails3-ProductUDF.PNG|400px|border]] | |||
== Activities Tab == | |||
The Activities table displays the activities taken by the engineer against the service. | |||
The table displays the following details: | |||
* ''Activity'' - the description of the activity. | |||
* ''Quantity'' - how many times this activity was undertaken. | |||
You can view further details of the activity by clicking the '''Select''' button against the line - the screen will show an Activity Details pop-up. | |||
You can delete an activity by clicking the '''Delete''' button against the line - the screen will ask you to confirm before the activity is deleted. | |||
[[File:EPOD-ServiceDetails5.PNG|400px|border]] | |||
<br />''Edit Service Activities Pop-up''<br /> | |||
You can edit these details by clicking the '''Edit''' button. When changes are complete, you can click '''Save''' to save the changes, or '''Close''' to close the pop-up without saving. | |||
You can add a new Activity to the service item by clicking on the '''New Activity''' button provided. The screen will show an Activity Details pop-up. | |||
[[File:EPOD-ServiceDetails6.PNG|border]] | |||
<br />''Add Service Activities Pop-up''<br /> | |||
You can enter all details except the Service ID: | |||
* ''Activity'' - A drop-down list of activities. | |||
* ''Quantity'' - how many times this activity was undertaken. | |||
When changes are complete, you can click '''Save''' to save the changes, or '''Close''' to close the pop-up without saving. | |||
For completed service activities, the screen will show a tab for any user-defined forms entered against the activity. Note that this is available only for a Fleet Management (Tyre) system. | |||
[[File:EPOD-ServiceDetails5-ActivityUDF.PNG|400px|border]] | |||
[[Category:UG 291094 EPOD Admin User Guide|200_300_100]] | [[Category:UG 291094 EPOD Admin User Guide|200_300_100]] | ||
Latest revision as of 11:05, 6 August 2024
This screen only can be shown from the Job and Service screens, for enquiry, editing or adding new services.
The screen displays the service details of the job in a table below:
Depending on the status of the line, the line will be coloured:
- Pending - No colour
- Complete - Green
- Cancelled - Red.
Under this table, the screen will display any details entered by the users, grouped into sections. The sections are:
- Products.
- Activities.
If this screen is shown from the Services screen, the details of the service or service item selected from the Services screen will have the details displayed in these tabs. If this is shown by the Jobs screen, the screen will display the details of the first service item for this service.
The screen allows none of the details in these sections to be edited.
Viewing Service Details
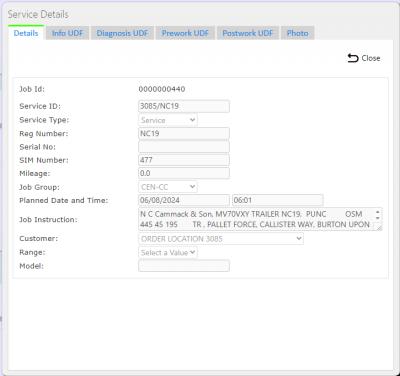
You can view the service details clicking the Select button against the service item in the top table - the screen will show the details in a Service Details pop-up.
The details displayed are:
- Job ID.
- Service ID.
- Service Type.
- Reg Number.
- Serial No.
- SIM Number.
- Mileage.
- Job Group.
- Planned Date and Time.
- Job Instruction.
- Customer.
- Range.
- Model.
You can cancel the service of an item by clicking the Cancel button.
You can remove an item from the service by clicking the Delete button.
There are several tabs on this pop-up, as follows:
- Details - this tab shows immediately and is described above.
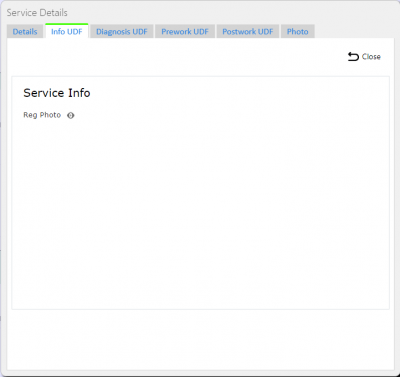
- Info UDF - this tab shows for completed services, and shows any user-defined form entered against the service info.
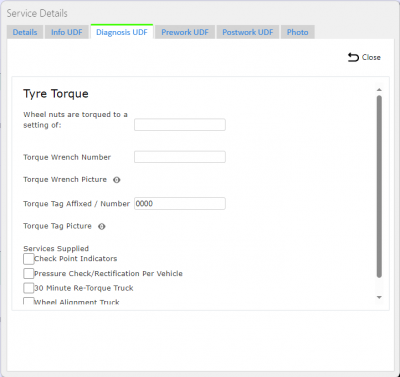
- Diagnosis UDF - this tab shows for completed services, and shows any user-defined form entered when completing the service.
- Prework UDF - this tab shows for completed services, and shows any user-defined form entered before starting the service.
- Postwork UDF - this tab shows for completed services, and shows any user-defined form entered after completing the service.
- Photos - this tab shows for completed services, and shows any phots captured against the service.
Viewing Service Item Details
You can click the Details button against the service item line in the top table to view the Parts Used and Activities against a Service. The screen will refresh the tabs below with the details against this service item.
Products Tab
The Products table displays the parts used by the engineer against the service.
The table displays the following details:
- Product - The ID of the part.
- Direction - Used (U) or Returned/Required (R), depending on device configuration.
- Quantity - the quantity of this part used.
- Description - the description of the part.
- Vehicle ID - the vehicle from which this part was sourced.
You can view further details of the part clicking the Select button against the line - the screen will show a Product Details pop-up.
You can delete parts by clicking the Delete button against the line - the screen will ask you to confirm before the part is deleted.
You can edit these details by clicking the Edit button. When changes are complete, you can click Save to save the changes, or Close to close the pop-up without saving the changes.
You can add a new Part to the service item by clicking on the New Product button provided. The screen will show a Product Details pop-up.
You can enter all details except the Service ID:
- Product - A drop-down list of all the available parts configured in the system.
- Direction - A drop down list of Used or Returned, depending on device configuration.
- Quantity - the quantity of the part used.
- Return to SE - return product to stock - an instruction to ERP.
- Vehicle ID - the vehicle from which the part was sourced.
When changes are complete, you can click Save to save the changes, or Close to close the pop-up without saving.
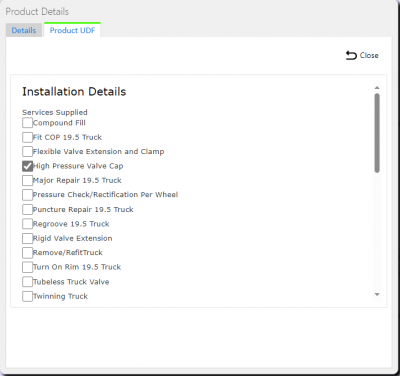
For completed service products, the screen will show a tab for any user-defined forms entered against the product. Note that this is available only for a Fleet Management (Tyre) system.
Activities Tab
The Activities table displays the activities taken by the engineer against the service.
The table displays the following details:
- Activity - the description of the activity.
- Quantity - how many times this activity was undertaken.
You can view further details of the activity by clicking the Select button against the line - the screen will show an Activity Details pop-up.
You can delete an activity by clicking the Delete button against the line - the screen will ask you to confirm before the activity is deleted.
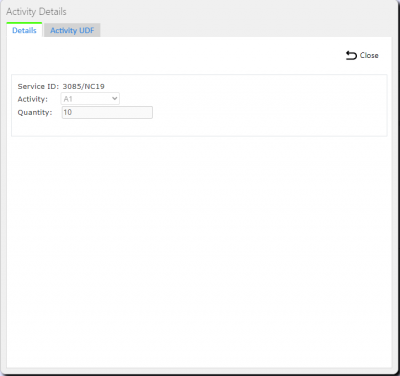
Edit Service Activities Pop-up
You can edit these details by clicking the Edit button. When changes are complete, you can click Save to save the changes, or Close to close the pop-up without saving.
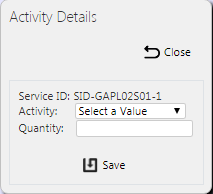
You can add a new Activity to the service item by clicking on the New Activity button provided. The screen will show an Activity Details pop-up.
You can enter all details except the Service ID:
- Activity - A drop-down list of activities.
- Quantity - how many times this activity was undertaken.
When changes are complete, you can click Save to save the changes, or Close to close the pop-up without saving.
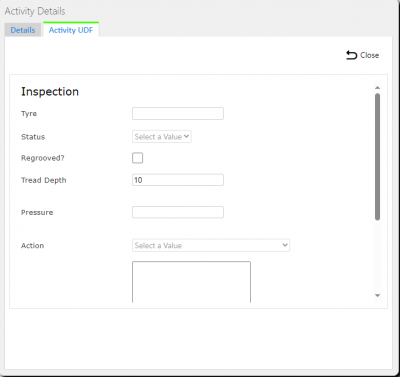
For completed service activities, the screen will show a tab for any user-defined forms entered against the activity. Note that this is available only for a Fleet Management (Tyre) system.

