PDA Configuration: Difference between revisions
No edit summary |
(Added new preferences) |
||
| (7 intermediate revisions by 2 users not shown) | |||
| Line 1: | Line 1: | ||
When the user presses the settings icon on the login screen or from the Job List menu, the device will request whether the settings should be set through a QR barcode scan or manual entry. | |||
If '''Barcode''' is pressed, the user will be prompted to scan the provided Settings QR barcode. | |||
<gallery widths= | If '''Manual''' is pressed, the application will check whether the system has any remote access users set up against it. If so, the device will prompt for the remote access user and password, to prevent drivers from changing critical application settings. When entered correctly, or if the settings are not locked down, the Settings screen is shown. | ||
File: | |||
File:ePOD_Settings.PNG| | <gallery widths=300px heights=450px perrow=3> | ||
File:ePOD_Settings4.PNG|''Settings Options'' | |||
File:ePOD_Settings2.PNG|''QR Barcode Scanning'' | |||
File:ePOD_Settings3.PNG|''Settings Authorisation'' | |||
File:ePOD_Settings.PNG|''Application Settings'' | |||
File:ePOD_Settings5.PNG|''Settings Confirmation'' | |||
</gallery> | </gallery> | ||
Here the user can change: | Here the user can change: | ||
* | * Site - the site that the application is using. Typically this is the depot or carrier, and will have been advised by the OBSL Implementation team. | ||
* Web Service - The system that the application is using. This will have been advised by the OBSL Implementation team. | |||
*Web Service | * Display | ||
* | ** Tablet Mode - for larger-screen devices, such as tablets, this mode reduces the text size and makes better user of the larger space available on the device. | ||
* | ** Orientation - Controls the application orientation. {{Note}} Tablet mode takes precedence. Selected from: | ||
*** Automatic (based on device orientation) - the default. | |||
* | *** Portrait (ignores device orientation) | ||
* | *** Landscape (ignores device orientation) | ||
* | * Intervals | ||
* | ** Pending Interval - the amount of time between checks for pending data to be sent to the server. Several options are available. | ||
* | ** Update Interval - the amount of time between checking whether the load in progress on the device has changed. Several options are available. | ||
* | * GeoLocation | ||
** GPS-Tag Messages - Indicates whether messages sent back to the server are tagged with GPS co-ordinates. This should always be checked. | |||
** Send GPS Tracking Messages - the amount of time between sending back tracking messages to the server. Several options are available. | |||
** Default Navigation - Which navigation method should be used as the default | |||
*** Google Navigation - takes you straight into navigation app with the address of the job. If that navigation app is Google Maps, navigating already. | |||
*** Generic Geolocation Request - takes you to your navigation app with the address of the job. | |||
* Alerts | |||
** Alert Sound - The sound made on a critical alert. This option opens the device's notification browser. The options available depend on the device itself. Additional sounds may be uploaded into the device's notification area - please check with the device manufacturer for details. | |||
** Vibration Alerts - Indicated whether critical alerts vibrate the device. Several options are available. | |||
* Image Quality | |||
** Size - The size of the resulting image - select 'Native' to control image size through the Camera application. | |||
* Debug | |||
** Log Debug Messages - if enabled, logs application messages to the system log. | |||
All changes will be saved automatically once you have made them. The '''Back''' button will return to the Login prompt, where style changes will be applied and a confirmation message will be displayed. | |||
[[Category:UG 291097 EPOD Client User Guide|201]] | [[Category:UG 291097 EPOD Client User Guide|201]] | ||
Latest revision as of 12:52, 6 August 2024
When the user presses the settings icon on the login screen or from the Job List menu, the device will request whether the settings should be set through a QR barcode scan or manual entry.
If Barcode is pressed, the user will be prompted to scan the provided Settings QR barcode.
If Manual is pressed, the application will check whether the system has any remote access users set up against it. If so, the device will prompt for the remote access user and password, to prevent drivers from changing critical application settings. When entered correctly, or if the settings are not locked down, the Settings screen is shown.
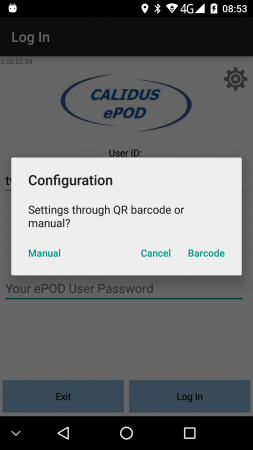
Settings Options
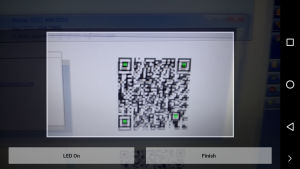
QR Barcode Scanning
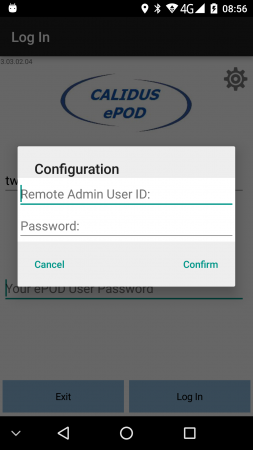
Settings Authorisation
Application Settings
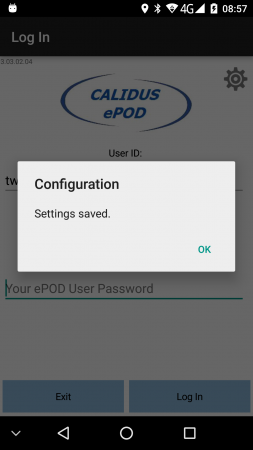
Settings Confirmation


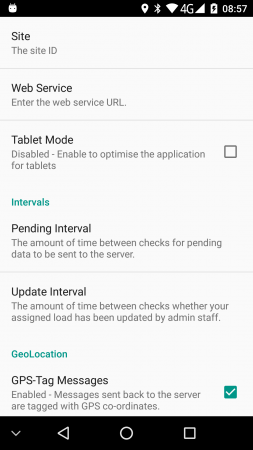
Here the user can change:
- Site - the site that the application is using. Typically this is the depot or carrier, and will have been advised by the OBSL Implementation team.
- Web Service - The system that the application is using. This will have been advised by the OBSL Implementation team.
- Display
- Tablet Mode - for larger-screen devices, such as tablets, this mode reduces the text size and makes better user of the larger space available on the device.
- Orientation - Controls the application orientation.
 Note: Tablet mode takes precedence. Selected from:
- Automatic (based on device orientation) - the default.
- Portrait (ignores device orientation)
- Landscape (ignores device orientation)
- Intervals
- Pending Interval - the amount of time between checks for pending data to be sent to the server. Several options are available.
- Update Interval - the amount of time between checking whether the load in progress on the device has changed. Several options are available.
- GeoLocation
- GPS-Tag Messages - Indicates whether messages sent back to the server are tagged with GPS co-ordinates. This should always be checked.
- Send GPS Tracking Messages - the amount of time between sending back tracking messages to the server. Several options are available.
- Default Navigation - Which navigation method should be used as the default
- Google Navigation - takes you straight into navigation app with the address of the job. If that navigation app is Google Maps, navigating already.
- Generic Geolocation Request - takes you to your navigation app with the address of the job.
- Alerts
- Alert Sound - The sound made on a critical alert. This option opens the device's notification browser. The options available depend on the device itself. Additional sounds may be uploaded into the device's notification area - please check with the device manufacturer for details.
- Vibration Alerts - Indicated whether critical alerts vibrate the device. Several options are available.
- Image Quality
- Size - The size of the resulting image - select 'Native' to control image size through the Camera application.
- Debug
- Log Debug Messages - if enabled, logs application messages to the system log.
All changes will be saved automatically once you have made them. The Back button will return to the Login prompt, where style changes will be applied and a confirmation message will be displayed.