PDA Service: Difference between revisions
No edit summary |
|||
| Line 101: | Line 101: | ||
{{PDAType|WinMo=Y|Text=Products can be removed from this list by selecting the item from the list or from the table and clicking the '''Remove''' button.}} | {{PDAType|WinMo=Y|Text=Products can be removed from this list by selecting the item from the list or from the table and clicking the '''Remove''' button.}} | ||
{{PDAType|Android=Y|iOS=Y|Text=Products can be removed from this list by | {{PDAType|Android=Y|iOS=Y|Text=Products can be removed from this list by long-pressing the row on the table to display a pop-up menu, allowing you to ''Remove 1'' or ''Remove All'' from the list.}} | ||
{{PDAType|WinMo=Y|Text=The ''Removed Products'' tab functions in a similar way to the installed products tab, but you may enter a value in the product field instead of selecting from a list. This is to allow for the removal of products that are no long stocked as part of the service. | {{PDAType|WinMo=Y|Text=The ''Removed Products'' tab functions in a similar way to the installed products tab, but you may enter a value in the product field instead of selecting from a list. This is to allow for the removal of products that are no long stocked as part of the service. | ||
| Line 111: | Line 111: | ||
<!-- NEW PAGE --> | <!-- NEW PAGE --> | ||
=== MC Refs === | === MC Refs === | ||
This information can be entered either as a {{PDAType|WinMo=Y}} separate tab or {{PDAType|Android=Y|iOS=Y}} directly from the ''Diagnosis'' tab. | This information can be entered either as a {{PDAType|WinMo=Y}} separate tab or {{PDAType|Android=Y|iOS=Y}} directly from the ''Diagnosis'' tab. | ||
Revision as of 15:40, 15 May 2013
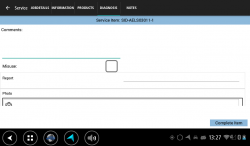
The Service process is an entirely configurable process, all set up through the Admin front end.
The device will be configured as to what functionality is required in this process and therefore what entry and validation is required.
The main entry is through tabs and popup screens, as follows:
- Overview/Job Details - Always displayed
- Info
- Pre-work
- Activities
- Installed Products
- Returned Products
- MC Refs
- Diagnosis
- Post-work
| The OK button will take you to the next tab, until all have been displayed. If there are no more tabs it will attempt to complete the job, performing validation based on the current configuration. |
The ![]() Cancel or
Cancel or ![]()
![]() Back button will return you to the Job List.
Back button will return you to the Job List.
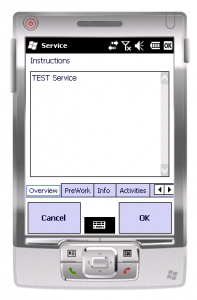
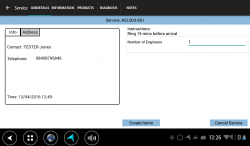
Overview/Job Details
This tab will display the Fault Reported. This comes from the Job instruction. This tab is always displayed.
Click ![]() OK or the next tab to move on.
OK or the next tab to move on.
Info
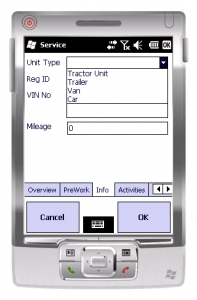
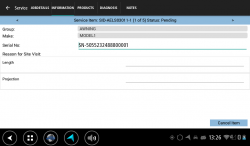
This tab will prompt you for information on the job. Configuration controls the fields shown for entry here.
As an example, the following information is prompted for:
- Unit Type - Drop-down selection of Tractor/Trailer/Van/Car
- Reg ID - Numeric Only
- VIN No - Numeric Only
- Mileage - Numeric Only.
Each entry is optional - no data needs to be entered for any of the items.
Click ![]() OK or the next tab to move on.
OK or the next tab to move on.
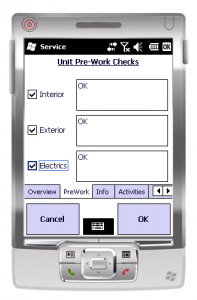
Pre-work Checks
This information can be entered either as a ![]() separate tab or
separate tab or ![]()
![]() button from the Info tab.
button from the Info tab.
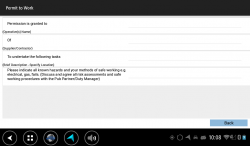
This displays the pre-work checks that are required before performing a service. These must be checked before you will be allowed to continue. You can enter details in the text field if additional information needs to be recorded.
Once the checks are complete and all defects are entered, click ![]() OK or the next tab or
OK or the next tab or ![]()
![]() Save to move on.
Save to move on.
Activities
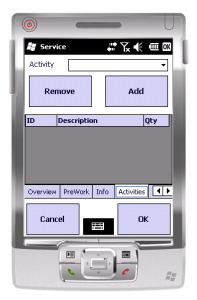
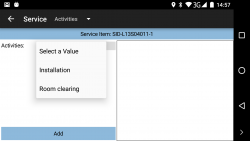
This tab allows you to specify activities completed during the service. Activities are any task set up through the Admin system, and will appear on a drop-down list.
Activities can be added multiple times with the Add button, to increase the quantity.
| Press the Remove button to remove 1 activity - once all are removed, the item will disappear from the list. |
| Press the activity on the list to display a pop-up menu, allowing you to Remove 1 or Remove All from the list. |
Once the activities are added as required, click ![]() OK or the next tab to move on.
OK or the next tab to move on.
Installed/Removed Products
This tab allows you to specify products that were used as part of the installation. ![]() Multiple tabs are provided.
Multiple tabs are provided.
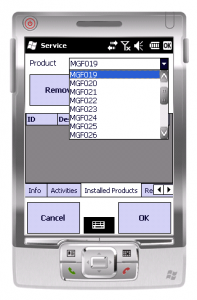
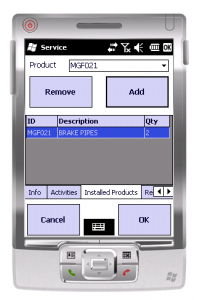
To install a product you must select the product from the list of items and click the ![]() Add or
Add or ![]()
![]() Installed button. If the same product is added more than once the quantity field will be updated to reflect this.
Installed button. If the same product is added more than once the quantity field will be updated to reflect this.
| Products can be removed from this list by selecting the item from the list or from the table and clicking the Remove button. |
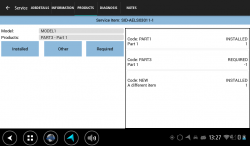
| Products can be removed from this list by long-pressing the row on the table to display a pop-up menu, allowing you to Remove 1 or Remove All from the list. |
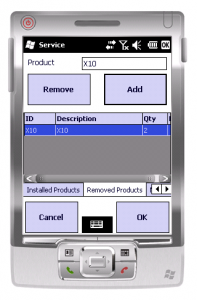
| The Removed Products tab functions in a similar way to the installed products tab, but you may enter a value in the product field instead of selecting from a list. This is to allow for the removal of products that are no long stocked as part of the service.
|
Click ![]() OK or the next tab to move on.
OK or the next tab to move on.
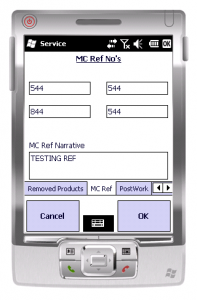
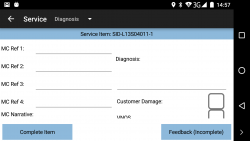
MC Refs
This information can be entered either as a ![]() separate tab or
separate tab or ![]()
![]() directly from the Diagnosis tab.
directly from the Diagnosis tab.
This prompts you to enter the MC Reference fields. These are a series of part serials (up to 4) that can optionally be entered.
If this is configured, either a narrative or refs must be entered.
![]() MC Ref fields are numeric only.
MC Ref fields are numeric only.
MC Narrative is free text entry.
Click ![]() OK or the next tab to move on.
OK or the next tab to move on.
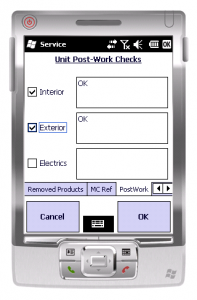
Post-work Checks
This information can be entered either as a ![]() separate tab or
separate tab or ![]()
![]() button from the Diagnosis tab.
button from the Diagnosis tab.
This allows you to confirm the post work checks have been completed.
These fields are required and must be checked for the user to continue. As with pre-work checks the user can add additional information in the text fields.
Click ![]() OK or the next tab to move on.
OK or the next tab to move on.
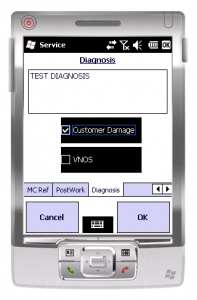
Diagnosis
This tab allows you to enter problem diagnosis information.
You will be prompted to to specify the results of the service and any relating details that are required.
Diagnosis must be entered - all other fields are optional.
![]() The check boxes and labels can be changed or removed as part of the style configuration on the device.
The check boxes and labels can be changed or removed as part of the style configuration on the device.
Click ![]() OK or the next tab to move on.
OK or the next tab to move on.
Completion
Once you have entered this, click the OK button. You will be taken to the Job Confirmation screen, where you (the engineer) and the customer will be required to review the job and sign as confirmation that it is complete.
