Jobs
The Job Details screen shows the Jobs associated to the Load. Jobs can be created, edited or deleted, if the user is a full admin user.
This screen is common to all job types (Services, Deliveries or Collections).
The data displayed is only that for the user’s default site, and only for those job groups to which the user has access (controlled through User Access).
When this screen is called from the Load screen, the screen displays a grid of all Jobs that are assigned to the specific Load. Data is not be allowed to be filtered. There is also an additional Assign button to assign jobs to the load being viewed.
When this screen is called from the Customer screen, the screen displays a grid of all Jobs for that customer. Data is not be allowed to be filtered. There is also an additional Assign button to assign jobs to the load being viewed.
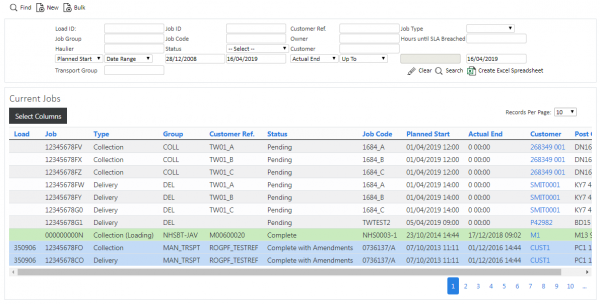
If the Job screen is called from the main menu, the screen allows the user to filter the data by:
- Load Id
- Job Id
- Customer Ref
- Job Type, with a Drop-down list
- Job Group
- Job Code
- Planned Date
- Hours until SLA Breached
- Actual Date
- Job Status, though a drop-down list of Pending, In Progress, Complete, Complete Amended and Cancelled.
- Customer Code
Once the filter information is entered at the top of the screen, all matching jobs are displayed in a table below.
Alternatively, clicking Create Excel Spreadsheet will export the Job data - functionality differs per browser used to access the Admin system, the likely result being that the resulting file will be offered for download.
Depending on the status of the job being shown on the table lines, the line will be RAG coloured:
- Pending - No colour
- In Progress - Amber
- Complete - Green
- Complete with Amendments - Blue
- Cancelled - Red. Also, if the line has a Reason Code entered against it.
A single line is displayed per Job found.
Each column can be sorted by clicking on the column header - clicking again will reverse the sort sequence.
A Cancel button against each line will set the status of the specific job to Cancelled. ![]() Warning: Care should be taken with this option. You will be asked to confirm before this happens.
Warning: Care should be taken with this option. You will be asked to confirm before this happens.
A Details button against each line allows the user to see the details of the specific job:
- The user can drill down into the Container Details page if this is a delivery or collection type.
- If the job is a service, the link will allow the user to drill down to the Service Details page.
Creating a New Job
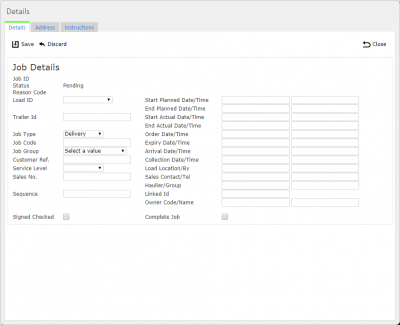
The screen allows the user to create a new Job, by pressing the provided "New" button at the top of the screen.
The user can enter all the details below:
- Trailer ID
- Job Type, from a drop-down list.
- Job Code, the main unique order reference.
- Job Group, selected from a Drop-down List.
- Customer Ref, the customer's order reference.
- Sales No, the S/O reference.
- Planned Date and Time.
- Order Date and Time, the time the order was requested by the customer.
- Expiry Date and Time, used to determine SLA compliance.
- Sales Contact, of the administrative user who took the order.
- Service Level.
- A Customer Code, also allowing creation of a new customer if required.
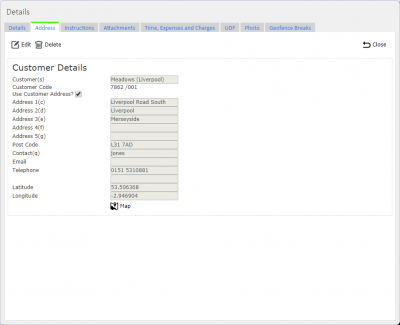
- The Job Address, either through using the selected customer's address, or through entering a specific address for this job.
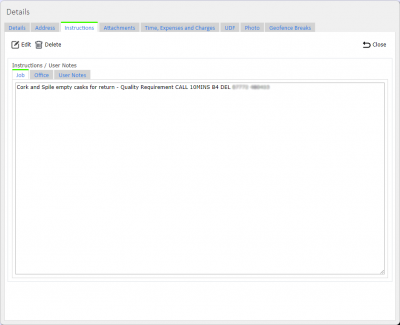
- Instructions against the Job or Back Office can be entered using the tabbed display.
When saved, the Status of the job is set as "Pending".
The Load will be set to the Load of the calling screen, if the load has been passed in. If not, the load will be left blank and can be assigned.
A Save button is provided to save the entered data.
If the job is complete, the POD can be viewed, emailed or printed from here in the configured format, by clicking the Report button against each Job line in the grid at this status.
Viewing/Editing a Job
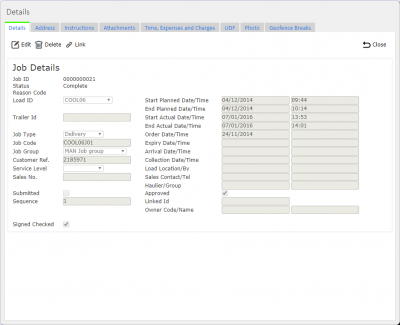
Click Select against the line of the job to be edited and a pop-up screen will be shown, showing all the details of the job.
To edit the job, click the Edit button.
The following details may be changed:
- Trailer ID
- Job Type, from a drop-down list.
- Job Code, the main unique order reference.
- Job Group, selected from a Drop-down List.
- Customer Ref, the customer's order reference.
- Sales No, the S/O reference.
- Planned Date and Time.
- Order Date and Time, the time the order was requested by the customer.
- Expiry Date and Time, used to determine SLA compliance.
- Sales Contact, of the administrative user who took the order.
- Service Level.
- A Customer Code, also allowing creation of a new customer if required.
- The Job Address, either through using the selected customer's address, or through entering a specific address for this job.
- Instructions against the Job or Back Office can be entered using the tabbed display.
The Save button will save the Load ID and Sequence to the Job.
A Delete button is provided in this pop-up, if the Load the job is associated to is not in progress. When clicked, this will delete the job.
The job can be marked as complete through using the Complete Job check box and saving the order.
Multiple tabs may be available on this screen for many purposes, which allow data to be viewed, edited or added:
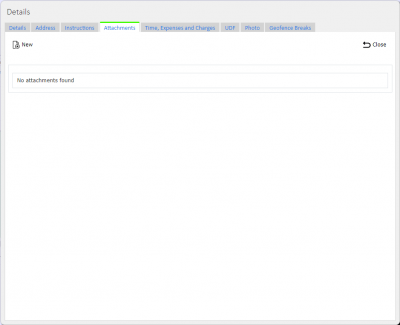
- Attachments - this tab allows attachments to be uploaded to the server.
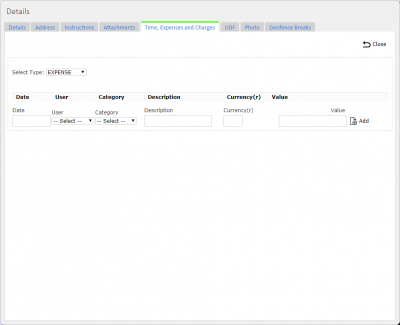
- Time and Expense - this tab allows the user to view or edit driver-entered time and expense information, or to pre-define expenses for a job.
- UDF - Job Details User-defined Forms information, entered by the user when starting a job.
- Photos - When a job is completed, images may have been taken by the driver if the job is cancelled, or as part of the Job Details UDF. If so, this tab will allow viewing of all the photos in a gallery. Clicking the link to the photo from the other tabs will also open this tab and show the related images. Comments as entered by the driver will be displayed for each image, along with a description of at what stage the image was taken.
Assigning Jobs to Loads
The pop-up editing screen can be used to assign jobs to loads in 2 main ways.
If creating a new job or editing a job that is not already assigned to a load, the Job can be assigned to or de-assigned from a load by changing the Load ID using the drop-down list provided. Select the pre-created load, and the job will be assigned to that load.
![]() Note: Only jobs with a customer with (at least) a post code can be assigned, and only to Loads that are not in progress.
Note: Only jobs with a customer with (at least) a post code can be assigned, and only to Loads that are not in progress.
If jobs are found by drilling down through a Load, jobs can be assigned to this load in bulk - click the Assign button on the header and a table will be displayed of all Pending jobs - simply check the jobs that are to be assigned, then click Assign.
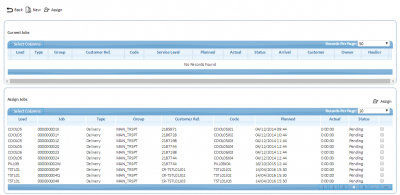
Assign Jobs to the Load in Bulk
Creating Linked Jobs
A Link button is provided in the header of the New/Edit pop-up, to allow the user to specify a job that in linked to this one (for example, the delivery job associated with a collection job). Clicking this button will immediately create a copy of the original job, but as a delivery (if the original was a collection) or collection (if the original was a delivery). All details, including Container and Product details will be copied. Depending on the Site configuration, if there are no container or product details, a warning will be issued when attempting to created a linked job of this type.
