Container Details
This screen shows the container and product details directly associated to the specific Job record selected on the Job screen. All container records have the ability to be deleted, edited and created, if the user is a full Admin user.
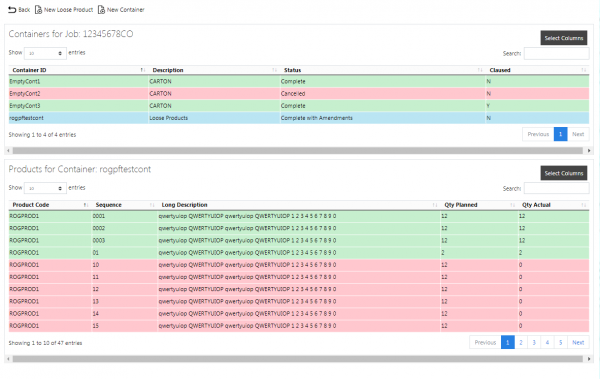
On entry to the screen, all container details will be found relating the Job passed in to the screen and displayed in a grid:
Depending on the status of the line, the line will be RAG coloured:
- Pending - No colour
- Complete - Green
- Cancelled - Red. Also, if the line has a Reason Code entered against it.
A single line will be displayed per Container found.
Each container record can be selected and you can display the products within the container by using the Products button provided against the container line - the lower grid will display the details.
If a photo has been taken this image can be viewed through this page where a pop-up will display the image/images.
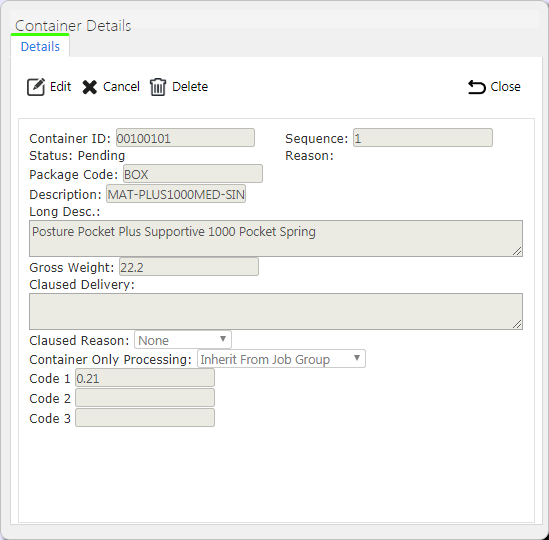
The Container ID, Package Code and Container Descriptions can be edited by the users, by pressing the Select button, then the Edit button through the pop-up screen.
A Save button is provided to save the changes. If the Container ID is a duplicate on the Job ID, the screen will display an error.
A Delete button is provided in this pop-up, if the Load the job is associated to is not in progress. When clicked, this will delete the container.
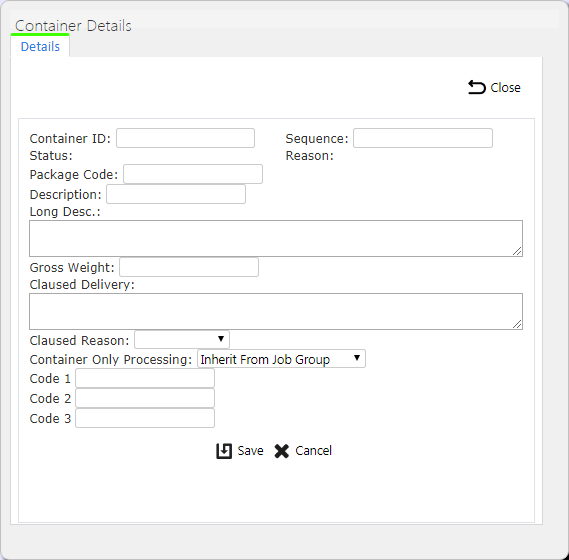
The screen allows the user to create a new container, by pressing the provided New Container button at the top of the screen.
The user can enter all the details of the container. The Job ID and Site ID will be defaulted to the current Site and Job. The Status will be set as "Pending".
A Save button is provided to save the entered data.
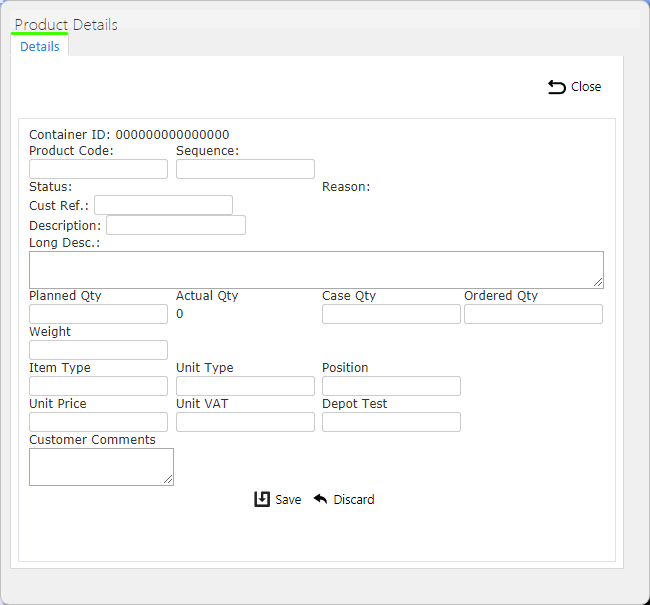
The Product Details can be edited by the users, by pressing the Select button against the Product line, then the Edit button through the pop-up screen.
A Save button is provided to save the changes.
A Delete button is provided in this pop-up, if the Load the job is associated to is not in progress. When clicked, this will delete the Product.
The screen allows the user to create a new Product, by pressing the provided New Product button at the top of the Products grid.
The user can enter all the details of the container. The Job ID and Site ID will be defaulted to the current Site and Job. The Status will be set as "Pending".
A Save button is provided to save the entered data.
Cancel buttons are provided against both products and containers - this can be used to set the status of a line to cancelled, ensuring it is not collected or delivered.
Loose Products (i.e. product quantities that are not in pallets or cages) can be maintained in this screen. Loose products are shown as products within a special container (labelled as Loose Products). The same process is followed for showing Loose Products on a job as for products within any container - simply click the Products button against the Loose Products container.
Additional loose products can be added to the Job using the New Loose Product button provided - this acts in the same manner as adding products to a container. You can also select the Loose Products container and click the New Products button on the lower grid to achieve the same effect.


