Execution: Difference between revisions
m (test) |
|||
| Line 371: | Line 371: | ||
[[Category:C-TMS Modules|B-100]] | [[Category:C-TMS Modules|B-100]] | ||
[[Category:C-TMS User Guide|BB-100]] | [[Category:C-TMS User Guide|BB-100]] | ||
[[Category:TEST|B-100]] | |||
Revision as of 07:34, 17 May 2024
Execution Screen
Accessing the Screen
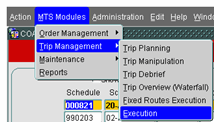
To access the screen follow the menu choices highlighted below:
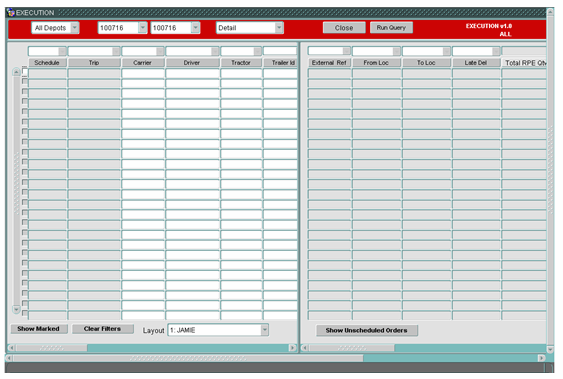
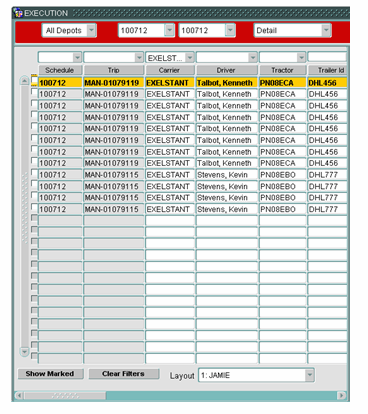
The screen will be displayed as below:
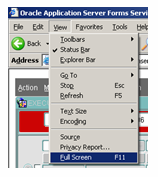
For best visibility of the screen it is best to view the screen in Full Screen Mode, see below:
Unscheduled Orders Form
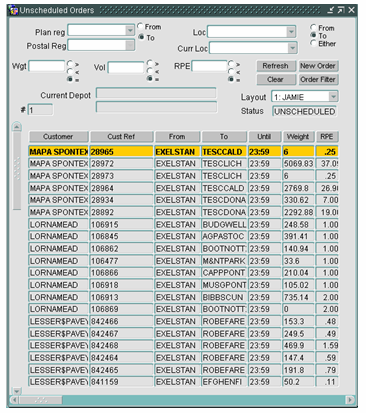
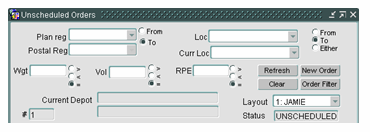
The first part of the screen is the Unscheduled Orders Form it displays the same information as the Order Well in the Trip Planning and Manipulation Screens.
To access the form select the button as shown below:
The form will be displayed as below:
The size of the form can be reduced or enlarged by holding the cursor over the edge of the form until this ↔ symbol appears and then dragging the margin in the desired direction.
Data Sort
Data can be sorted either alphanumerically or reverse alphanumerically by selecting a title header (example below), data can be sorted by any column.
Data Filters
The orders which are displayed in the Unscheduled Orders Form can be filtered using the filters above. This functionality is the same as that found in the Order Well in the Trip Planning Screen and the Trip Manipulation Screen.
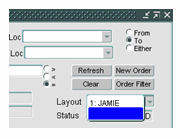
There are various filter options which can be seen above, more than one filter can be applied at a time to drill down the information being displayed. The Clear Button removes any filters applied.
The Refresh Button updates the information displayed to provide the most current information, for example if new orders are being entered by another user or if orders have been scheduled onto a trip.
A new order can be entered using the New Order Button.
Right Click Options
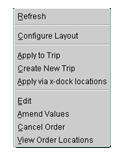
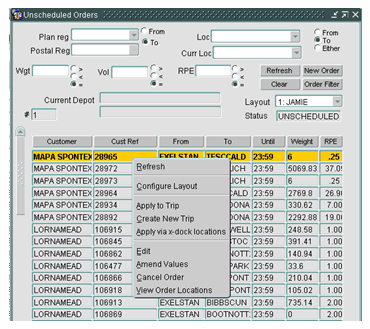
If you right click when over any of the order information in the form you get the following menu:
Refresh
Is an alternative way of updating the data displayed (same functionality as the Refresh Button mentioned above).
Configure Layout
The fields displayed in the columns of the Unscheduled Orders Form can be configured individually for each user, to do this right click over any order information in the form and the menu shown below will be displayed:
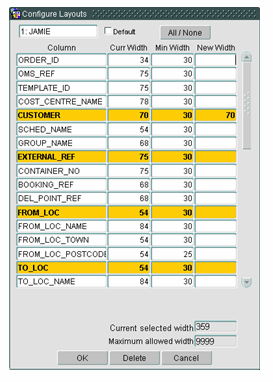
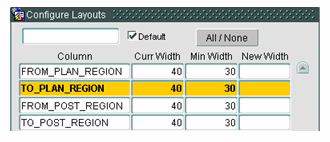
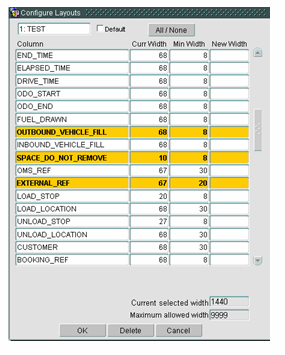
Select the Configure Layout option which will open the window shown below:
To save any changes made to layout you must give the layout a name, this can be done by typing in the box in the top left of the form (see previous page). You do not have to type the number the system generates this. It is possible for each user to have multiple layouts.
To create an additional layout select the drop down arrow next to the Layout field and select the blank space at the bottom of the drop down (see below). This will change the layout to display the system default. This drop down menu is used to switch between layouts where a user has more than one layout configured.
Repeat the right click Configure Layout mentioned above, note the top left box displayed below is blank, to save any changes made you need to name the layout in this box.
If a user has more than one layout a Default layout can be selected by checking the Default box shown above. The layout that has this box checked will always be displayed when the form is first opened.
Fields highlighted in yellow will be displayed, to add or remove a field select that field then hold down left click on the mouse and the Ctrl button on the keyboard, fields will become yellow if they have been selected and return to white if removed.
The width of each displayed column can be changed by typing in the New Width Column on the right of the form, please note that any field displayed has a minimum display width shown in the third column (above). There is also a maximum width allowed for the whole display (shown at the bottom right of the form) although the maximum for this form is so large it is unlikely to become relevant, it is worth considering how much will be visible without needing to enlarge the form.
Apply to Trip
This allows you to add an order to the trip which is selected in the main Execution Screen (shown later). It is possible to select one or multiple orders to apply to a trip. To select multiple orders select the first order required by left clicking the mouse then hold down the Ctrl key on the keyboard and left click any other orders required, any highlighted orders will then be applied to the trip.
Create New Trip
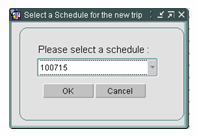
This allows you to select either a single or multiple orders (as described for apply to trip) to create a new trip. Select required orders then right click and select Create New Trip you will be presented with the following box.
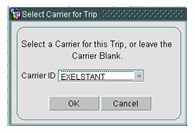
The schedule date will be populated if the main Execution Screen is displaying information for only one schedule date, if the screen is displaying a range of schedule dates you will need to select the schedule date that you want to create the trip on from the drop down list. Once selected you will be presented with the following box:
You can either select a carrier or create the trip without a carrier. A list of carriers is available by selecting the down arrow at the right of the field. When creating subsequent trips the Carrier ID field will be populated with the last carrier used.
Apply via X-dock Location
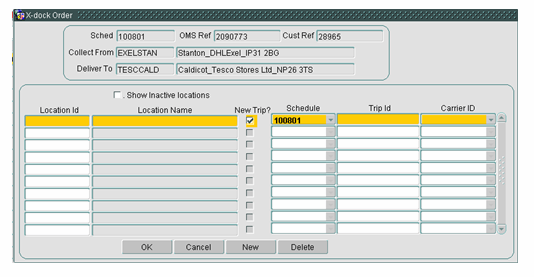
This allows you to select either a single or multiple orders (as described above). Select required orders then right click and select Apply via x-dock locations you will be presented with the following form (this follows the existing functionality in the Trip Planning and Trip Manipulation Screens).
Edit
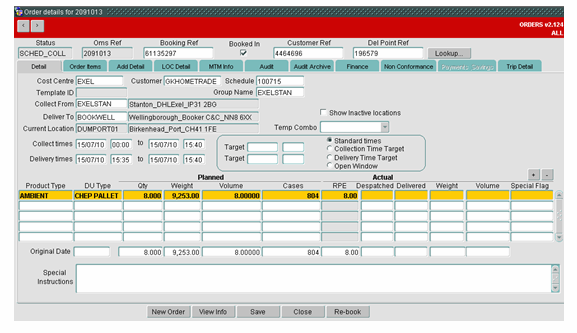
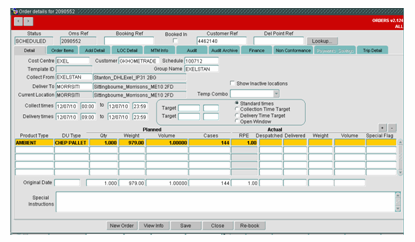
This opens up the main order detail form as shown below:
Amend Values
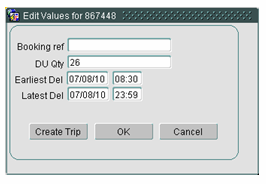
This provides a short cut to changing certain order details without opening the order details as above.
Cancel Order
This allows a user to cancel an order and it will no longer appear in Unscheduled Orders Form or in the Order Well in the Trip Planning Screens. If required orders can be reinstated using the Orders Module of the system.
View Order Locations
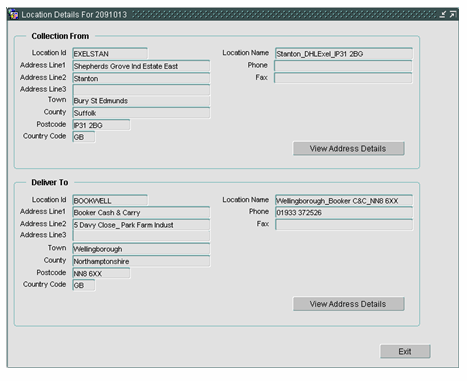
This allows the user to see collection and delivery addresses for the selected order, see below:
If you select the View Address Details button you get the following screen with increased address information:
Main Execution Screen
Header Menu
Shown below:
Depot Selection
Depending on a users access this field can be used to either see all orders they are permitted to view or they can select a particular depot to limit the amount of information displayed. The screen defaults to All Depots. When making changes the Run Query button will update what is displayed.
Date Range
This allows the user to select either a single schedule date or a date range to view. When opened the screen defaults to the current date. When making changes the Run Query button will update what is displayed.
Detail/Summary
Users have the choice of displaying information in Detail or Summary which can be selected in the drop down on the header menu. When making changes the Run Query button will update what is displayed.
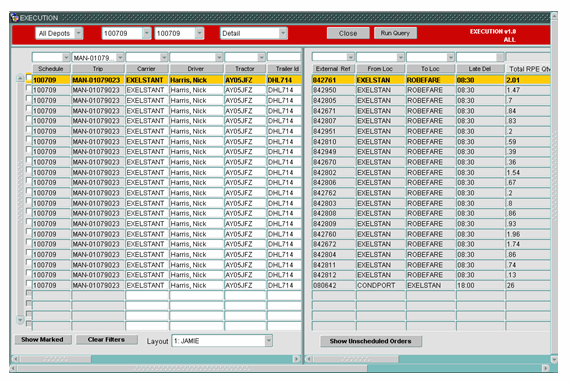
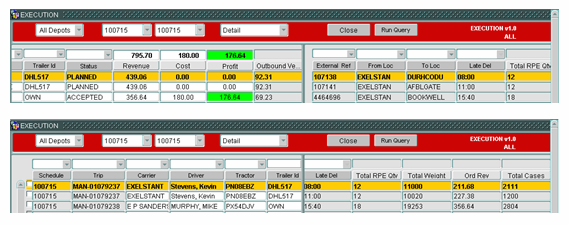
Detail Mode will display one line for each order on a trip (see example on the following page).
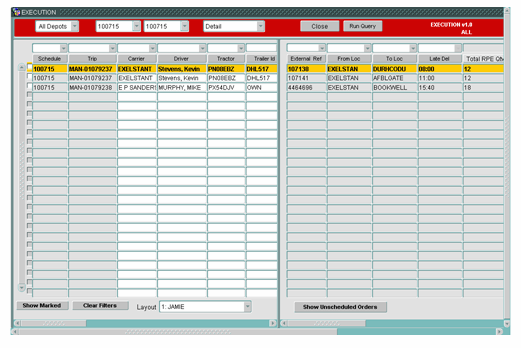
Summary Mode will display the first order on each loaded leg of the trip (see example on the following page).
Detail
Summary (same trip displayed)
Close
Self Explanatory
Run Query
When changes are made to the selection options listed the Run Query button will refresh the information displayed. When changes are made to information in the Execution Screen selecting Run Query is required to display the most current information.
Screen Panes
The Execution Screen is split into two panes the information on the left hand pane is trip information and the right hand pane displays the associated order information.
Configure Layout
The screen can be configured as in the Unscheduled Orders Pane (process described previously). To configure the layout right click over any column. Despite being displayed in two separate panes the layout is configured as a single block any field displayed above the SPACE_DO_NOT_REMOVE field (see below) will appear on the left hand trip pane any field displayed below the space field will appear on the right hand order pane.
Please note if you remove the SPACE_DO_NOT_REMOVE field the Order Pane will not display.
The choice of fields available is vast and should enable users to customise the display to suit their role specifically.
Layout Switch
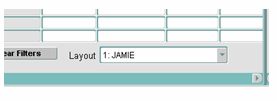
Users can set up more than one layout which can be switched using the Layout drop down (see below).
Screen Panes Revisited
The Trip Pane on the left hand side of the screen displays Trip information the Order Pane on the right hand side of the screen displays Order information.
The Trip Pane scrolls independently of the Order Pane (and vice versa), each pane has its own scroll bar (see below) above the main screen scroll bar.
The scroll bars allow the information to be moved independently of the opposite pane (see examples below).
Screen Filters
Any columns which are displayed with a drop down box above them can be filtered. If there is no drop down arrow above the field it can not be filtered (see examples below).
Selecting the drop down arrow will provide a choice records to filter by (see below).
More than one filter can be used simultaneously to allow further reduction of any data displayed.
Please note that when applying a second filter the choice of options to select will be based on the information displayed in the Header Menu and not the information remaining in the display.
Filters can either be individually removed by using the drop down arrow and selecting the blank field at the bottom of the menu or be removed simultaneously using the Clear Filters button in the bottom left of the screen (see below).
Screen Sorts
Data can be sorted alphanumerically or reverse alphanumerically by any column with a darker grey menu title, those with a lighter grey menu title do not have the functionality (see below).
Sorting Trip information will always keep the relevant trip information together (the only exception to this is if two trailer numbers are used on one trip).
Sorting Trip information will allow users to move blank Carrier, Tractor, Driver or Trailer information to the top of the screen to show which still require allocating.
Please note that when sorting by any Order Detail Column (right hand pane) orders will be logically sorted and not be displayed in Trip groups.
Mark Trip
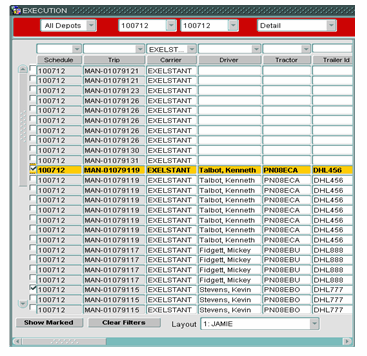
This allows user to see two or more trips together that may not be possible using the screen filters. To mark a trip select the white box at the far left of the display and then select the Show Marked button at the bottom left (see below). To clear the marked display use the Clear Filters button on the bottom left of the screen.
Right Click Functionality
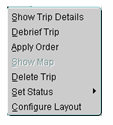
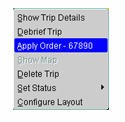
Right click over either the Schedule or Trip columns gives the following menu:
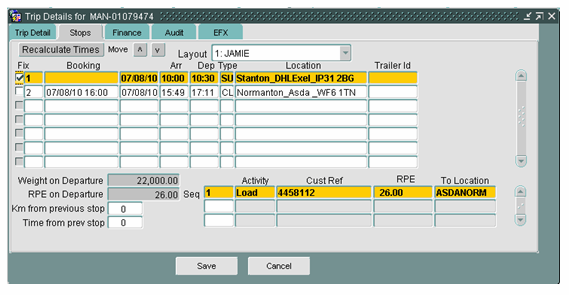
Show Trip Details
Opens the Trip Details Form (see below). This form replicates the functionality provided by the section at the bottom right of the Trip Planning Screen and the top right of the Trip Manipulation Screen, it is spilt into five tabs which can be seen below.
Debrief Trip
This provides a short cut to the Debrief Screen for the selected trip.
Apply Order
Described later
Delete Trip
This can be used to delete the selected trip, all orders on the trip will return to the Unscheduled Orders Well.
Set Status
This allows the update of trip status.
Resource Details
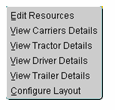
Right click over Carrier, Driver, Tractor or Trailer columns will give the following menu.
Edit Resources
Selecting Edit Resources opens the following window.
To allocate resources type into the relevant field and use the Tab key to move between fields. The Cancel button will ignore any changes made, the Save button will apply any details entered and the Remove All button will remove driver, tractor and trailer.
Resource allocation is dependent on whether or not a Carrier is set up as Free Text or Pop List. If a Carrier is set up as Free Text anything can be entered into the fields. If the Carrier is set up as Pop List the system will not allow the entry of a resource not set up in the Pop List. For Pop List entry users can either fully or partially type in an entry that will be accepted if valid or if it is invalid a list of available alternatives will be displayed to select, alternatively selecting the grey box at the end of the field will produce a list of available alternatives. Currently the Trailer field is set as Free Text for all carriers.
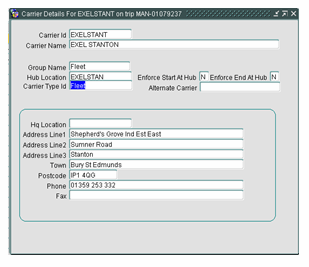
View Carrier Details
View Carrier Details will display details as below:
View Tractor Details
View Tractor Details will display details as below:
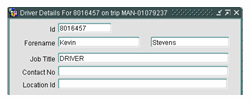
View Driver Details
View Driver Details will display details as below:
View Trailer Details
View Trailer Details will display details as below:
Right Click Functionality Order Pane
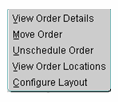
Right click over any field on the right hand Order Pane gives the following menu:
View Order Details
Selecting View Order Details will open the main Order details template for that order.
Move Order
Selecting Move Order will allow the option to select a single order to move between trips. Once selected the external reference field for the order will be highlighted in blue.
Apply Order
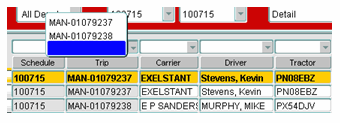
Right click over either the Schedule or Trip columns allows the order selected using the Move Order functionality to be applied to the selected trip. The customer order number for the selected order will be displayed against the Apply Order option (see below).
Unschedule Order
Selecting Unschedule Order will allow the option to remove an order from a trip and return it to the Unscheduled Orders Form (it will also display in the Trip Planning and Trip Manipulation screen order wells). If there is only one order on a trip and it is removed using this function the trip will still exist but not display in the Execution Screen (it will be visible in the Trip Planning and Trip Manipulation Screens), as an alternative the Delete Trip functionality is recommended to remove the last order from a trip.
View Order Locations
Selecting View Order Locations displays order address details. This is the same functionality as explained in the Unscheduled Orders Form.
View Trip Locations
If the screen is configured to show either Load or Unload location there is a right click option to view trip locations. For most orders order location and trip location will be the same but for a cross docked orders trip location will display the load and unload points of the order on that trip.
Carrier Cost Entry Short Cut
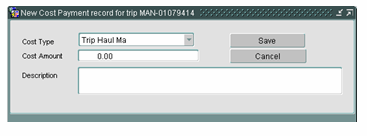
If carrier cost is zero; double clicking in either the Carrier Cost or Cost Column opens a new form shown below and allows a carrier cost to be entered.
Please note costs can only be applied using this short cut if there is no value in Carrier cost.
If Carrier costs have already been entered additional costs can be entered using the Trip Detail Tab.
Revenue, Carrier Cost, Cost and Profit Fields
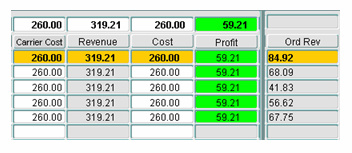
Revenue, Carrier Cost, Cost and Profit fields show the totals for the trip duplicated against each line on the trip. The totals at the top of each column discount this duplication (see below).
The Order Revenue is displayed per order and there is only one line per order.
On the example above you will notice the Carrier Cost and Cost columns display the same information.
Carrier Cost is any external Carrier charges applied to the trip. The Cost column shows the total costs for the Trip, in most cases Carrier Cost and Cost columns will display the same information as in the example above.
For Trips which have been Cross docked through an internal Consolidation Centre the figures may vary. The Carrier Cost column will display any carrier charges for the trunk leg of the trip and the Cost column will display the sum of those trunk costs and any internally charged tariff for the radial delivery. The radial delivery charges will not be calculated and displayed until the trip status is set to Accepted or beyond.
