ORS
The ORS Reporting Suite is based on a number of key database tables in order to allow the user a degree of flexibility in extracting the data they require. The data is extracted into the .csv format which can be viewed in Microsoft Excel.
Accessing the Extract Suite
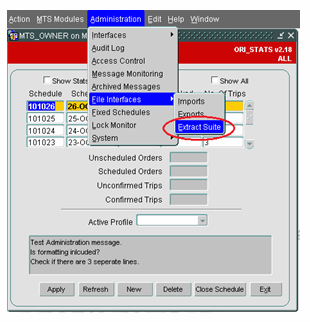
To gain access to the Reporting Suite, select “Administration”, “File Interfaces” and “Extract Suite” (see below).
Creating a New Report
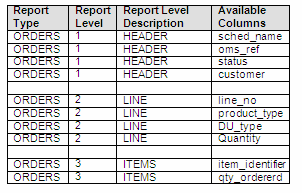
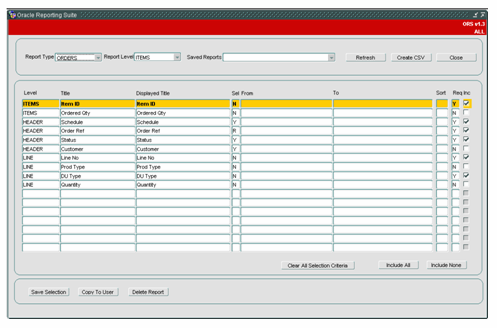
The following example details the steps required to create a new report from scratch based on “Orders”. The “Orders” report has 3 report levels (Header, Line, Items) , each allowing a different amount of information to be displayed and manipulated by the user. The table below shows the data available at each level. If Report Level Items (3) is selected then all levels above that (Line(2) and Header (1)) will also be extracted.
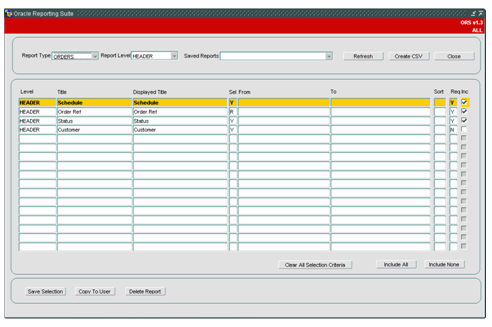
We will begin by selecting a Report Type of “Orders” and a Report Level of “Header” as shown below.
If we select a Report Type of “Orders” and “Report Level” of Header we see the following columns shown on the form.
We could run this report as it stands but it is advisable to firstly restrict the report in some way otherwise the system could try to retrieve thousands of order records which will potentially take a long time.
Restricting the Report
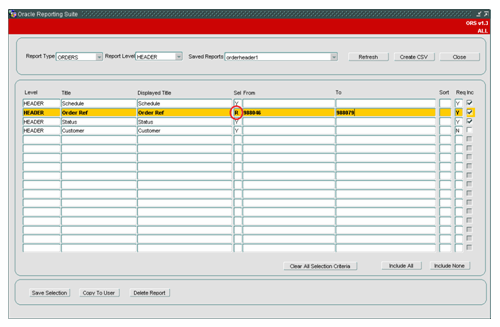
In this example, we will restrict the report by entering a restriction of the “order number” from 988046 to 988079. This is possible because the “Sel” column is set to “R” (Range Selection). When the column is set to “Y” you can enter a value in the “From” column only. When the column is set to “N”, no restrictions can be set (see the following example).
Saving the Report
When the report restriction has been decided, the user is required to click on the “Save Selection” button at the bottom left of the screen. This would display a pop-up as shown below:
A report name needs to be entered so in this example we will enter “orderheader1” (see below).
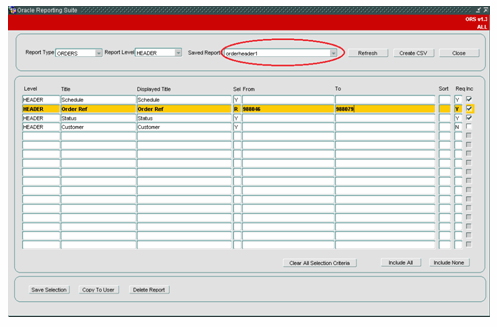
Once the “Save Report” button is clicked, this report is saved and can be retrieved at a later date and a .csv extract file produced. Having clicked the “Save Report” button, the report name is submitted to the “Saved Reports” list of values at the top of the screen:
Creating the CSV Extract
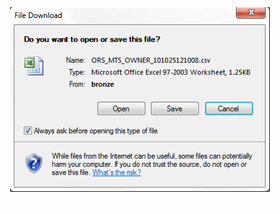
Now we are ready to produce the extract .csv file. To do this, simply select the “Create CSV” button (having firstly done the steps in sections 2.1 and 2.2). The user will be shown the following confirmation pop-up, asking whether to open, save or cancel the extract. In this example we will select “Open”.
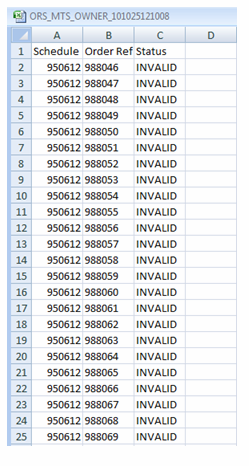
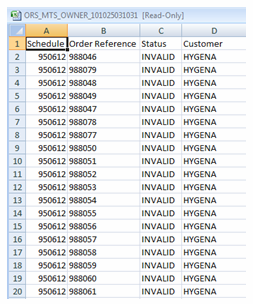
Once the “Open” option has been selected, Microsoft Excel will open and display the contents of the .csv file (see the following .csv extract example). The time taken to do this depends on the number of records to be retrieved by the Extract Suite screen.
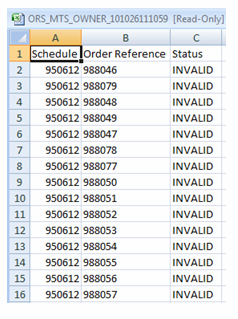
As can be seen, the 3 selected columns from the screen (Schedule, Order Ref and Status) are included in the extract file.
Amending The Report Titles
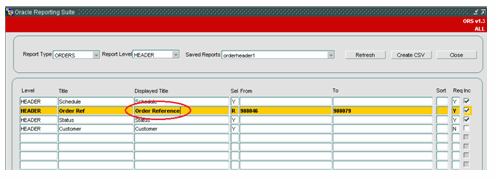
If we wished to change the Excel column titles, we need to change the “Displayed Title” on the form. In the following example, we have amended the Displayed Title from “Order Ref” to “Order Reference”.
Having amended the Displayed Title, by clicking the “Create CSV” button, we can now see the amended column heading in the .csv Excel extract file.
Sorting Report Columns
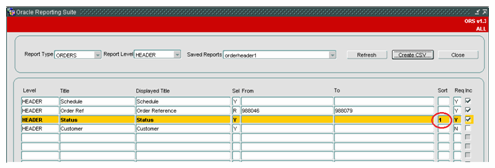
There is also the option to sort the output by entering a sort order into the “Sort” column on the form (see below). Further sorts can be done by entering 2, 3 etc.
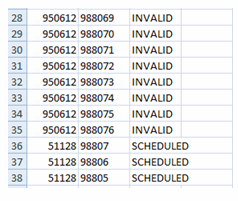
As can now be seen, the Status column is now sorted alphabetically in the .csv Excel extract file.
Using the Include All and Include None Buttons
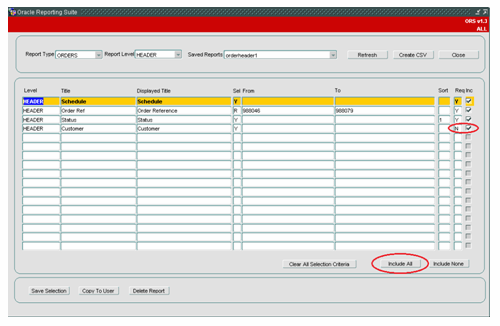
By selecting the “”Include All” button, all of the available columns will automatically be selected which saves the user having to individually select each column they wish to include the report (this may be useful if there are many columns available to select). In the following example the “Include All” button has been pressed. This has automatically selected the only additional column which wasn’t already selected for inclusion in the .csv extract.
It is worth noting that any columns with the “Req” (required) field set to “Y” already have the “Inc” (included) check box selected. The “req” column is not updatable via this screen, it’s value is set in the corresponding database table.
Having selected the “Include All” button, we can again run the report via the “Create CSV” button and, in the following example, see the addition of an extra column to the extract .csv file.
If the “Include None” button is selected then all of the fields which don’t have the “Req” field set to “Y” will be unchecked and removed from the report extract.
Using the Copy To User Function
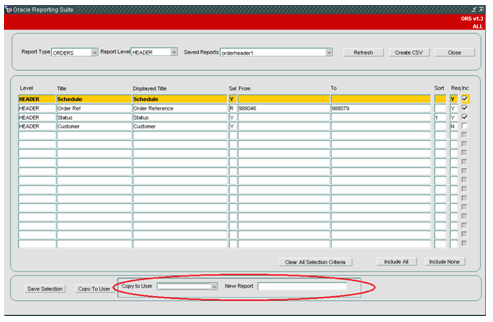
The “Copy to User” button allows the current report to be copied to another user. When the button is pressed a pop-up is shown which allows a user to be selected where the report is to be copied to. The new report name also needs to be entered here.
Selecting the user is done via a list displaying the users where the report can be copied to.
The new report name should be entered in the field provided. This will then be accessible to the user selected. The information is saved upon pressing return after filling out the new report name.
If we were now to log onto the system as the user who has had the report copied to (e.g. OBSDJY) we can select the report from the “Saved Reports” list and all the selected column details (restrictions on the order reference column and the sort on the status column) are accessible by the new user (see the following example).
Clear All Selection Function
The “Clear All Selection Criteria” button simply allows the user to clear all of the “From” and “To” selection criteria (if any exists).
Creating an Order Line Report
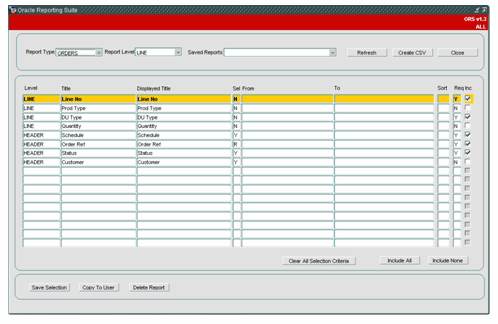
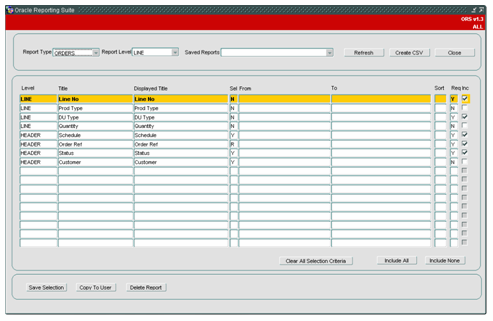
As previously stated, the “Orders” report has 3 different levels of report (Header, Line and Items). If we now click the “Refresh” button at the top of the screen (to clear all the existing report details and reset the form) and then select a new report type of “Orders” and a Report Level of “Line”, we can see the following details on the form. The order line details have now been added to the existing order header details.
Again, we will enter some restrictions on the report (in the order reference field) to restrict the report. See below:
We will save the report as “orderlines1” by clicking on “Save Selection” and then “Save Report”.
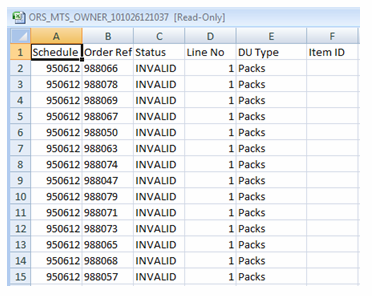
If we were now to run the extract via the “Create CSV” button we would get an extract file similar to the following example. Note that the “Included” order line columns (Line No and DU Type) have been included in the extract file. We didn’t include the remaining order line columns (Prod Type and Quantity) so these have not been included.
Creating an Order Item Report
Next we will look at the Order Items report. If we now click the “Refresh” button and entered new report details of Report Type = “Orders” and Report Level = “Items”, we would get a report looking similar to the following example.
Once we have entered the restriction criteria for the new report (e.g. Order Reference 988046 to 988079), we should click “Save Selection” and enter the Report Name of “orderitems1”. Finally, click “Save Report” so it can be retrieved later.
Now run the report via the “Create CSV” button and we should the addition of the order items to the orders extract file (if any exists).
Deleting a Report
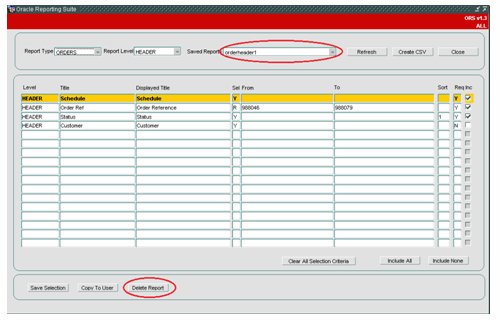
By firstly selecting a report (e.g. orderheader1) we can delete the report via the “Delete Report” button.
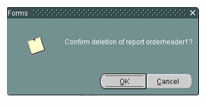
Once the “Delete Report” button has been pressed, a confirmation message appears to check if the report can actually be deleted.
If the “OK” button is selected then the report will be deleted for the current user. If the report has been copied to another user before deletion then this report will still exist for that user after deletion. After the report has been deleted, we can see by trying to select the report via the “Saved Reports” button that the report no longer exists for this user.
As can be seen above, the report “orderheader1” is no longer shown in the “Saved Reports” list. If after deletion, there was a requirement to retrieve this report we could log on as the user we copied the original report to in section 2.7.
