Allocate Resources
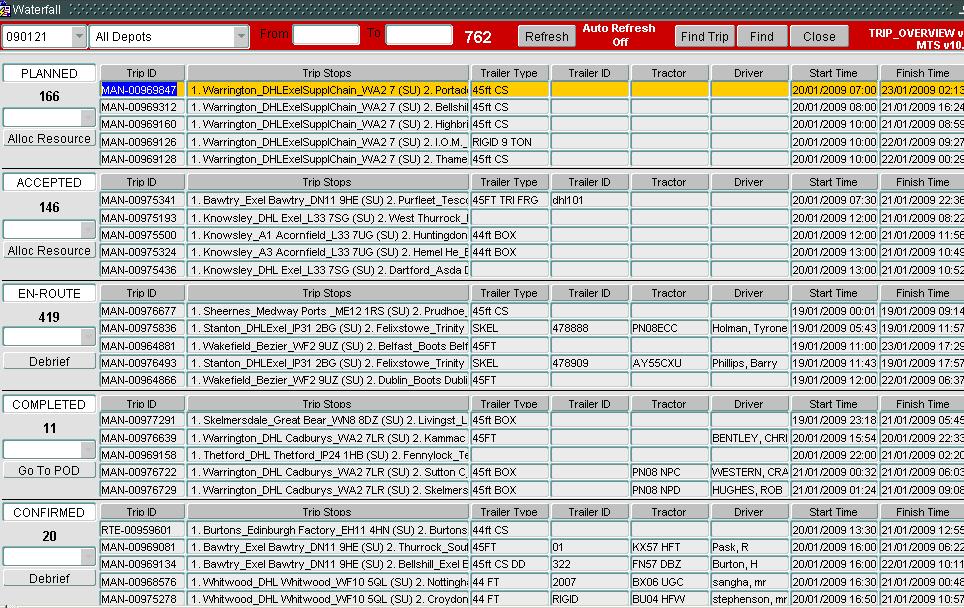
The Allocate Resources screen is only accessible via the Alloc Resource button in the PLANNED and ACCEPTED sections of the Trip Overview screen. You can see an example of this in the screen below:

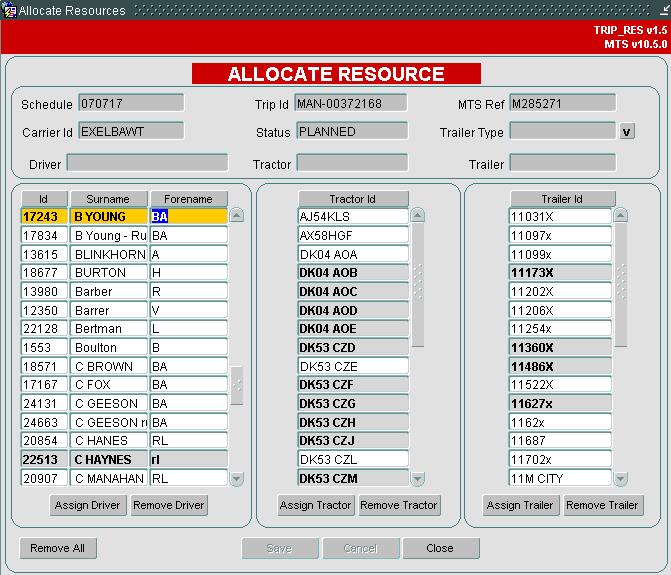
Select a trip from the well, that you want to allocate resources to, then click the Alloc Resource button. The screen below will be displayed:

The Drivers, Tractors and Trailers that appear in the bottom of the screen are those available to be allocated to the current trip. Only Drivers and Tractors linked to the Carrier assigned to the trip are available for selection. If a Trailer Type has already been assigned to the trip then only Trailers linked to that Trailer Type are available for selection, but if no Trailer Type has been assigned, then all Trailers will be available. See the Resources screen for the set up of these links. Note that if a Trailer Type has already been assigned when entering the form, you will be unable to change it at this point.
If a Trailer Type has not been assigned, this can be done using the V lookup button next to that field in the header. Those resources that are currently in use between the trips start time and finish time are high-lighted in grey to show you they are currently in use, although they can still be allocated.
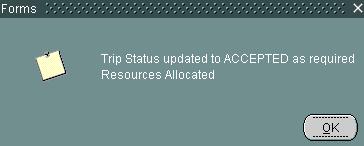
To assign a resource, select it from the list and click the associated Assign button. When assigned, the name/id will appear in the header. Use the Remove button if a resource needs to be removed. Once happy that resources have been added, click Save. If during a Save, all resources have been added to a PLANNED trip, the system will automatically update the trip status to ACCEPTED. You will get a message like below:

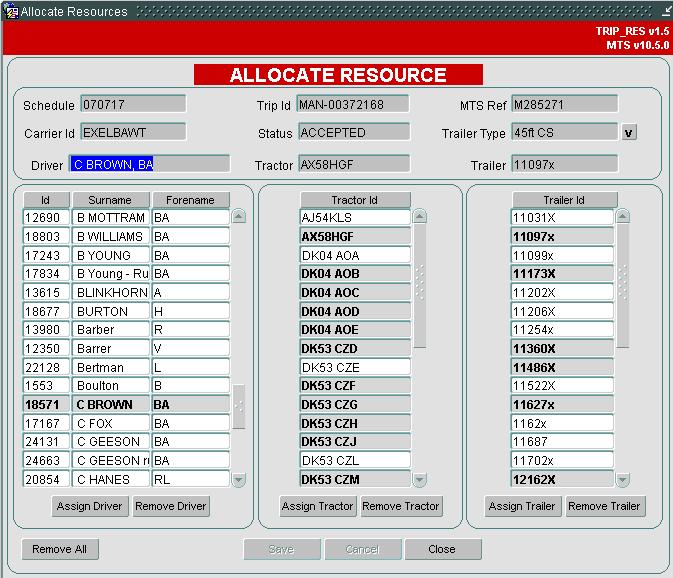
Clicking OK will update the status in the header to ACCEPTED as shown:

When you Close the form and return to the Trip Overview screen, the trip will now be moved from the PLANNED section to the ACCEPTED section.