REQ 308231 Airlink Requirements: Difference between revisions
From Calidus HUB
(v0.2 - added images and new product SCR. Awaiting review.) |
(Spelling corrections and slight formatting changes) |
||
| (2 intermediate revisions by the same user not shown) | |||
| Line 1: | Line 1: | ||
<div class="noprint"> | <div class="noprint"> | ||
{{#vardefine:Client| | {{#vardefine:Client|ALS}} | ||
{{#vardefine:ClientName|Air Link}} | {{#vardefine:ClientName|Air Link}} | ||
{{#vardefine:System|''CALIDUS'' eSERV}} | {{#vardefine:System|''CALIDUS'' eSERV}} | ||
{{#vardefine:Doc_Title|Air Link eSERV Requirements}} | {{#vardefine:Doc_Title|Air Link eSERV Requirements}} | ||
{{#vardefine:Version|0 | {{#vardefine:Version|1.0}} | ||
{{#vardefine:Date| | {{#vardefine:Date|23rd April 2013}} | ||
{{#vardefine:Reference|308231}} | {{#vardefine:Reference|308231}} | ||
{{#vardefine:Year|2013}} | {{#vardefine:Year|2013}} | ||
| Line 103: | Line 103: | ||
The use of this screen is described in the Admin User Guide. In summary: | The use of this screen is described in the Admin User Guide. In summary: | ||
* Click the '''New''' button to create a new call, and enter the details in the pop-up screen. Click '''Save''' when finished. | * Click the '''New''' button to create a new call, and enter the details in the pop-up screen. Click '''Save''' when finished. | ||
* Existing calls can be found using the '''Find''' button and entering | * Existing calls can be found using the '''Find''' button and entering selection criteria, then clicking '''Search'''. | ||
* Editable fields against calls can be seen by clicking '''Select''' - the call can be amended, deleted, cancelled and saved from this pop-up screen. | * Editable fields against calls can be seen by clicking '''Select''' - the call can be amended, deleted, cancelled and saved from this pop-up screen. | ||
* The user-entered details of a call can be checked by clicking the '''Details''' button. | * The user-entered details of a call can be checked by clicking the '''Details''' button. | ||
| Line 114: | Line 114: | ||
The use of this screen is described in the Admin User Guide. In summary: | The use of this screen is described in the Admin User Guide. In summary: | ||
* Click the '''New''' button to create a new Load, and enter the details in the pop-up screen. Click '''Save''' when finished. | * Click the '''New''' button to create a new Load, and enter the details in the pop-up screen. Click '''Save''' when finished. | ||
* Existing loads can be found using the '''Find''' button and entering | * Existing loads can be found using the '''Find''' button and entering selection criteria, then clicking '''Search'''. | ||
* Editable fields against loads can be seen by clicking '''Select''' - the load can be amended, deleted, cancelled and saved from this pop-up screen. | * Editable fields against loads can be seen by clicking '''Select''' - the load can be amended, deleted, cancelled and saved from this pop-up screen. | ||
* The calls assigned to a load can be seen by clicking the '''Details''' button - this will display the Jobs screen above. | * The calls assigned to a load can be seen by clicking the '''Details''' button - this will display the Jobs screen above. | ||
Calls can be assigned to a load in two ways: | Calls can be assigned to a load in two ways: | ||
** Singly through the Jobs screen, by setting the Load | ** Singly through the Jobs screen, by setting the Load against the call when created or edited. | ||
** Mass entry through the Loads screen, by finding a load, clicking '''Details''', then clicking the '''Assign''' button and assigning multiple calls, then clicking the '''Assign''' button. | ** Mass entry through the Loads screen, by finding a load, clicking '''Details''', then clicking the '''Assign''' button and assigning multiple calls, then clicking the '''Assign''' button. | ||
| Line 131: | Line 131: | ||
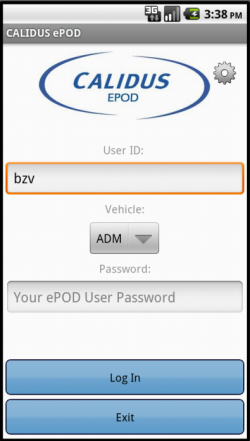
The engineer should enter the User ID, Vehicle and Password that they have been provided. If there is any error regarding the values entered, the application will inform you of the error. A pop-up keyboard will be displayed for entry of the details. | The engineer should enter the User ID, Vehicle and Password that they have been provided. If there is any error regarding the values entered, the application will inform you of the error. A pop-up keyboard will be displayed for entry of the details. | ||
[[File:AIRLINK-308231-03.PNG|border]] | [[File:AIRLINK-308231-03.PNG|250px|border]] | ||
A '''Settings''' button is provided to configure the device through a Configuration screen. {{Note}} If the device has never been configured before, this screen will prompt the user to configure the system first. | A '''Settings''' button is provided to configure the device through a Configuration screen. {{Note}} If the device has never been configured before, this screen will prompt the user to configure the system first. | ||
| Line 146: | Line 146: | ||
Upon logging onto a device, the user will be presented with a work list (Load) of Calls to complete. | Upon logging onto a device, the user will be presented with a work list (Load) of Calls to complete. | ||
[[File:AIRLINK-308231-04.PNG|border]] | [[File:AIRLINK-308231-04.PNG|250px|border]] | ||
The Calls on the Job List will be sorted in Start Planned Date and Time sequence. | The Calls on the Job List will be sorted in Start Planned Date and Time sequence. | ||
| Line 159: | Line 159: | ||
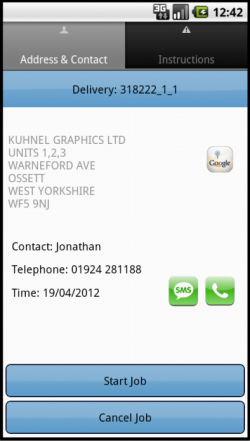
When selected, the system will display the Job Summary screen. | When selected, the system will display the Job Summary screen. | ||
[[File:AIRLINK-308231-05.PNG|border]] | [[File:AIRLINK-308231-05.PNG|250px|border]] | ||
The user can then start the Call, by clicking on the '''Start''' button - this marks the Call as in progress, and captures the Actual Call Start time. The button will change to a label of '''Arrive Job''' | The user can then start the Call, by clicking on the '''Start''' button - this marks the Call as in progress, and captures the Actual Call Start time. The button will change to a label of '''Arrive Job''' | ||
{{Note}} All Job Status information similar to this will be sent back to the server immediately, to ensure that the server has the best information available as quickly as possible. | {{Note}} All Job Status information similar to this will be sent back to the server immediately, to ensure that the server has the best information available as quickly as possible. | ||
{{Note}} The engineer will be forced to read the Instructions on the call before marking the call as Started. | |||
The user will at this time drive to the site, and can use the contact or navigation options provided within the application. {{note}} Telephoning or texting the customer will only be allowed if the device's SIM has a Voice plan. | The user will at this time drive to the site, and can use the contact or navigation options provided within the application. {{note}} Telephoning or texting the customer will only be allowed if the device's SIM has a Voice plan. | ||
| Line 187: | Line 189: | ||
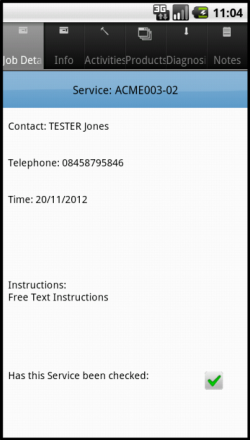
* Instructions - the reported fault. | * Instructions - the reported fault. | ||
[[File:AIRLINK-308231-06.PNG|border]] | [[File:AIRLINK-308231-06.PNG|250px|border]] | ||
It is not expected that any information needs to be added to this screen at this time. | It is not expected that any information needs to be added to this screen at this time. | ||
| Line 194: | Line 196: | ||
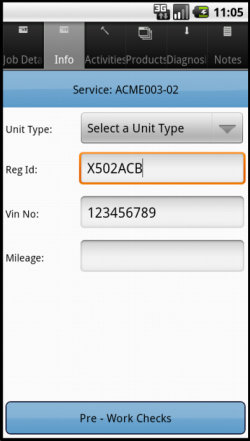
This tab currently contains the job-level information required for the Service. | This tab currently contains the job-level information required for the Service. | ||
[[File:AIRLINK-308231-07.PNG|border]] | [[File:AIRLINK-308231-07.PNG|250px|border]] | ||
This screen will be modified to display a picker for System Type. | This screen will be modified to display a picker for System Type. | ||
| Line 205: | Line 207: | ||
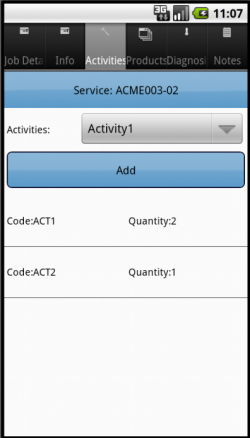
This tab allows entry of Installed and Removed Products, during the completion of the call. | This tab allows entry of Installed and Removed Products, during the completion of the call. | ||
[[File:AIRLINK-308231-08.PNG|border]] | [[File:AIRLINK-308231-08.PNG|250px|border]] | ||
If a product is used during the call, select the product from the picker and click the '''Installed''' button. | If a product is used during the call, select the product from the picker and click the '''Installed''' button. | ||
| Line 220: | Line 222: | ||
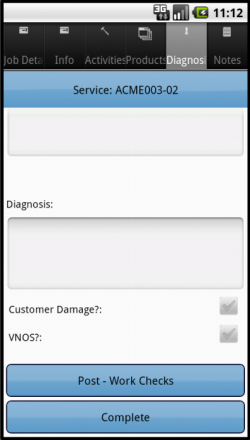
This tab allows the user to enter Problem Diagnosis information. | This tab allows the user to enter Problem Diagnosis information. | ||
[[File:AIRLINK-308231-09.PNG|border]] | [[File:AIRLINK-308231-09.PNG|250px|border]] | ||
This screen will be modified to: | This screen will be modified to: | ||
| Line 237: | Line 239: | ||
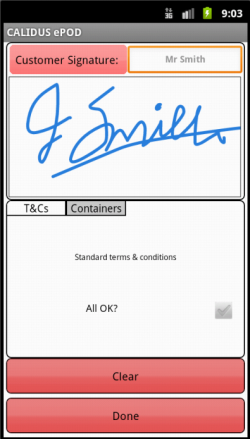
Once all the information has been entered and the engineer clicks the '''Complete''' button, the PDA will prompt for the customer's signature. | Once all the information has been entered and the engineer clicks the '''Complete''' button, the PDA will prompt for the customer's signature. | ||
[[File:AIRLINK-308231-10.PNG|border]] | [[File:AIRLINK-308231-10.PNG|250px|border]] | ||
{{Note}} The user will be able to back out of this signature capture to see the details entered against the service, so that the customer can review before signing. | {{Note}} The user will be able to back out of this signature capture to see the details entered against the service, so that the customer can review before signing. | ||
| Line 247: | Line 249: | ||
}} | }} | ||
When complete and confirmed, the device will ask the user whether any job photos are required. If so, the device will display the Job Photo prompt, where the user will be able to take an image and associate it to the job. | When complete and confirmed, the device will ask the user whether any job photos are required. If so, the device will display the Job Photo prompt, where the user will be able to take an image and associate it to the job. | ||
{{SCR|Reference={{#var:Reference}}|SCRNo={{ #vardefineecho: SCR | {{ #expr: {{ #var: SCR }} + 1 }} }} | {{SCR|Reference={{#var:Reference}}|SCRNo={{ #vardefineecho: SCR | {{ #expr: {{ #var: SCR }} + 1 }} }} | ||
|Definition=Allow optional Photo on finishing Job. | |Definition=Allow optional Photo on finishing Job. | ||
| Line 270: | Line 273: | ||
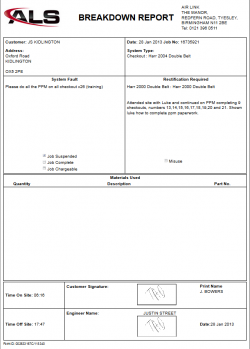
A new Service Report format will be written for the operation, based on the existing Breakdown Report. The format has been prototyped and is shown below. | A new Service Report format will be written for the operation, based on the existing Breakdown Report. The format has been prototyped and is shown below. | ||
[[File:AIRLINK-308231-11.PNG|border]] | [[File:AIRLINK-308231-11.PNG|250px|border]] | ||
{{Note}} The printing of the report is browser-dependent and can differ in small ways from the sample above. | {{Note}} The printing of the report is browser-dependent and can differ in small ways from the sample above. | ||
