OV 287575 CALIDUS VEhub Admin
![]()
Aptean Proof of Delivery - Calidus Edition
CALIDUS VEhub Admin Guide
Functional Specification
13th October 2015 - 1
Reference: OV 287575
Functional Overview
The document is intended to describe the basic functionality of the CALIDUS VEhub admin system.
CALIDUS VEhub
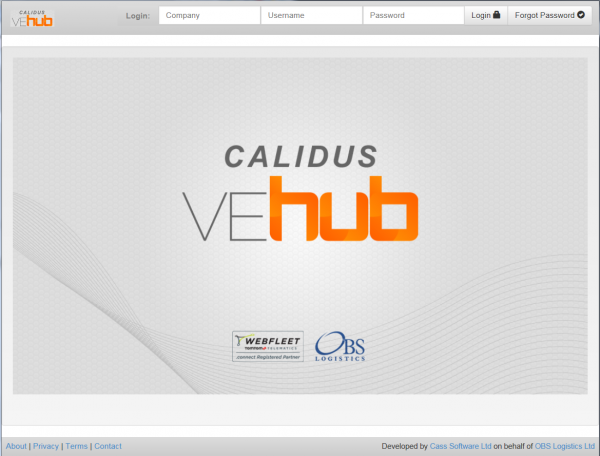
Login
Enter Company, Username and Password, then press the Login button.
If you have forgotten your login, use the Forgot Password button.
Once logged in, the Dashboard screen will be displayed.
General Screen Details
Header:
Each screen shows a navigation menu:
- Dashboard - this takes you to the Dashboard screen, and is the first screen shown after logging on.
- Vehicle Checks
- Asset Tagging
- Accident Reports
- Setup Vehicles
- Setup Trailers
- Change Password
- Download Device APK - used to download the application for installing to an Android device.
- Download Templates
Alerts
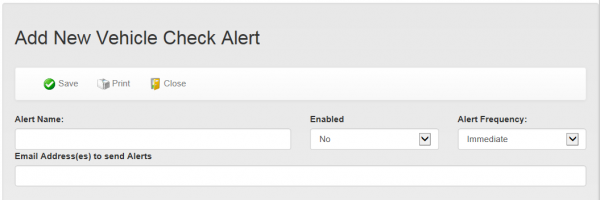
- Add "Vehicle Check" Alert
- Add "Accident Report" Alert
- Add "Trailer Scan" Alert
- Add "Lapsed Check" Alert
Alerts generally allow specification of:
- The Alert Name
- whether the alert is enabled
- the frequency of the alert (Immediate or Daily)
- The Email address
Accident Report alerts may be set against specific entered fields, standard or custom.
Accident Report alerts may be set against the specific submitted Vehicle or Trailer. Additionally, customer fields may be checked.
Trailer Scan alerts may be set against the specific trailer, or the Scan Code
Lapsed Check alerts may be set against the specific vehicle, and may be checked at specific days of the week, and a specific time.
Settings
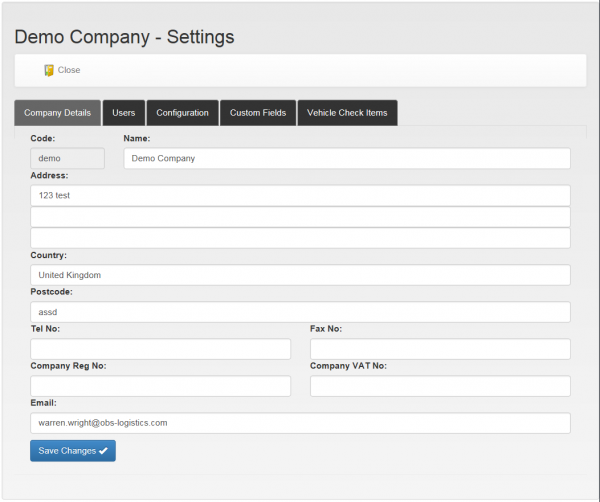
Company Details
The screen allows you to amend the Company details.
Setting that may be modified are:
- Code
- Name - Displayed in the title
- Address - up to 3 lines
- Country
- Postcode
- Tel No
- Fax No
- Company Reg No
- Company VAT No
When changes are complete, click the Save Changes button.
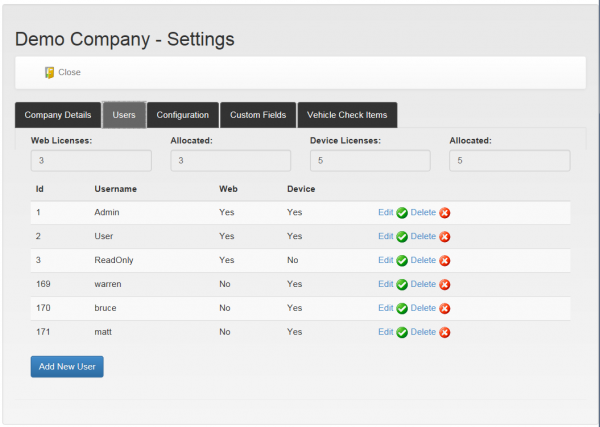
Users
This screen allows the users of the system to be maintained.
The screen initially shows a table of all users currently on the system. Each user may be edited or deleted using the Edit or Delete buttons respectively against the line.
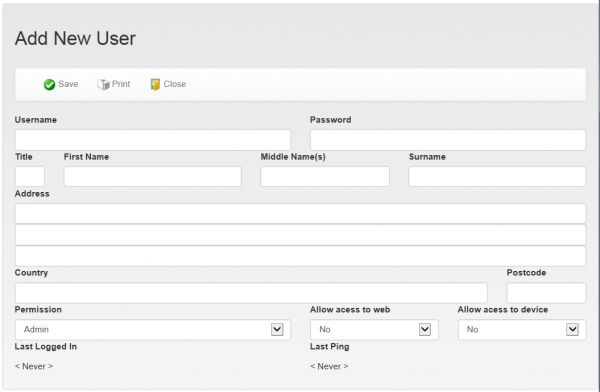
A new user may be added using the Add New User button.
When editing or adding a new user, the edit user screen will be displayed, allowing entry of:
- Username
- Password
- Title
- First Name
- Middle Name(s)
- Surname
- Address - up to 3 lines
- Country
- Postcode
- Permission (Admin, User or Read Only)
- Allow Access to web - Yes or No
- Allow Access to device - Yes or No
The screen also shows when the user was last seen (Last Logged In and Last Ping).
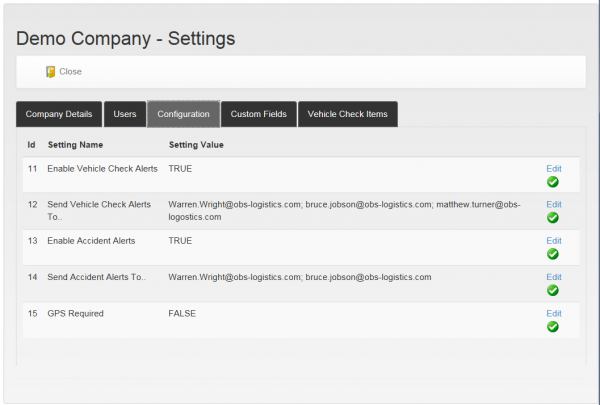
Configuration
This screen allows maintenance of system settings.
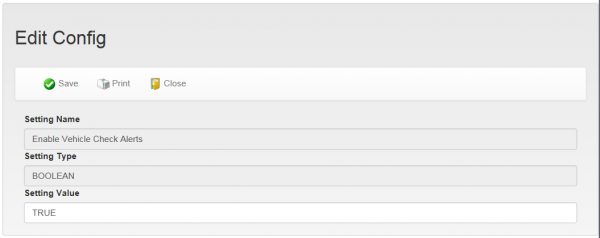
A setting may be edited with the Edit button. This allows changing of the configuration flag.
When changes are complete, click the Save button. Changes may be discarded with the Close button.
Configurable elements are:
- Enable Vehicle Check Alerts - whether to email alerts for vehicle checks with defects.
- Send Vehicle Check Alerts To.. - Email address for vehicle checks with defects.
- Enable Accident Alerts - whether to email alerts for accident reports received.
- Send Accident Alerts To.. - Email address for accident reports received.
- GPS Required - whether GPS connectivity is required before any data captured on the device is recorded.
- Next Check for Unchecked Vehicles at... Default start date for any new vehicles to be checked.
- Enable Unchecked Vehicle Alerts - whether to email alerts for vehicles that have not been checked.
- Send Overdue Vehicle Check Alerts To - Email address for overdue vehicle checks.
Custom Fields
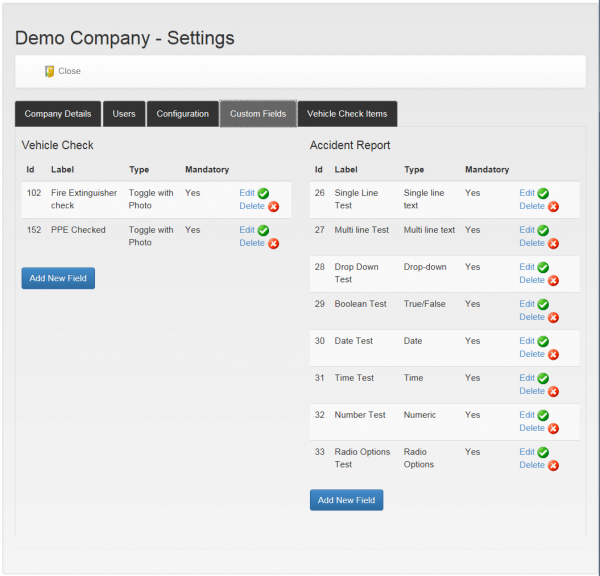
This screen allows custom Vehicle Check and Accident Report fields to be maintained.
Custom Fields may be edited using the Edit button against each field, and may be deleted through the Delete button against each field.
New Custom Fields of each type may be added using the appropriate Add New Field button in each section.
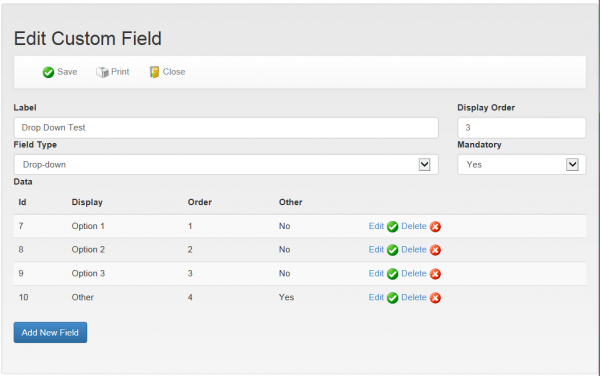
When Editing or Adding new fields, the Edit Screen is displayed, and allows editing of:
- Label
- Display Order
- Field Type - one of:
- Single Line Text
- Multi Line Text
- Drop Down
- True/False
- Date
- Time
- Numeric
- Radio Options
- Toggle with Photo
- Mandatory - Yes/No
Depending on the Field Type, data may be allowed for the field.
Custom Data may be edited using the Edit button against each field, and may be deleted through the Delete button against each field.
New Custom Data may be added using the appropriate Add New Field button.
When Editing or Adding new data, the Edit Screen is displayed, and allows editing of:
- Display Label
- Allow Free Type (Other)
- Data Value
- Display Order
With either screen, when changes are complete, click the Save button. Changes may be discarded with the Close button.
Vehicle Check Items
This screen allows the Vehicle Check items to be maintained.
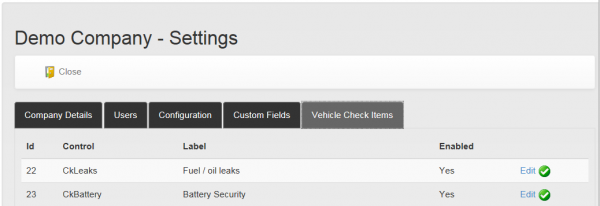
Vehicle Check Items Settings Screen
Each control may be edited using the Edit button against the line. This shows the following:
- Control Name (May not be amended)
- Label
- Enabled - Yes/No
When changes are complete, click the Save button. Changes may be discarded with the Close button.
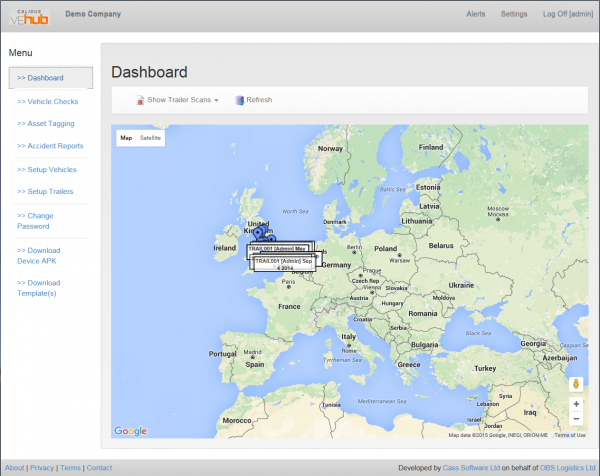
Dashboard Screen
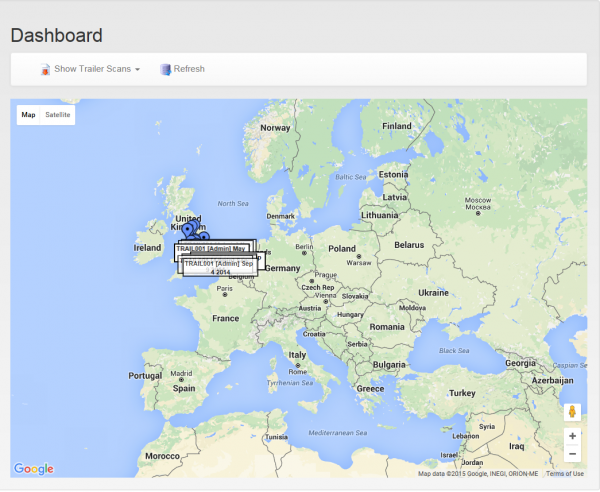
The Dashboard screen shows the location of all actions taken by users within your company.
By default, the screen shows all Trailer Scans. This may be changed using the filter provided. When the filter is changed, the screen will refresh automatically.
The Refresh button will redisplay all the selected events.
The map may be zoomed in and out using the mouse scroll button, or the buttons provided in the bottom right of the map.
Clicking on an event will show a pop-out label, showing the some details of the event.
Vehicle Checks Screen
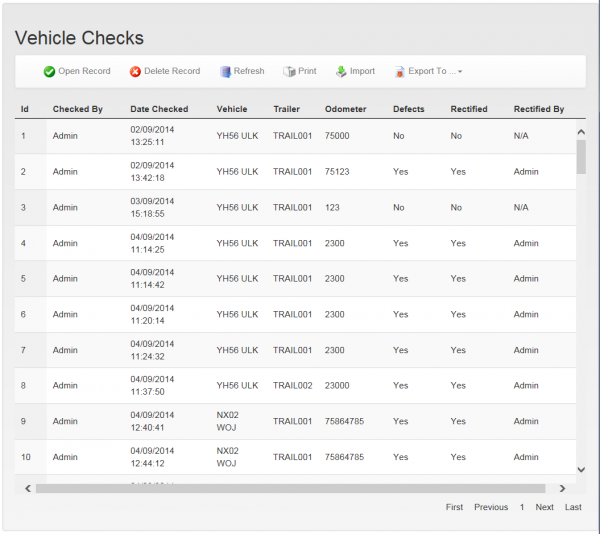
This screen allows the Vehicle Checks completed for this company to be maintained.
The screen first displays a list of all the vehicle checks, showing:
- ID
- Checked By
- Date Checked
- Vehicle
- Trailer
- Odometer
- Defects - whether there were defects
- Rectified - whether defects were rectified
- Rectified By - who rectified the defects
Selecting a line will highlight it, then an action can be taken against that line. the actions are shown on the top of the screen:
- Open Record - shows the details of the checks in a Vehicle Check Details screen
- Delete Record - delete the line
The screen also allows some general functions:
- Print - print the full list of checks
- Refresh - refresh the list
- Import - import the list of checks
- Export To - export the list of checks
Importing and Exporting of checks can be done in several formats:
- XML
- CSV
- JSON
Vehicle Check Details Screen
The screen shows all the details captured from the vehicle checks, and also allows comments and rectifying defects.
The screen shows several sections:
- Details
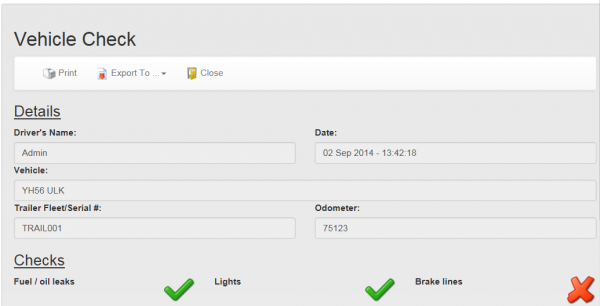
Vehicle Checks Details - Details and Checks Section
- Driver's Name
- Date
- Vehicle
- Trailer Fleet/Serial #
- Odometer
- Checks
- Any standard checks that were completed
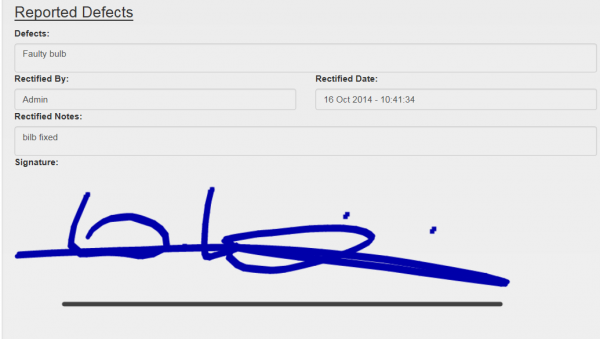
- Reported Defects
- Defects
- Rectified By
- Rectified Date
- Rectified Notes
- Signature
- Comments
- Author
- Date
- Comment
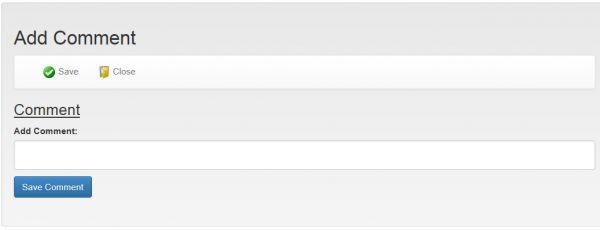
New comments may be added with the Add Comment button.
Once a comment is added, this may be saved with the Save button.
- Custom Data - any customer checks configured for the company.
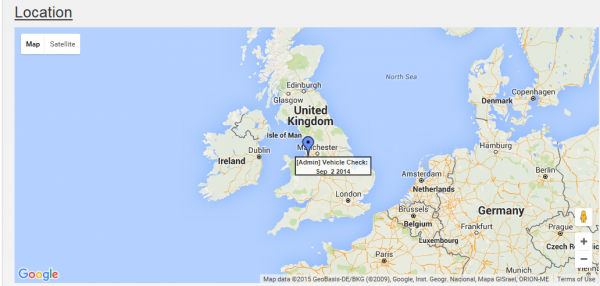
- Location - A map of the location where the vehicle checks were completed (if provided).
- Images - Any images associated to the standard checks.
Action may be taken through the buttons provided on the top of the screen:
- Print - print the screen
- Export To - Export the checks to XML, CSV or JSON format.
- Close - Close the screen and return to the Vehicle Checks screen.
Asset Tagging Screen
This screen allows the Vehicle Checks completed for this company to be maintained.
The screen first displays a list of all the vehicle checks, showing:
- ID
- Trailer Code
- Trailer Name
- Scanned By
- Scan Date
- Scan Value
Selecting a line will highlight it, then an action can be taken against that line. the actions are shown on the top of the screen:
- Open Record - shows the details of the checks in an Asset Tagging Details screen
- Delete Record - delete the line
The screen also allows some general functions:
- Print - print the full list of checks
- Refresh - refresh the list
- Import - import the list of checks
- Export To - export the list of checks
Importing and Exporting of checks can be done in several formats:
- XML
- CSV
- JSON
Asset Tagging Details Screen
The screen shows all the details captured from the asset tagging.
The screen also allows some general functions:
- Print - print the details
- Export To - export the Asset Tagging details to XML, CSV or JSON
- Close - return to the Asset Tagging screen
Accident Reports Screen
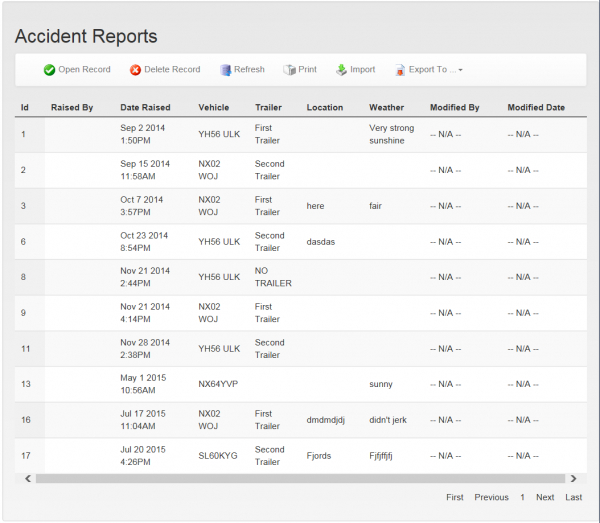
This screen allows the Accident Reports completed for this company to be maintained.
The screen first displays a list of all the vehicle checks, showing:
- ID
- Raised By
- Date Raised
- Vehicle
- Trailer
- Location
- Weather
- Modified By
- Modified Date
Selecting a line will highlight it, then an action can be taken against that line. the actions are shown on the top of the screen:
- Open Record - shows the details of the checks in an Accident Reports Details screen
- Delete Record - delete the line
The screen also allows some general functions:
- Print - print the full list
- Refresh - refresh the list
- Import - import a list
- Export To - export the list
Importing and Exporting can be done in several formats:
- XML
- CSV
- JSON
Accident Reports Details Screen
The screen shows all the details captured from the Accident Reports.
The screen displays in several sections:
- Accident Details
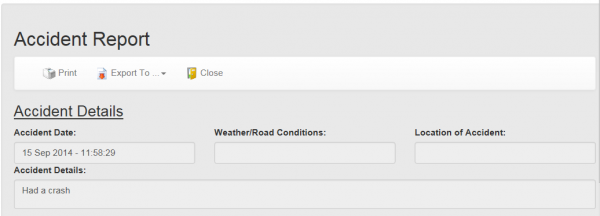
Accident Reports Details Screen
- Accident Date
- Weather/Road Conditions
- Location of Accident
- Accident Details
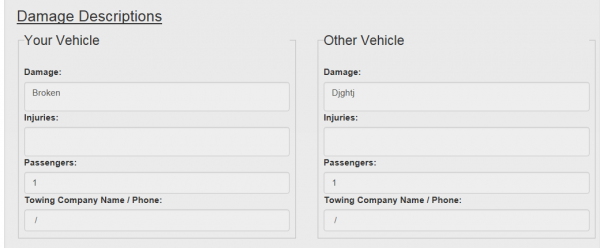
- Damage Descriptions
![]() Note: Data can be entered for Your and the other Vehicle:
Note: Data can be entered for Your and the other Vehicle:
- Damage
- Injuries
- Passengers
- Towing Company Name/Phone
- Other Driver/Vehicle Information

Other Driver/Vehicle Information section
- Owner's Name
- Owner's Address
- Owner's Phone
- Vehicle Reg
- Make
- Model/Year
- Colour
- Insurance Company
- Agent Name & Phone
- Other Driver's Name
- Other Driver's Address
- Other Driver's Phone
- Police Information
- Officer Name
- Department
- Phone
- Badge #
- Other Info
- Witness Information
- Name
- Address
- Home Phone
- Work Phone
- Custom Data
- Comments
- ID
- Author
- Date
- Comment
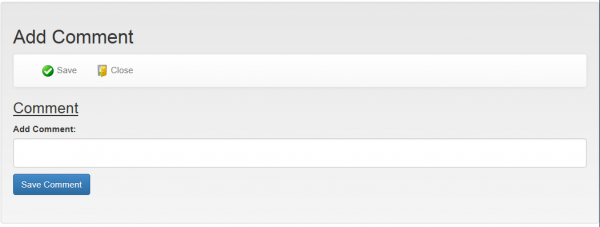
A new comment may be added by clicking the Add Comment button, which will display the Add Comment screen.
Once completed, click Save to save the comment and return to the Accident Report Details screen. To discard entry and return to the Accident Report Details screen, click Close.
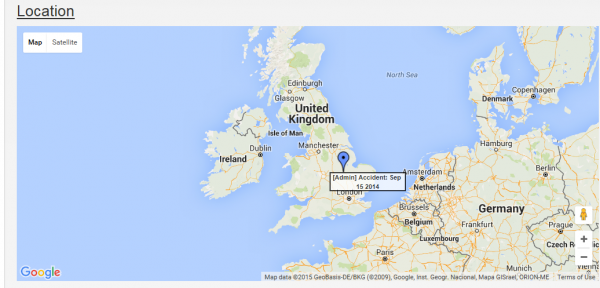
- Location - A map of the location where the Accident Report was completed (if provided).
- Images - Any images associated to Accident Report.
The screen also allows some general functions:
- Print - print the details
- Export To - export the details to XML, CSV or JSON
- Close - return to the Accident Reports screen
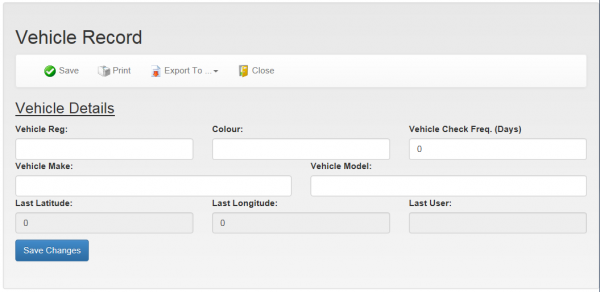
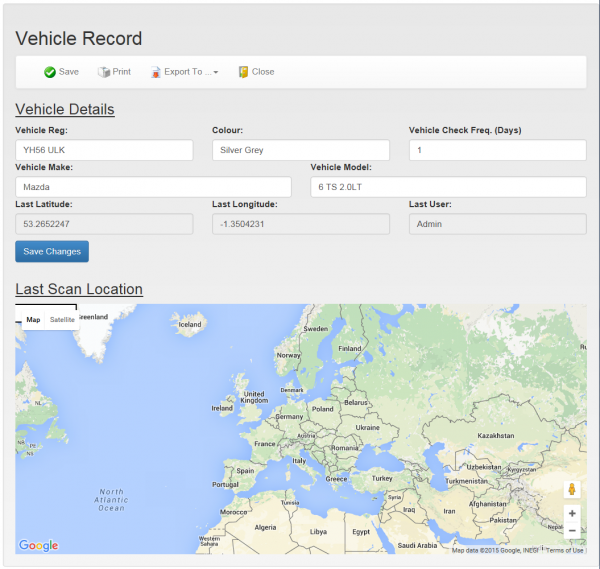
Setup Vehicles
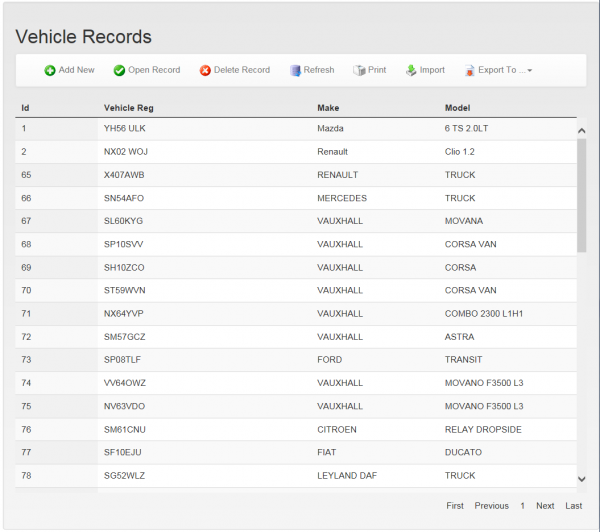
This screen allows the maintenance of Vehicles for this company.
The screen first displays a list of all the vehicles, showing:
- ID
- Vehicle Reg
- Make
- Model
Selecting a line will highlight it, then an action can be taken against that line. the actions are shown on the top of the screen:
- Add New - allows a vehicle to be added through an Add Vehicles screen
- Open Record - shows the details of the vehicle in an Edit Vehicles screen
- Delete Record - delete the line
The screen also allows some general functions:
- Refresh - refresh the list
- Print - print the full list
- Import - import a list
- Export To - export the list
Importing and Exporting can be done in several formats:
- XML
- CSV
- JSON
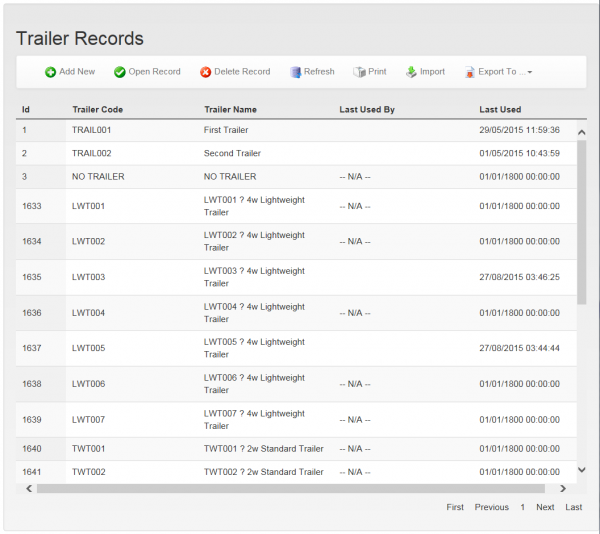
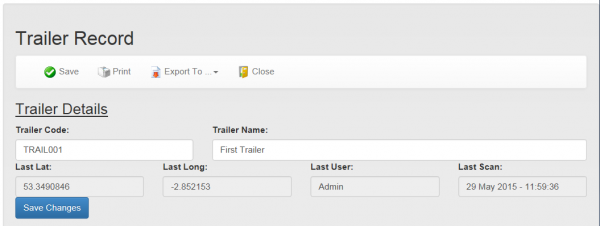
Setup Trailers
This screen allows the maintenance of Trailers for this company.
The screen first displays a list of all the trailers, showing:
- ID
- Vehicle Reg
- Make
- Model
Selecting a line will highlight it, then an action can be taken against that line. the actions are shown on the top of the screen:
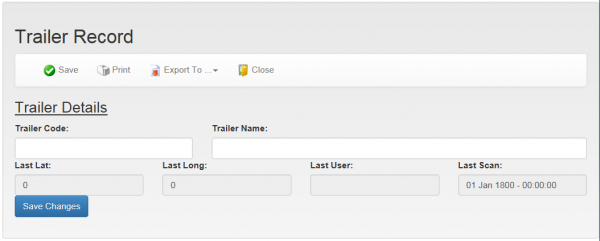
- Add New - allows a trailer to be added through an Add Trailers screen
- Open Record - shows the details of the trailer in an Edit Trailers screen
- Delete Record - delete the line
The screen also allows some general functions:
- Refresh - refresh the list
- Print - print the full list
- Import - import a list
- Export To - export the list
Importing and Exporting can be done in several formats:
- XML
- CSV
- JSON
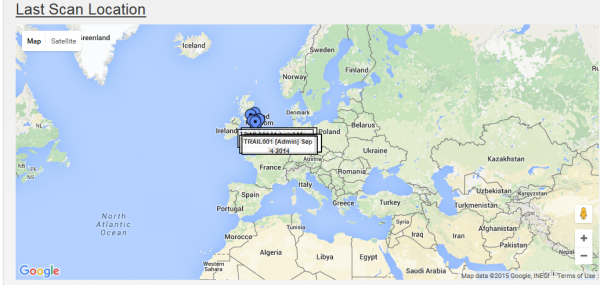
Edit Trailers - Locations section
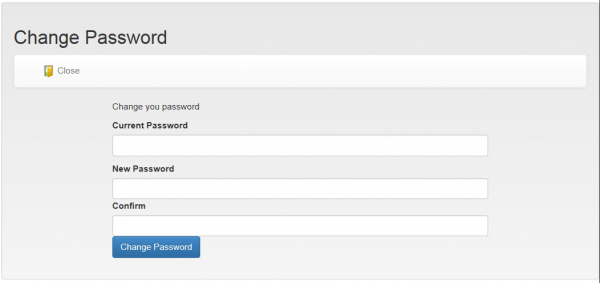
Change Password
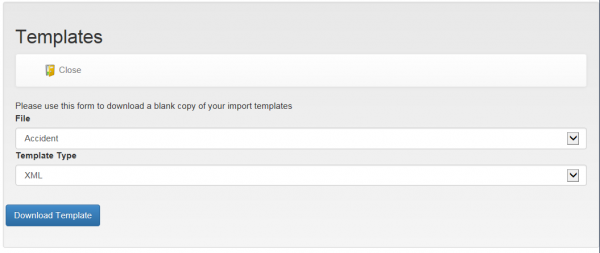
Download Template(s)
Use this form to download a blank copy of your import templates.
File:
- Accident
- Trailer
- Trailer Scan
- Vehicle
- Vehicle Check
Type:
- XML
- CSV
- JSON
Appendix A: Document References
A.1 References
| Ref No | Document Title & ID | Version | Date |
| 1 |
A.2 Glossary
| Term | Definition |
|---|---|
| EPOD | Electronic Proof of Delivery. The OBS EPOD system is CALIDUS ePOD. |
| CALIDUS eSERV | The OBS mobile system to complete Service functionality in the field. This is part of the CALIDUS ePOD system. |
| PDA | The mobile device on which the C-ePOD system will run in the field. This can be a Phone, EDA or industrial PDA, running Android. |
| DAL | Data Access Layer. A mechanism for accessing data by the system that is removed from the application, allowing for simplified access and providing protection to the data, as only approved DAL methods can be used to modify it. |
| GPS | Global Positioning System. A mechanism of retrieving accurate positioning information in the form of Latitude and Longitude (Lat-Long) co-ordinates from a device. |
| GPRS, 3G, HSDPA, Data Service | All terms referring to mobile device network connectivity, and the speed at which the device connects to the internet. |
A.3 Authorised By
Murray Middleton | OBS Project Manager | _____________________________ |
Tony Walker | OBS Consultant | _____________________________ |
