CALIDUS VEhub App
CALIDUS VEhub App
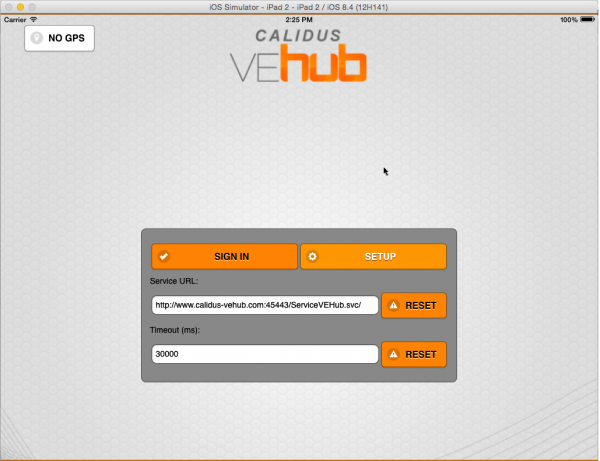
Login
Enter a valid Customer ID, User Name and Password.
Click Sign In to go to the Main Screen, or Setup to configure the application.
Setup
This screen allows configuration of the communications for the application.
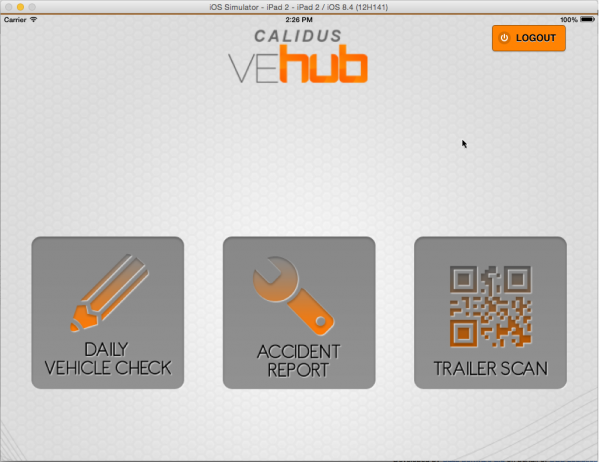
Main Screen
From here, the following 3 options may be selected:
Vehicle Checks
Page 1: Basic Details
Buttons:
- Home - return to the Main Screen.
- Notes - show the last submitted vehicle check
- Trash - reset all entered vehicle check information to this point, and start again. The device will prompt for confirmation first.
- Confirm - move to the next stage
Fields:
- Driver's Name
- Date
- Vehicle - enter through drop-down list of vehicles set up for this company
- Trailer - enter through drop-down list of trailers set up for this company
- Odometer - numeric-only
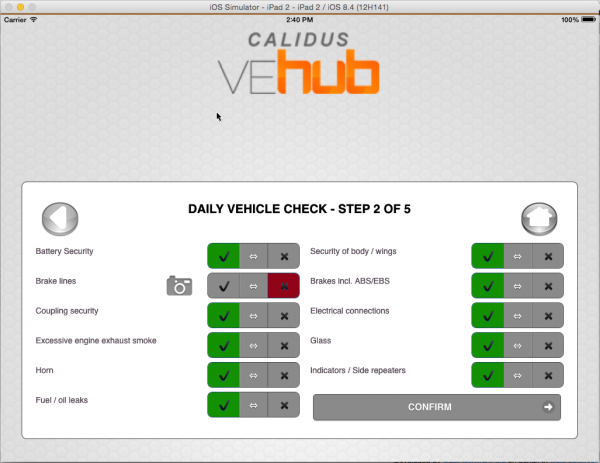
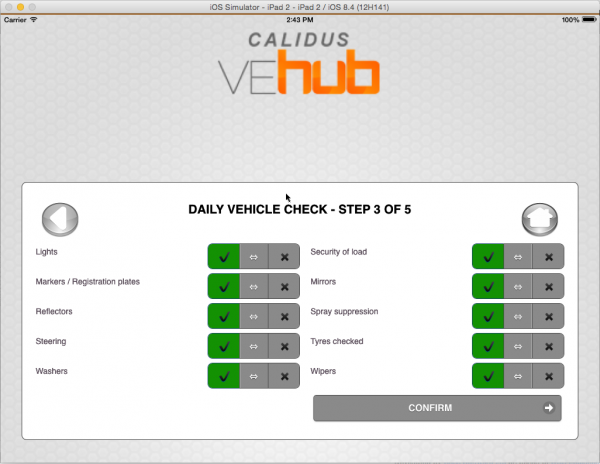
Page 2/3: Basic Checks
Check boxes for all the configured basic checks.
Buttons:
- Home - return to the Main Screen.
- Back - return to the previous screen.
- Confirm - move to the next stage
Each item may be checked as Passed (a tick) or Failed (a cross).
If failed, an image may be taken, through a popup button for images.
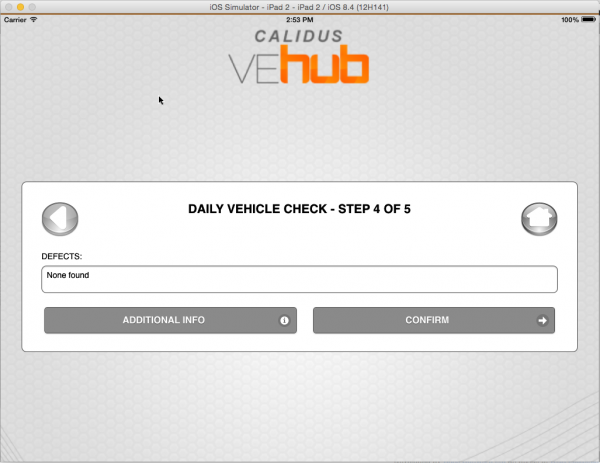
Page 4: Defects
Buttons:
- Home - return to the Main Screen.
- Back - return to the previous screen.
- Confirm - move to the next stage
- Additional Info - enter any custom fields set up against the vehicle checks
Fields:
- Defects
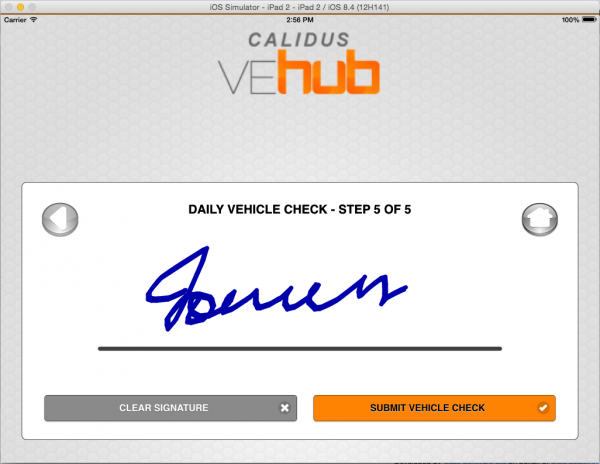
Page 5: Signature
- Home - return to the Main Screen.
- Back - return to the previous screen.
- Clear Signature - clear the entered signature
- Submit Vehicle Check - save the vehicle checks
Once completed, the checks will be sent back and stored in the system.
The last submitted vehicle checks are visible from the Notes button on the first page:
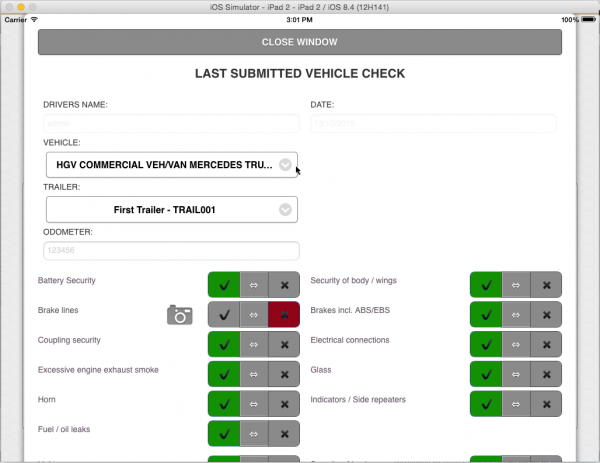
Viewing the Last Submitted Vehicle Checks
Accident Report
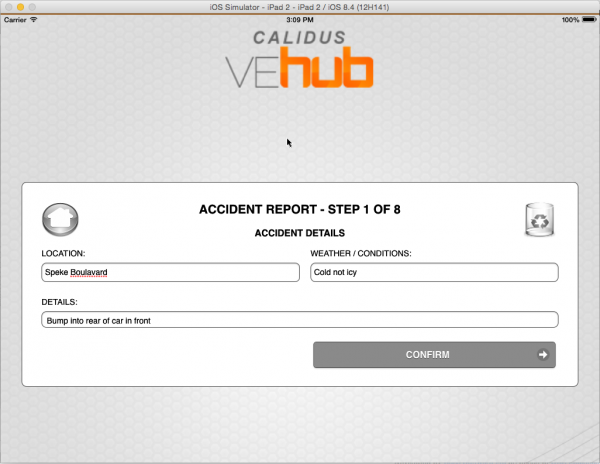
Page 1: Basic Details
Buttons:
- Home - return to the Main Screen.
- Trash - reset all entered vehicle check information to this point, and start again. The device will prompt for confirmation first.
- Confirm - move to the next stage
Fields:
- Location - In addition to GPS data
- Weather/Conditions
- Details
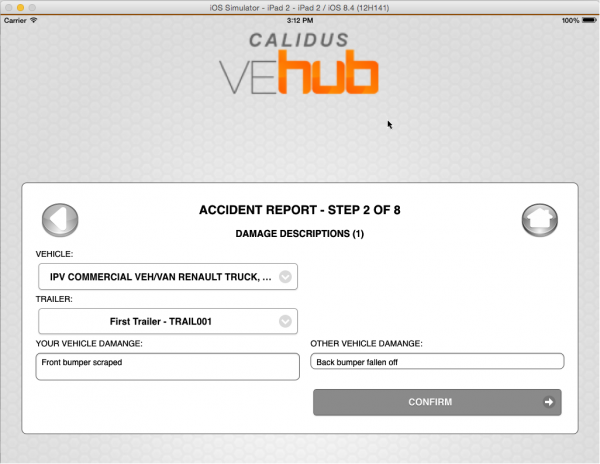
Page 2: Damage Descriptions (1)
Buttons:
- Home - return to the Main Screen.
- Back - return to the previous screen.
- Confirm - move to the next stage
Fields:
- Vehicle - enter through drop-down list of vehicles set up for this company
- Trailer - enter through drop-down list of trailers set up for this company
- Your Vehicle Damage
- Other Vehicle Damage
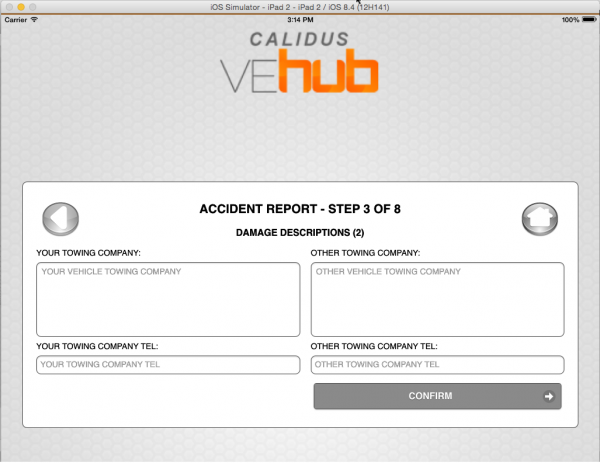
Page 3: Damage Descriptions (2)
Buttons:
- Home - return to the Main Screen.
- Back - return to the previous screen.
- Confirm - move to the next stage
Fields:
- Your Towing Company
- Your Towing Company Tel
- Other Towing Company
- Other Towing Company Tel
Page 4: Other Driver / Vehicle Info (1)
Buttons:
- Home - return to the Main Screen.
- Back - return to the previous screen.
- Confirm - move to the next stage
Fields:
- Other Owner Name
- Other Owner Address
- Other Vehicle Model
- Other Vehicle Reg
- Other Owner Phone
- Other Vehicle Make
- Other Vehicle Colour
Page 5: Other Driver / Vehicle Info (2)

Other Driver Insurance Details
Buttons:
- Home - return to the Main Screen.
- Back - return to the previous screen.
- Confirm - move to the next stage
Fields:
- Other Vehicle Insurance
- Other Driver Name
- Other Driver Address
- Other Vehicle Agent Tel
- Other Driver Phone
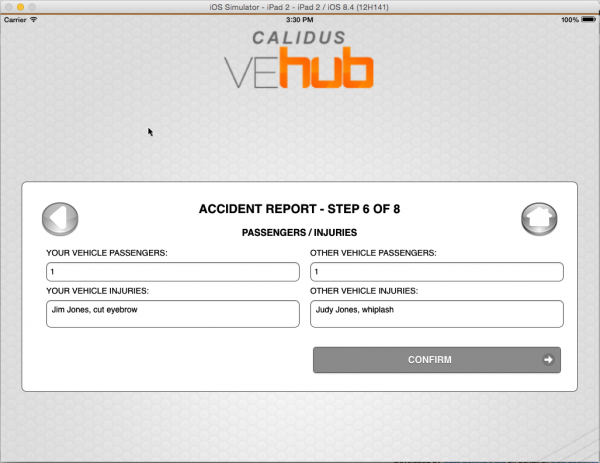
Page 6: Passengers/Injuries
Buttons:
- Home - return to the Main Screen.
- Back - return to the previous screen.
- Confirm - move to the next stage
Fields:
- Your Vehicle Passengers
- Your Vehicle Injuries
- Other Vehicle Passengers
- Other Vehicle Injuries
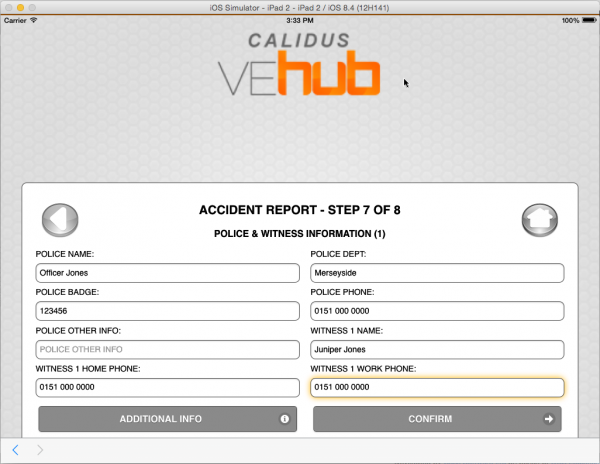
Page 7: Police & Witness Information (1)
Buttons:
- Home - return to the Main Screen.
- Back - return to the previous screen.
- Confirm - move to the next stage
- Additional Info - enter any custom fields set up against the Rccident Report, through a popup window.
Fields:
- Police Name
- Police Dept
- Police Badge
- Police Phone
- Police Other Info
- Witness 1 Name
- Witness 1 Home Phone
- Witness 1 Work Phone
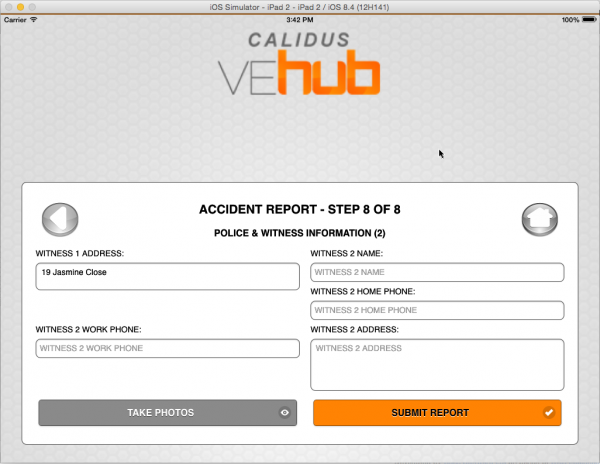
Page 8: Police & Witness Information (2)
Buttons:
- Home - return to the Main Screen.
- Back - return to the previous screen.
- Take Photos - Take and store photos
- Submit Report - Save the Accident Report
Fields:
- Witness 1 Address
- Witness 2 Name
- Witness 2 Home Phone
- Witness 2 Address
- Witness 2 Work Phone
The screen will validate that all information is entered correctly before submitting the report.
Once completed, the report will be sent back and stored in the system.
Trailer Scan
Fields:
- Type - select from
- Vehicle Check
- Location Check
- Trailer Swap
- Load Ref
Buttons:
- Cancel - return to the main screen
- Scan - Scan a QR barcode
- Submit Scan - submit the scan and save it on the system

