WMS Inbound
Pre-Advice
The WMS Pre Advice page can be used to enter a receipt into the Calidus WMS system. The page will initially be displayed as follows:
User
If allowed to select a user, then this section may be allowed to change the user entering the receipt:
Supplier
If a default supplier is set against the user/group, then it will initially be selected, otherwise the user can select (or change) the supplier for the receipt:
Product
From this section, the user can enter the item details for the receipt.
The user can find stock by catalogue ID:
Or by product code or description:
Once the stock is selected they can enter the pre-advice quantities against the required stock lines along with the pallet type and number of pallets:
View/Submit
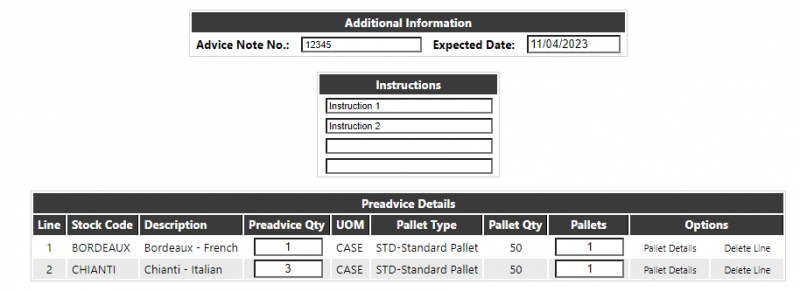
The view/submit section is used to enter additional information, instructions, and enter Pallet Details (if required) as well as specify an expected receipt date. It is also used to submit the or delete/cancel the pre-advice:
If the Pallet Details button appears against the options line, then Pallet details are required and must be entered before submitting the pre-advice. At this point the Submit button will be crossed out, as shown in the screenshot above.
Clicking on the Pallet Details text in the Options section will take the user into the pallet details page:
Dependent on the configuration of the Calidus WMS system, the user may need to enter a Customer Pallet, Customer Batch ID, manufacture and/or Sell-By-Date as well as the Pre-Advice quantity for that pallet. Once all the details have been entered, the user should click the 'Update' button to save the details, then click Back to go back to the View page to enter any remaining pallet details.
Dependent on the configuration of the Calidus WMS system, serial numbers may also be required.
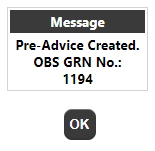
Once all pallet details (if required) have been entered, the user can click the 'Submit' button to submit the pre-advice. This will show the summary/confirmation page detailing the generated pre-advice number on the Calidus WMS system:
Inbound Processing
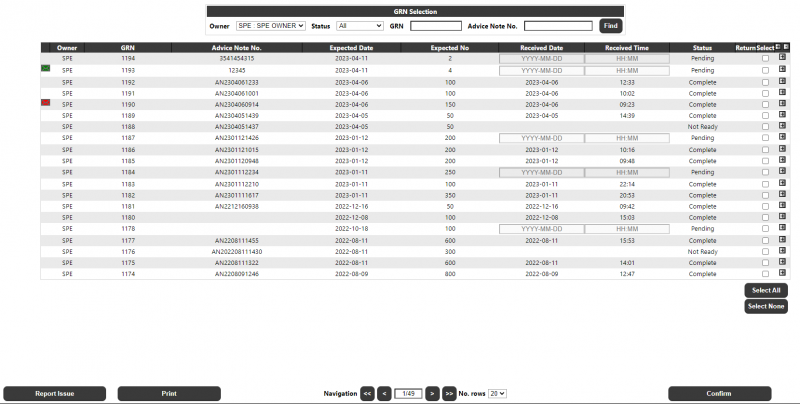
This page will display a list of all available orders for inbound processing. A number of filters will be available for the users to filter what is displayed:
NOTE: None, Either or Both of the GRN No. / Advice Note No. fields may be entered. If both are entered, then the search will try to match against both values.
Once the user has made their selection and clicks on the 'Find' button, a list of orders will be displayed which match the selected criteria. The screen will limit the number of Orders displayed with buttons to fetch the next/previous pages of data.
The data will initially be sorted by Status and GRN No. Clicking on any of the column headings will change the sort sequence. The details displayed for each GRN found will be:
- Msg - showing whether a problem has been reported. If there is an outstanding alert, the icon will be red; else if all the alert(s) have been cleared the icon will be green. Clicking the alert icon will take the user into the Alert/Issues page to display the alerts. NOTE: It will not be possible to select a GRN for processing which has an outstanding alert.
- Owner - the owner/study
- GRN No - the Calidus WMS GRN No
- Advice Note No - the Advice Note No
- Expected Date - the Expected Date in the format DD-MMM-YYYY
- Expected No - the Quantity expected
- Received Date/Time - for Pending GRN's, these fields can be used to capture the actual Received Date/Time when confirming the receipt.
- Return - a tick icon to denote if the GRN is marked as a return i.e. the GRN type is "R".
- Select - a radio button for the user to select a single GRN to be actioned. Note that if a GRN has an outstanding alert, then the radio button will not be available for selection.
- +/- Expansion - clicking on the +/- button at the end of each row will expand the rows details to show the following additional detail information:
- Stock Code - the Calidus WMS Stock Code
- Description - the description of the stock
- Rotation - the Calidus WMS System Rotation No
- Sell By Date - the Sell-By-Date against the line
- Qty - the total unit qty against the line
Note that the +/- icons in the heading will expand/collapse all of the row details.
At the foot of the page, a navigation section will allow the user to navigate between the pages of data and select the number of records to be displayed on the page.
In addition to the navigation section, a selection of buttons will be available, dependent on the order selections made, as described below:
- Report Issue - If this button is pressed clicking this button will display a confirmation dialogue, showing the GRN Number and user name. If the user confirms that they wish to continue reporting a problem, the system will display the Message Creation page passing the selected GRN information into the page. This page will allow the user to enter details of an email. The Email recipient and some of the details will be pre-set on the form. On clicking Send, the email will be sent directly through the client's email program. The details of the email will also be saved in Calidus WMS, and the message thread can be viewed on the Calidus Portal Message Processing page.
- Print - If the GRN status is 'Pending', clicking this button will create a GRN Putaway Note. Selecting a status other than 'Pending' will disable this button. The GRN Putaway Note produced will be a PDF document with a simple list of the GRN information, followed by each product and the Serial Numbers against each product. The list can be saved and printed by the user.
- Confirm - If the GRN status is 'Pending', clicking this button will display a confirmation dialogue, showing the GRN Number and user name. If the user confirms that they wish to continue with the confirmation, the system will create all pallets in their default putaway locations with all pre-advised serial numbers received as if 100%. The page will also mark the GRN as putaway confirmed. Standard processing (automatically holding the stock until the temperature has been confirmed) will remain in place. Once the confirmation has been processed, the data grid will be refreshed to display the changed GRN status.


