User Predictors: Difference between revisions
No edit summary |
(Updated based on version 2.4.4) |
||
| (7 intermediate revisions by the same user not shown) | |||
| Line 7: | Line 7: | ||
To create a new Predictor, select 'New' from the drop-down Predictor box and enter the name and description in the fields provided. Click ''Save'' to save the new Predictor. The screen will then allow you to enter the Parameters. Note that you can copy an existing Predictor's parameters here by choosing the Predictor from the provided drop-down box. | To create a new Predictor, select 'New' from the drop-down Predictor box and enter the name and description in the fields provided. Click ''Save'' to save the new Predictor. The screen will then allow you to enter the Parameters. Note that you can copy an existing Predictor's parameters here by choosing the Predictor from the provided drop-down box. | ||
[[Image:UDPredictor_New.PNG|border|600px]] | |||
To find an existing Predictor, select the Predictor from the drop-down Predictor box - the screen will immediately display the result of the Predictor. | To find an existing Predictor, select the Predictor from the drop-down Predictor box - the screen will immediately display the result of the Predictor. | ||
| Line 25: | Line 28: | ||
==Step 2: Owner== | ==Step 2: Owner== | ||
The Predictor needs to know which owner you are predicting for | The Predictor needs to know which owner you are predicting for - choose the Owner from the drop-down list provided. Only Owners your user is set up to see can be chosen here. Click '''Next''' when complete. | ||
[[Image:UDPredictor2.PNG|border|600px]] | [[Image:UDPredictor2.PNG|border|600px]] | ||
==Step 3: Tasks== | ==Step 3: Tasks== | ||
The Predictor need to know what task type is being predicted. | The Predictor need to know what task type is being predicted. Several Task types may be selected: | ||
* ''Generic'' - generic task types (for example, Part Picking, Putaway, Replen). | |||
* ''Extended'' - if your system has been configured with generic tasks split down into sub-types, this option will be available here, with a list of all the sub-types. | |||
* ''Orders'' - the available orders in the system. If selected, a list of the available customer groups for the orders will be displayed for selection. | |||
Click '''Next''' when complete. | |||
[[Image:UDPredictor3.PNG|border|600px]] | [[Image:UDPredictor3.PNG|border|600px]] | ||
| Line 37: | Line 43: | ||
==Step 4: Amount== | ==Step 4: Amount== | ||
The Predictor needs to know the amount of tasks that are to be completed in this model. | The Predictor needs to know the amount of tasks that are to be completed in this model. Drop-down lists will be shown to allow selection, depending on the task type. | ||
For ''Generic'' and ''Extended'' tasks, a drop-down list allows you to choose from the current outstanding tasks of that type, or you can manually enter a number of tasks to be completed in the box provided. | |||
For ''Orders'', a drop-down list will show allowing selection of: | |||
* ''Allocated (Today)'' - all allocated lines for all orders for today only | |||
* ''Allocated (All)'' - all allocated tasks for all orders | |||
* ''Ordered (Today)'' - all ordered lines for all orders for today only | |||
* ''Ordered (All)'' - all ordered lines for all orders | |||
Click '''Next''' when the information has been chosen. | |||
[[Image:UDPredictor4.PNG|border|600px]] | [[Image:UDPredictor4.PNG|border|600px]] | ||
| Line 46: | Line 62: | ||
Once this information has been entered, click '''Next''' to continue. | Once this information has been entered, click '''Next''' to continue. | ||
[[Image: | [[Image:UDPredictor5.PNG|border|600px]] | ||
==Step 6: Time== | ==Step 6: Time== | ||
| Line 62: | Line 75: | ||
==Step 7: Results== | ==Step 7: Results== | ||
Once all information has been identified (or an existing Predictor is chosen to be displayed), the screen will display the results of the Predictor. For example, here this is predicting the | Once all information has been identified (or an existing Predictor is chosen to be displayed), the screen will display the results of the Predictor. For example, here this is predicting the amount of time required to complete the current part-pick tasks outstanding at the current owner rate, with the current logged-on Part Pickers. | ||
[[Image:UDPredictor7.PNG|border|600px]] | |||
==Editing== | ==Editing== | ||
Latest revision as of 14:43, 18 June 2018
The Predictor can be used to predict the following items:
- The Estimated Time to Completion of the tasks selected, using the resources available.
- Number of Users required to complete a given set of tasks in a given timescale
- Productivity Rate required to complete a given set of tasks within a specific timescale at the specified rate.
- Amount of Tasks that can be completed of that type with those resources within the timescale.
To create a new Predictor, select 'New' from the drop-down Predictor box and enter the name and description in the fields provided. Click Save to save the new Predictor. The screen will then allow you to enter the Parameters. Note that you can copy an existing Predictor's parameters here by choosing the Predictor from the provided drop-down box.
To find an existing Predictor, select the Predictor from the drop-down Predictor box - the screen will immediately display the result of the Predictor.
You can delete a Predictor once found using the Delete button.
You can save changes to the name and description by clicking the Save Titles button. If you do not want the changes you have made to the titles, click the Reset Titles button.
Click on each of the steps to create or amend the values of the Predictor.
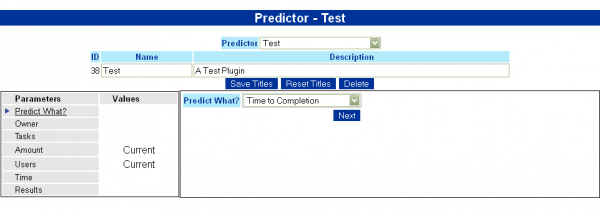
Step 1: Predict What?
First the system must be informed of what it to be predicted – choose it from the drop-down list and click Next when complete.
Depending on the item to be predicted, the screen will modify the stages following.
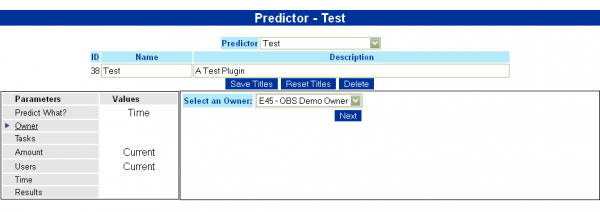
Step 2: Owner
The Predictor needs to know which owner you are predicting for - choose the Owner from the drop-down list provided. Only Owners your user is set up to see can be chosen here. Click Next when complete.
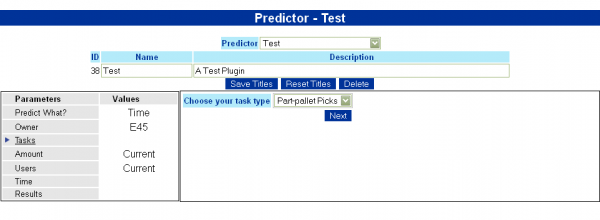
Step 3: Tasks
The Predictor need to know what task type is being predicted. Several Task types may be selected:
- Generic - generic task types (for example, Part Picking, Putaway, Replen).
- Extended - if your system has been configured with generic tasks split down into sub-types, this option will be available here, with a list of all the sub-types.
- Orders - the available orders in the system. If selected, a list of the available customer groups for the orders will be displayed for selection.
Click Next when complete.
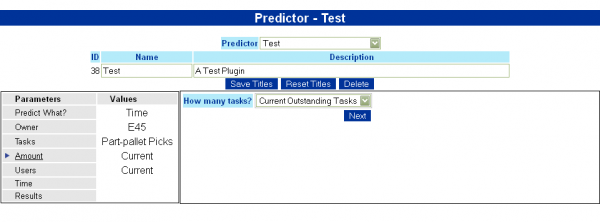
Step 4: Amount
The Predictor needs to know the amount of tasks that are to be completed in this model. Drop-down lists will be shown to allow selection, depending on the task type.
For Generic and Extended tasks, a drop-down list allows you to choose from the current outstanding tasks of that type, or you can manually enter a number of tasks to be completed in the box provided.
For Orders, a drop-down list will show allowing selection of:
- Allocated (Today) - all allocated lines for all orders for today only
- Allocated (All) - all allocated tasks for all orders
- Ordered (Today) - all ordered lines for all orders for today only
- Ordered (All) - all ordered lines for all orders
Click Next when the information has been chosen.
Step 5: Users
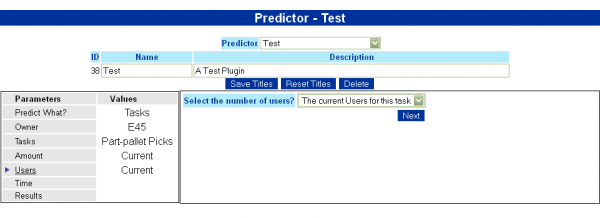
You are next asked to identify the Users you are using for the calculation. You can choose the current users logged in to this task type or you can enter a number of users. Once this information has been entered, click Next to continue.
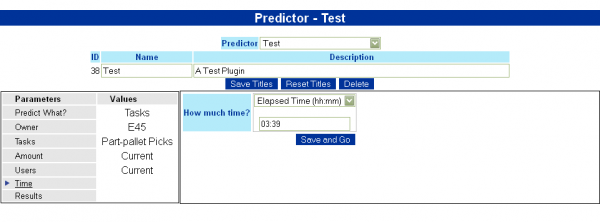
Step 6: Time
You will be asked to identify the amount of time required to complete the tasks in this stage. You can enter this as an Elapsed number of hours and minutes, an actual time or specify a Limit break.
Limit breaks are set in the Rules to define the time that logical breaks occur in the operation (for example Shift breaks). Up to 3 of these may be entered. The system will check for the next Limit break after the current time and use that to determine how much time is remaining before we get to that time.
Click Next when the time has been entered.
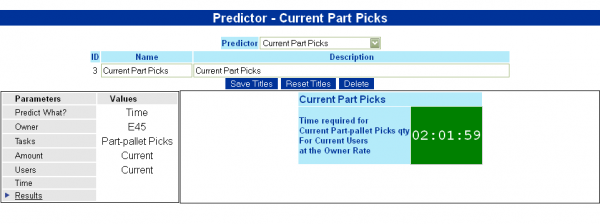
Step 7: Results
Once all information has been identified (or an existing Predictor is chosen to be displayed), the screen will display the results of the Predictor. For example, here this is predicting the amount of time required to complete the current part-pick tasks outstanding at the current owner rate, with the current logged-on Part Pickers.
Editing
Each step of a saved predictor can be modified by clicking on the Steps menu on the left of the form. When modifying the steps the Next button will be changed to a Save and Go button, which will automatically save your changes and take you back to the Results step and display the results of your changes. Note that this will not save changes to the titles.

