System Users
This screen allows a list of all users of the CALIDUS Vision system to be displayed. You can Edit existing users, Add new ones and Delete users from this screen.
When started, the screen displays a list of all users.
To delete a user, click the Delete button associated to that user. You will be prompted to confirm that you want to delete this user. If you confirm (through the OK button), the user will be deleted and the list redisplayed.
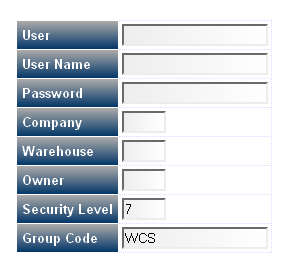
To add a user, click the Add button. A pop-up will be shown to enter the details.
- Enter the User ID - this will be converted to lower case.
- Enter the User Name
- Enter the Password - this is case-sensitive.
- Enter the default Company Code
- Enter the default Warehouse ID
- Enter the default Owner Code, if the user is to be restricted to viewing only this owner's data. If the user is to see all the data for all the owners, leave this blank. You can select the owners from the drop-down list provided.
- Enter the user's 'Security Level'. This defines which screens can be seen - any screens of a security level less than or equal to the user's security level may be viewed. For supervisors, enter 8, for normal users 7 or less. For Admin users, enter 9.
- Enter the 'Group Code' - this defines which systems may be seen. Currently this is:
- WCS - Calidus 3pl-Mobile
- WMS - Calidus 3pl
- ADM - Calidus Vision Administration Functions
- ALL - All Available Systems
Multiple systems may be defined by delimiting them with a comma, e.g. WCS,WMS. Specifying ALL allows the user access to all available systems.
You can hide the pop-up again by clicking the Hide button.
To edit an existing user, click the Edit button associated to that user. A pop-up will be shown to edit the existing user details. This is the same as the Add User pop-up, but will be pre-populated with the details of the user you selected. You will not be able to amend the User ID or Password.

