FXMOPT Menu Options
This screen allows the creation and/or amendment of menus and the options they will contain.
The user can create a new menu in entry mode or can add an option to an existing menu by finding that menu, using query mode, and adding an option.
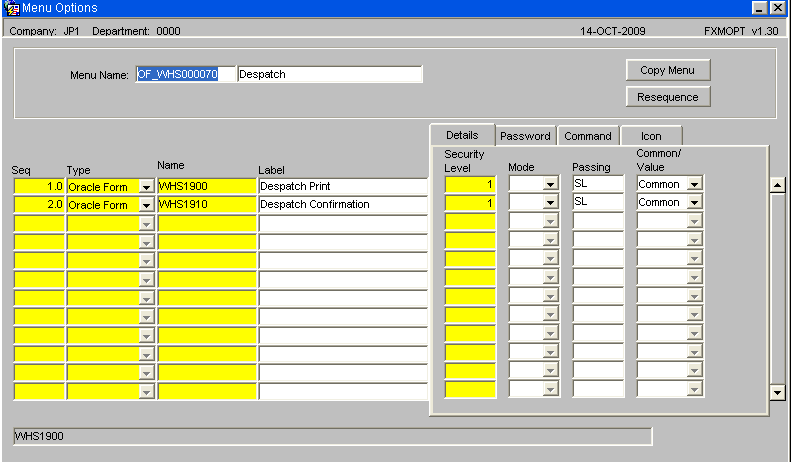
The FXMOPT screen used to create and maintain menus is shown below:

| Field Name | Description | Options | Values |
|---|---|---|---|
| Menu Name | A code or name for identifying the menu | 12 alpha/ numeric characters | User Defined |
| Description | The Name of the menu as it will appear in Menu Explorer in WMS. |
30 alpha/ numeric characters | User Defined |
| Seq | Used to control the sequence in which the items on the menu will be listed | 0.0 - 99.9 | User Defined |
| Type | Indicate the type of the item being added to the menu | A drop-down list contains valid values | FX Menu is used to add a menu option. Oracle Form is used to add a program. Free Text may be used to insert blank lines that may be used to format the menu. |
| Name | The name of the program or menu being added. | A valid menu name or program identifier Not applicable if Type = Free Text. | User Defined |
| Label | The descriptive name that will appear on Menu Explorer | 30 alpha/ numeric characters | User Defined |
| Details | |||
| Security Level | The security level of the item added to the menu | 0 - 9 | User Defined |
| Mode | For programs: should the screen open in Entry, Find or Query mode | Select Entry, Find or Query from a drop-down list | User Defined |
| Passing | For programs: Indicate if a 'Passing' command is to be associated with the screen | n/a | New forms do not require this value, any forms associated with PO will require PL and any Reports and Enquiries for SOP will require SL adding. |
| Common/ Value | For programs: is the passed information from common or a value | Common or Value. | User Defined |
| Password | |||
| Enabled | Indicate if this option is to be controlled by a password | Yes or No | Unless entered the assumption will be that no password is required and that the user's security levels will be sufficient |
| Password | If Enabled = Yes then enter the password | The password will be displayed as asterisks during entry and will then be encrypted to disguise the number of characters it contains | Client defined |
| Command | |||
| Command | An entry to run a program that is not part of WMS | May only be used if the Type = Command | May be the path name / location of an external program |
| Icon | |||
| Filename | The filename of the icon associated with a program external to WMS | n/a | n/a |
| Icon | The icon associated with the filename | n/a | n/a |
Copy Menu
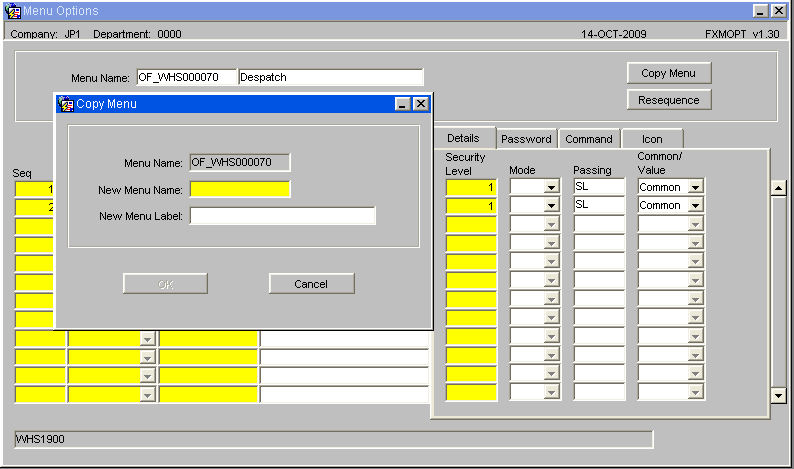
The Copy Menu button may be used to create a copy of the currently displayed menu. The following sub-screen will be displayed:

| Field Name | Description | Options | Values |
|---|---|---|---|
| Menu Name | The name of the menu being copied | n/a | Display |
| New Menu Name | The name to be given to the new menu | 12 alpha/ numeric characters | Defined by client |
| New Menu Label | The descriptive name of the menu | 30 alpha/ numeric characters | Defined by client |
Resequence
This button can be used to re-arrange the options on a menu. When adding a new menu item it is possible to use one decimal place. This permits items to be given a number between two other options, which can then be re-sequenced to appear in the desired order on the menu. Re-sequencing will also re-number the menu options so that the insertion process should always be available.
Menu Building
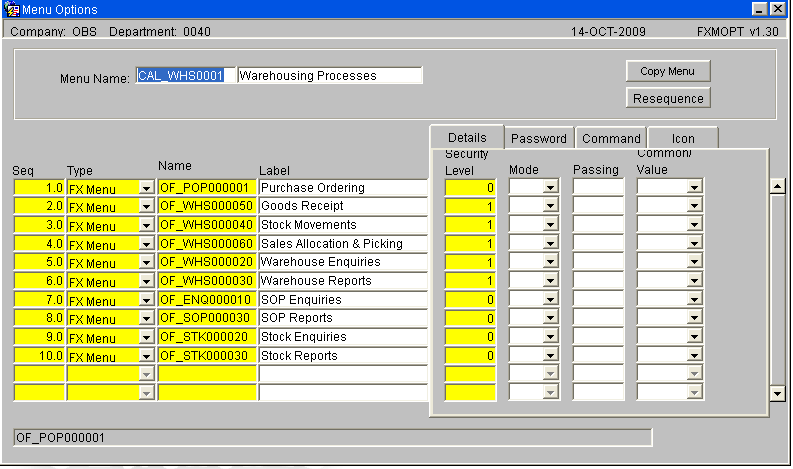
Once the new menu has been created it will be necessary to ensure that it appears within Menu Explorer. This is done by adding the menu to another menu, thus creating a hierarchy. WMS will be supplied to the client with at least one menu level in place; thus, by using identifying the name of this menu it will be possible for the client to build a hierarchy that suits their needs. So, for example, the top-level menu of WMS will be likely contain only other menu items, as shown below:
