WHS0172 Single Stage Goods Receipt
An alternative to the standard three stage goods recipt is to use the Single Stage Goods Receipt screen.
The advantages of using this screen is that all data is entered and captured in one form and the individual process can be completed in one stage.
Selection Criteria Tab
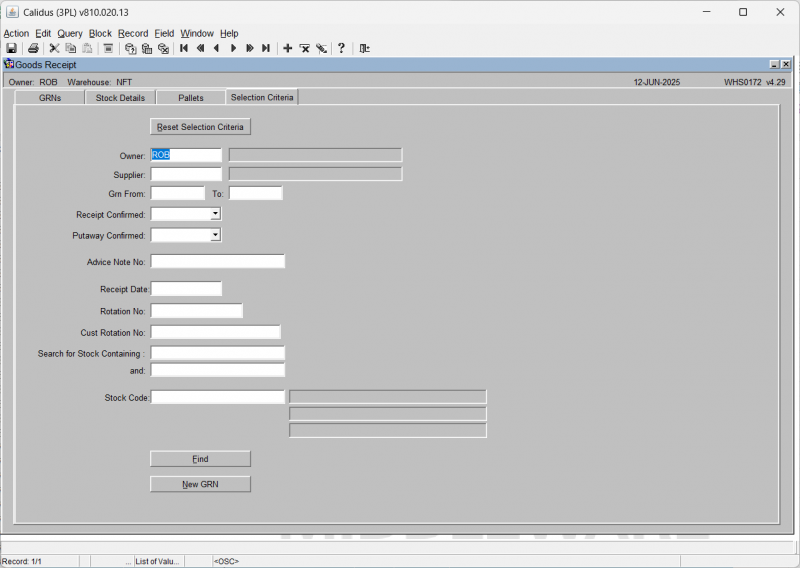
On the Selection Criteria tab, enter your selection criteria to find an advice.
You can optionally enter any or several of the following:
- Owner - this will default to your default owner, A lookup is available for other owners.
- Supplier - a lookup is available
- GRN From/To
- Receipt Confirmed - select Yes or No from the drop-down list.
- Putaway Confirmed - select Yes or No from the drop-down list.
- Advice Note Number
- Receipt Date
- Rotation No
- Cust Rotation No
- Search for Stock Containing/And - search text for stock codes
- Stock Code - a particular stock code - a lookup is available.
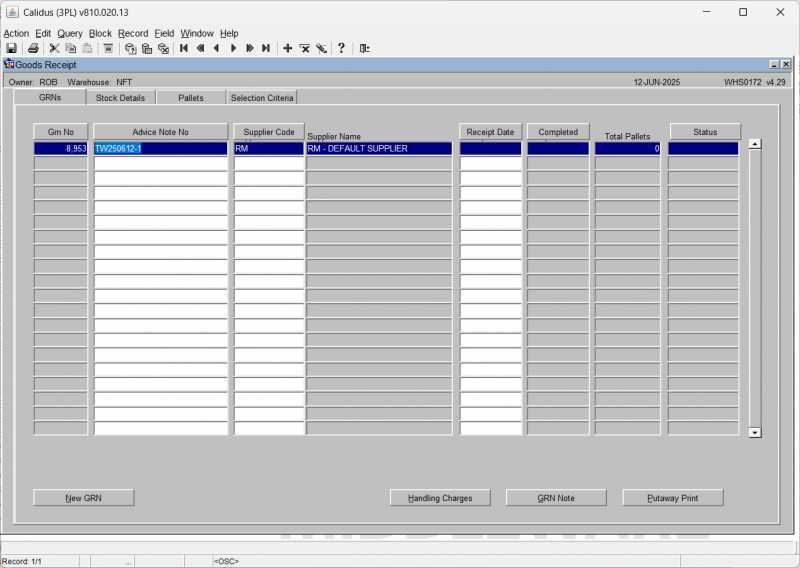
When you have entered your criteria, click Find - the screen will display the matching GRN advices in the GRNs tab.
You can select a GRN on this table to start to process.
Creating a New GRN
By selecting the New GRN button in either the Selection Criteria or GRNs tab it is possible to enter the details for a new GRN. The GRNs tab will open and the user will be prompted to enter key information such as
- Advice Note Number
- Supplier
- Receipt Date
Once saved, you
GRNs Tab
From here, you may also:
- Create a New GRN
- Enter Handling Charges
- Run GRN Note
- Run Putaway Print
Stock Details Tab
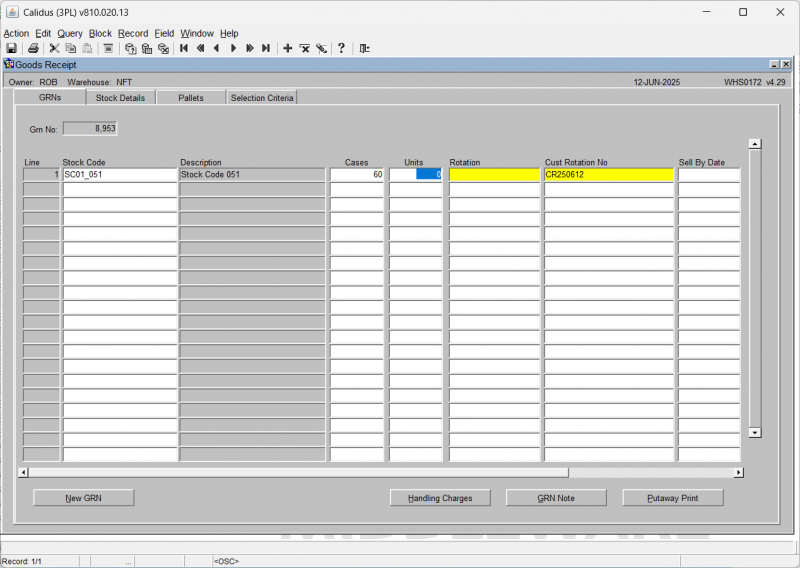
Once you have found a GRN or created a new one, you can click on the Stock Details tab - this will show you the stock details for that GRN selected.
You can enter:
- Cases/Units
- Rotation
- Cust Rotation No
- Sell-by Date
- Pallet Type
- Num Pallets
Other actions available:
- Inventory Enquiry
- Confirm Receipt
- Fast Track
- Handling Charges
- GRN Note
- Putaway Print
Pallets Tab
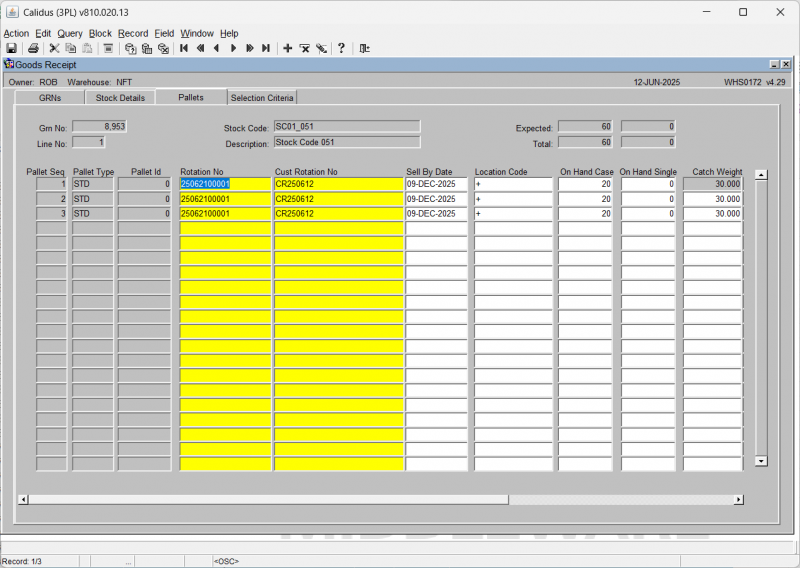
Once you have changed or entered what you want here, you can click on the Pallets tab - this will show you the pallets for that GRN line selected.
You can enter or change:
- Rotation Number - Required
- Cust Rotation Number - Required
- Sell-by Date
- Location Code
- On Hand Case
- On Hand Single
- Catch Weight
- Cust Pallet ID
- Cust PO Number
Once all details are entered or confirmed, you should return to the Stock Details tab and continue to enter all required details for all pallets and stock on that GRN.
You can then click Confirm Receipt to confirm the receipt is completed.
You can then click Putaway Print to generate the putaway note for the operatives to place the pallets into their defined locations.


