Despatch by RouteLoad: Difference between revisions
No edit summary |
No edit summary |
||
| Line 13: | Line 13: | ||
The following section covers how to despatch a single order. | The following section covers how to despatch a single order. | ||
<br\> | <br\> | ||
[[Image:WHS1714SIG.PNG]] | [[Image:WHS1714SIG.PNG]] | ||
| Line 21: | Line 20: | ||
Select ‘Order Number’ from the ‘Choose By’ drop down box. The ‘Route/Load’ field will now be greyed out. | Select ‘Order Number’ from the ‘Choose By’ drop down box. The ‘Route/Load’ field will now be greyed out. | ||
<br\> | <br\> | ||
[[Image:WHS1910SIG1.PNG]] | [[Image:WHS1910SIG1.PNG]] | ||
| Line 29: | Line 27: | ||
Enter the order you wish to despatch in the ‘Order’ field. Note: You can use the list of values icon to select your order. | Enter the order you wish to despatch in the ‘Order’ field. Note: You can use the list of values icon to select your order. | ||
<br\> | <br\> | ||
[[Image:WHS1910SIG2.PNG]] | [[Image:WHS1910SIG2.PNG]] | ||
| Line 37: | Line 34: | ||
Press the execute query icon to bring up the detail for the order. | Press the execute query icon to bring up the detail for the order. | ||
<br\> | <br\> | ||
[[Image:WHS1910SIG3.PNG]] | [[Image:WHS1910SIG3.PNG]] | ||
| Line 45: | Line 41: | ||
Press the ‘Confirm’ button (see screen shot above) | Press the ‘Confirm’ button (see screen shot above) | ||
<br\> | <br\> | ||
[[Image:WHS1910SIG4.PNG]] | [[Image:WHS1910SIG4.PNG]] | ||
| Line 55: | Line 50: | ||
A message will be displayed showing that the order has been dispatched. | A message will be displayed showing that the order has been dispatched. | ||
<br\> | |||
[[Image:WHS1910SIG5.PNG]] | [[Image:WHS1910SIG5.PNG]] | ||
Revision as of 12:25, 9 November 2010
<br\>
Goods Out – Despatch by Route/Load
<br\>
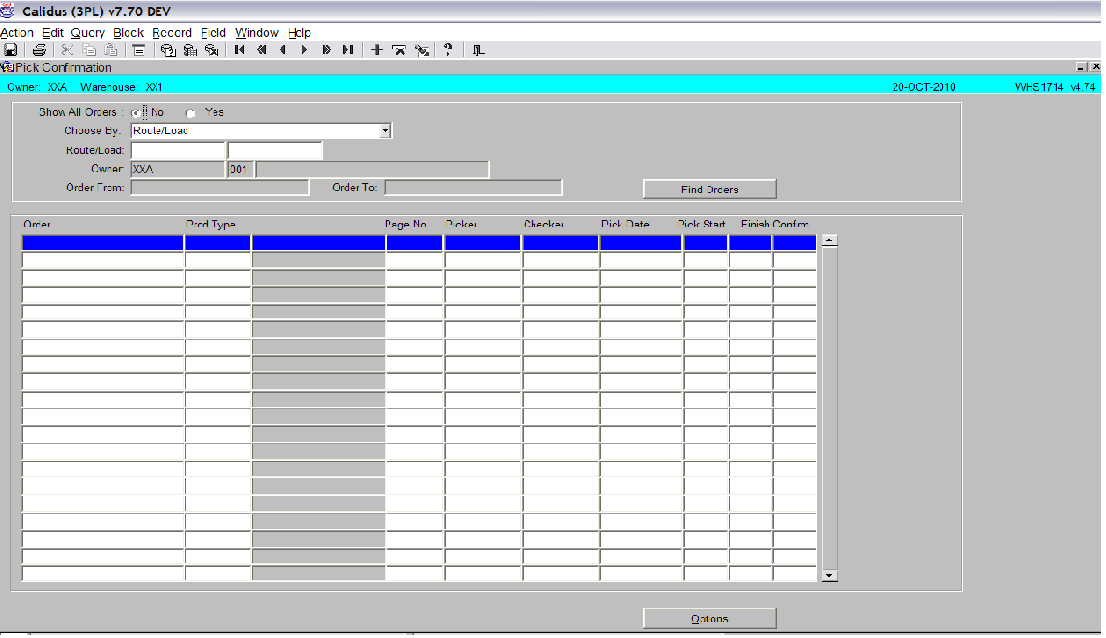
The Despatch by Route/Load screen is used to confirm the despatch of order from the warehouse.
The system will reduce the stock from warehouse.
The Despatch by Route/Load screen is located in the Sales Allocation & Picking folder.
The following section covers how to despatch a single order. <br\>
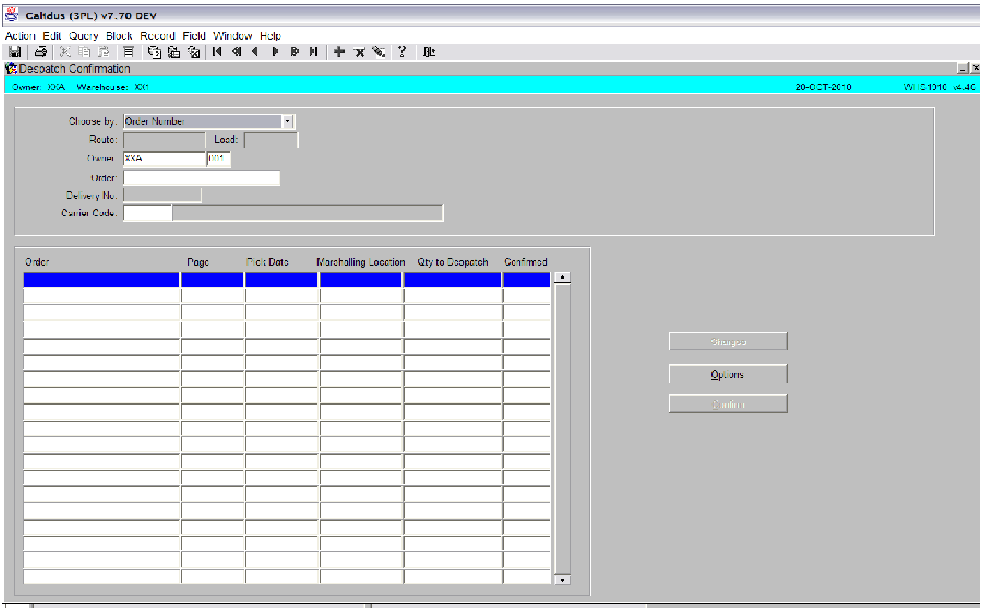
Select ‘Order Number’ from the ‘Choose By’ drop down box. The ‘Route/Load’ field will now be greyed out.
<br\>
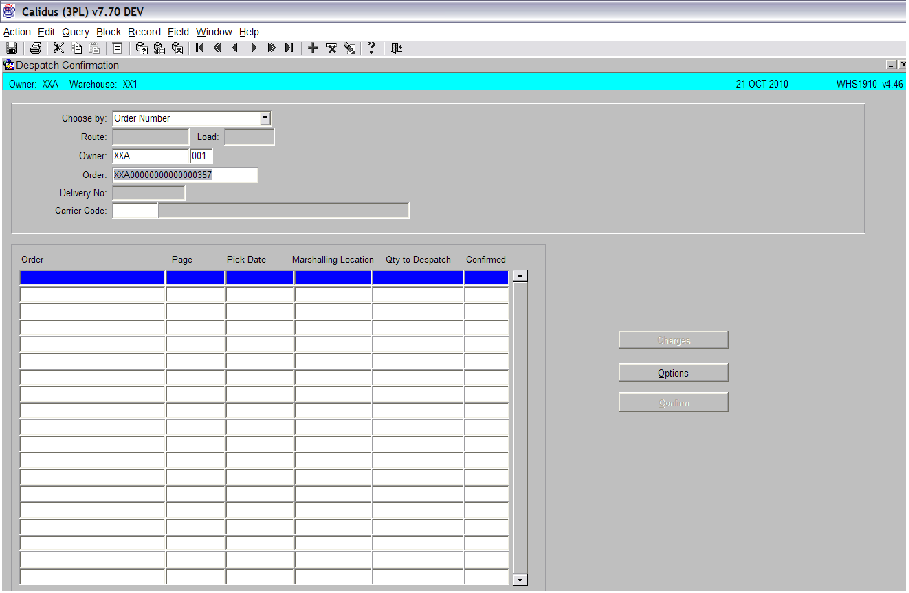
Enter the order you wish to despatch in the ‘Order’ field. Note: You can use the list of values icon to select your order.
<br\>
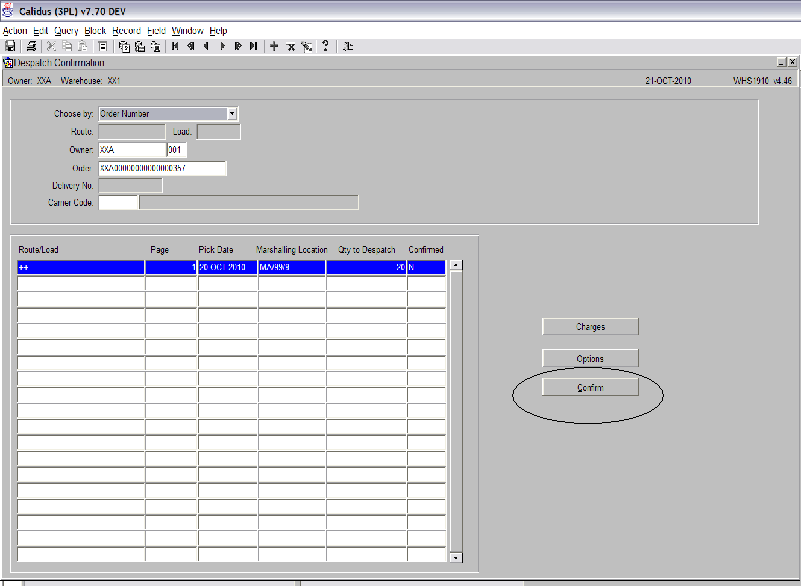
Press the execute query icon to bring up the detail for the order.
<br\>
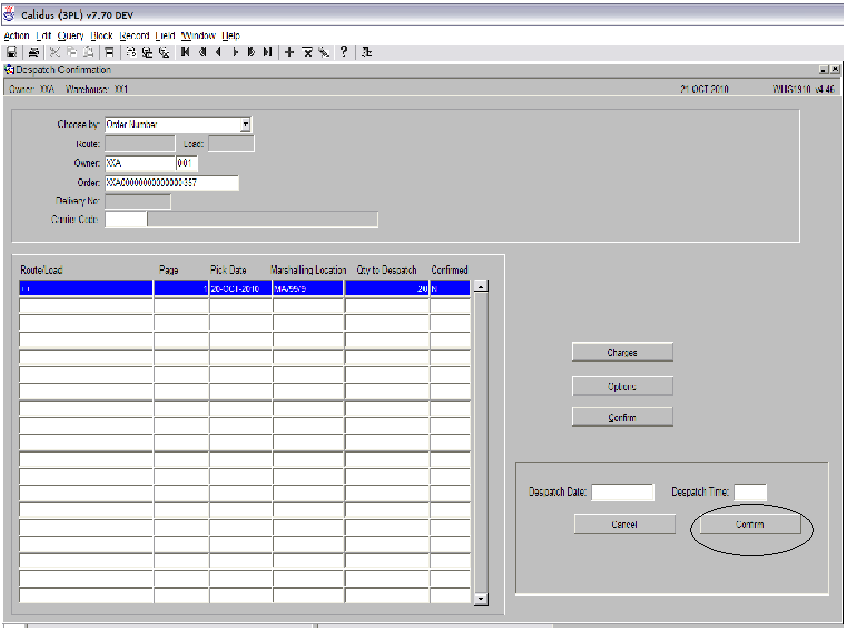
Press the ‘Confirm’ button (see screen shot above)
<br\>
Enter the despatch date and time. You can tab through the fields if you wish to default to today’s date and time. Press the Confirm button to despatch the order.
<br\>
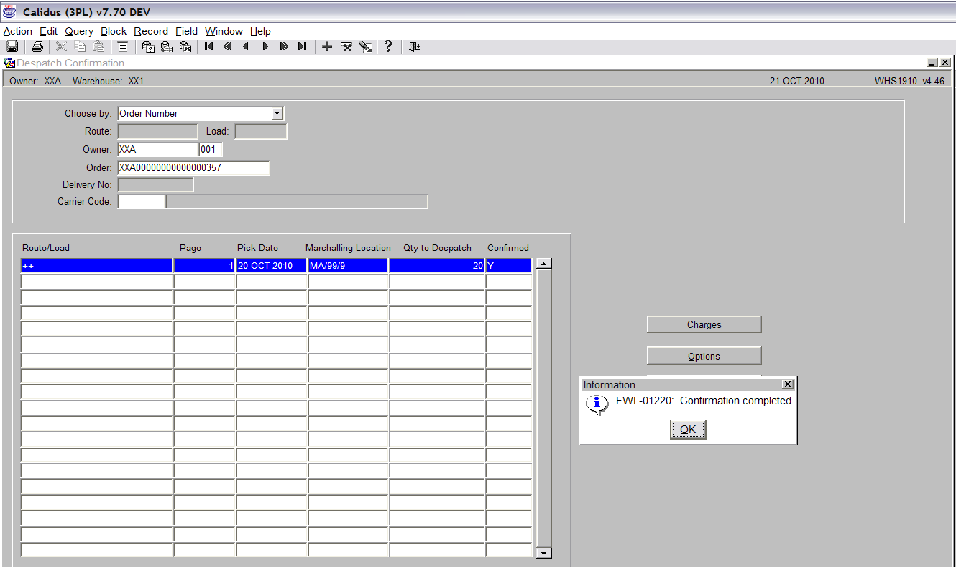
A message will be displayed showing that the order has been dispatched. <br\>
Document History
Copyright OBS Logistics © 2008
The information contained herein is the property of OBS Logistics and is supplied without liability for errors or omissions. No part may be reproduced or used except as authorised by contract or other written permission. The copyright and foregoing restriction on reproduction and use extend to all media in which the information may be embodied
