Stock Adjustments
<br\>
Stock Movements – Stock Adjustments <br\>
The Stock Adjustments screen is used to increase of decrease levels of stock within the warehouse.
The Stock Adjustments screen is located in the Stock Movements folder.
The following document covers how to increase stock on an existing pallet, reduce stock on an existing pallet and creating a new pallet.
Increasing Stock On An Existing Pallet
<br\>
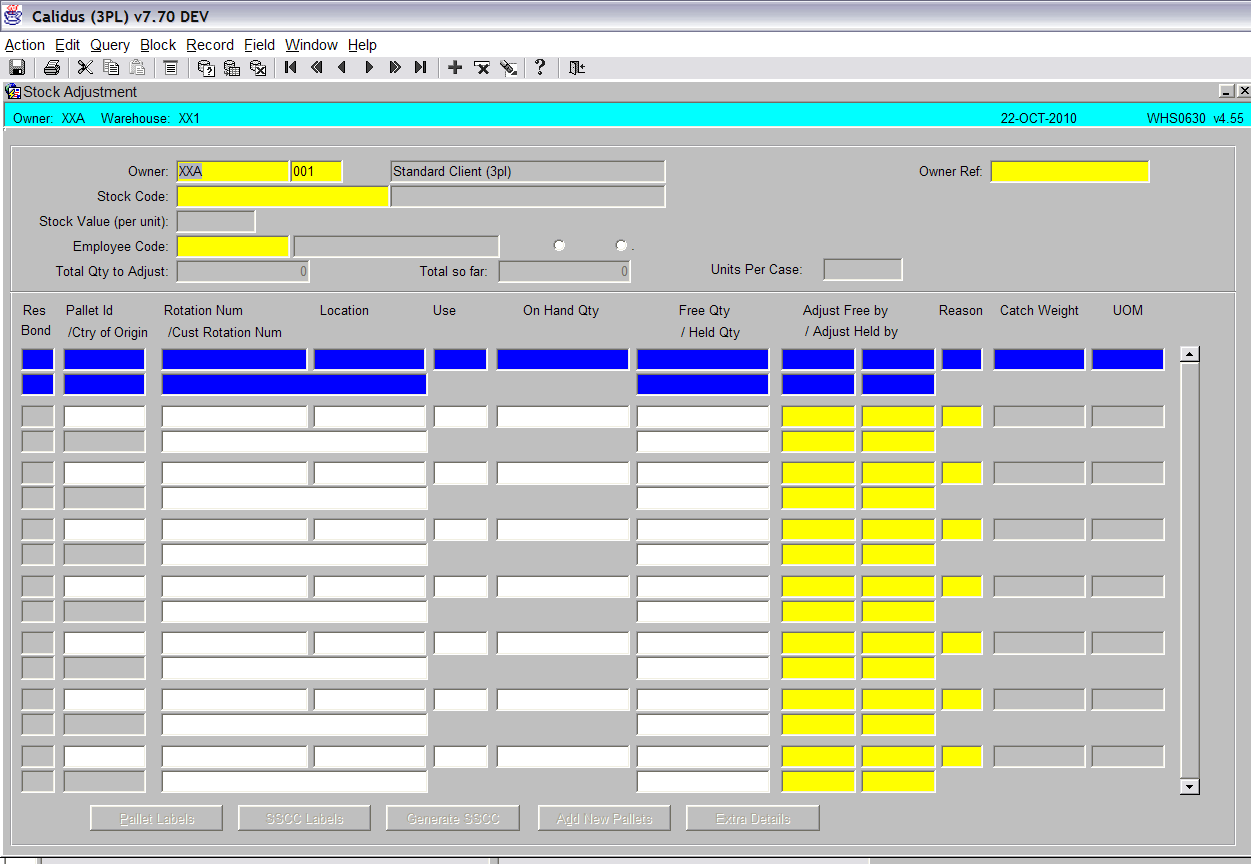
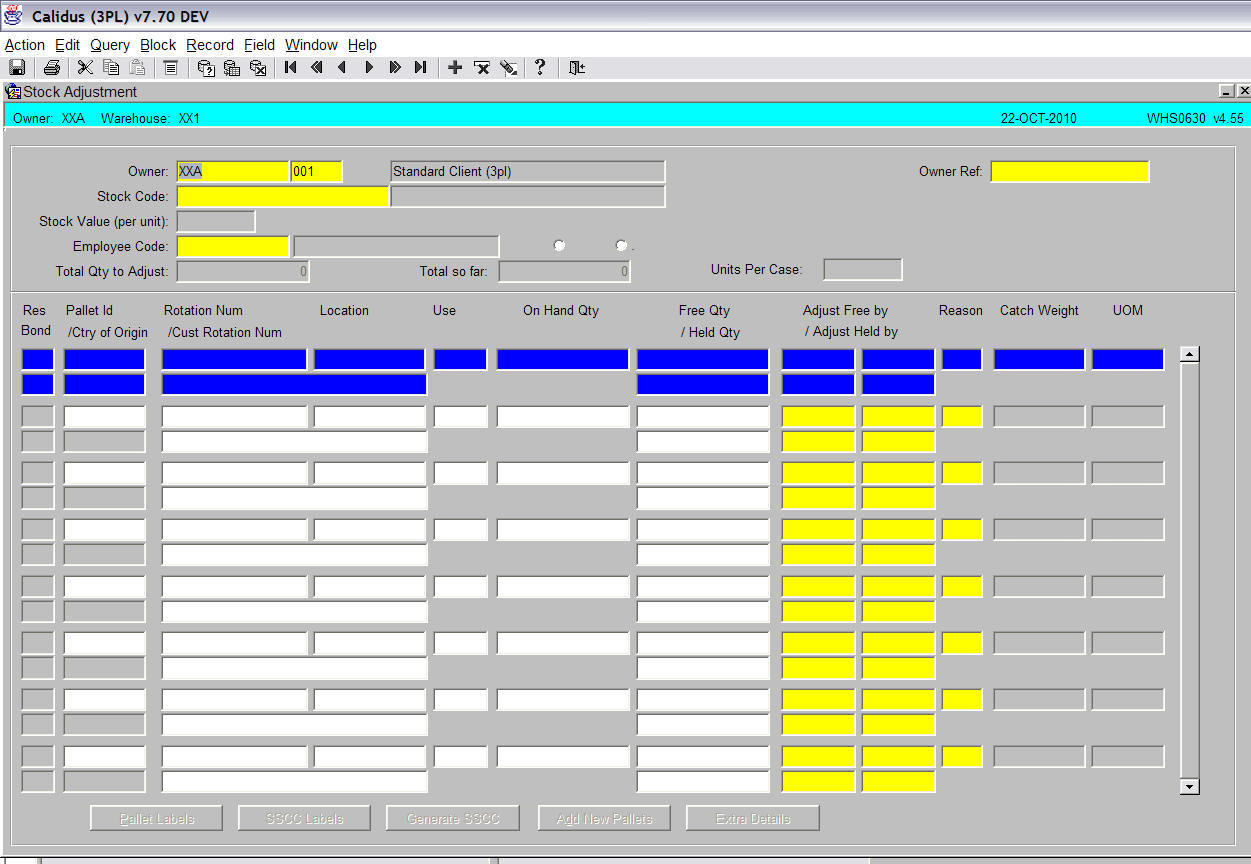
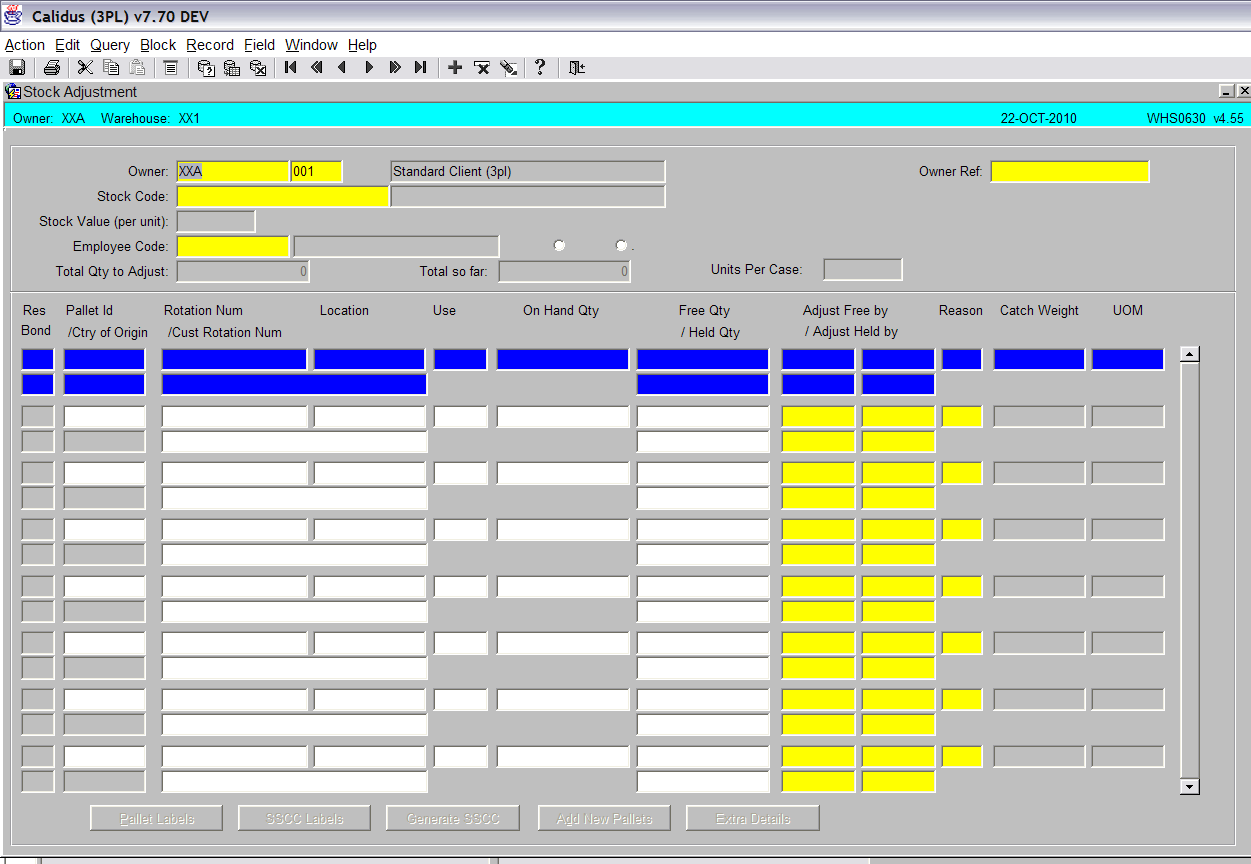
Upon entering the screen the cursor will be in the Owner field. The Owner will be defaulted from your user settings. The owner can be changed if you require.
Once the correct owner has been entered, click in the ‘Stock Code’ field.
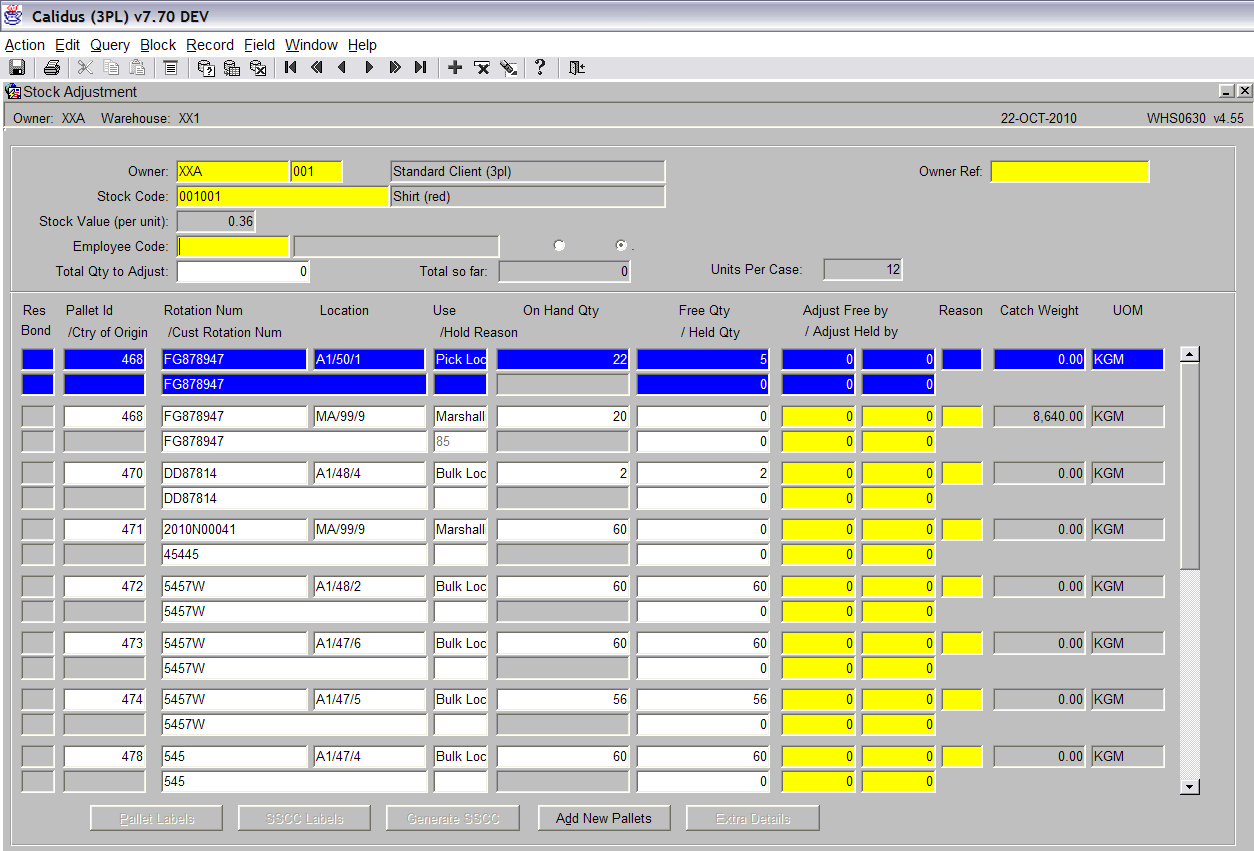
Enter the stock code that you wish to stock adjust. Note: You can use the list of values icon and select the required code.
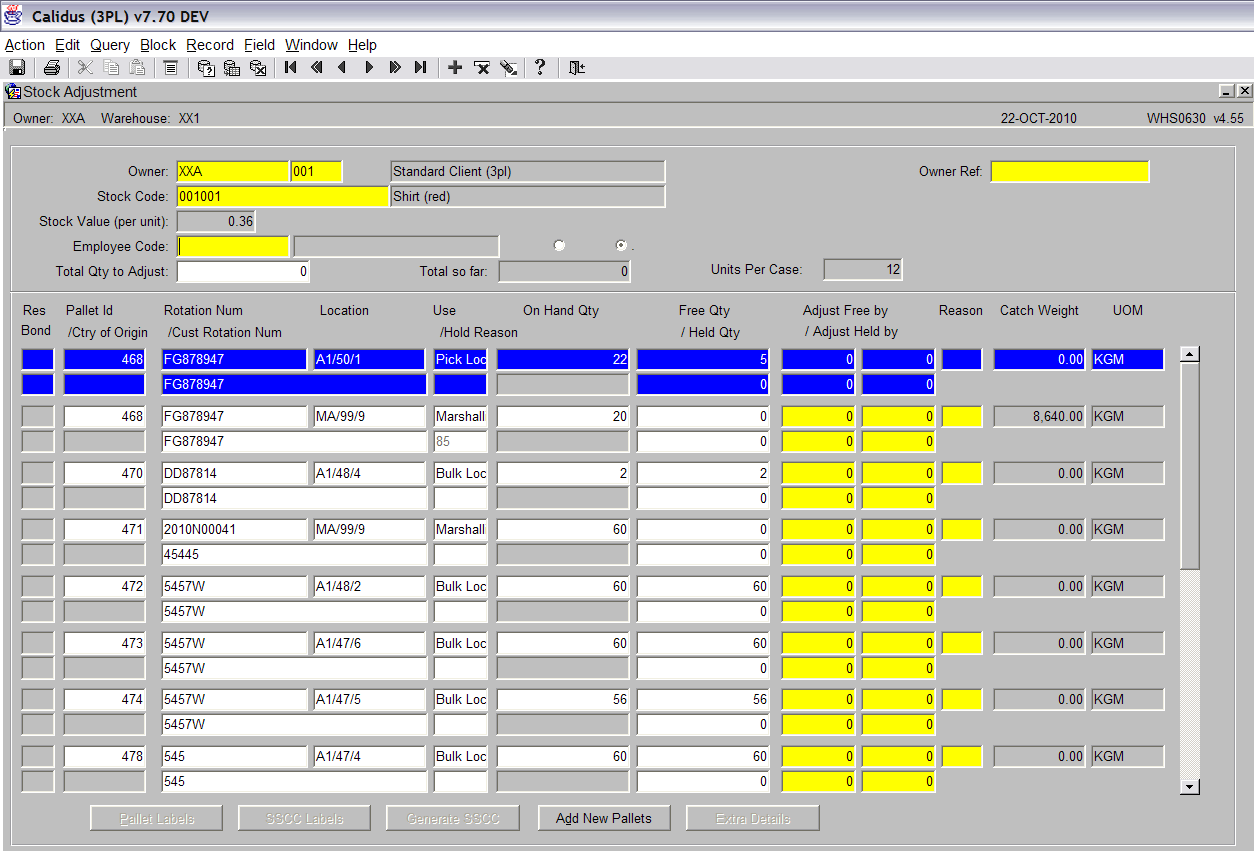
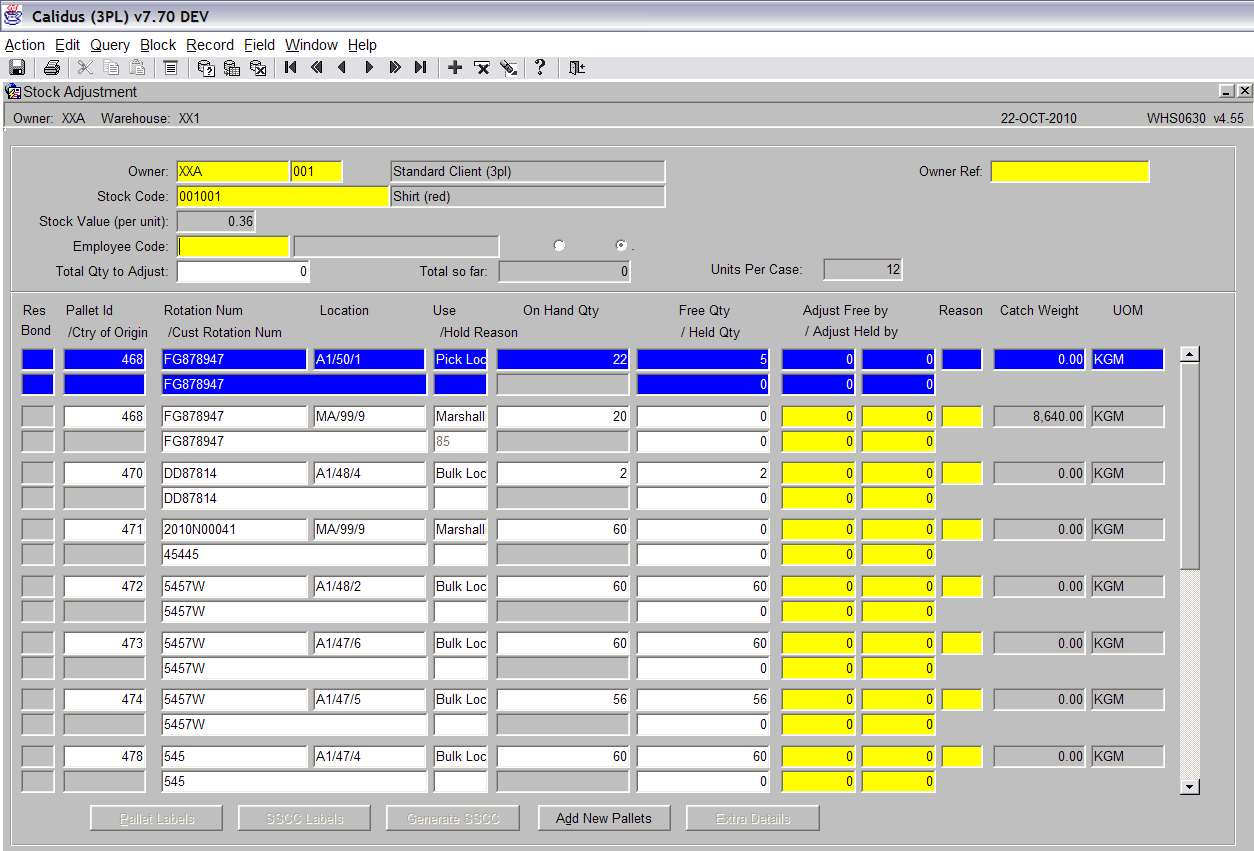
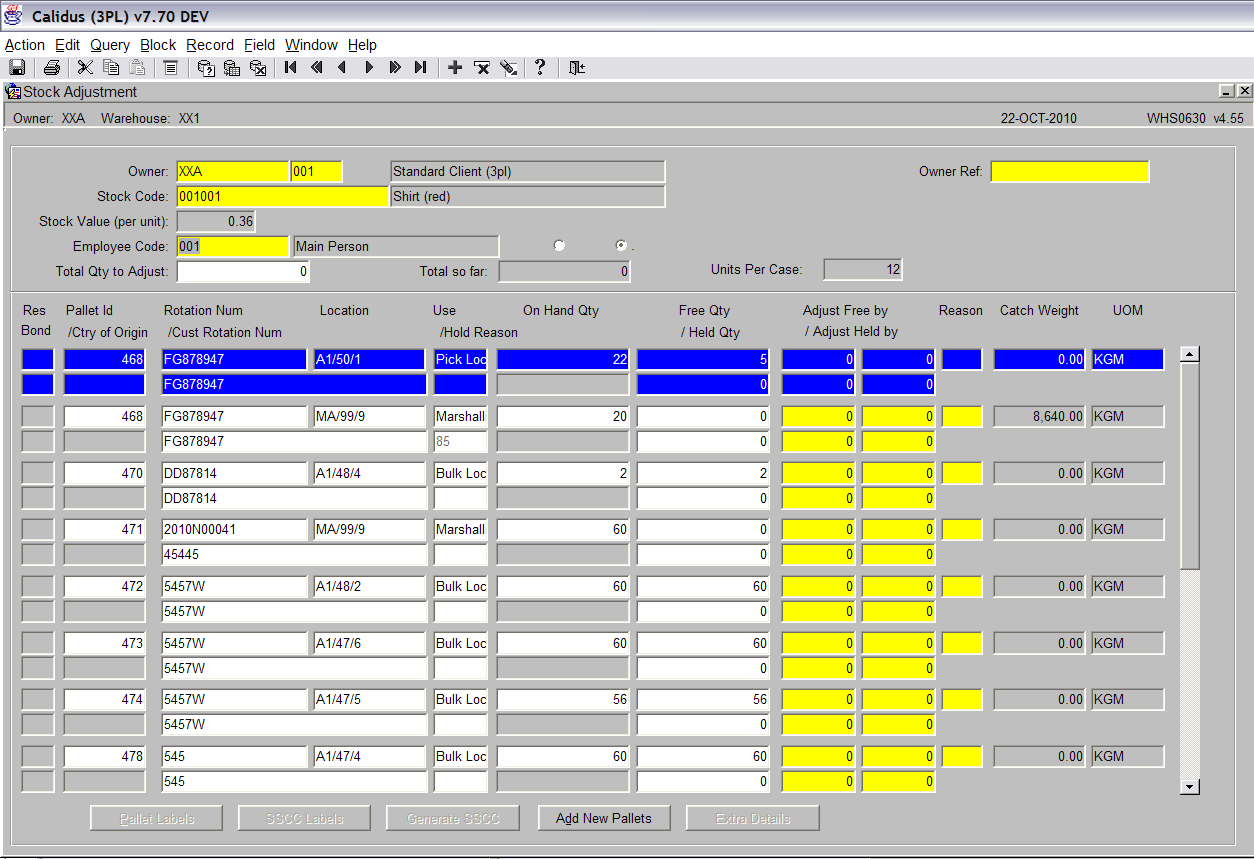
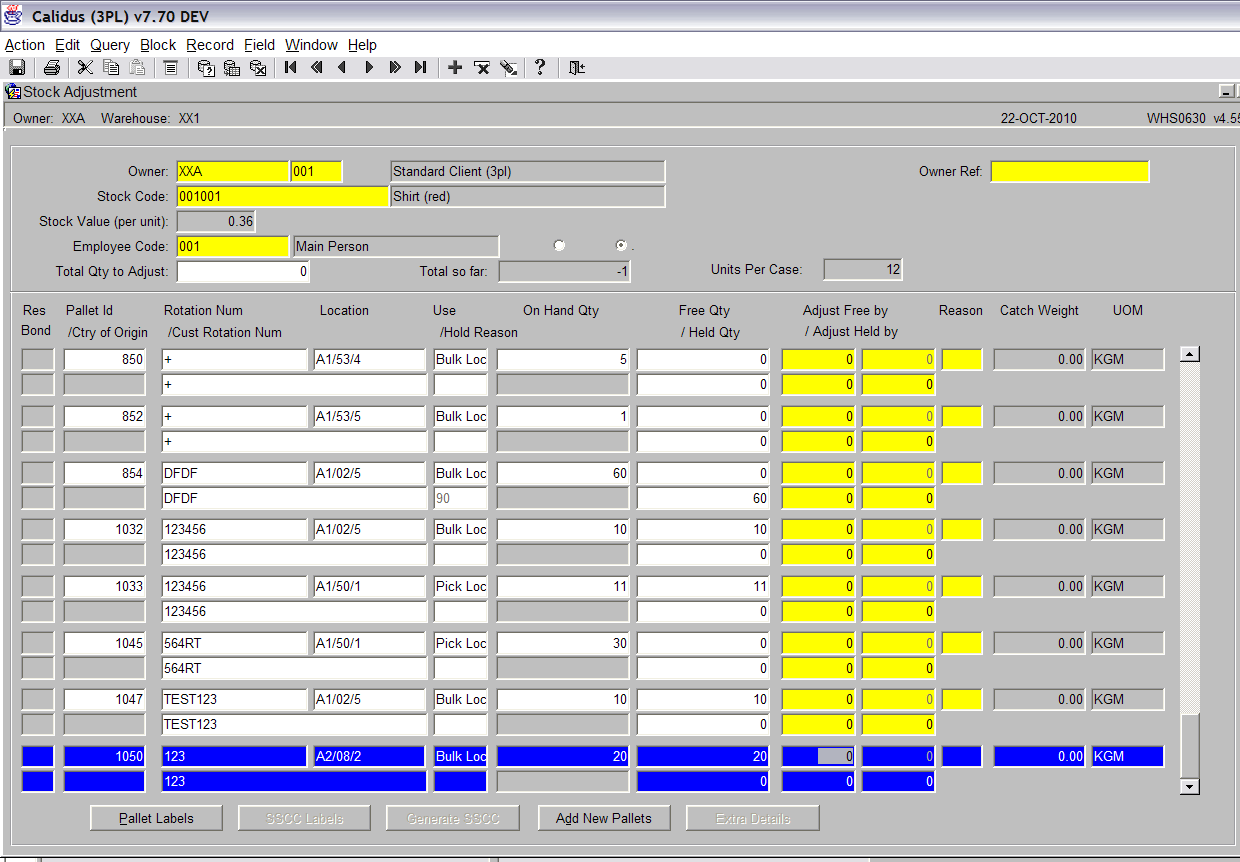
Once the stock code has been entered the list of pallets will be displayed. <br\>
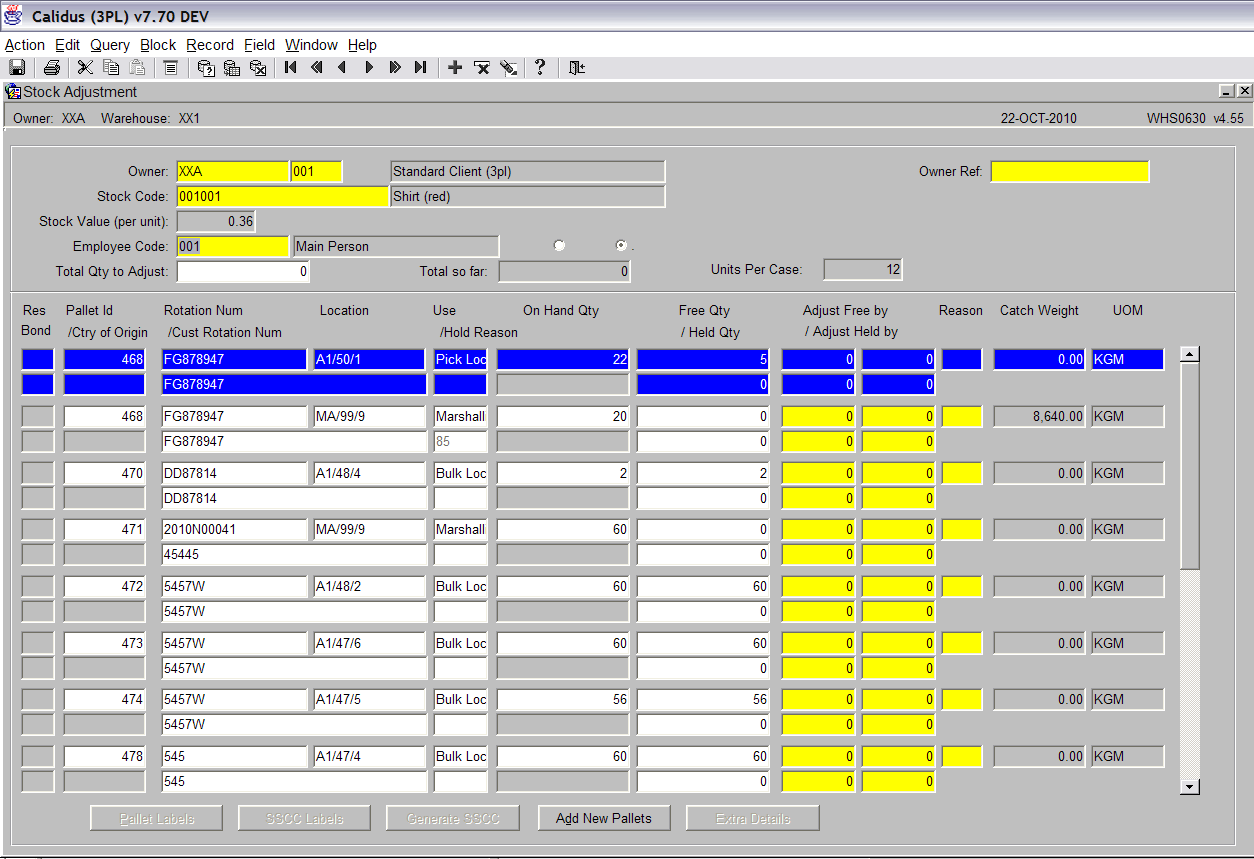
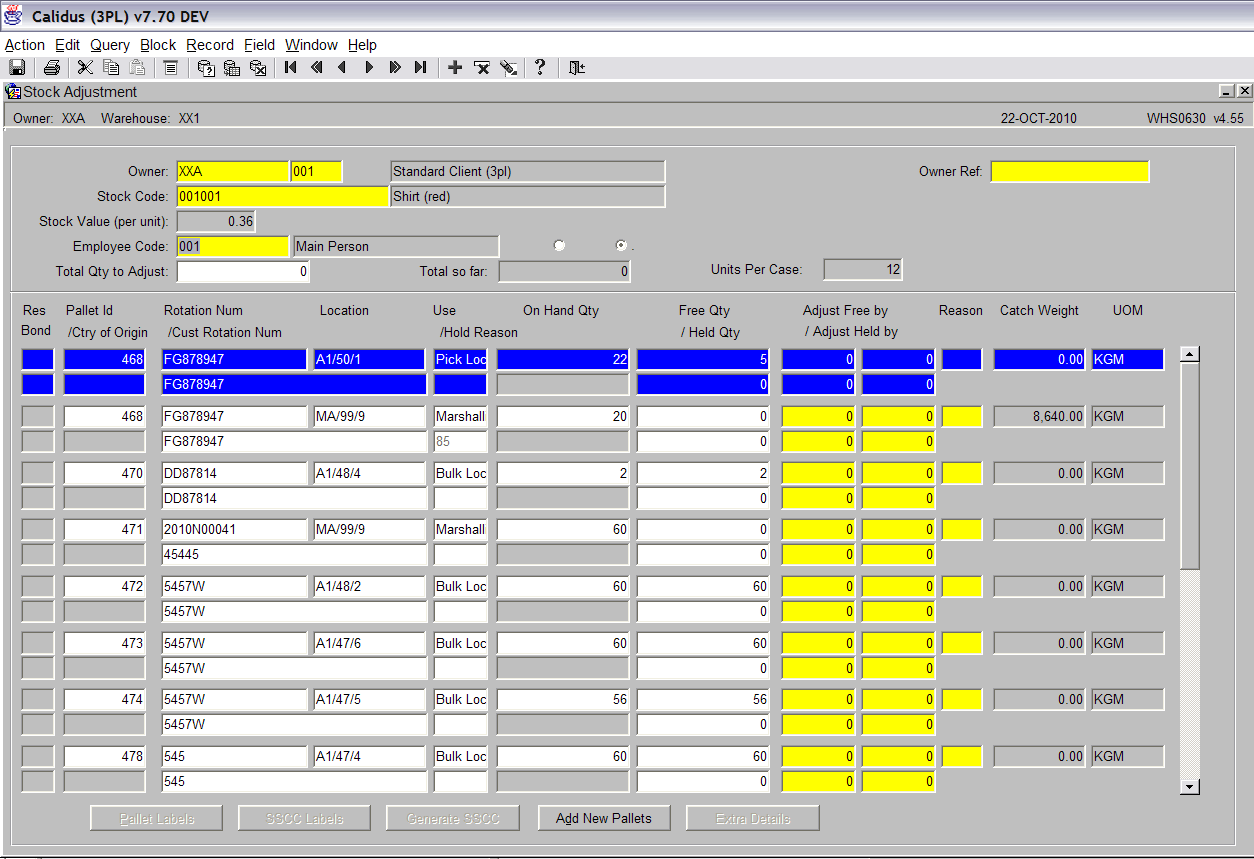
Next enter a valid employee code.
<br\>
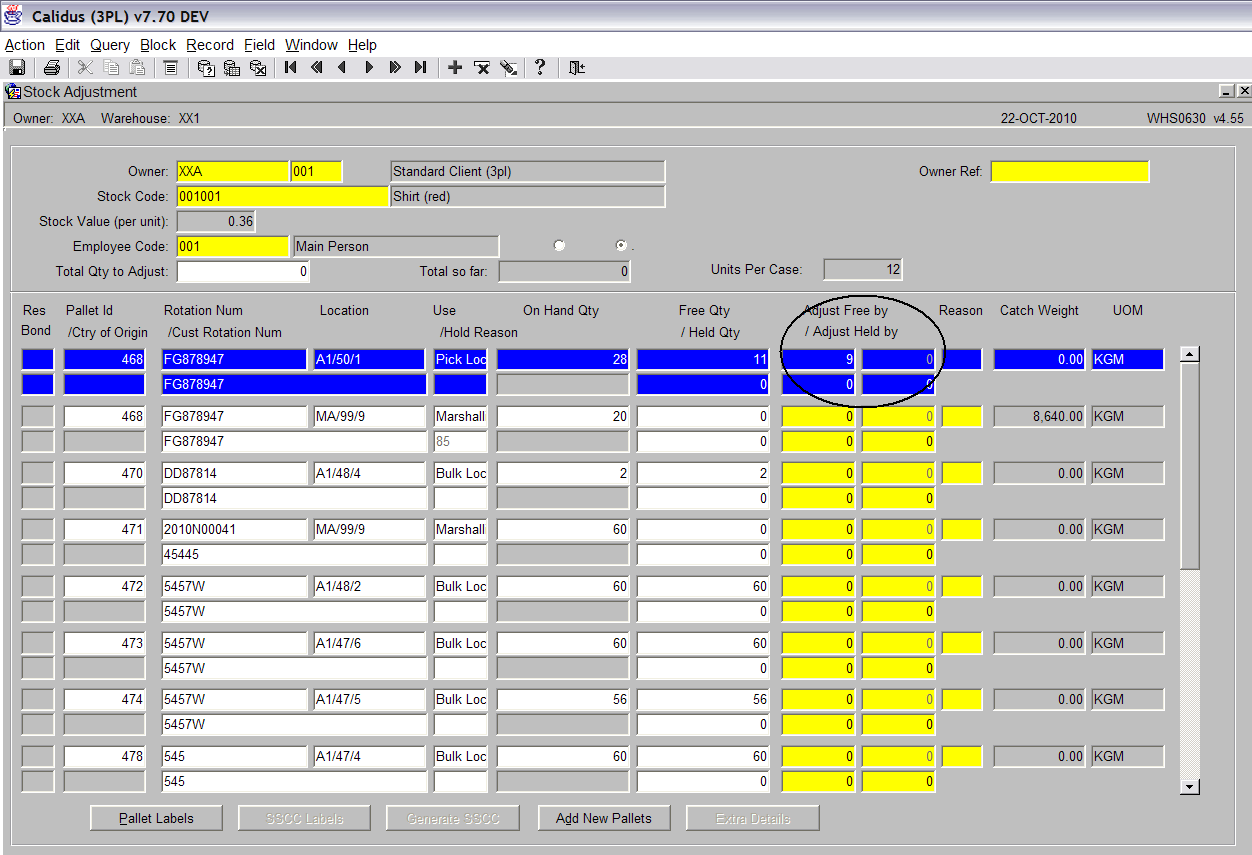
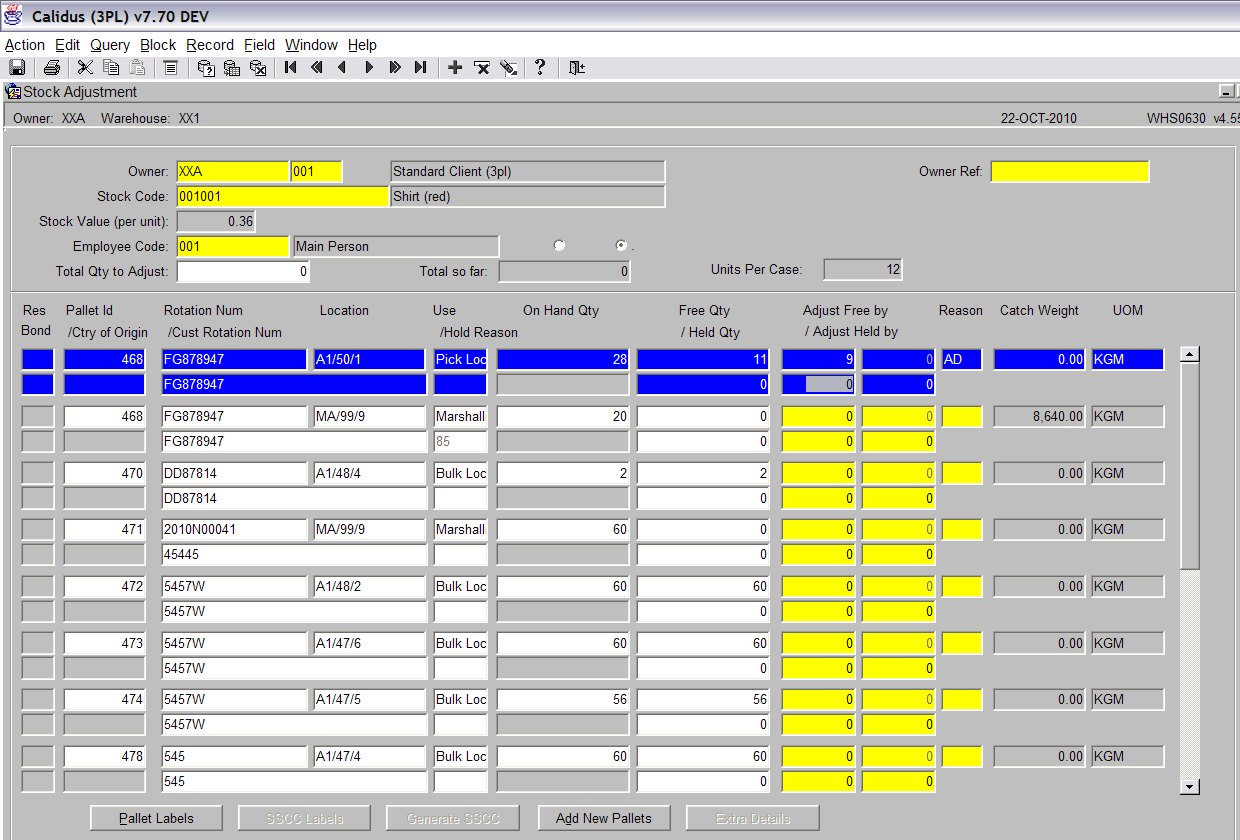
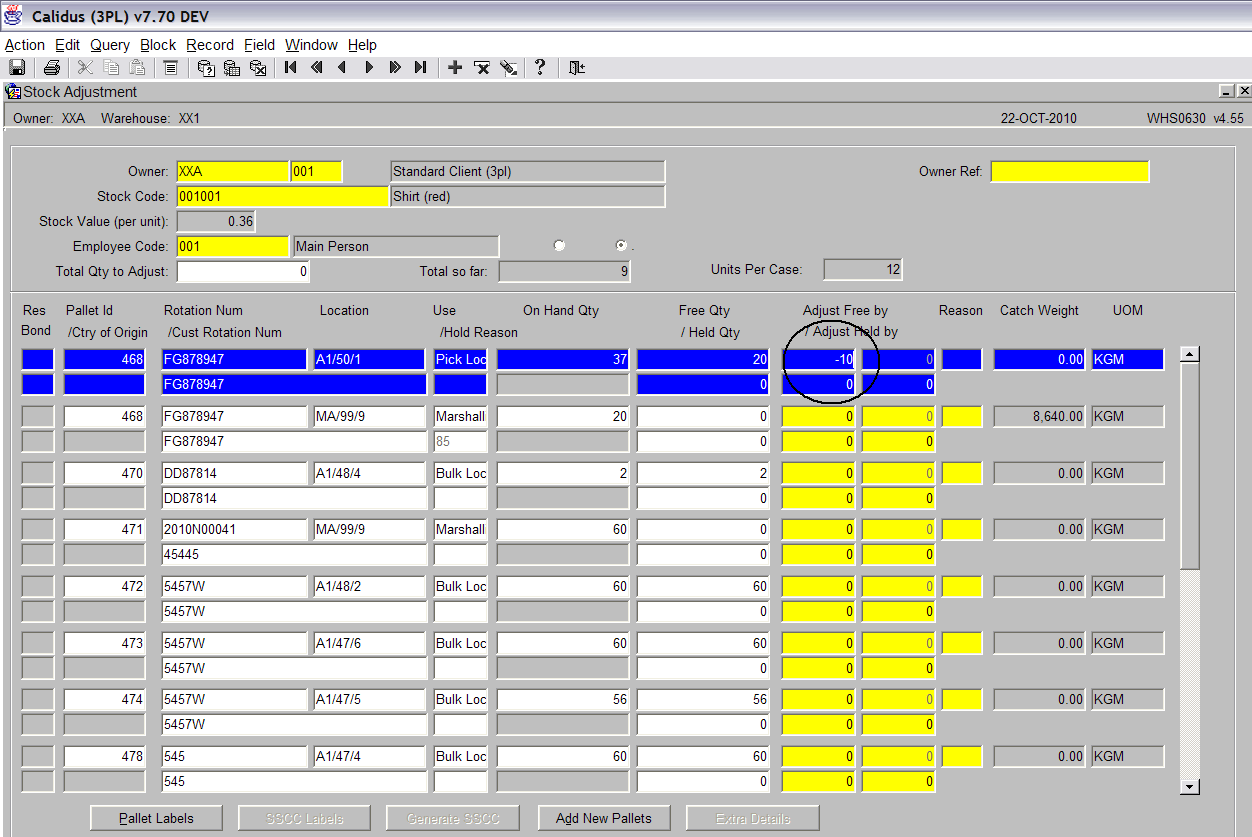
Click in the ‘Adjust Free By’ field against the pallet you wish to adjust and enter the quantity (see screen shot below).
<br\>
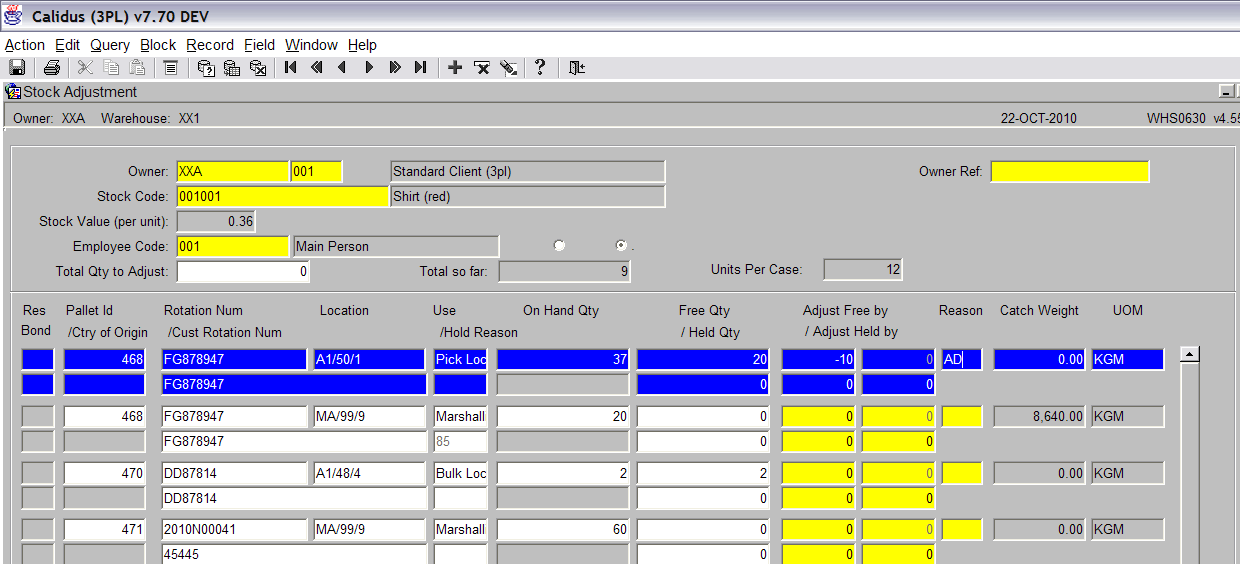
Press the Tab key to move the cursor over to the ‘Reason’ field. Enter the relevant reason code for the adjustment. The list of values will display all reason codes.
<br\>
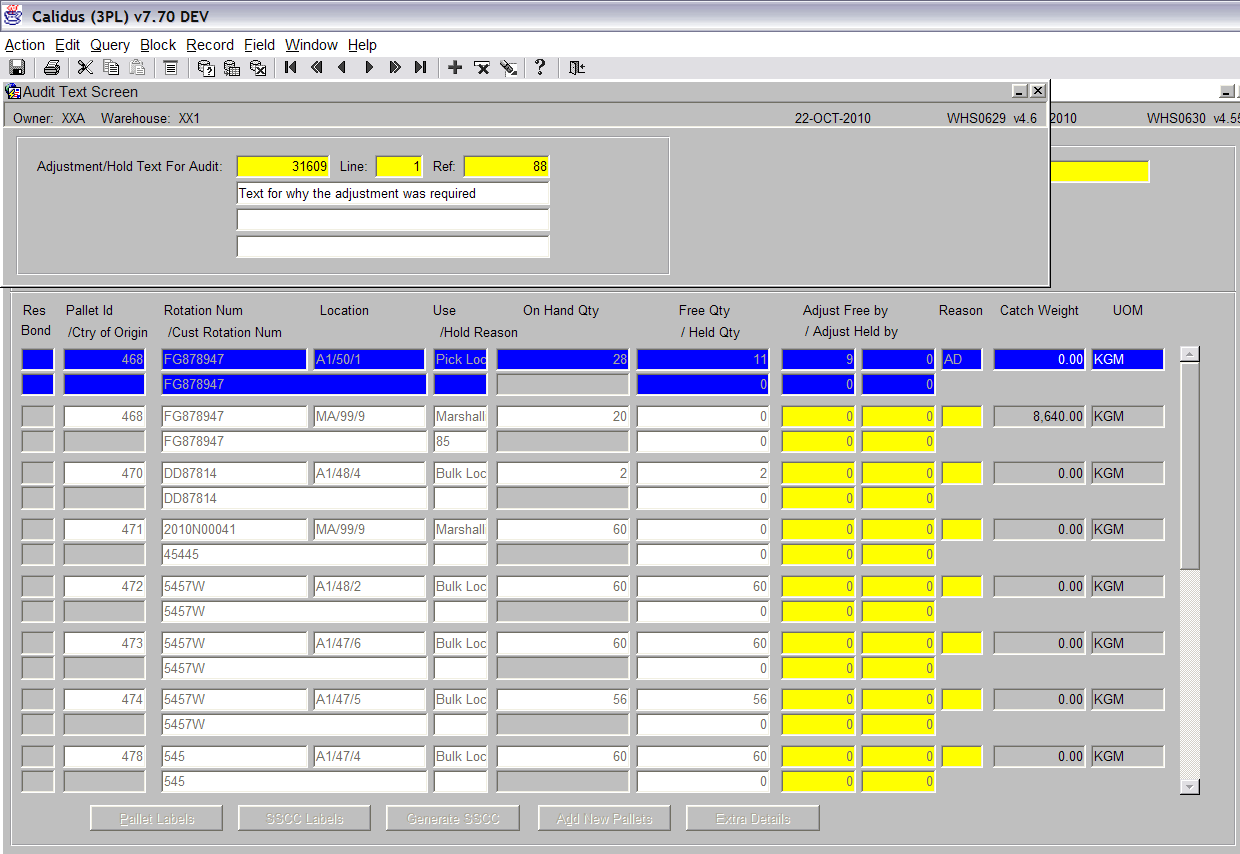
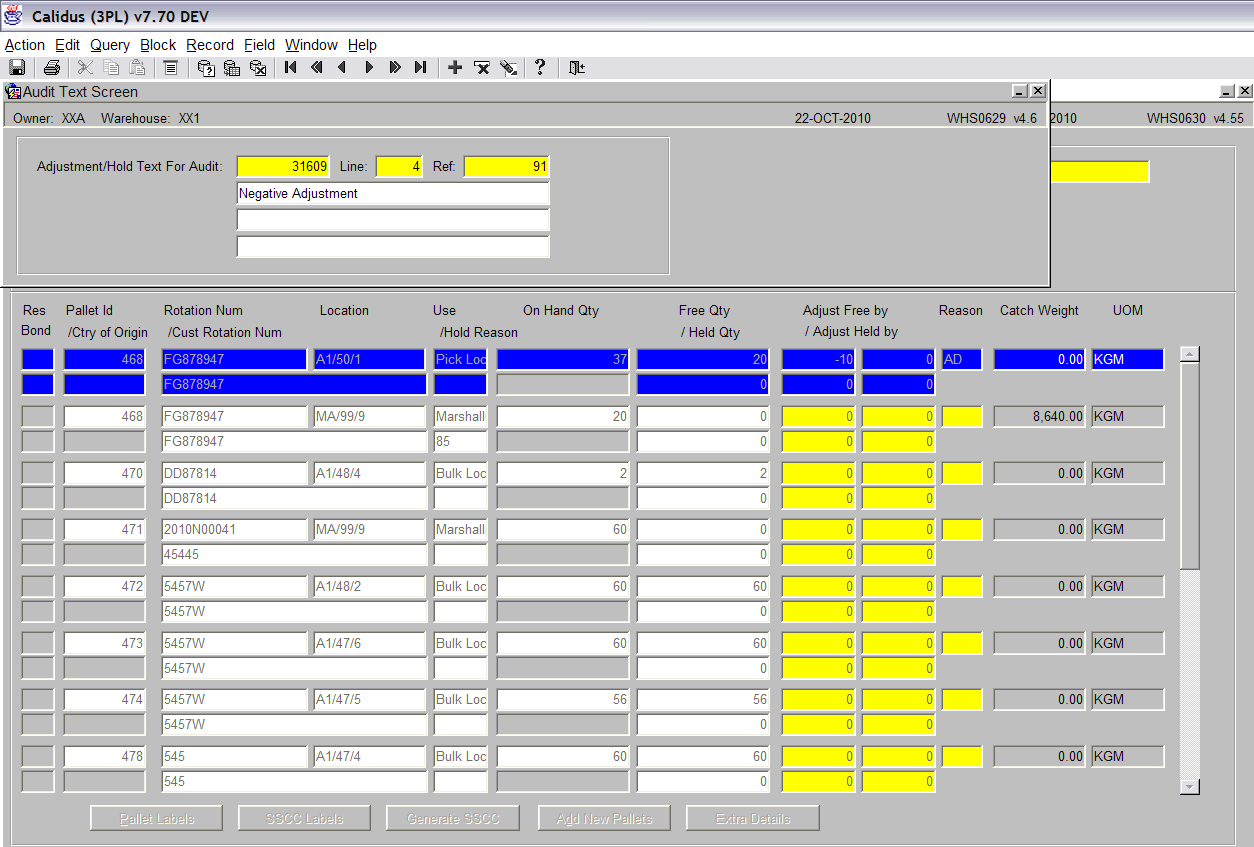
Press the Save button to confirm the adjustment. A pop up box will appear that allows the user to enter a text comment regarding the adjustment (see screen shot below).
<br\>
Press the Save button to record the text audit. Press the Exit button to return to the previous screen.
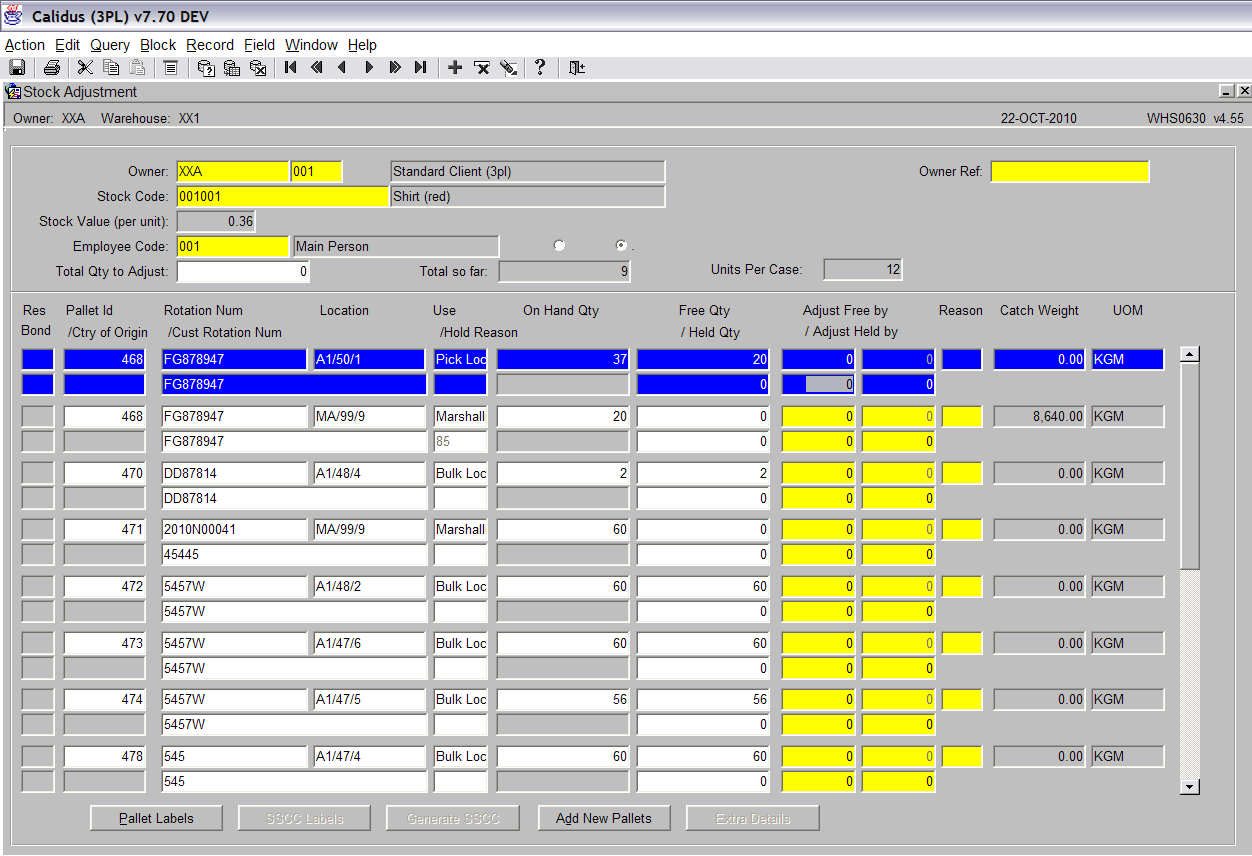
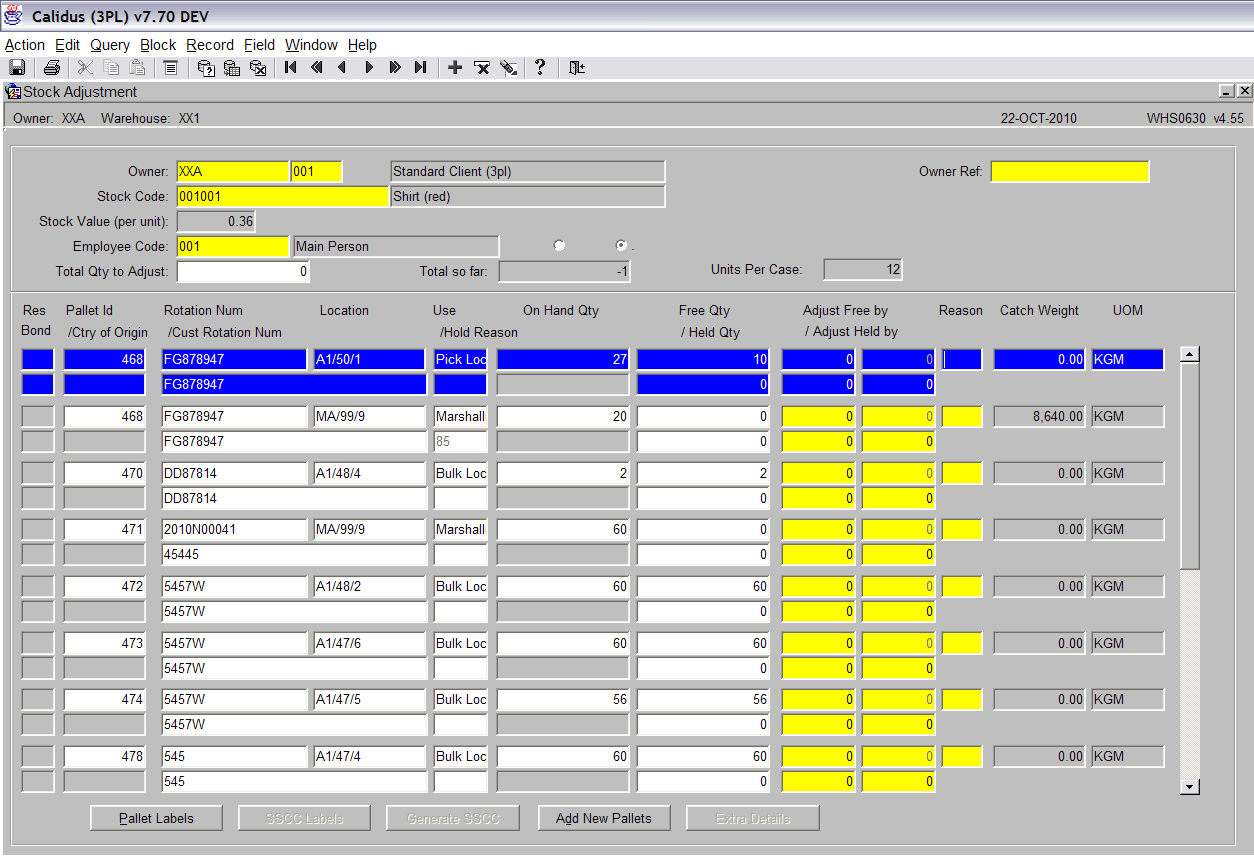
The screen will now display the adjusted quantity of the pallet (see screen shot below). <br\>
Decreasing Stock On An Existing Pallet
<br\>
Upon entering the screen the cursor will be in the Owner field. The Owner will be defaulted from your user settings. The owner can be changed if you require.
Once the correct owner has been entered, click in the ‘Stock Code’ field.
Enter the stock code that you wish to stock adjust. Note: You can use the list of values icon and select the required code.
Once the stock code has been entered the list of pallets will be displayed. <br\>
Next enter a valid employee code.
<br\>
Click in the ‘Adjust Free By’ field against the pallet you wish to adjust and enter the quantity (see screen shot below). Note: To carry out a negative adjustment, a minus symbol must prefix the quantity.
<br\>
Press the Tab key to move the cursor over to the ‘Reason’ field. Enter the relevant reason code for the adjustment. The list of values will display all reason codes. <br\>
Press the Save button to confirm the adjustment. A pop up box will appear that allows the user to enter a text comment regarding the adjustment (see screen shot below). <br\>
Press the Save button to record the text audit. Press the Exit button to return to the previous screen.
<br\>
The screen will now display the adjusted quantity of the pallet (see screen shot below).
<br\>
Creating a New Pallet
<br\>
Upon entering the screen the cursor will be in the Owner field. The Owner will be defaulted from your user settings. The owner can be changed if you require.
Once the correct owner has been entered, click in the ‘Stock Code’ field.
Enter the stock code that you wish to stock adjust. Note: You can use the list of values icon and select the required code.
Once the stock code has been entered the list of pallets will be displayed. <br\>
Next enter a valid employee code.
<br\>
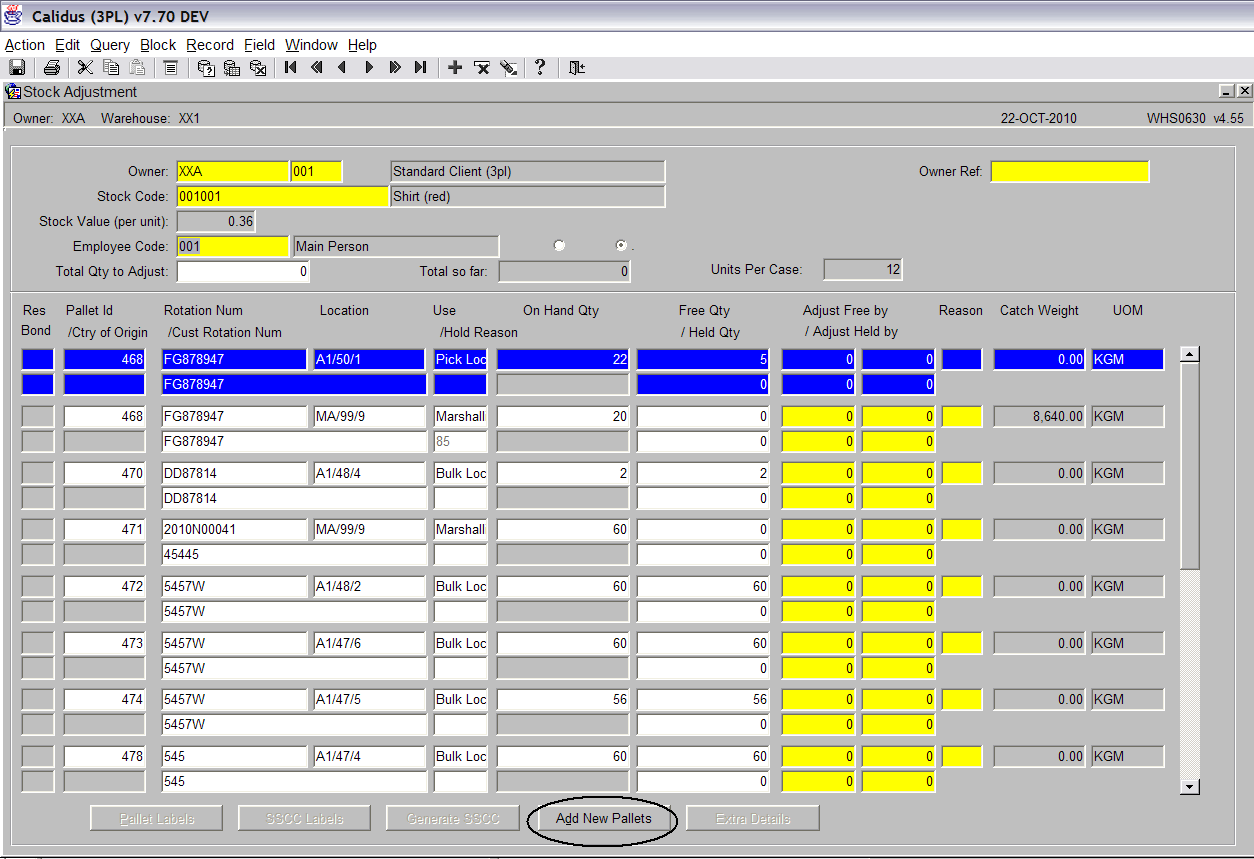
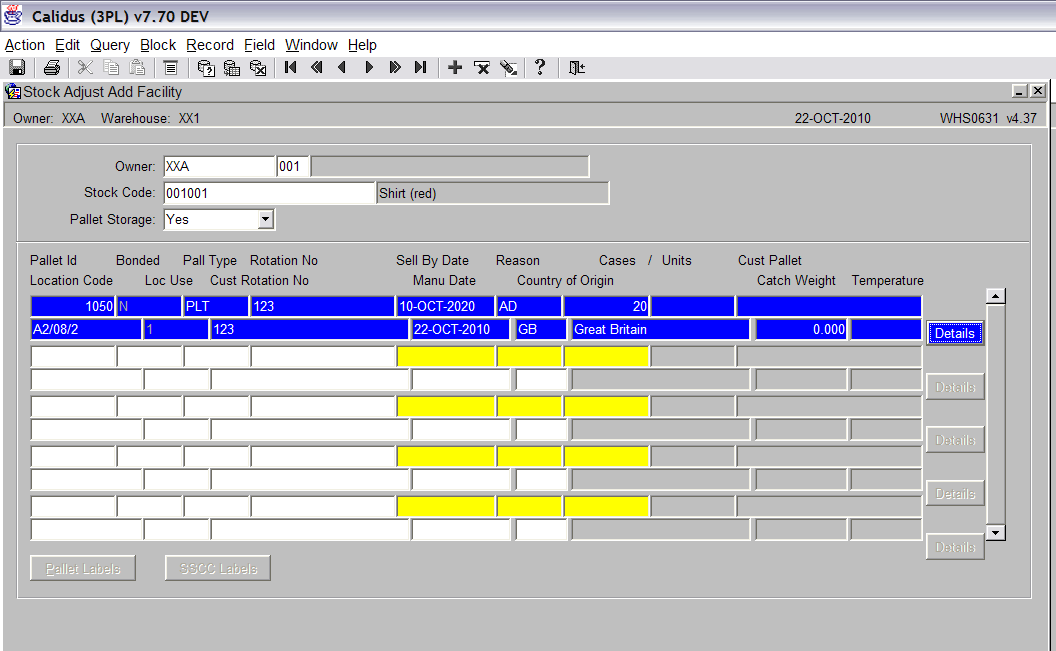
Press the ‘Add New Pallets’ button (see screen shot below).
<br\>
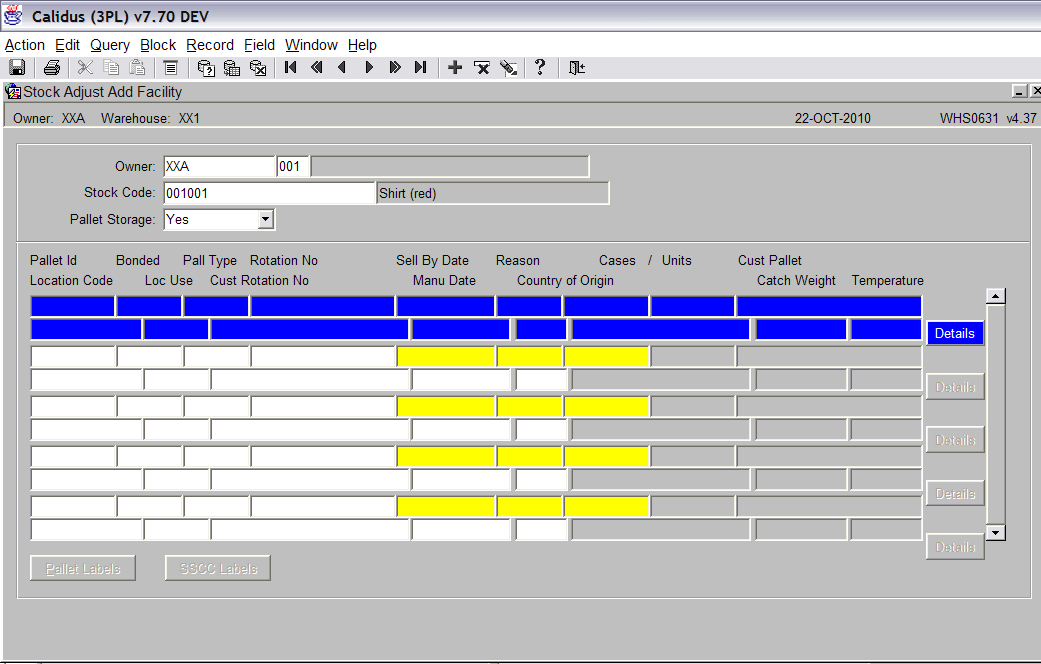
Enter the following data:
Pallet ID – Press the Tab button and the system will assign a new pallet id.
Pall(et) Type – Press the tab button for the system to use the default pallet type that has been assigned to the stock code in the stock maintenance screen. Or you can use the list of values and select the pallet type that is required.
Rotation No – Enter the rotation number of the pallet. This can be switched off if it not required.
Sell By Date – Enter the sale by date of the product. This will only be required if the stock requires a sell by date (this is set up within Stock Maintenance).
Reason – Enter the relevant reason code for the adjustment. The list of values will display all reason codes.
Cases/Units – Enter the number of cases/units that are to be stored on the pallet.
Location Code – Enter the location where the pallet is stored. The list of values can be used to select the location from.
Manu Date – Enter the manufacturing date (if you tab over the field the system will use today’s date.) <br\>
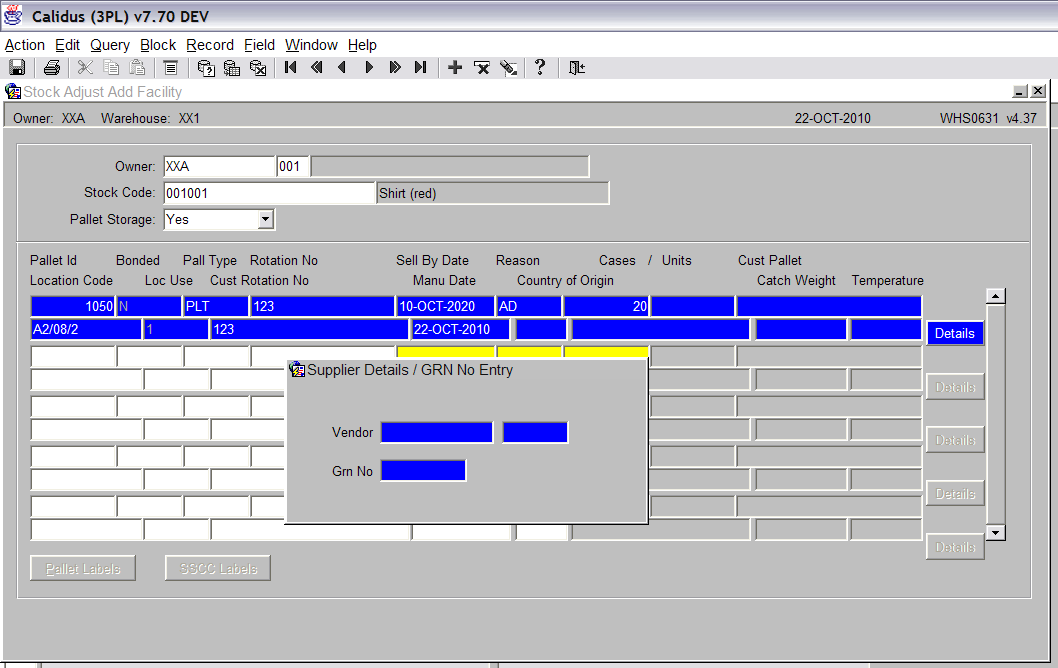
Once all the above data has been entered a pop up box will be displayed. This gives the user the option to enter details regarding a GRA (goods received advice), if they are aware of how it was received. If the user doesn’t know the details then you can tab through the fields leaving them blank.
Press the tab button to complete the remaining fields. <br\>
Once all the relevant data has been entered, press the Save button.
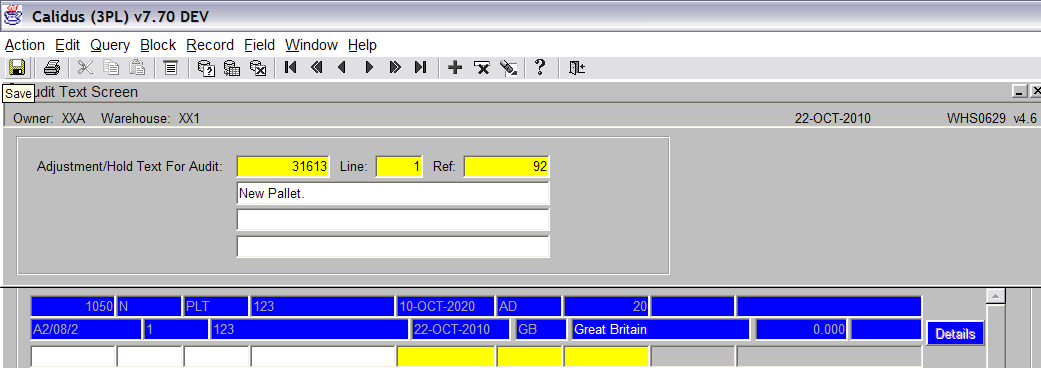
A pop up box will appear that allows the user to enter a text comment regarding the adjustment (see screen shot below). <br\>
Press exit to return to the main screen. We can now see the new pallet. <br\>
Document History
Copyright OBS Logistics © 2008
The information contained herein is the property of OBS Logistics and is supplied without liability for errors or omissions. No part may be reproduced or used except as authorised by contract or other written permission. The copyright and foregoing restriction on reproduction and use extend to all media in which the information may be embodied
