Bay Diary (Front) View
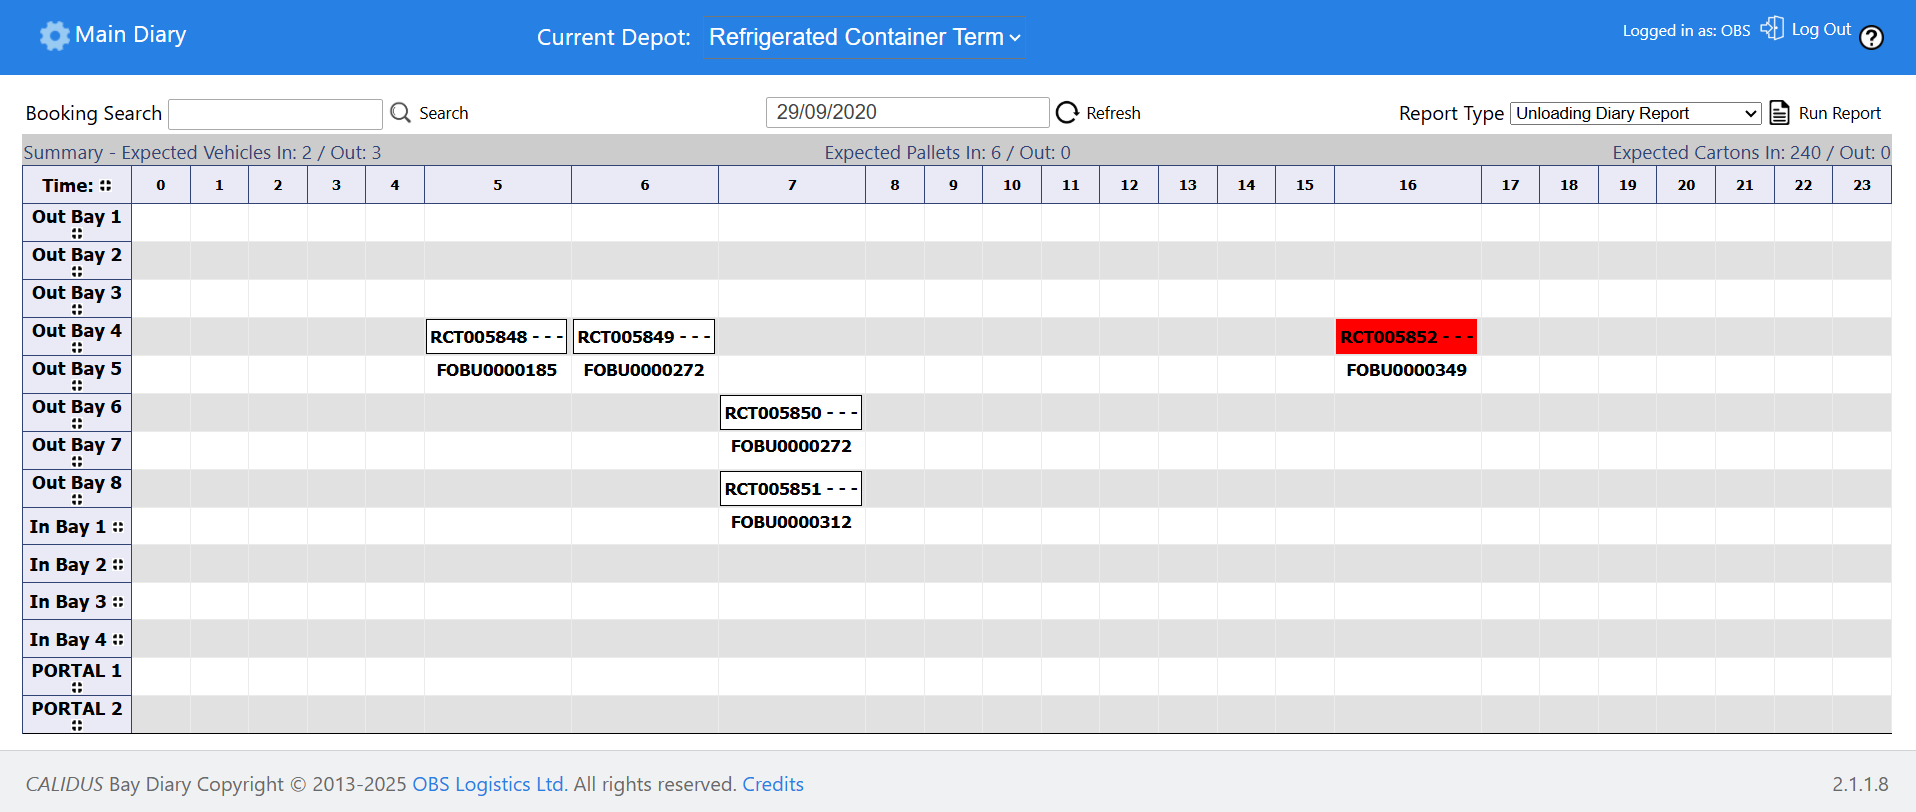
The header displays:
- Logos (configurable)
- Legend - the colours of the different booked slots in the Bay Slots table (below).
- Calendar - the main navigation element of this screen. The Gatehouse user should select the current date for operation on the day. Users taking and creating bookings should select the date required for the booking before checking the slots.
- Information, including the current warehouse for the logged-on user.
- A Search bar
- Reports selectors (covered in a later section)
- A summary bar
The summary bar shows the summary counts for the day, based on the bookings created for the bays on that day, consisting of:
- Expected Vehicles In/Out
- Expected Pallets In/Out
- Expected Cartons In/Out
A table of all configured Bays and Slots will be displayed in the Bay Slot table, with all slots ready for booking. Any created bookings will be indicated in the Booking slot (the cell), coloured as per the legend in the header. Optionally, all bookings on a bay will be displayed in a Front View list under the bay, showing the details as configured for the user or warehouse.
To add a new booking, click on an empty slot and the Booking (Detail) view will be displayed with no details, ready for a booking to be created.
To edit or view an existing booking, click on the slot itself - the booking will be displayed in the Booking (Details) view.
To quickly see and amend some details of a booking, move the mouse over a selected slot - the details will be displayed in the Quick Update view in the top right of the screen.
Quick Update View
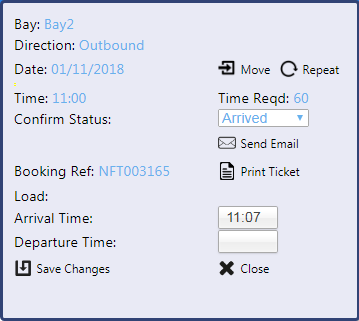
Hovering over a booking slot will display a small Update view in the top-right of the Diary screen, as follows:
Some details of the selected booking are displayed at this time slot, and this allows the user to quickly set the status and take some actions.
Editable Fields:
- Confirm Status - a drop-down list of the available statuses. This may be used to quickly arrive or complete a booking at the gatehouse.
- Arrival Time - the Arrival time to be keyed in when setting the status to Arrived. The time will be automatically populated with the current time in this case, but may be modified.
- Departure Time - the Departure time to be keyed in when setting the status to Processed. The time will be automatically populated with the current time in this case, but may be modified.
When all details are entered, click Save Changes to save the details or Close to abandon them
Several buttons are provided on this Update view.
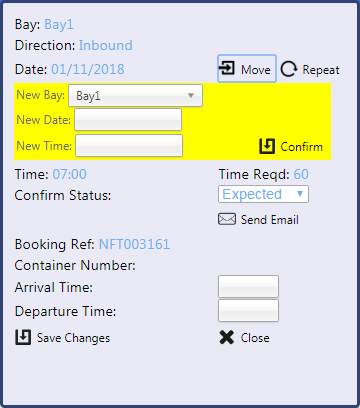
Click the Move button to move the booking to a new date and time, or bay - fields will be displayed for this purpose. Click Confirm to confirm the move.
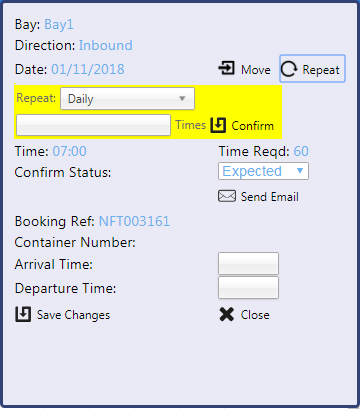
Click the Repeat button to repeat this booking many times. Fields will be displayed for this purpose, allowing the Repeat interval to be specified (Daily, Weekly or Monthly) and the number of Times to repeat this booking. Click Confirm to submit the repeat booking.
If an email is required to be sent to the recipients on arrival or completion, this can be achieved through clicking the Send Email button, which will then send a confirmation email directly.
![]() Note: This Update view will be modified to add a Print Ticket button to the screen.
Note: This Update view will be modified to add a Print Ticket button to the screen.


