OMS7010
Master Orders – Selection Criteria
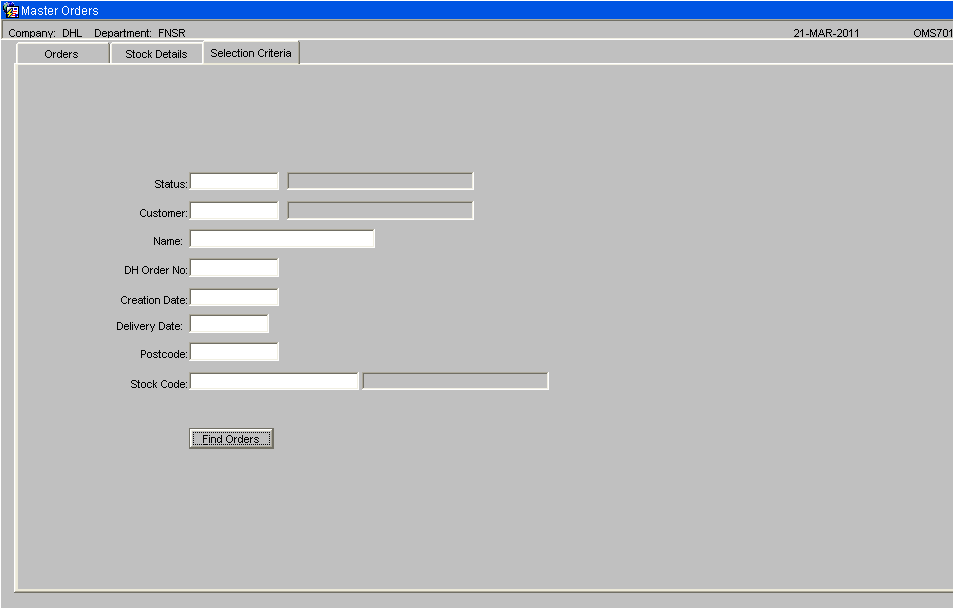
If the user is not setup to automatically find master orders, then the master order screen will start on the selection criteria tab. If the user has a “Default Master Order Status” setup on “OMS Users” then this will be used to automatically populate the status field. If the user is setup, on “OMS users”, to only find orders with this status, then the status field will be grey and the user will not be able to find orders with any other status.
Following entry of the selection criteria, the “Find Orders” button can be clicked to display the master orders that match the criteria.

Status - Status can be set to -
- N – New Master Orders
- O – OK, Master orders that have been successfully converted into Anticipated Order.
- C- Cancelled Master Orders,
- 9 – Despatched.
Name - A partial customer name can be entered to find orders with a customer name containing the entered text.
Date - The date selection fields, +0 can be entered for today’s date, +1 for tomorrow’s date. The day number of the month can be entered and the system will default the current month and year.
Postcode - The first part of the postcode can be entered to find orders with postcodes matching the entered text.
Master Orders Screen – Main Screen
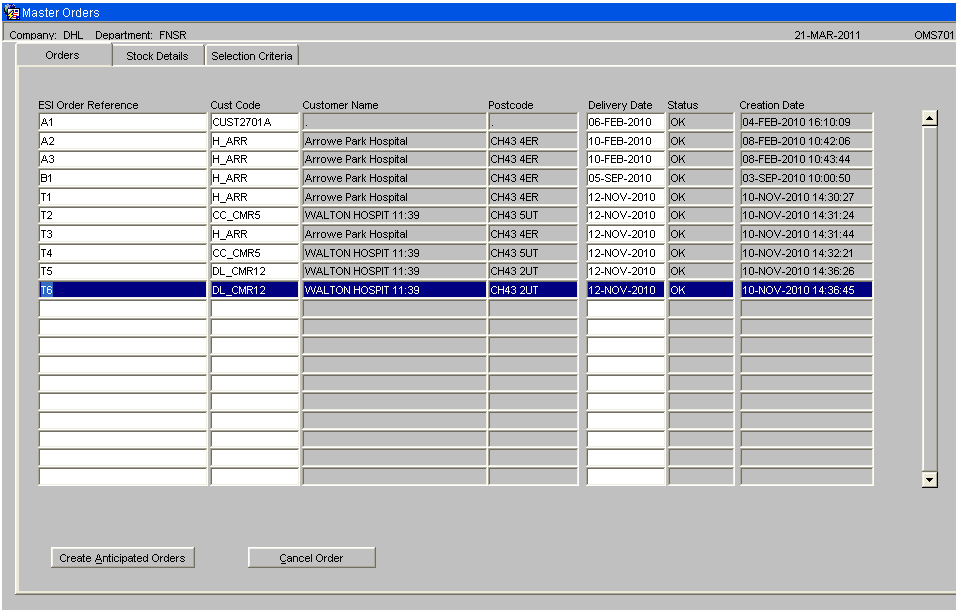
This screen will show the Master Orders. Master orders are created, either by EDI order upload or by entering directly using this form, with a status of “New”.
If the ‘Allow Entry of DH Orders’ flag is set to “Y” on the OMS Control screen and “Y” on the OMS Users screen, then this user will be able to enter master orders using this screen.

Create Anticipated Orders Button This button will validate the details and move the orders onto the next stage. Details cannot be changed in this screen for orders that have been moved onto the Anticipated Order stage. The details will remain to provide a history. Master Orders that have been successfully converted to anticipated orders will have a status of OK. Order that have been despatched will have a despatched status.
Cancel Order Button If the ‘Allow Cancellation of Master Orders’ flag is set to “Y” on the OMS Users screen then this user will be allowed to use the ‘Cancel Order’ button. If this flag is set to N for the user then the ‘Cancel Order’ button will be grey and this user will not be able to cancel master orders. Master orders can be cancelled, using this screen, while they only exist in the order management layer. Master orders that have been sent to the warehouse, must be cancelled using one of the Warehouse order cancellation screens. If the warehouse order is cancelled, the orders re-assessed to reset the anticipated order status to New, then it will be possible to cancel the master order.
To cancel a master order, the order to be cancelled will be clicked to make it the current record. The “Cancel Order” button will be clicked. A prompt will appear asking the user to confirm.
When the ‘Yes’ button is clicked, the order will set to status cancelled. To complete the cancellation, the changes must be saved by clicking the Save icon or pressing Control S. Upon save, any associated anticipated orders will be deleted. If the leave screen is clicked without a save then a prompt will appear, as shown below. If the No button is clicked then the cancellation will not be saved returning the order to it’s original status.
When a master order is cancelled, the system will write details of a zero despatched order to the despatch confirmation transient tables. The next EDI outbound despatch confirmation run will include the cancelled master orders showing zero quantity despatched.
Master Orders Screen – Stock Detail Screen
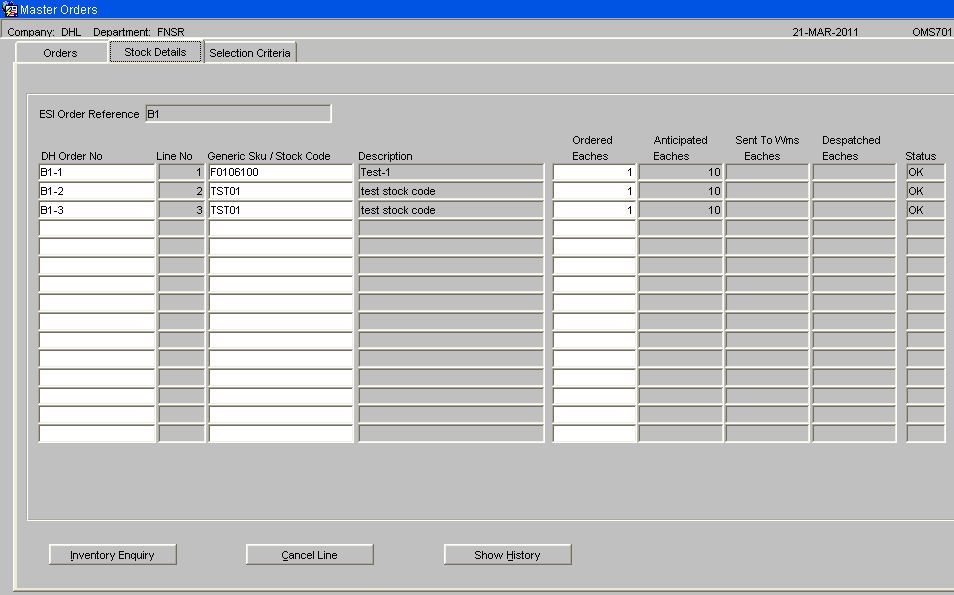
The ‘Stock Details’ tab on the Master Orders main screen can be clicked to display the stock details for the current order.
The stock details screen will have the following layout: -

Quantity fields will be displayed to the right of the screen.
- Ordered Eaches – The order quantity in eaches for this order line.
- Anticipated Eaches – The quantity expected in eaches to be delivered based on stock availability.
- Sent to WMS Eaches– The quantity in eaches of this order line that has been sent to the appropriate warehouse for picking / despatch.
NB. The quantity ordered will be in a number of eaches. The quantity anticipated / sent to WMS may be higher when the quantity ordered has been rounded up to allow delivery of a whole shipping unit of the product.
For example, if quantity ordered was 17 but product is stored in cases where each case contains 10 eaches. The order would need to despatch 2 cases of the product which equates to 20 eaches. This line would show, qty ordered 17, qty anticipated 20.
Inventory Enquiry Button This button will only be useful for order lines where the stock code used on the master order matches the stock code on the WMS. This button calls the standard WMS inventory enquiry.
Cancel Order Button If the ‘Allow Cancellation of Master Orders’ flag is set to “Y” on the OMS Users screen then this user will be allowed to use the ‘Cancel Line’ button. If this flag is set to N for the user then the ‘Cancel Line’ button will be grey and this user will not be able to cancel master order lines. Master order lines can be cancelled, using this screen, while they only exist in the order management layer. To cancel a master order line, the order line to be cancelled will be clicked to make it the current record. The “Cancel Line” button will be clicked. A prompt will appear for the user to confirm.
When the ‘Yes’ button is clicked, the order line will set to status cancelled. To complete the cancellation, the changes must be saved by clicking the Save icon or pressing Control S. Upon save, any associated anticipated orders will be deleted. If the leave screen is clicked without a save then a prompt will appear, as shown below. If the No button is clicked then the cancellation will not be saved and the order line will return to it’s original status.
When a master order line is cancelled, the system will write details of a zero despatched order line to the despatch confirmation transient tables. The next EDI outbound despatch confirmation run will include the cancelled master order lines showing zero quantity despatched.
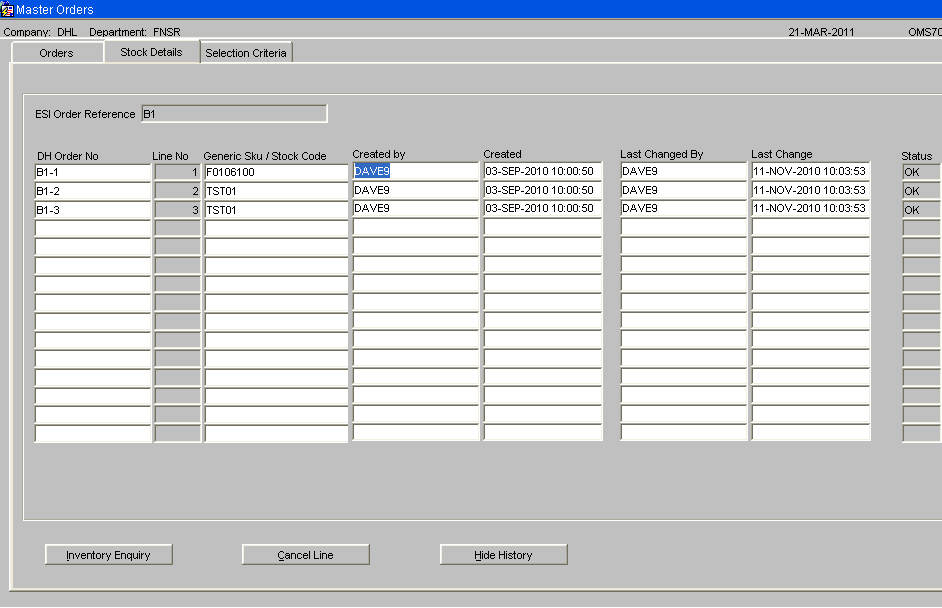
Show History Button
The “Show History” button can be clicked to change the display to show the dates and usernames of the order creation and last change.
