WHS8142
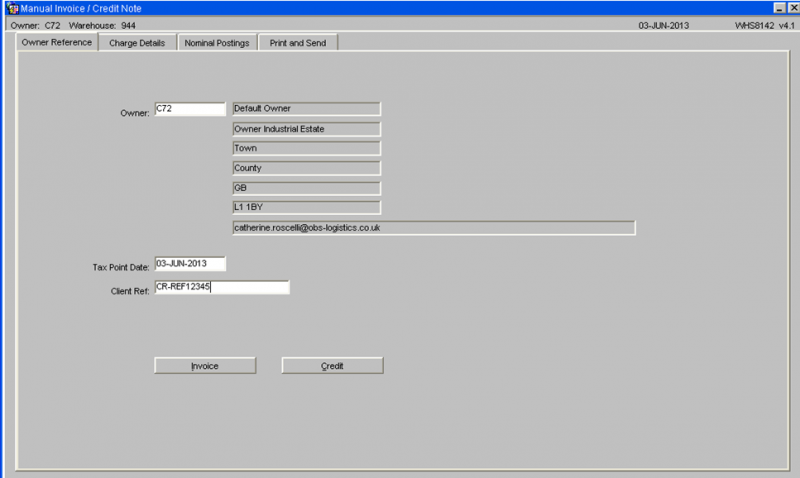
The header section includes the following fields:-
- Owner Code – This will default to the current owner. A list of values will be available which will show all the owners the user has access to.
- The owner name, address and email address will be displayed.
- Tax Point Date – A past or future date can be entered.
- Client Reference.
- Invoice Button – This button is used to create a manual invoice.
- Credit Button – This button is used to create a manual credit note.
Manual Invoice / Credit – Charge Details Section
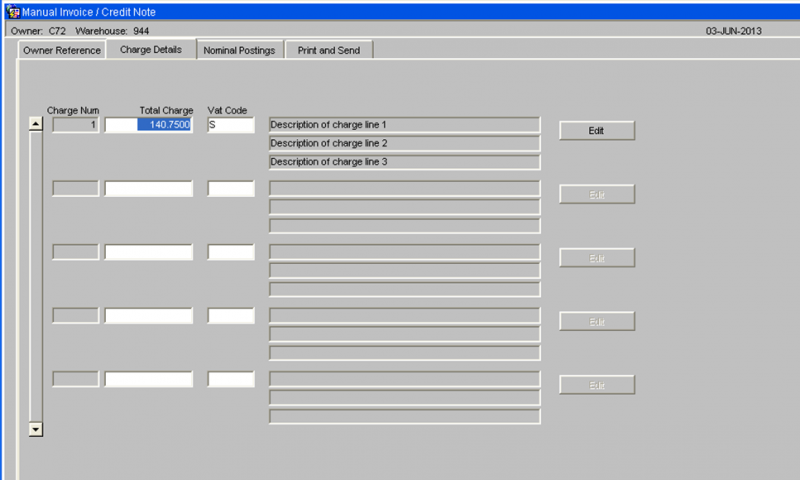
The Charge Details tab screen will include the following fields. This screen will display the first 3 lines of the description. The Edit button can be used / amend view any additional description:-
Each charge line comprises of:-
- Charge Number - this is a system generated sequential number.
- Charge Amount
- Vat code - this will be validated to ensure the vat code exists.
- Charge description - This will be free text.
The charge amount and the VAT code will be entered. Upon leaving the VAT code field, the user will be taken to the Charge Description sub-screen.
Charge Description Sub-Screen
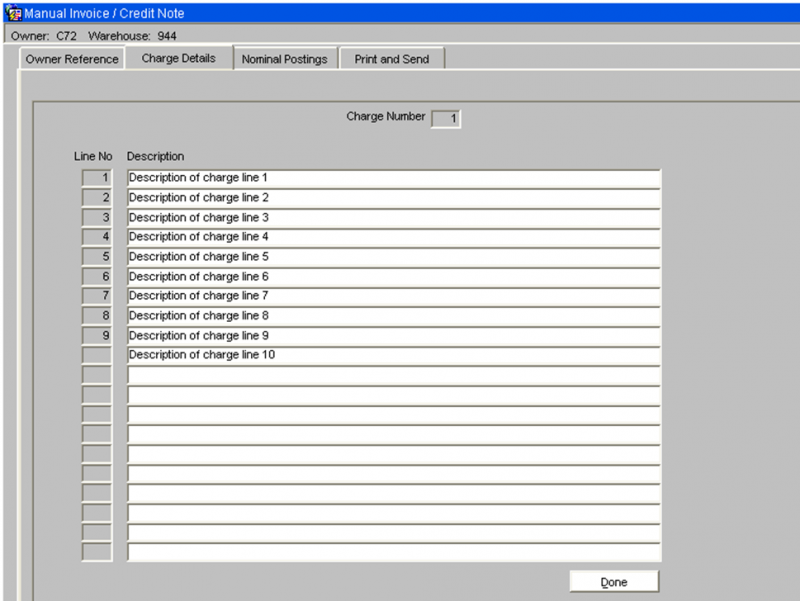
This sub-screen will allow all the required text to be entered, as shown below:-
When the Done button is clicked, the sub-screen will be closed and the first three lines of the description will be displayed on the main Charge Details screen.
As many charge lines can be added as required.
Nominal Posting Section
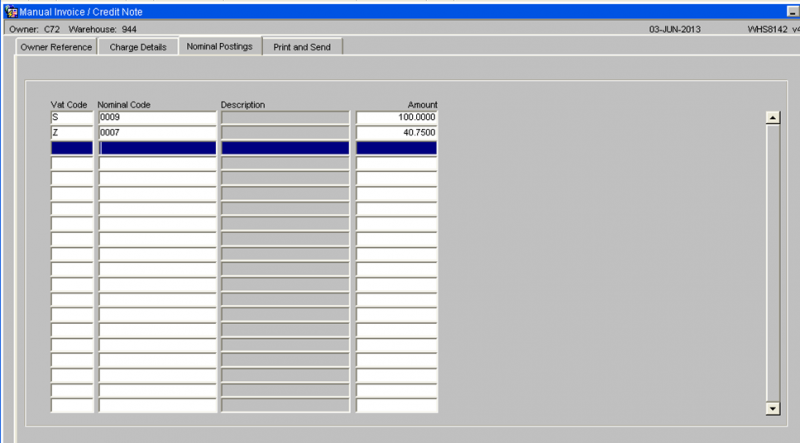
The Nominal Postings section must be completed for each Vat code. This section includes the following fields:
- Vat Code
- Nominal Code
- Description of Nominal Code
- Amount
The table of nominal codes will be used to provide a list of values and to retrieve the description of the nominal code. An amount will be entered against each nominal code.
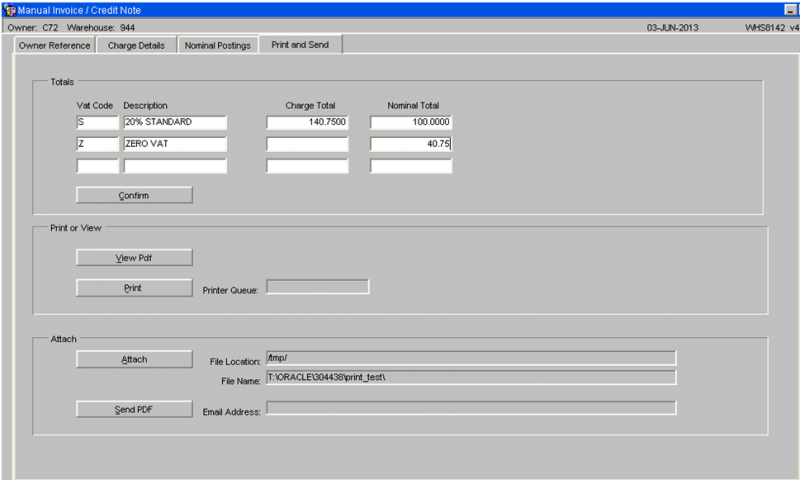
Print and Send Section
The totals section will show each VAT code used on this document with the total entered for this Vat code in the Charge Details section and the total entered for this VAT code in the Nominal Postings section.
The totals must match before the Confirm button is used to complete the entry of the invoice / credit note.
View PDF
Press the View PDF button to allow the PDF invoice / credit note to be produced and either displayed on the screen or sent to a printer.
Press the Print button when this button and the PDF invoice / credit note will be produced and sent to the default printer queue, as displayed.
Attach
The Attach Documents section is optional.
The user may have scanned a document which now exists on the hard disc of their PC. This document needs to be attached to the e-mail sent out to the client.
This section will include the following fields:-
- Pathname – the location of the file.
- File name – the name of the file.
- Attach button
The system will verify that a document exists in the selected location with the entered filename.
