Stock Movement Request
<br\>
Stock Movements – Stock Movement Request
<br\>
The Stock Movements Request screen is used to move stock around within the warehouse.
The Stock Movements Request screen is located in the Stock Movements folder.
The following document covers how to move full and part pallets. Part pallets are referred to as ‘Stock Movements’.
Full Pallet Movement
<br\>
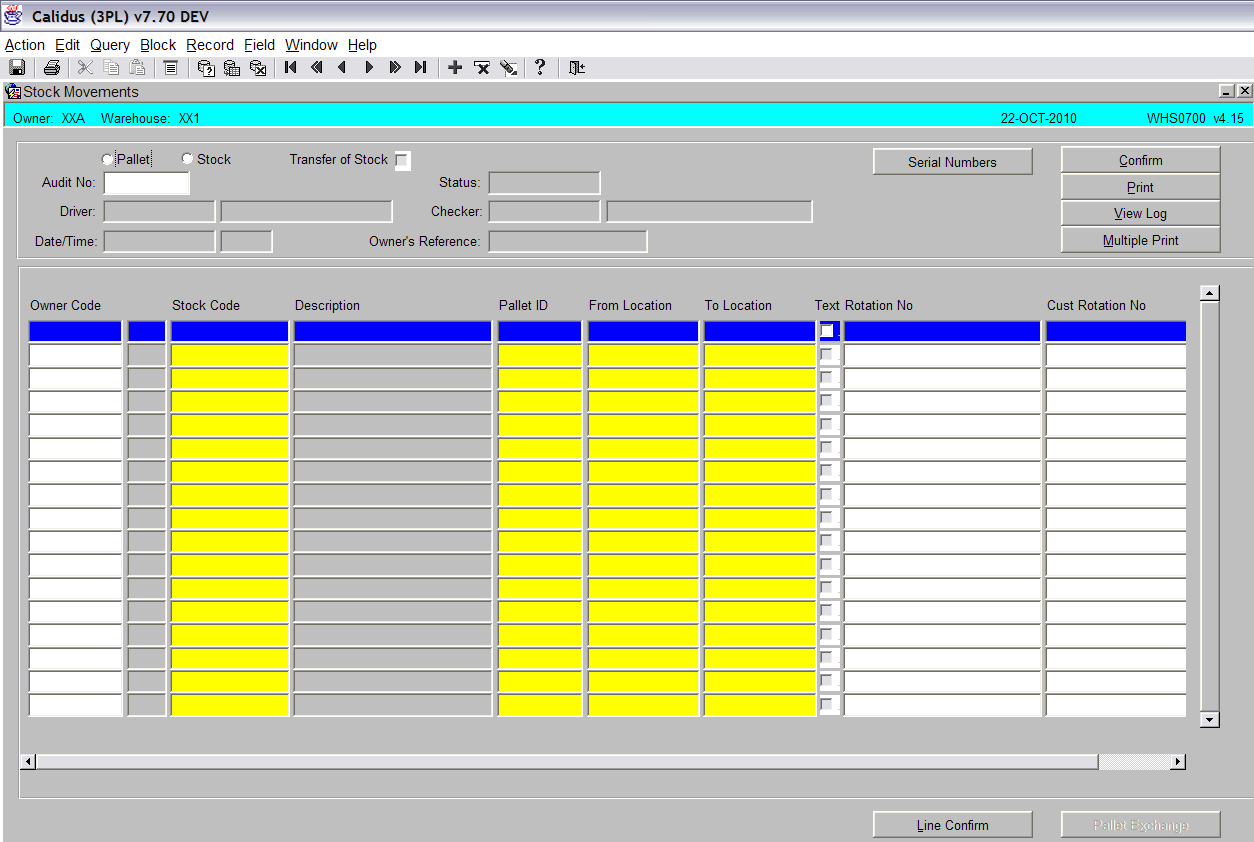
Click in the Pallet radio button (see screen shot below).
<br\>
Press the ‘Cancel Query’ button.
<br\>
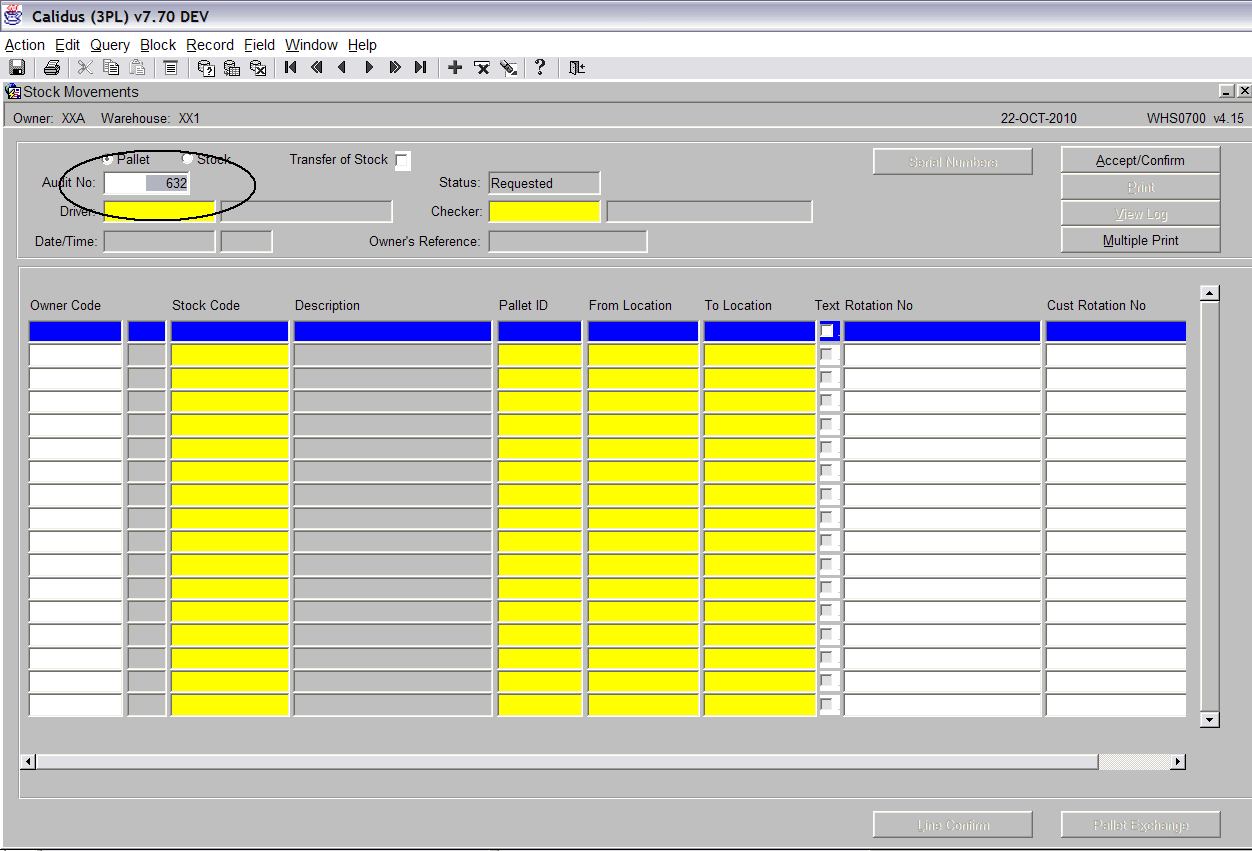
An audit number has now been produced (see screen shot above).
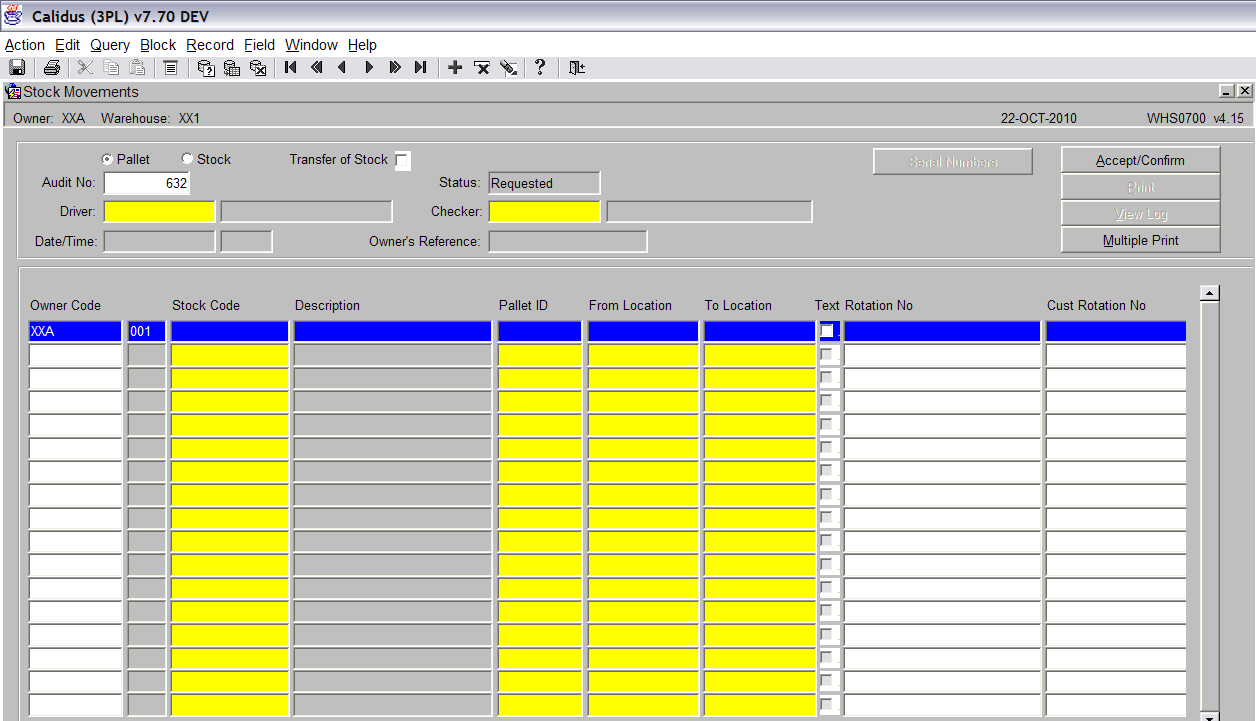
Click in the Owner code field (see screen shot above). <br\>
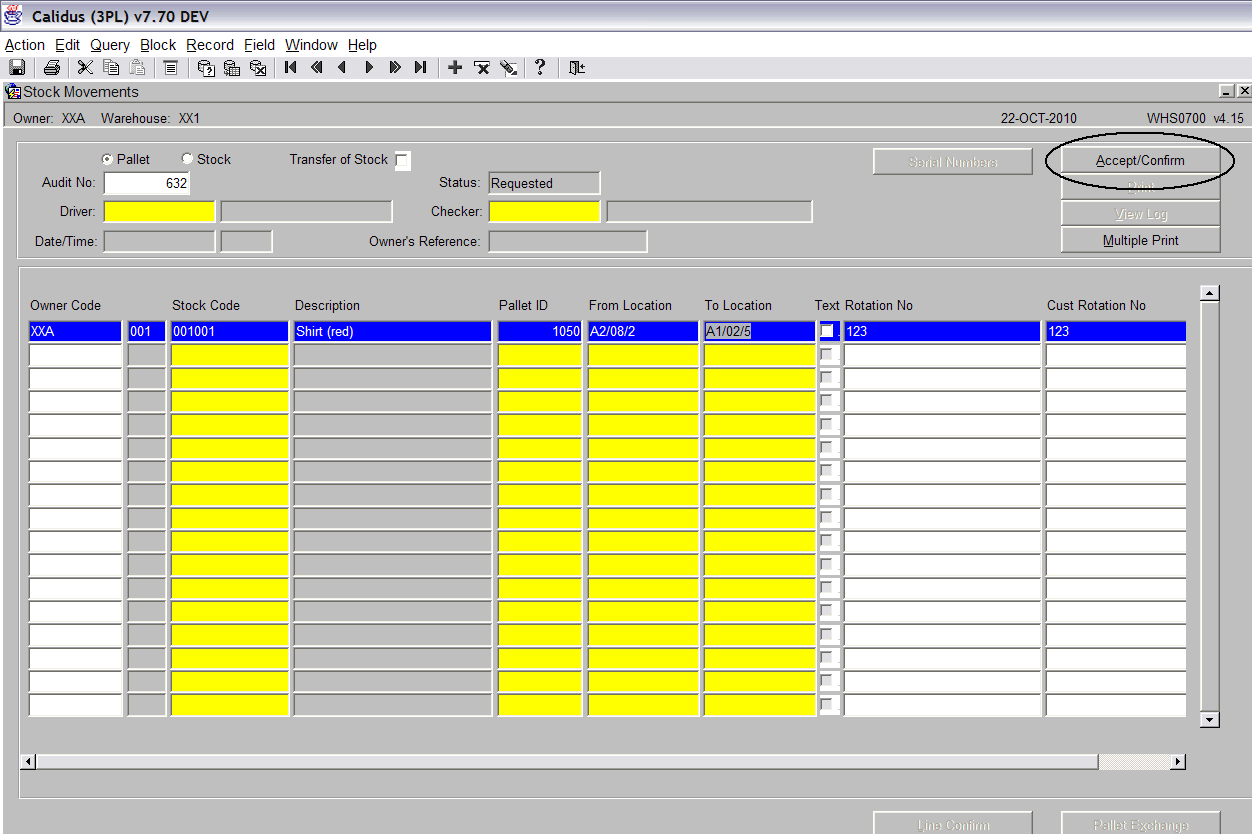
The Owner Code field will be automatically filled with the default owner set up for the user. Stock Code – Enter the stock code you wish to move. Alternatively, use the list of values to select from.
Pallet ID – Enter the pallet ID that you wish to move.
From Location – This will be populated automatically with the location that the pallet is currently stored in.
To Location – If auto-putaway is switched on, the system will automatically suggest a new location. This can be deleted and you can select your own by either manually typing it in, or by using the list of values. <br\>
Press the Accept/Confirm button when have entered the required data (see above screen shot).
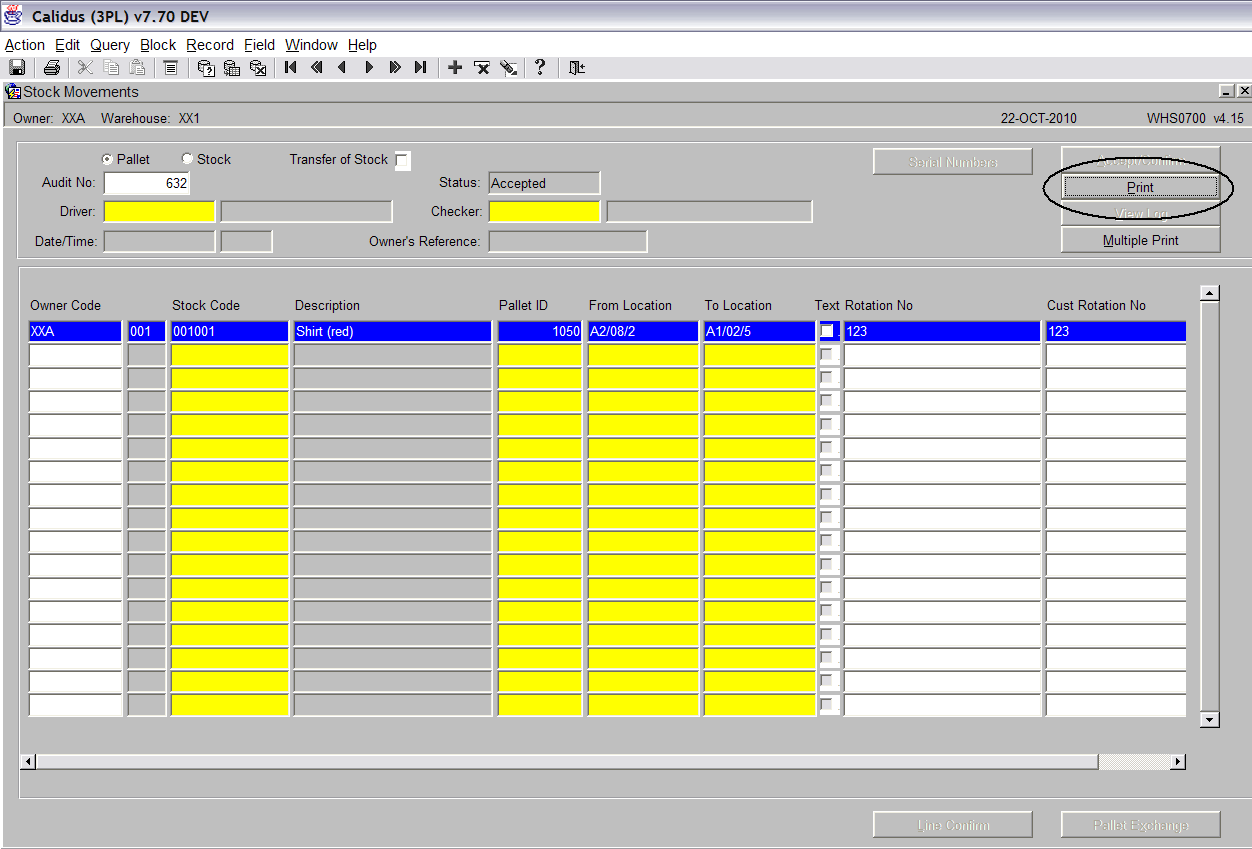
Press the ‘Print’ button (see screen shot below) <br\>
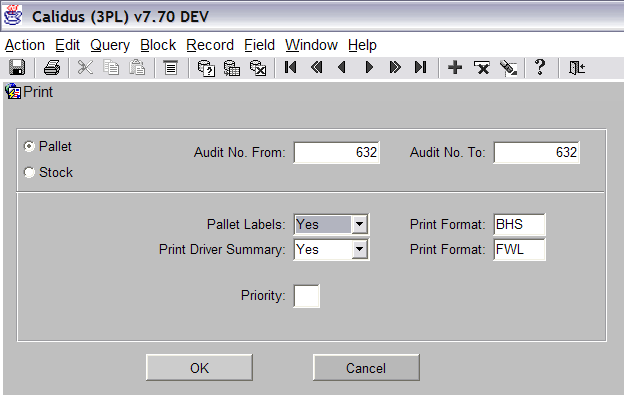
A pop up box will now be displayed. <br\>
You can change whether you wish Pallet Labels and a Driver Summary along with the formats of the prints.
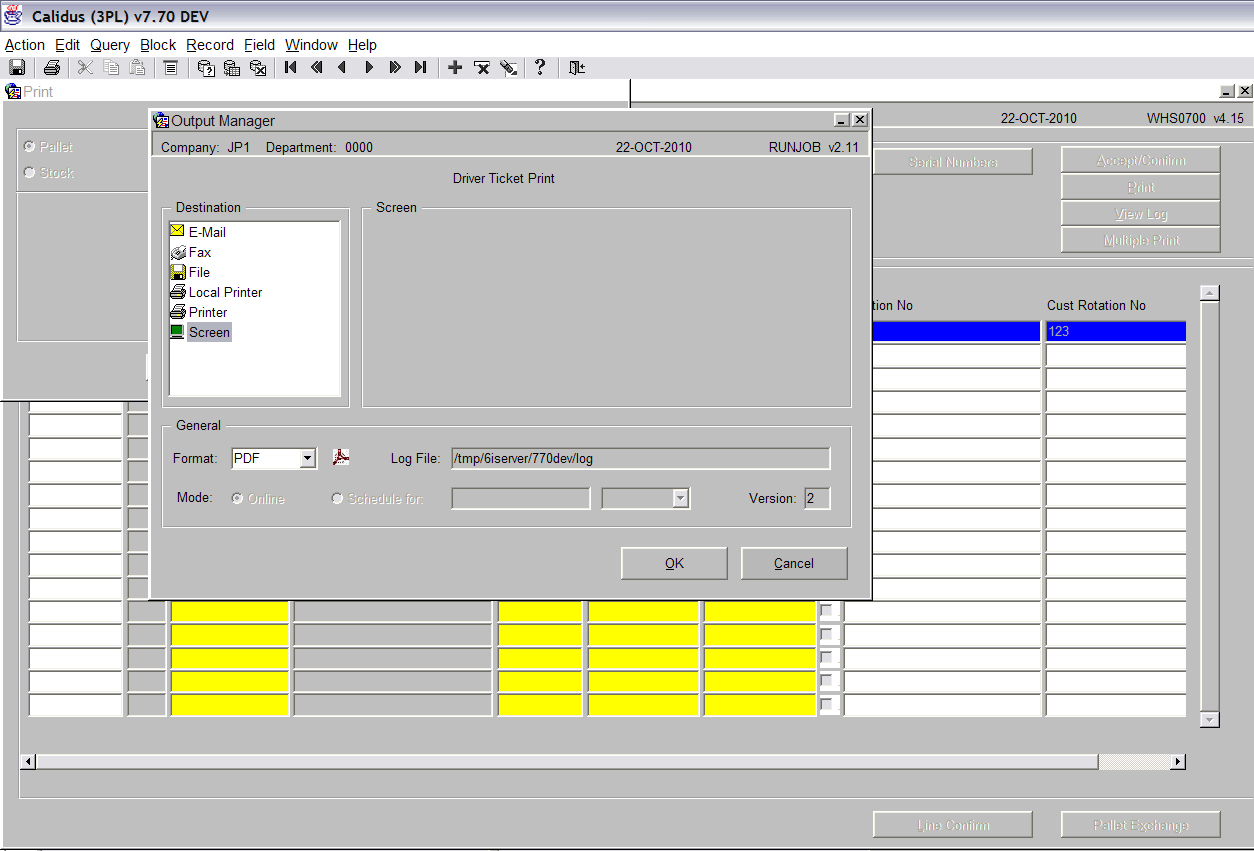
The output manager box will now be displayed. Press the screen icon and then click the OK button.
<br\>
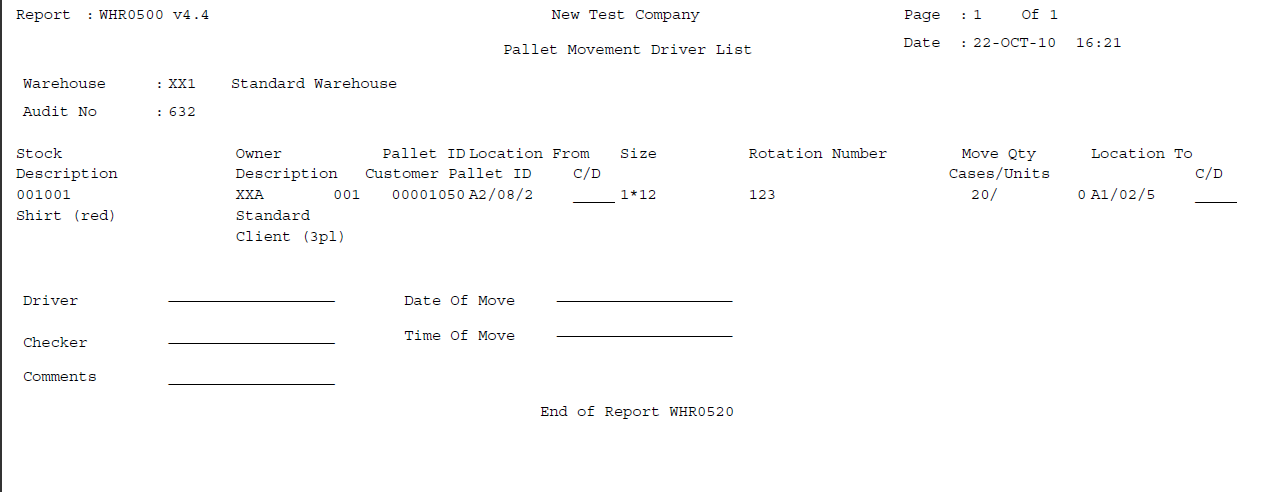
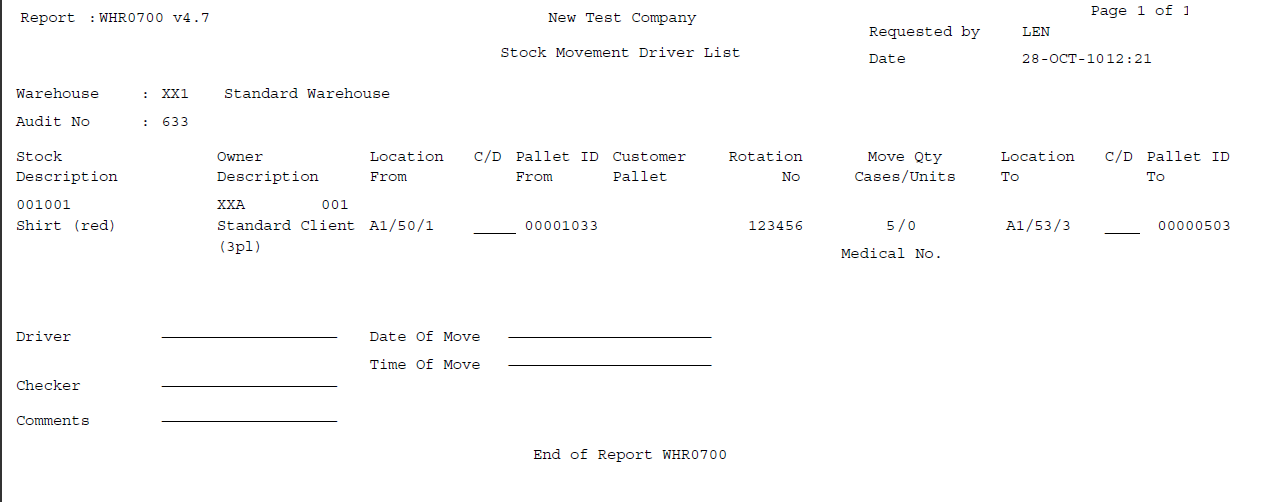
The movement report will now print.
<br\>
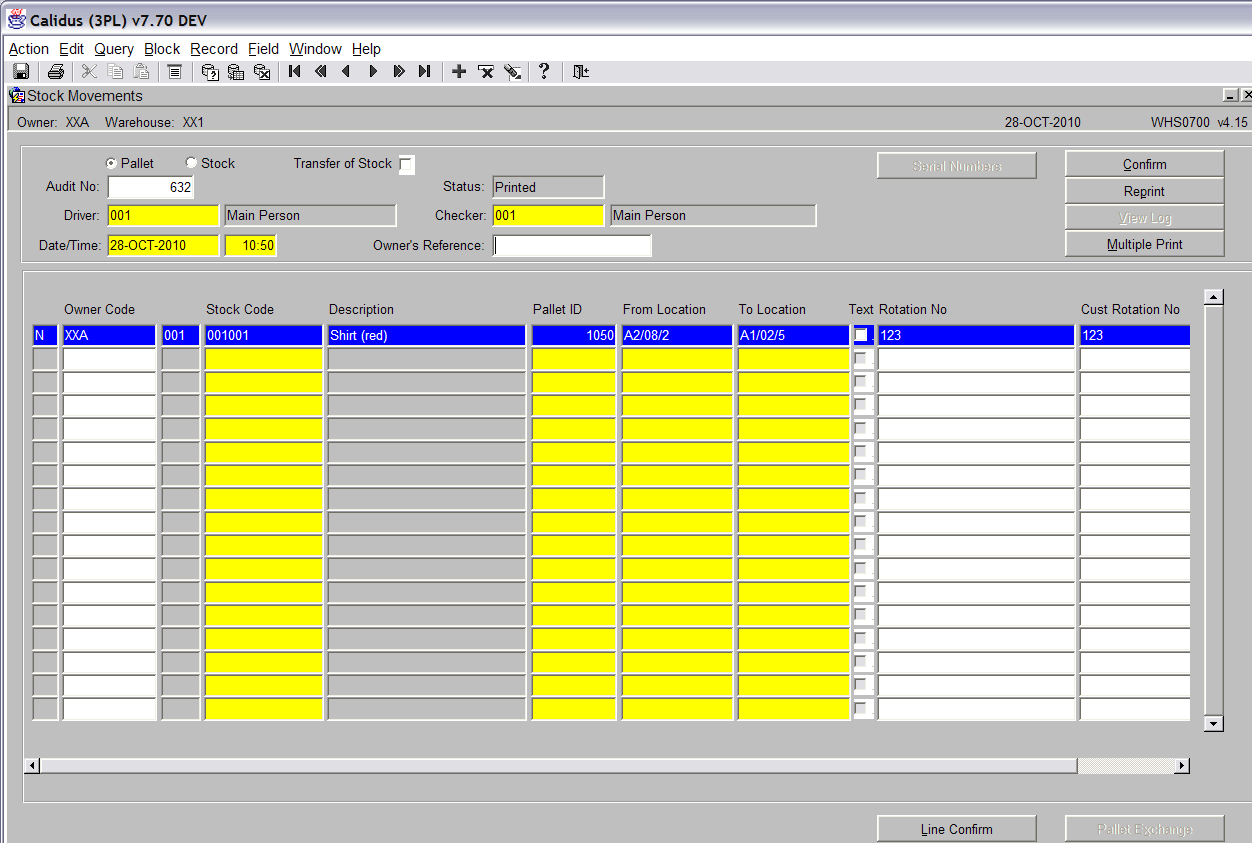
There are 3 fields that need to be completed before the movement can be confirmed.
Driver – An employee code must be entered. The list of values can be used to display all valid employees.
Checker - An employee code must be entered. The list of values can be used to display all valid employees.
Date/Time – A date and time can be manually entered or if you tab across the field, the system will default to today’s date and time.
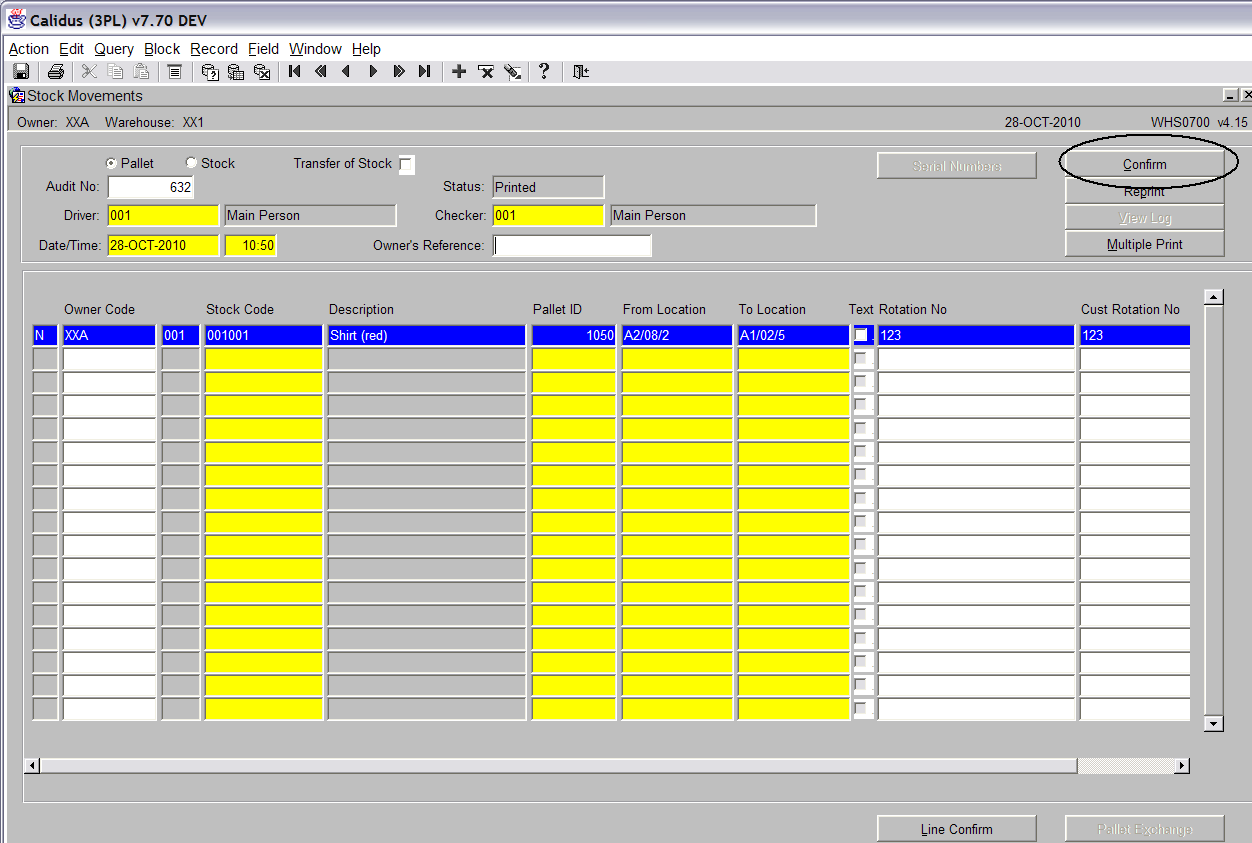
Once all the data has been entered, press the ‘Confirm’ button to complete the movement (see screen shot below).
<br\>
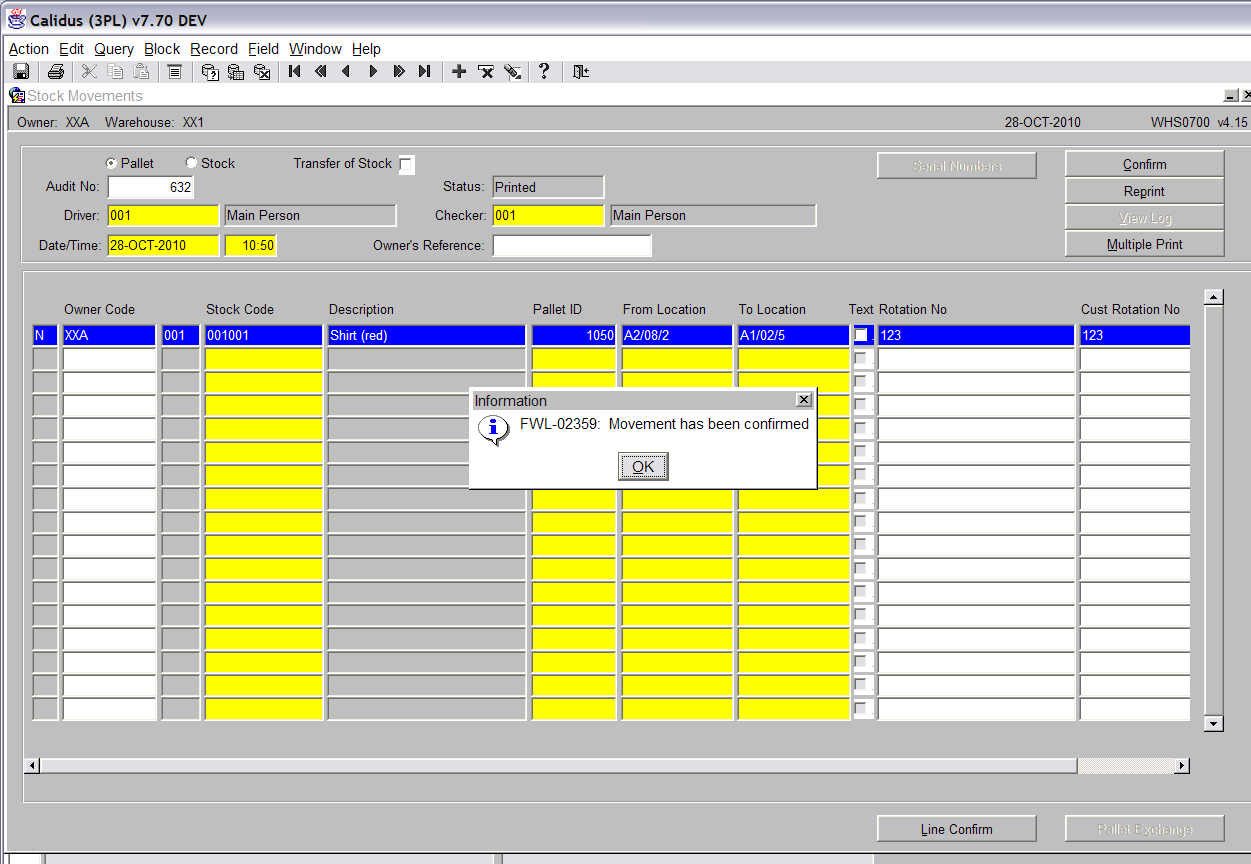
A message will be displayed stating that the movement has been confirmed. <br\>
Stock Movement
<br\>
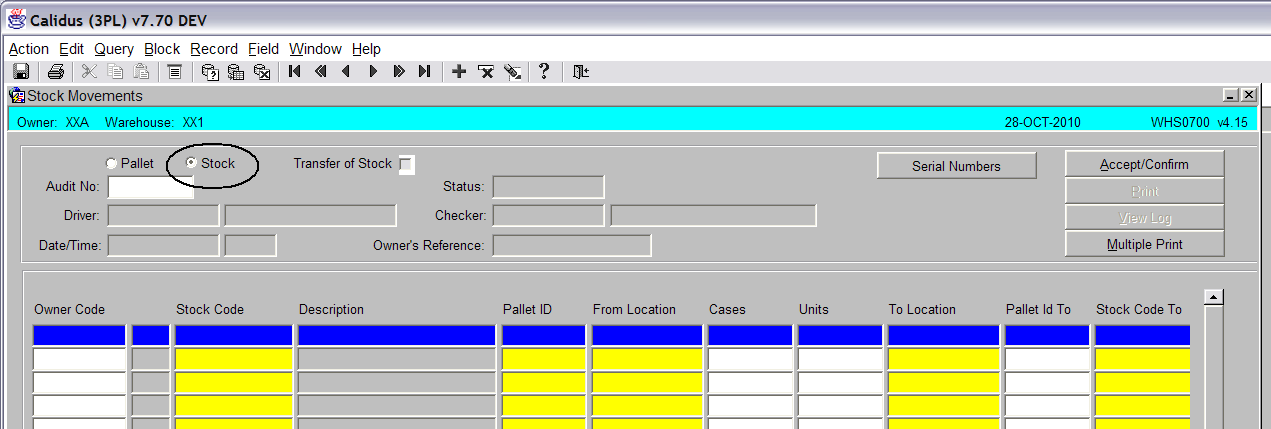
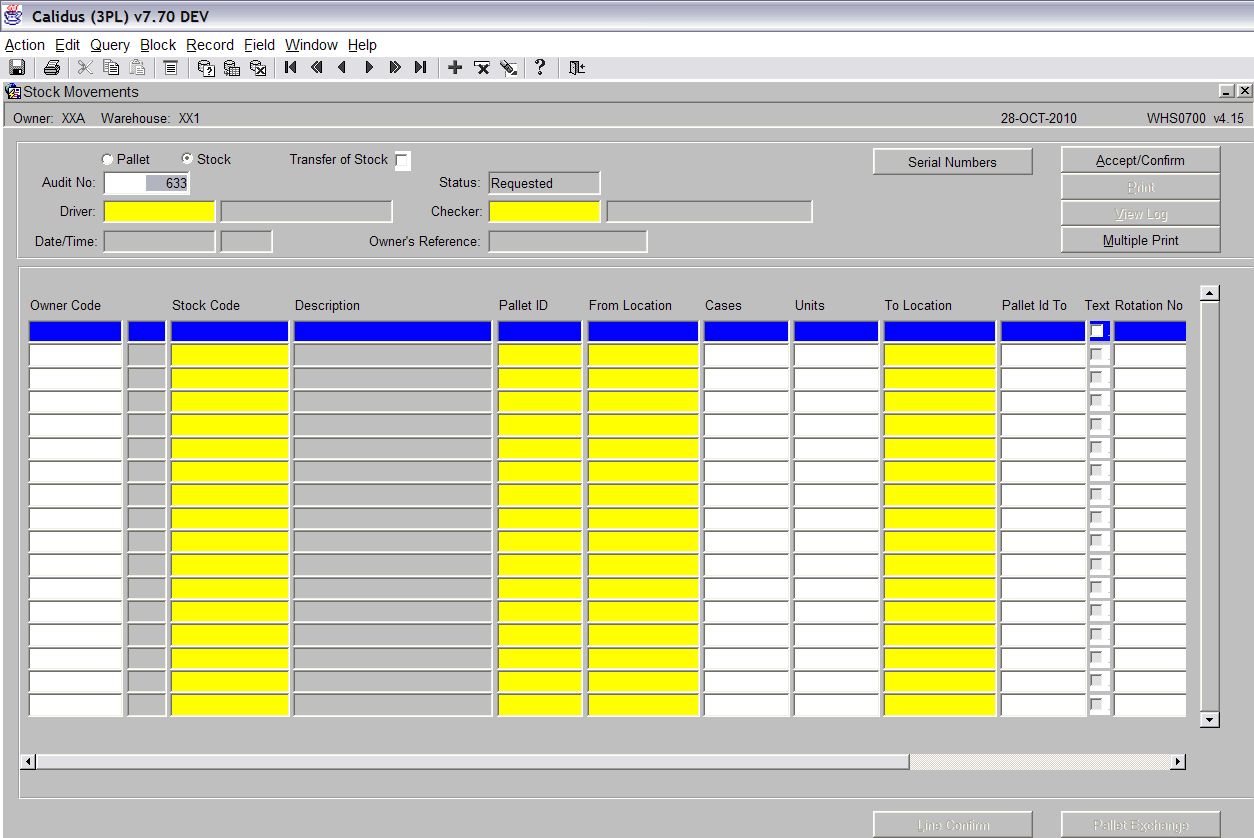
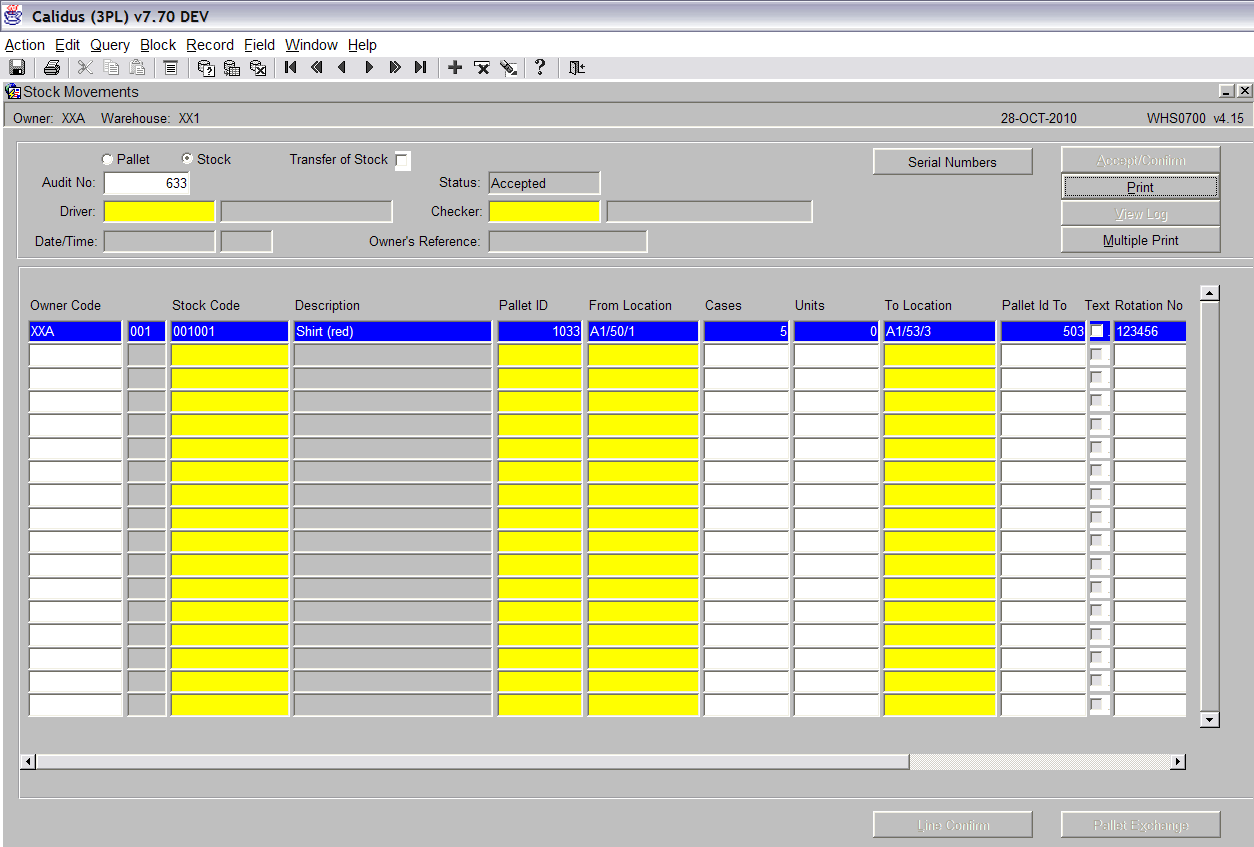
Click in the ‘Stock’ radio button (see screen shot below).
<br\>
Press the ‘Cancel Query’ button.
<br\>
An audit number has now been produced (see screen shot above).
The screen is very similar to the pallet movement option, however, here you can specify the number of cases or units to move.
The Owner Code field will be automatically filled with the default owner set up for the user.
Stock Code – Enter the stock code you wish to move. Alternatively, use the list of values to select from.
Pallet ID – Enter the pallet ID that you wish to move.
From Location – This will be populated automatically with the location that the pallet is currently stored in.
Cases – Enter the number of cases that you wish to move.
Units - Enter the number of units that you wish to move.
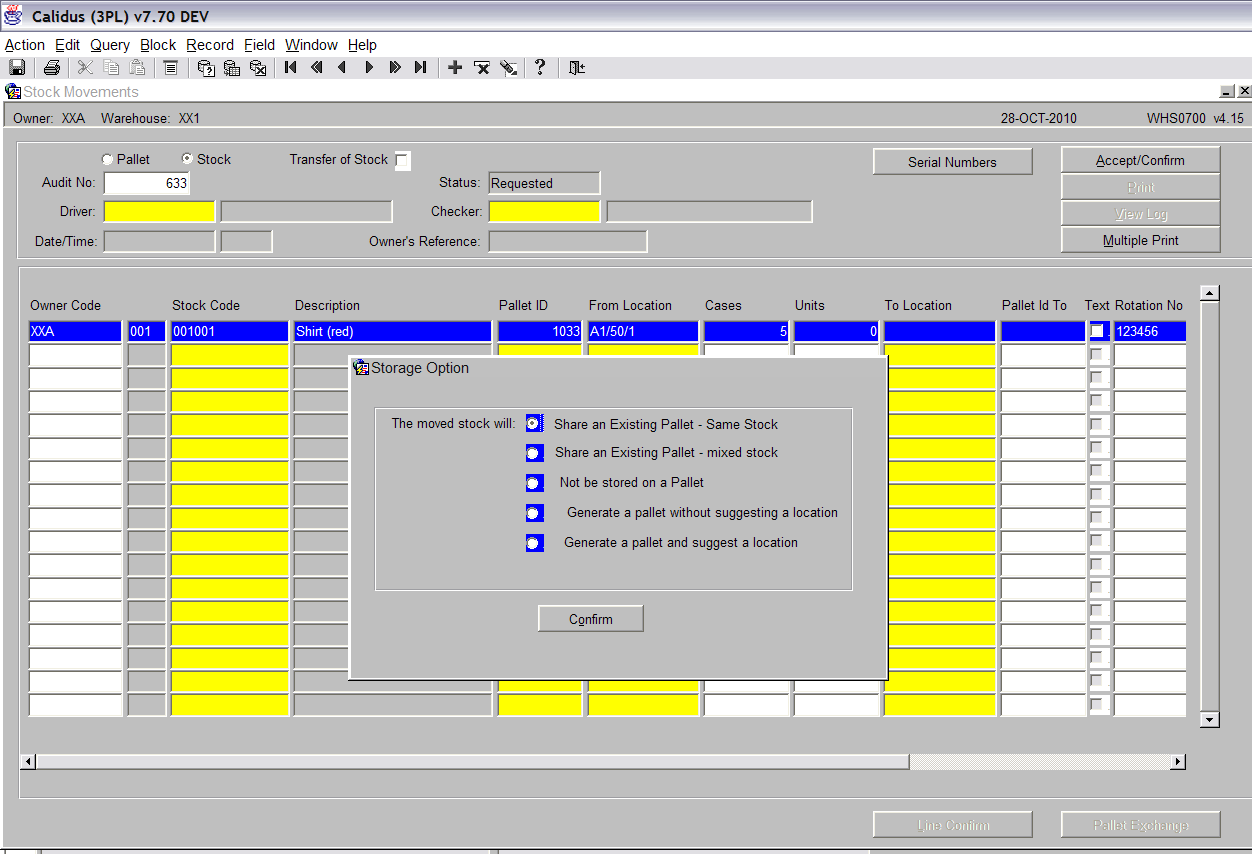
To Location – If auto-putaway is switched on, the system will automatically suggest a new location. This can be deleted and you can select your own by either manually typing it in, or by using the list of values. <br\>
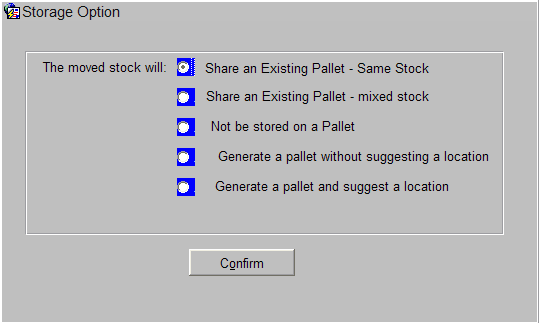
When you click in the ‘To Location’ field a pop-up box will be displayed. You need to choose one of the options:
<br\>
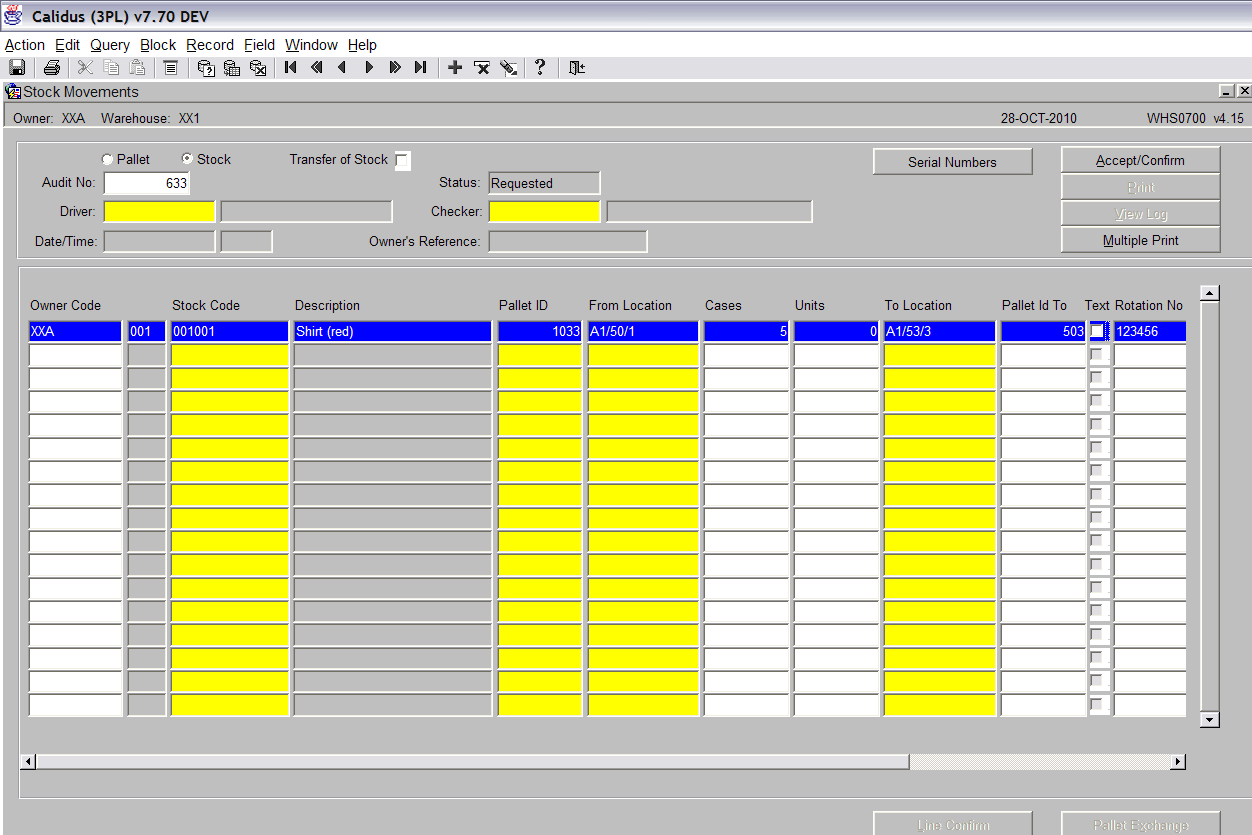
In this instance we will use an existing pallet that already contains the same stock. Click the ‘Confirm’ button when you have selected your choice. <br\>
The ‘Pallet Id To’ field will be automatically populated with the pallet id that is currently stored in the location you selected.
Press the Accept/Confirm button when have entered the required data (see above screen shot).
<br\>
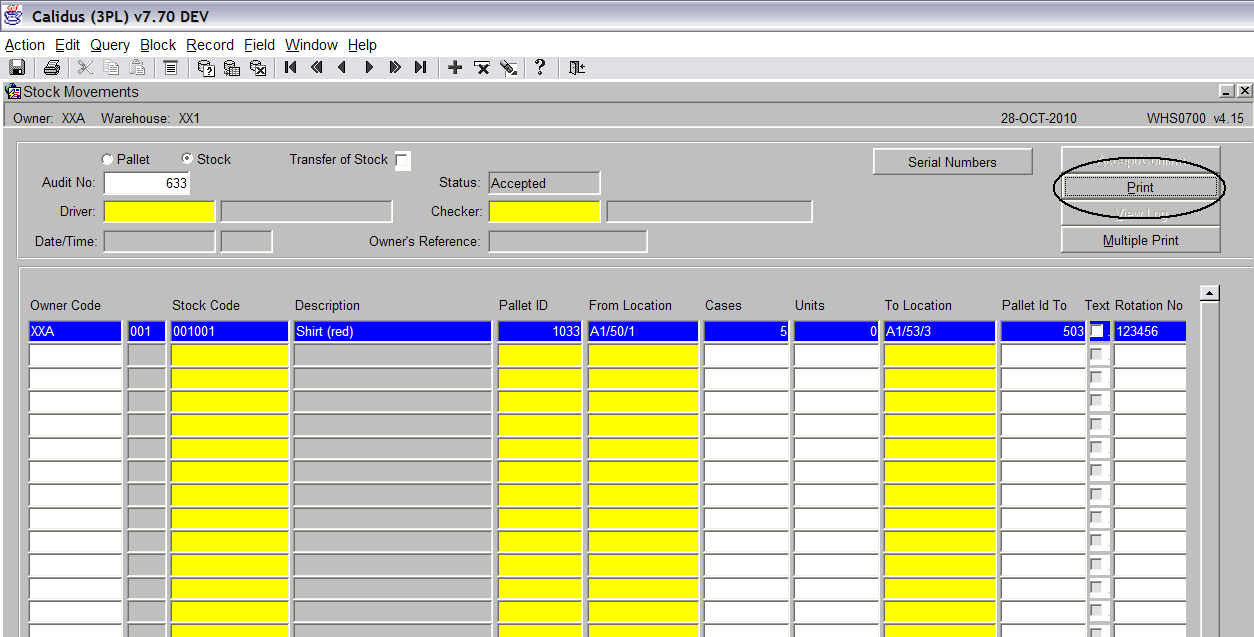
Press the ‘Print’ button (see screen shot below)
<br\>
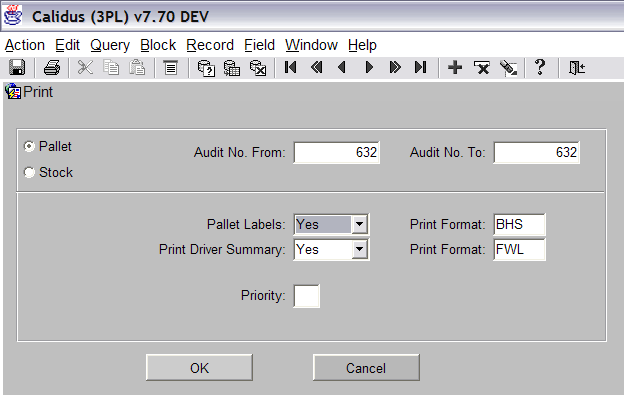
A pop up box will now be displayed.
<br\>
You can change whether you wish Pallet Labels and a Driver Summary along with the formats of the prints.
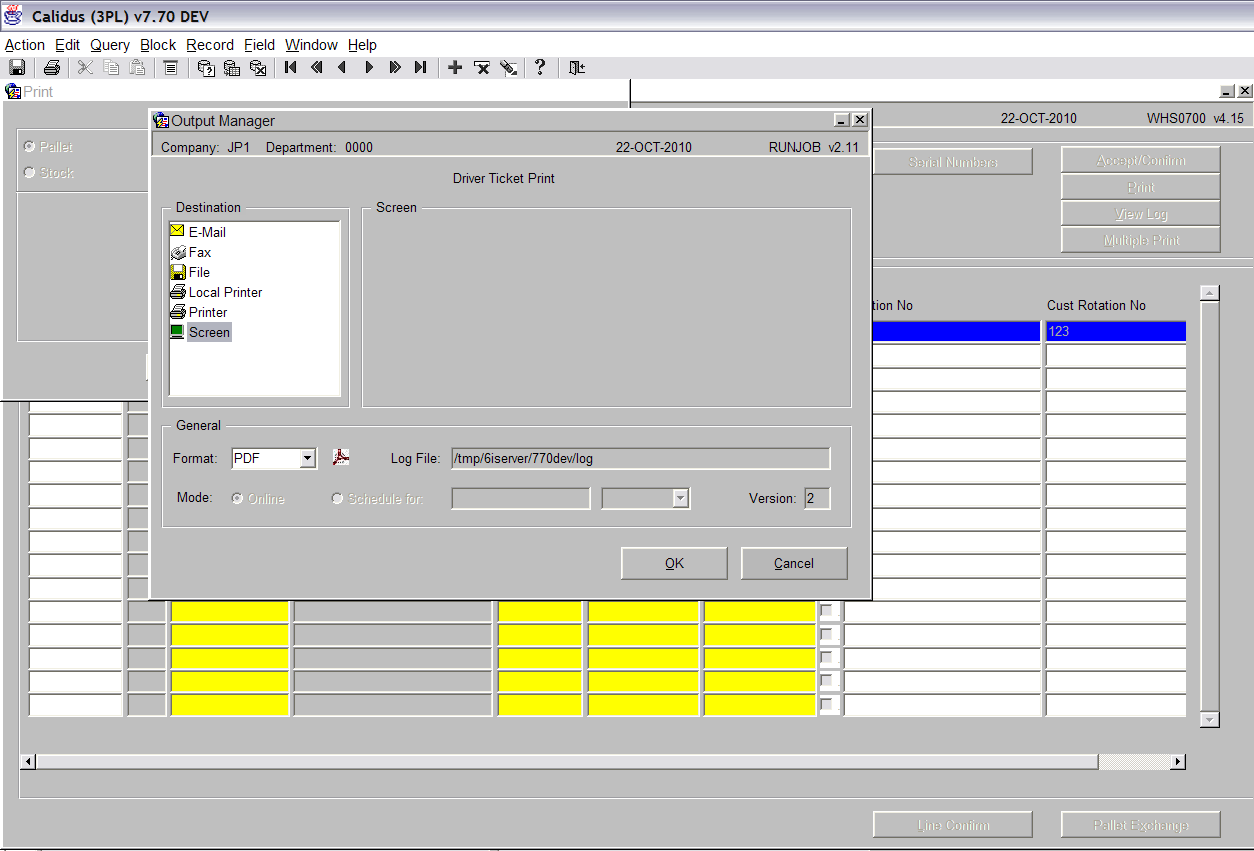
The output manager box will now be displayed. Press the screen icon and then click the OK button. <br\>
The movement report will now print.
<br\>
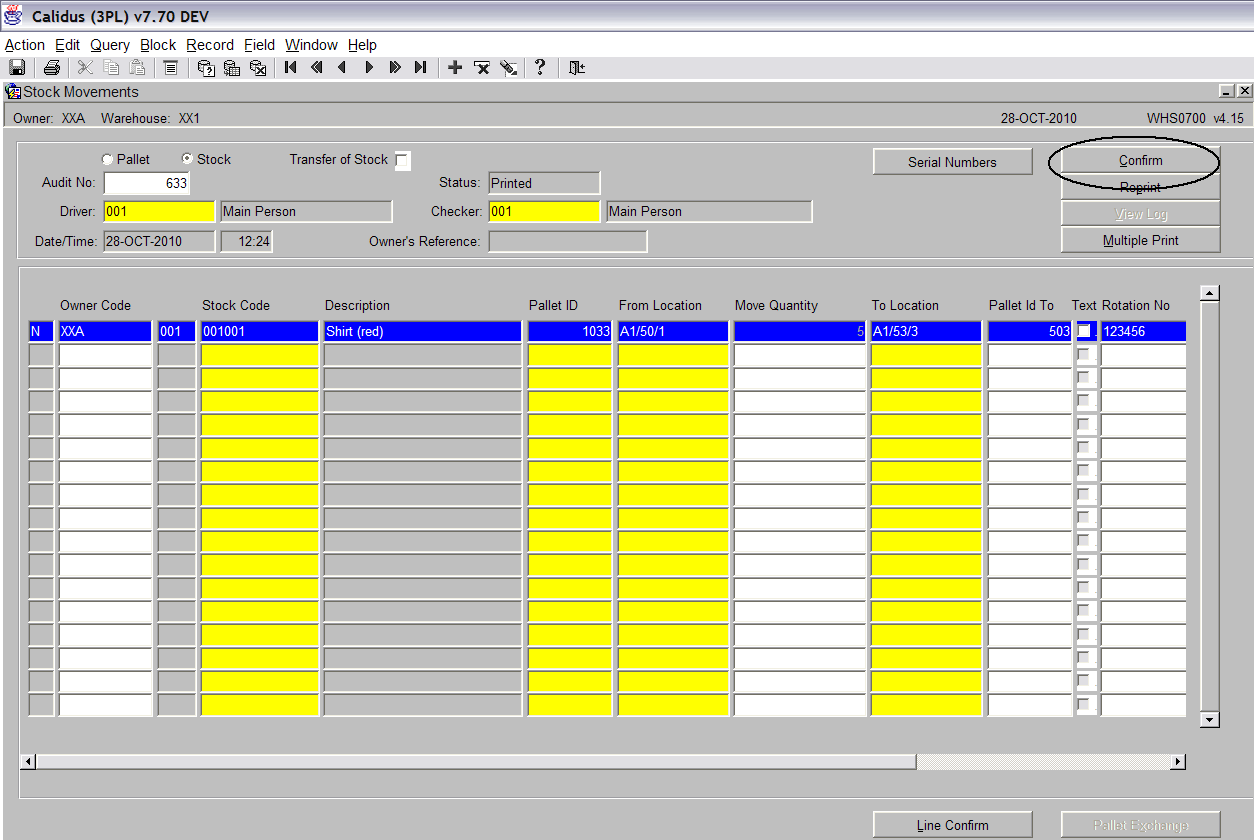
There are 3 fields that need to be completed before the movement can be confirmed.
Driver – An employee code must be entered. The list of values can be used to display all valid employees.
Checker - An employee code must be entered. The list of values can be used to display all valid employees.
Date/Time – A date and time can be manually entered or if you tab across the field, the system will default to today’s date and time.
Once all the data has been entered, press the ‘Confirm’ button to complete the movement (see screen shot below).
<br\>
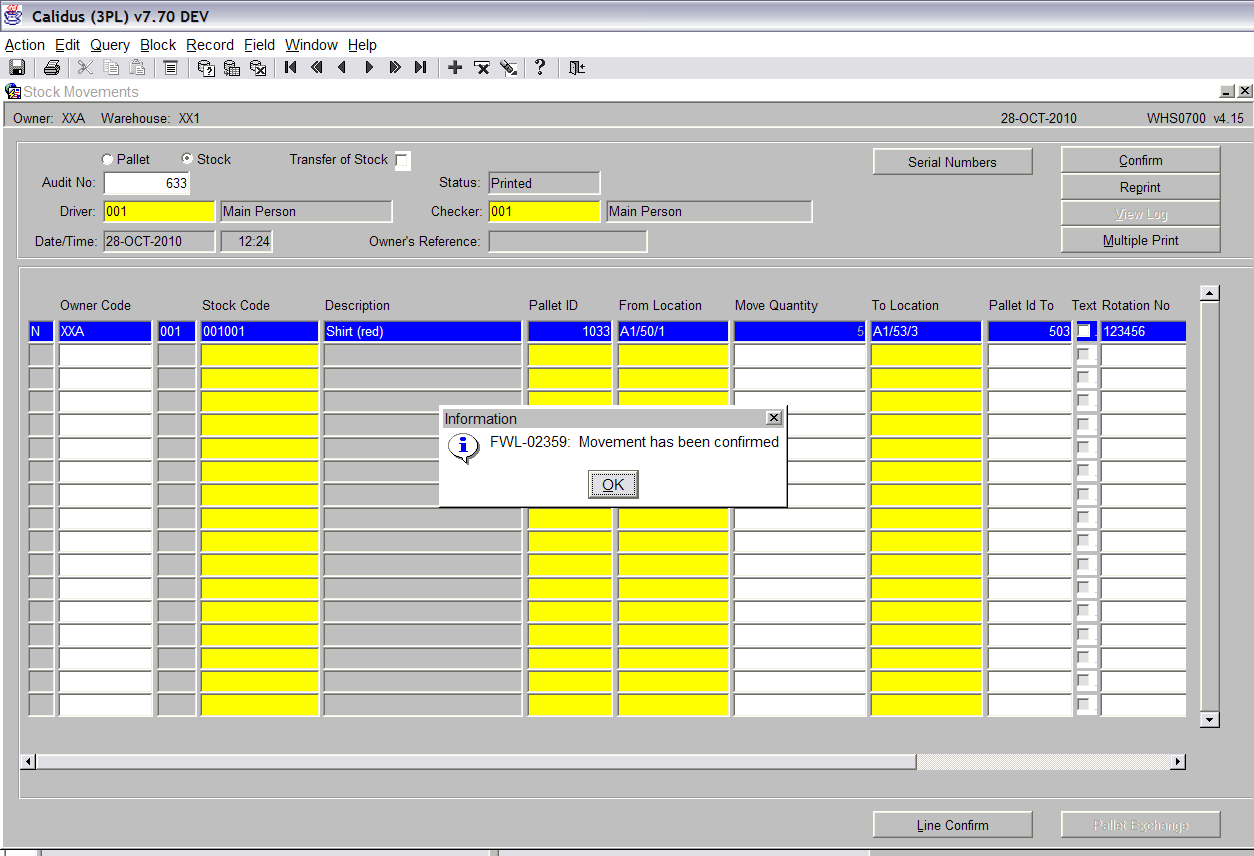
Once the movement is confirmed a message will be displayed.
<br\>
Document History
Copyright Aptean © 2008
The information contained herein is the property of Aptean and is supplied without liability for errors or omissions. No part may be reproduced or used except as authorised by contract or other written permission. The copyright and foregoing restriction on reproduction and use extend to all media in which the information may be embodied
