Customers
This screen allows you to maintain the customers within the system.
![]() Note: Typically, an external ERP or TMS system would maintain this data and send it to CALIDUS ePOD as part of the data imported into the system, for example CALIDUS TMS. This data should not require any further maintenance. However, if the external system does not pass this information in, or CALIDUS ePOD/eSERV is being run as a stand-alone system, system administrators can use this screen.
Note: Typically, an external ERP or TMS system would maintain this data and send it to CALIDUS ePOD as part of the data imported into the system, for example CALIDUS TMS. This data should not require any further maintenance. However, if the external system does not pass this information in, or CALIDUS ePOD/eSERV is being run as a stand-alone system, system administrators can use this screen.
You can view, create and edit customers.
You can filter data by:
- Customer Code.
- Customer Name.
- Postcode.
- Contact Name.
Once you have entered the criteria, click Search. The screen will display a table of all the matching data. Any plain text boxes will match data that contains what you enter as the criterion.
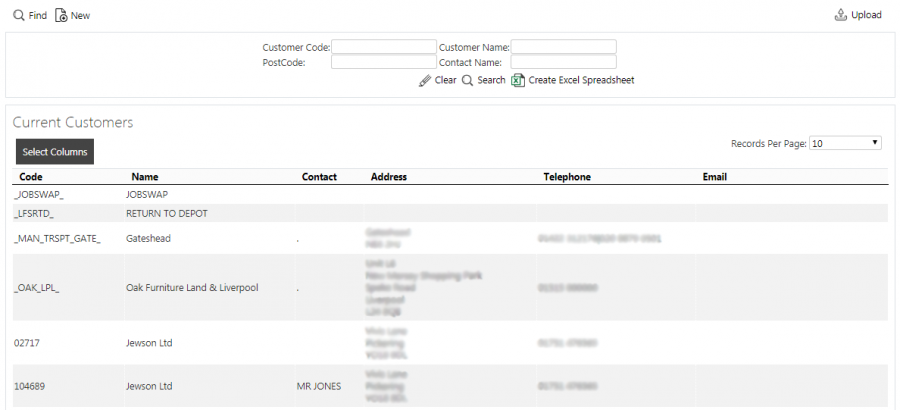
Customers Search Panel and Results table
Alternatively, if you click Create Excel Spreadsheet, the screen will export the customers data to a Microsoft Excel spreadsheet. The functionality differs per the browser you have used to access the Admin system, but the likely result is the spreadsheet file will offered for download.
The results table displays a single line per each customer found.
You can sort the table by individual columns by clicking on the column header - clicking again will reverse the sort sequence.
You can choose to hide or show almost all of the columns in the results table by using the Select Columns button on the header. The results table shows the following columns:
- Code - the customer code i.e. the account code.
- Name - the name of this customer.
- Contact - a contact at this address for this customer.
- Address - the address.
- Post Code - the post code of the address.
- Telephone - any telephone numbers.
- Email - any email addresses.
You can view jobs that have been created for the customers by clicking on the Jobs action button against the line in the table - this will take you to the Jobs screen, showing all jobs for that customer.
Uploading Customers
The screen allows upload functions - you can access these by pressing the Upload button. You can hide the upload buttons by pressing the Hide button.
The screen allows you to upload customers through a spreadsheet template file. You can get this template by clicking the Obtain Upload Template button - results differ per browser used to access the Admin system, the likely result being that the template will be offered for download.
You can then enter customers data into this template and save it there, external to the CALIDUS ePOD application. Alternatively, an external system could generate a file to upload in this format. Regardless, you can then upload this data into the system by selecting the file (using the Choose File selector on the screen), then clicking Upload Excel Spreadsheet.
The screen will indicate the success or failure of the upload in a message on the button panel at the top of the screen - you can download detailed results using the provided Download Results Spreadsheet button.
New Customers
You can create new customers by pressing the provided New button at the top of the screen.
The pop-up screen displays two tabs:
- Details - the main customer details, with address and contact information.
- Invoice - the invoice address and contact details.
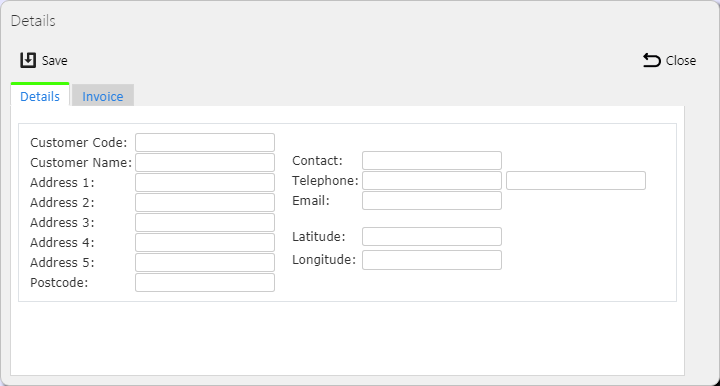
New Customer Pop-up showing Details tab
You can enter the following on the Details tab:
- Customer Code - the customer code i.e. the account code.
- Customer Name - the name of this customer.
- Contact - a contact at this address for this customer.
- Address 1-5 - the address lines.
- Postcode - the postcode.
- Telephone - multiple telephone numbers.
- Email - any email addresses, separated by the mail server's separation character.
- Latitude/Longitude - The latitude and longitude of the address, in degrees.
![]() Note: This is the core information for the customer - at least a name and some address information is required.
Note: This is the core information for the customer - at least a name and some address information is required.
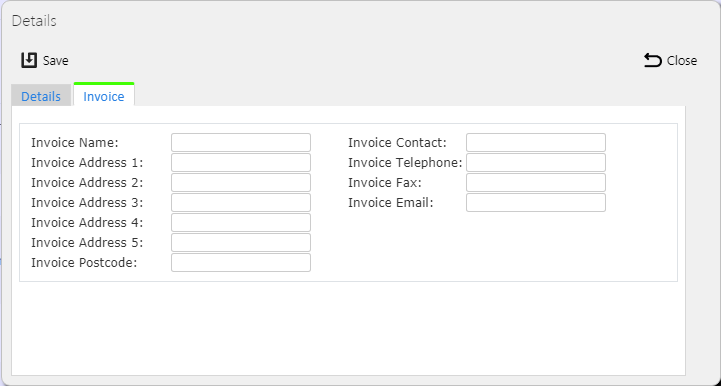
You can enter the following on the Invoice tab:
- Invoice Customer Name - the name of this customer.
- Invoice Contact - a contact at this address for this customer.
- Invoice Address 1-5 - the address lines.
- Invoice Postcode - the postcode.
- Invoice Telephone - multiple telephone numbers.
- Invoice Email - any email addresses, separated by the mail server's separation character.
![]() Note: You don't have to enter invoice address information.
Note: You don't have to enter invoice address information.
When changes are complete, you can click Save to save the changes, or Close to close the pop-up without saving the changes.
View/Edit Customers
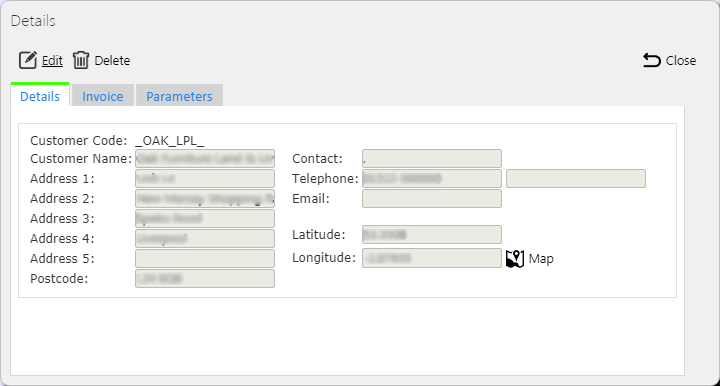
You can view and edit customers by clicking the Select button against the line in the table. The screen will display a pop-up showing all the details of the customer.
You can edit the customer by clicking the provided Edit button.
The pop-up screen displays three tabs:
- Details - the main customer details, with address and contact information.
- Invoice - the invoice address and contact details.
- Parameters - any parameters set up on your system.
The details you can change on each of these tabs is shown below.
When changes are complete, you can click Save to save the changes. If you don't want to save your changes, you can click Cancel to stop editing, or Close to close the pop-up without saving the changes.
You can click the Delete button to delete the customer - the screen will ask you to confirm before the customer is deleted. ![]() Note: You can't delete a customer if that customer is used on jobs, whether they are complete or not. In this case, the screen will not show the Delete button.
Note: You can't delete a customer if that customer is used on jobs, whether they are complete or not. In this case, the screen will not show the Delete button.
Details Tab
You can edit the following on the Details tab:
- Customer Name - the name of this customer.
- Contact - a contact at this address for this customer.
- Address 1-5 - the address lines.
- Postcode - the postcode.
- Telephone - multiple telephone numbers.
- Email - any email addresses, separated by the mail server's separation character.
- Latitude/Longitude - The Latitude and Longitude of the address, in degrees.
Map Pop-up
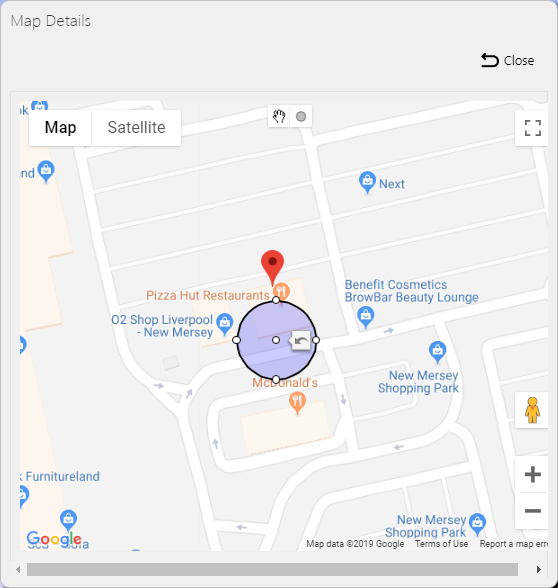
You can click a Map button on the Details tab to show the location of the address.
![]() Note: If you have entered a latitude and longitude, this is used on the device for direct navigation in preference to the address itself, as this provided latitude and longitude is expected to be more accurate.
Note: If you have entered a latitude and longitude, this is used on the device for direct navigation in preference to the address itself, as this provided latitude and longitude is expected to be more accurate.
If you are editing the customer, you can zoom in and out of the map and drag the map marker around to identify the exact location of the address, if necessary. The screen will store the latitude and longitude of the marker in the customer address.
Any geofence borders are displayed on the map along with the location of the address.
If you are editing the customer, you will be able to use a drawing toolbar on the top of the map to draw new geofences.
The toolbar shows the following:
- a hand - you can use this to drag map markers and geofences to different positions, and to resize geofences.
- a circle - you can use this to draw new geofence borders.
The circles are coloured according to the use to which the geofence will be put:
- Red - an outbound geofence, used when the driver is departing the location.
- Green - an inbound geofence, used when the driver is departing the location.
- Blue - inbound and outbound, used both when the driver is arriving at the location or leaving it after the job is finished..
When you draw a new geofence, this is considered to be a geofence that will be used both when the driver is arriving at the location or leaving it after the job is finished.
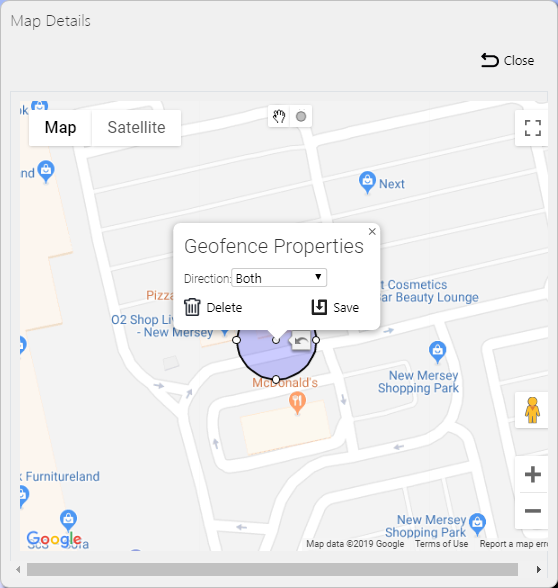
You can click any geofence to change it - the map will display a pop-up window.
The window shows a drop-down list of the direction, and you can choose from Inbound, Outbound and Both.
You can save changes to this geofence using the Save button and you can delete the geofence by using the Delete button. Note that this saves you changes while in the map, but you still need to save the customer to commit those changes.
![]() Note: This geofences functionality is still in development at this time.
Note: This geofences functionality is still in development at this time.
Invoice Tab
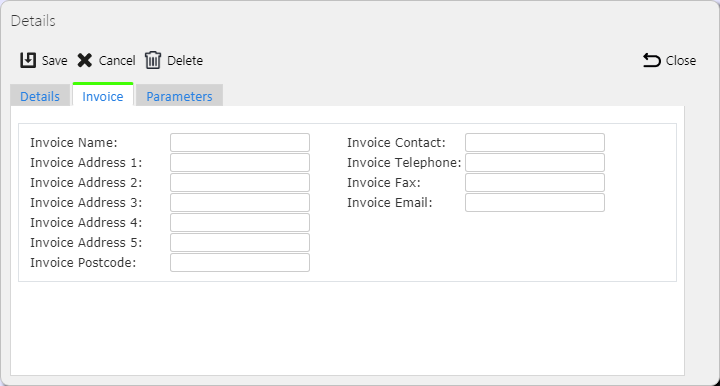
View/Edit Customer Invoice Address
You can enter the following on the Invoice tab:
- Invoice Customer Name - the name of this customer.
- Invoice Contact - a contact at this address for this customer.
- Invoice Address 1-5 - the address lines.
- Invoice Postcode - the postcode.
- Invoice Telephone - multiple telephone numbers.
- Invoice Email - any email addresses, separated by the mail server's separation character.
![]() Note: You don't have to enter invoice address information.
Note: You don't have to enter invoice address information.
The screen will save any changes you make here when the customer is saved.
Parameters Tab
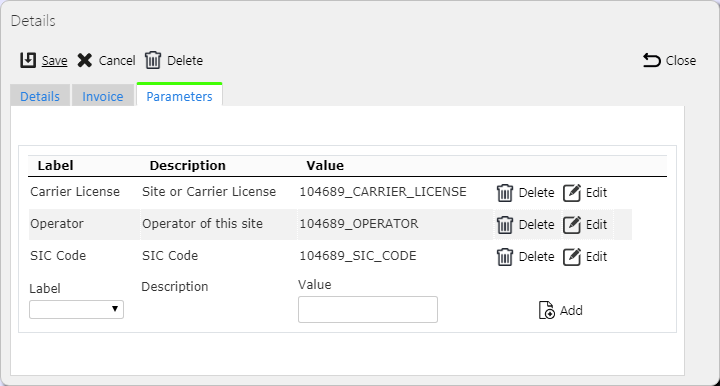
You can use the Parameters tab to enter any additional information against the customer that your system has been configured for.
All entered parameters will be shown in a list on the tab when you click on it.
If you are editing the customer, each parameter will have some buttons for editing and deleting existing parameters, and there will be a line under the table to enter new parameters.
You can enter new parameters by selecting the parameter from the drop-down list. As mentioned, your system administrators are in control of what appears in this list. This list will show only parameters that are valid for customers and that haven't been entered yet against the customer (or are allowed to be entered multiple times).
When you have selected a parameter, the screen will display the description next to it - you can hover your pointer over this description to get a longer description of what this may be used for.
You enter a value in the box provided. The screen won't validate this for any particular rule - any text can be entered.
Once you have entered your text, you can add the parameter by clicking the Add button.
You can edit an existing parameter by clicking the Edit button on the parameter's line. The screen will enable the value, the only thing that you can change.
You can save any changes that you make with the Update button that is shown, or cancel your changes with the Cancel button.
You can delete an existing parameter value by clicking the Delete button against the value in the parameters table - you will be asked to confirm before the value is deleted.
![]() Note: When you add or edit parameters on this screen, the changes will be saved when you click Add or Update - there is no need to save the customer from the header if all you are changing are some parameter values.
Note: When you add or edit parameters on this screen, the changes will be saved when you click Add or Update - there is no need to save the customer from the header if all you are changing are some parameter values.
