Development - VSCode
This page covers initial setup of Titanium and Visual Studio Code.
VS Code and Android Emulator

Initial Installation
![]() Note: If you already have Titanium and Appcelerator Studio installed, you can skip this step.
Note: If you already have Titanium and Appcelerator Studio installed, you can skip this step.
![]() Note: Not tested
Note: Not tested
Pre-requisites
See https://titaniumsdk.com/guide/Titanium_SDK/Titanium_SDK_Getting_Started/Prerequisites/
- Android Studio – API versions vary depending on SDK and minimum/target platforms. See https://titaniumsdk.com/guide/Titanium_SDK/Titanium_SDK_Getting_Started/Installation_and_Configuration/Installing_Platform_SDKs/Installing_the_Android_SDK.html
- Minimum is:
- API’s 16,23,25,29
- SDK Tools 28 (at least 25)
- SDK Build tools 23
- Emulators – any decent target emulator. Pixel 3 seems good.
- Java JDK – 8 or 10 recommended for all bar the latest SDK 10.1, which requires 11 minimum
- Node.js - v12 (works for TiSDK 7.3.1 up)
- Gperf possibly also required.
Versions required are subject to the Titanium SDK in use – see compatibility matrix on standard Titanium documentation (above).
Titanium Install
- To install Titanium –
- npm install titanium
- TiSDK
- Use ti sdk install {version}
- Minimum required 7.3.1.GA
- Modules
- If not already present, install from dropping in from EPOD Product folder.
- Source: \\DGA1FS01OBS\Projects\Product\EPOD\_Development\Android Modules
- Destination: C:\ProgramData\Titanium\modules\
- If not already present, install from dropping in from EPOD Product folder.
VSCode Installation and Configuration
Installation and setup steps are:
- Install latest titanium (from command line like you already did)
- Download VSCode and install
- Start VSCode
- Use judgement when setting up Intellicode/Intellisense and a few other things on install and first start.
- Click Extensions in left side
- Install Titanium by TiDev.
- Restart VS Code
- Click Titanium button on left side.
- In Help and Feedback, click Updates.
- Update whatever it asks for, including Alloy. I had to upgrade to Nodejsv12 from 10, including all build tools (3Gb used), Titanium SDK 10.1 and Alloy).
- Restart VS Code
- If prompting, click Install Tooling and install anything it wants.
- Restart VSCode.
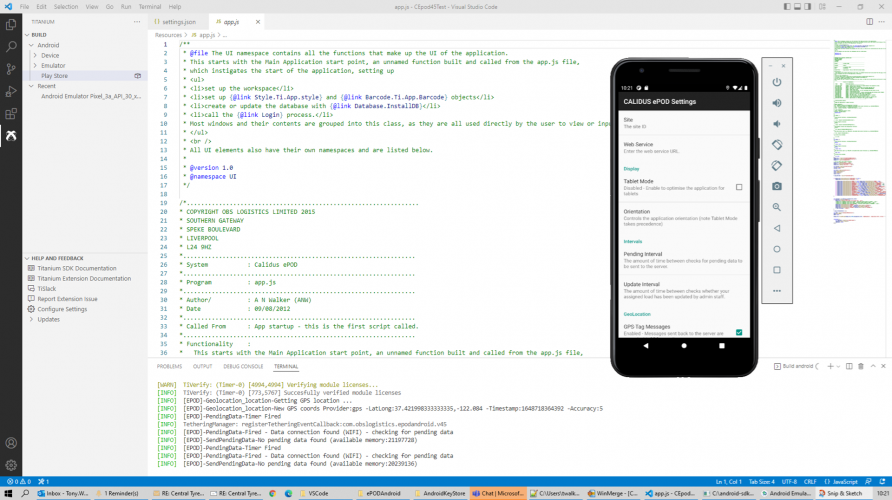
The Titanium panel should now show a lot like the screenshot, with build options. Or it will show Open Project/Create App/CreateModule if you haven’t got anything open. Or if you have, may be empty – click File/New Window and check again..
VS Code Operation
Creating/Opening a Project (Stand-alone/New)
- Create new android project with Create App (if you can’t get to that, start a New Window from the File menu).
- Select Android app
- I named it CEpod45Test
- Module name “com.obslogistics.EPODAndroid.v45”
- Selected a directory - I put this in a new VSCode subdirectory directly on my PC, dodging the OneDrive Documents area e.g. C:\Users\twalker\Documents\VSCode.
- Project is then created
- Exit VSCode
- IMPORTANT: Make a copy of this project to refer back to later
- Copied contents of our original EPODAndroid repository into the created C:\Users\twalker\Documents\VSCode\CEpod45Test folder.
- Start VSCode
- Use Explorer to find .vscode/settings.json
- Edit that to not exclude i18n, Platform, Resources in all 3 sections and save.
- Edit tiapp.xml
- Remove property name="appc-app-id" (not sure this is technically required, but the next step absolutely is, or the packager will tell you you can’t package an Appcelerator Studio app with VSCode).
- Replace guid with the guid of the generated project you saved earlier.
At this point you should be able to see and edit all code in the project explorer.
A faster (untested) mechanism of opening an existing project:
- Create a new workspace
- Open the EPODAndroid folder you desire (preferably from the Git folder if using source control).
- Edit tiapp.xml
- Remove property name="appc-app-id".
- Remove guid.
- Attempt build - the compiler will suggest guids for your use.
- Edit tiapp.xml
- add one of the guid in guid tags.
Creating project from git
- Create new android project with Create App (if you can’t get to that, start a New Window from the File menu).
- Select Android app
- Named it e.g. CEpod45Test
- Module name "com.obslogistics.EPODAndroid.v45"
- Selected a directory - I put this in a new VSCode subdirectory directly on my PC, dodging the OneDrive Documents area e.g. C:\Users\twalker\Documents\VSCode.
- Project is then created
- Menu: File, New Window
- Panel: Source Control, Open Folder
- Using the browser, you must open the ePODAndroid subfolder, not the folders above. In my case this was:
- C:\Users\twalker\Documents\GitHub\cepod-EPODAndroidV4.5\ePODAndroid
- File: Save Workspace As: - saved workspace into the top-level git folder so I can open this without faffing again.
- Exit VSCode (it works without doing this I think, but better safe than sorry).
- Used WinMerge to:
- Compare test project and new ePODAdnroid project
- copy all only left to right (i.e. copied unique contents of the test project to our new ePODAndroid project.
- Start VSCode
- Use Explorer to find .vscode/settings.json
- Edit that to not exclude i18n, Platform, Resources in all 3 sections and save.
- Edit tiapp.xml
- Remove property name="appc-app-id".
- Remove property name="guid".
• Replace guid with the guid of the generated project you saved earlier or build then use a new guid. This results in a repository with lots of additions and I can build the project.
I can also confirm that you can omit a lot of the stuff – for example, I omitted all of the new splash images and iOS stuff, and just left the new Alloy app folder (just in case) I have 18 changes ready to put back into git, which I think enables this working in VSCode:
- .gitignore
- keystore
- keystore.safe
- README
- tiapp.xml – my new changes
- .vscode
- extensions.json – VSCode file
- settings.json – VSCode file
- app - folder
- alloy.js
- config,json
- README
- Index.js
- App.tss
- Index.tss
- Index.xml
- build
- .gitignore
- plugins
- Deepclean.js
- Plugin.py
- Alloy.js
![]() Note: All of these might not be required and may be removed - if you try this and discover that this works, update this documentation.
Note: All of these might not be required and may be removed - if you try this and discover that this works, update this documentation.
Git Integration
Available from the Source Control panel.
Initially this is used to open the folder.
After open, this shows the changes by default.
Left click on an item to show differences
Right click to open the changed file, discard, stage or add to gitignore
You can multi-select to add to staged changes.
You can add the commit message to the top of the Source Control panel
Bottom left of the screen shows the current branch with a button to synchronise changes
Clicking the branch name offers a drop-down at the top of the IDE and allows:
- Selection of branches
- Creation of new branch (local)
On the Explorer dock panel, the Timeline now shows the commits to the selected file in the repository. There are right-click options there to compare (previous, selected commit, etc) – similar to the old Titanium source control history checks.
Committing changes to local Git
- Right-click, Stage. Can multi-select.
- Enter description in Message box at top.
- Click Tick to commit (or use ... menu on top right).
Pushing changes to Remote (DevOps)
- ... menu, Pull/Push, Push.
Once you have pushed, the commit is visible in the history of the branch on Devops.
![]() Note: If this is the first time you have pushed, pulled or fetched the repository in VSCode, a security popup will appear, asking for credentials. Use the credentials you used when cloning the repository initially.
Note: If this is the first time you have pushed, pulled or fetched the repository in VSCode, a security popup will appear, asking for credentials. Use the credentials you used when cloning the repository initially.
If you can't remember those, follow:
- Go to dev.azure.com/Aptean, Repos, cepo-EPODAndroidV4.5
- Click Clone
- Click Generate Git Credentials
- Use the generated user and password for the security login
![]() Note: When setting up VSCode for the first time, it will ask whether the repository should be regularly fetched. If enabled this will regularly fetch any committed changes. This is your preference.
Note: When setting up VSCode for the first time, it will ask whether the repository should be regularly fetched. If enabled this will regularly fetch any committed changes. This is your preference.
Fetching Local or Pulling Remote
- ... menu, Pull/Push
- Fetch to fetch changes in local repository
- Pull to pull most recent changes to remote branch
Creating a new Branch:
- Click Branch name on bottom of VSCode
- Select "Create new branch from" from popup.
- Enter new branch name
- When complete, click Publish Branch to publish to Devops.
Switching Branches:
- Click Branch name on bottom of VSCode
- Select branch to switch to from popup.
Run from VSCode on Device or Emulator
To run as Debug (assuming you have an emulator set up in Android Studio:
- Click Titanium.
- Click the Play button
- Select the emulator you have (there may be another step here initially, but it doesn’t do it on subsequent runs) or connected device.
- It builds and deploys the app – I have no idea what keystore it used, but quite clearly different to what happens in Build
The terminal logs the EPOD app debug statement just like Titanium Studio does.
Debugging application
- Either Debug/Play button on bottom status bar or "Run and Debug" panel of the sidebar.
- On first attempt, you must create a new launch configuration.
- Choose to create a configuration for the project or workspace - select the project - this will create a "launch.json" file
- This will then change the Debug/Play button.
- When you next press the Debug/Play button, you must select the target - select Android.
- Select a connected android device or emulator.
- Select the specific target from the list of emulators or devices connected. VSCode will begin he compilation and start the emulator if selected. It will switch to the Run and Debug panel and show debug actions at the top of the screen.
Actions available from the top of the screen
- Start/Continue (F5) or Pause (F6)
- Step Over (F10)
- Step Into (F11)
- Step Out (SHIFT-F11)
- Restart (CTRL-SHIFT-F5)
- Stop (SHIFT-F5)
Displayed in Run and Debug sidebar panel:
- Variables
- Watch
- Call stack
- Breakpoints
- Breakpoints can be set in the code by clicking to the left of the line number in the source file.
- Breakpoints can be enabled and disabled here.
When the code is compiled and running, the debug session will automatically stop at the first line of code - press the Start/Continue button to start the app properly on the device.
The terminal will display the debug messages from the application. This will automatically be filtered to just messages logged by the application and Titanium.
![]() Note: Currently, none of the breakpoints seem to work. Suggested mechanism:
Note: Currently, none of the breakpoints seem to work. Suggested mechanism:
- Set break on "All Exceptions".
- Add a line in the source code you want to debug as follows:
try{BreakPoint('#@# REMOVE ME');} catch(e){}
- When the application hits this point it will break and open the source code read only.
- Double-click the tab to keep this open.
- Add your breakpoints to this file - these will be obeyed and will persist between debug runs.
Packaging
![]() Note: VSCode will not use a keystore from another location - it complains that the keystore does not exist.
Note: VSCode will not use a keystore from another location - it complains that the keystore does not exist.
- Create a new keystore. Choose to store locally. It will be created as “keystore” at the top level or your project. I suggest storing in a different location, and then this keystore can be used for any project in the workspace. Details:
- CN=Tony Walker, OU=Liverpool, O=OBS Logistics Ltd, L=Liverpool, ST=Merseyside, C=GB
- Password: Liverpool123, Alias: calidus-epod
This should be identical to the keystore used for all builds of EPOD.
However, to ensure that this is identical, you should replace the generated keystore with the EPOD Project keystore, as follows:
- Use windows explorer to rename that keystore file safely
- Copy KeyStore from projects drive to your projects folder.
- Rename KeyStore to keystore.
- On Titanium panel, right-click Play Store, select Package
- Select area to dist to (will default to a dist subfolder of the project)
- Select keystore – should be able to say “use last one”.
- Should then build and package correctly to dist folder.
- You can then use saved settings to build the project.
Managing Titanium
Use the command line to manage Titanium, specifically SDKs and mobile modules.
Modules and SDKs are stored in C:\ProgramData\Titanium
General CLI information
ti –help

Titanium Command-Line Interface, CLI version 5.4.1, Titanium SDK version 9.2.0.GA
Copyright (c) 2012-2020, Appcelerator, Inc.  All Rights Reserved.

Please report bugs to https://github.com/appcelerator/titanium_mobile/issues

Usage: titanium <command> [options]

Commands:
  build     builds a project
  clean     removes previous build directories
  config    get and set config options
  create    creates a new project
  help      displays this help screen
  info      display development environment information
  module    displays installed Titanium modules
  plugin    displays installed Titanium CLI plugins
  project   get and set tiapp.xml settings
  sdk       manages installed Titanium SDKs
  setup     sets up the Titanium CLI

Global Flags:
 --no-banner          disable Titanium version banner
  --no-colors          disable colors
  --no-progress-bars   disable progress bars
  --no-prompt          disable interactive prompting
  -h, --help           displays help
  -q, --quiet          suppress all output
  -v, --version        displays the current version

Global Options:
  --config <json>        serialized JSON string to mix into CLI config
  --config-file <file>   path to CLI config file  [default:
                         C:\Users\twalker\.titanium\config.json]
  -s, --sdk <version>    Titanium SDK version to use to bootstrap SDK-level commands and parse the
                         tiapp.xml; actual Titanium SDK used determined by <sdk-version> in the
                         tiapp.xml  [default: latest]
Managing TiSDK:
ti sdk --help
Manages installed Titanium SDKs.
SDK Subcommands:
  install     download the latest Titanium SDK or a specific version
  list        print a list of installed SDK versions
  select      used to select which installed Titanium SDK is the selected SDK
  uninstall   uninstall a specific Titanium SDK version
Managing installed modules:
ti module list