PDA Job List
This screen shows all the jobs on the Load (worklist) that has been assigned to you.
If the system has been configured for Metric Entry, and a Load is started for the first time on this device, the device will prompt for the Mileage for the start of the load. Mileage will also be prompted when the last job on the load is complete, requesting that this is entered only when you have returned to base.


 Consolidated Jobs


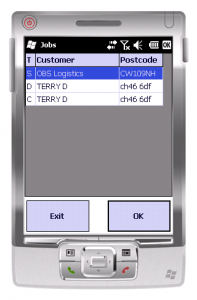
The screen displays a grid containing:
- Job Status ( through background or border colour)
- Job ID or Code
- Job Type, one of:
- S - Service
- C - Collection
- D - Delivery
- Planned Date/Time
- Service Level
- Customer Name
- Postcode
- Job SO Number
- Customer Reference Number
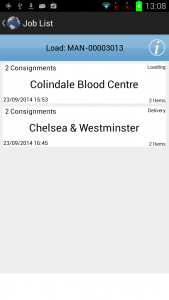
- Container and Product Counts (for Collections/Deliveries)
- Priority
The layout of this grid can be controlled through ![]() configuration in the Admin system or
configuration in the Admin system or ![]() the style chosen in the PDA client configuration screen.
the style chosen in the PDA client configuration screen.
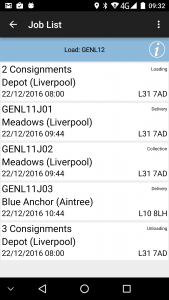
If the jobs have been consolidated together for one location (for example, all Loading jobs at the depot will be consolidated together for loading as one job), these will appear as 1 row on this job list, showing that there are multiple consignments for actioning. The details of the individual jobs can be seen in the JOb Details screen, following.
Depending on the system style chosen, the screen may display the status of the jobs on the load through a coloured outline, as follows:
|
This status is displayed prominently in the Job Details screen.
The system will be configured to display the most appropriate job reference on this screen (and throughout the whole application).
The jobs are displayed in the sequence in which they should be completed, with the first job selected. However, if the system is configured appropriately, the jobs can be completed in any sequence by clicking the line of the job you want to complete (![]() and then clicking the OK button). You will then be taken to the Job Details page.
and then clicking the OK button). You will then be taken to the Job Details page.
You can also long-press against the line for some options from a pop-up menu:
|
Clicking ![]() Exit or using the
Exit or using the ![]() Back button here will exit you from the CALIDUS ePOD/eSERV Client application.
Back button here will exit you from the CALIDUS ePOD/eSERV Client application.
The Menu button can be used here to allow the following options:
There are also some bug-reporting options available on this pop-up menu, which you may be asked to use from time to time by the support staff:
|