Drivers
This allows a record to be kept of each driver in the system. Typically, this allows reports to show which drivers are assigned to which trips.
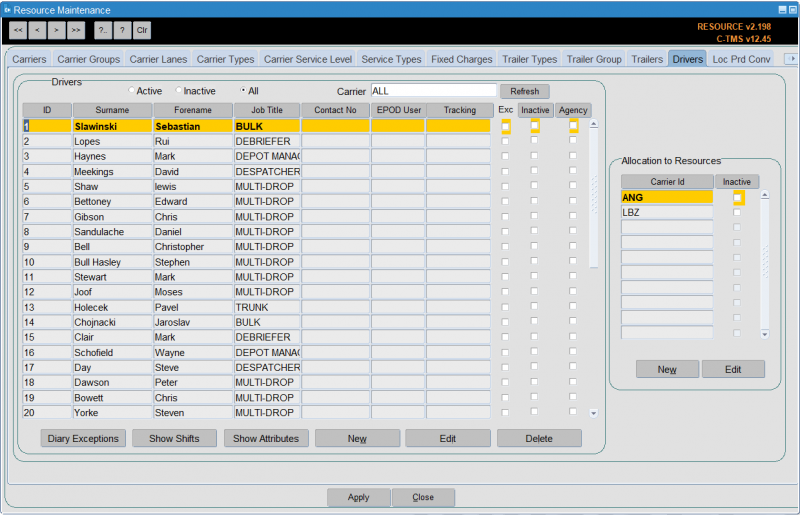
In much the same way as the "Trailers" tab enables specific trailer resources to be set up, the "Drivers" tab enables the actual drivers to be set up so that they can be allocated to trips with vehicles.
Isotrak's Manifest system, used by some client's transport personnel, allows drivers to be assigned to trips. Isotrak updates C-TMS with this information as trips are assigned to and accepted by drivers.
There are several actions available through buttons on the bottom of the screen:
- Diary Exceptions - see section below.
- Show Shifts - see section below.
- Show Attributes - see section below.
- New will allow a new activity to be entered for the current resource.
- Edit will allow editing of a record. When a resource is marked as unavailable, on holiday, absent or off the road if it has been allocated to any subsequent activity a message will be displayed warning the user they may need to take action to remove resources from trips etc.
- Delete will display a confirmation message and once confirmed will remove the record
- Apply allows you to save any changes you have made.
- Close will save any changes and return you to the main resource diary page.
Adding a New Driver
New drivers can be entered using the New button and existing drivers either edited or inactivated using the Edit button.
From the Drivers box click New:

Enter the "Id" this is a free text field and would normally be the drivers payroll number, "Job Title" which is a system value and will generally be "DRIVER" enter D and return, "Forename" and "Surname" are both free text fields. A driver can be set to indicate that they have access to a Tom Tom or WEBFLEET device.
You can allocate to resources (carriers) here, as well as entering attributes for the driver - both of these processes are covered in sections below.
Click Save and the system will confirm the driver has been saved, but needs to be linked to a carrier. Click OK. You can then enter a subsequent driver or click Cancel to return to the main form.
Allocate to Resources
To allocate to resources, select the driver and from the Allocation to Resources section, click New. Allocate a carrier id to the driver. This will be the carrier id of the depot where the driver is based.
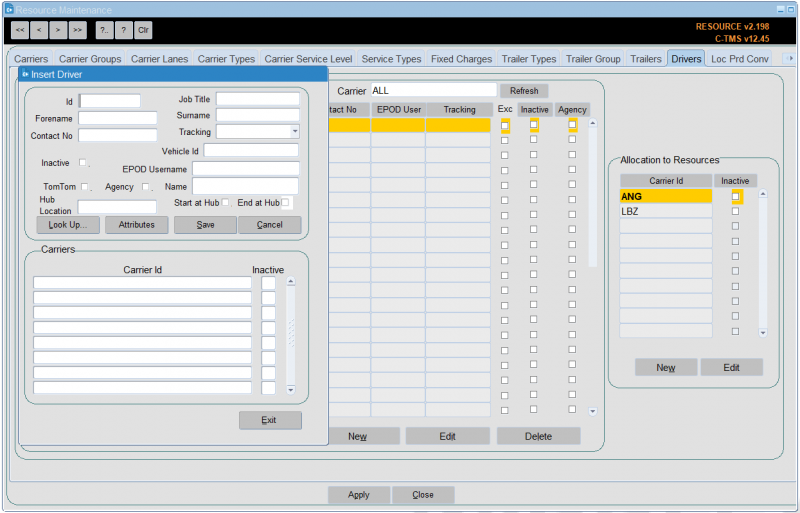
Click Save. The driver is now allocated to the carrier id. The driver will now be available to assign to trips using the chosen carrier.
Note that you can also specify the following here:
- Hub Location - a location where the driver is based, for example, another depot, home, etc. CTMS will use this location in preference to the carrier hub location when creating trips.
- Vehicle ID - where the driver has a default vehicle, you may specify this here. Note that this affects ONLY the CTL Call Logging screen, not core CTMS.
Making a Driver Inactive
If the driver id is no longer required you are able to make it inactive. This follows the same process as making a trailer id inactive.
Using the search buttons find the driver you want to make inactive and click Edit from the Allocation to Resources box.
Click in the "Inactive" check box, so a tick appears.
Click Save. The driver id is now inactive.
Driver Attributes
Additionally, more detailed driver attributes can be recorded. Pressing the Attributes button displays a popup window in which the specific attributes can be entered:
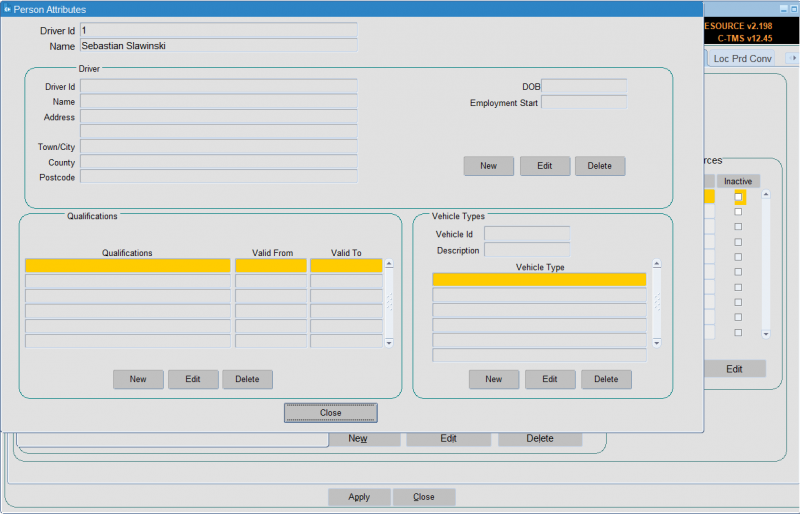
Each section of the screen has three buttons:
- New – See Below
- Edit - See Below
- Delete – A message will be displayed asking the user to confirm the deletion, once confirmation is received the current record will be removed from the database.
A Close button is included in the bottom of the screen, when pressed if there are any un-committed changes a message will be displayed to ask the user to Save or abandon the changes before the screen is closed.
New/Edit
The New or Edit buttons are pressed a popup window will be displayed to allow creation or updating of a record.
Driver Details
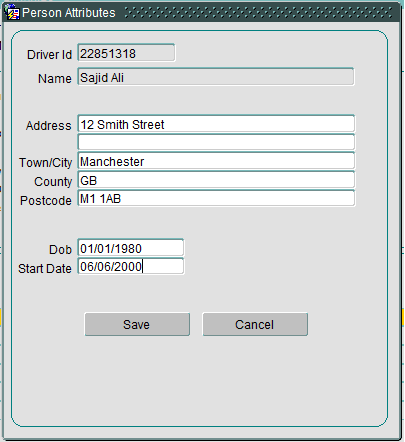
The address fields are free format text and the DOB and start date will be date values.
Qualifications
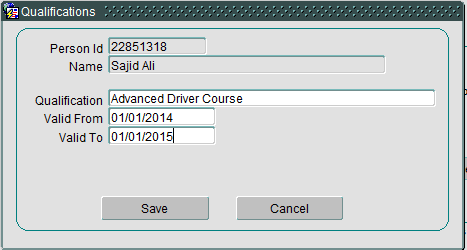
The Qualification field is free format text and the "Valid From" and "Valid To" are both Date fields.
Vehicle Types
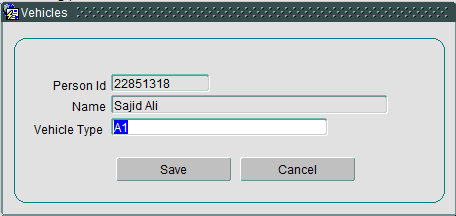
The Vehicle type will be selected from a list of values from the Trailer Type master data.
In all cases two buttons are included
- OK – validate and commit changes then close the popup.
- Cancel – display a conformation message if there are uncommitted changes, once confirmation is received changes will be rolled back and the popup window closed.
These driver attributes can also be directly accessed for view and edit from the main Drivers tab using the Show Attributes button at the bottom of the screen.
Diary Exceptions
The Diary Exception button displays a popup window showing the activity a current resource has been allocated to, along with any diary exceptions added for that driver, such as holidays, sickness, etc.
The data will be displayed in descending date and will be display only when first opened:
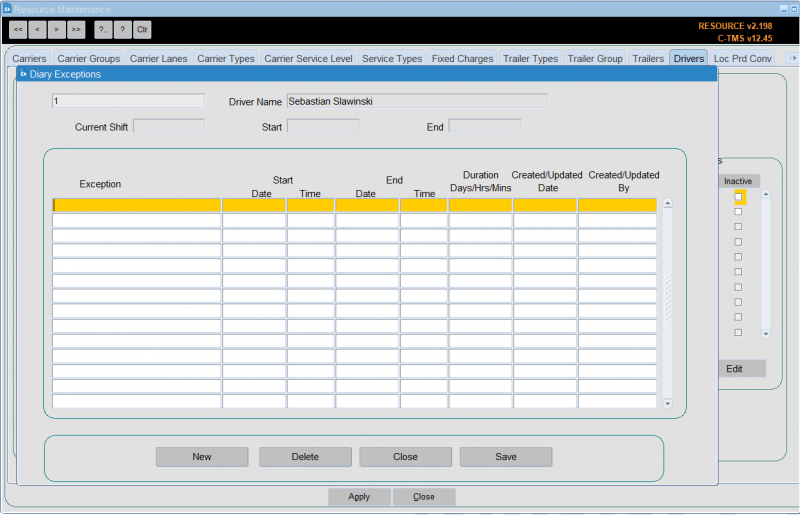
There are four buttons on the screen:
- New will allow a new activity to be entered for the current resource.
- Edit will allow editing of a record. When a resource is marked as unavailable, on holiday, absent or off the road if it has been allocated to any subsequent activity a message will be displayed warning the user they may need to take action to remove resources from trips etc.
- Delete will display a confirmation message and once confirmed will remove the record
- Close will save any changes and return you to the main resource diary page.
Note that the exceptions screen will be used to setup manual exceptions to the driver’s shift availability, for example, the driver is unavailable for transport work while attending a training session.
To create a new record press the New button and enter the reason for the exception. Then enter the start and end date and time. The duration is calculated automatically.
Press the Save button to commit the record to the database. To delete a record press the Delete button.
![]() Note: Exceptions records created by planned trip activity related to the vehicle cannot be deleted.
Note: Exceptions records created by planned trip activity related to the vehicle cannot be deleted.
Pressing the Close button will return you to the main screen.
View Shifts
You can view drivers shifts from here.
The Show Shifts button will display a new popup window to display the drivers shift patterns:
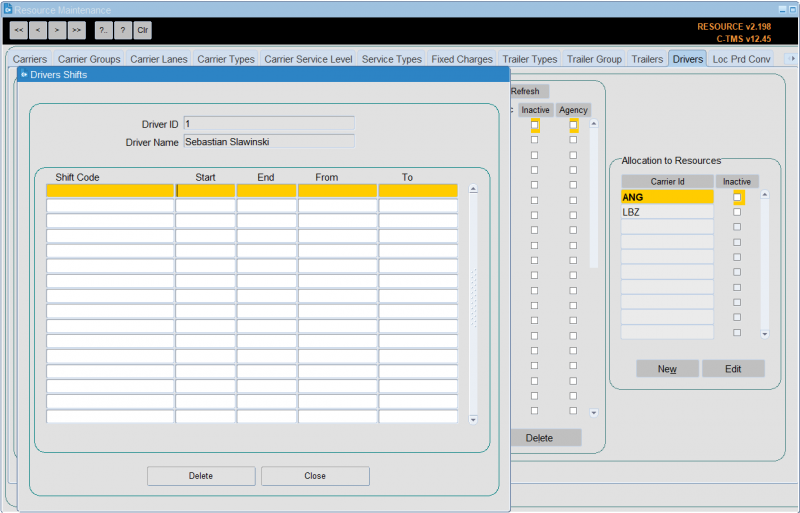
All data is display only.
The following actions are available from the buttons on the bottom of the screen:
- The Close button will return you to the main screen.
- The Delete button will display a confirmation message to confirm the delete. Once deletion is confirmed the record will be removed.
This data is related to the "Shift Patterns" data which is maintained in the "Business Data Maintenance" screen. This also provides functionality to generate shifts against the drivers. Further information can be found in the user guide covering the Business Data Maintenance screen.
Imports
Drivers (and associated reference data) may also be imported through Imports: