Scheduling Engine - Network Schedule
This guide is intended to show the most complicated use of the Network scheduling engine, based around a multi-legged healthcare logistics provider.
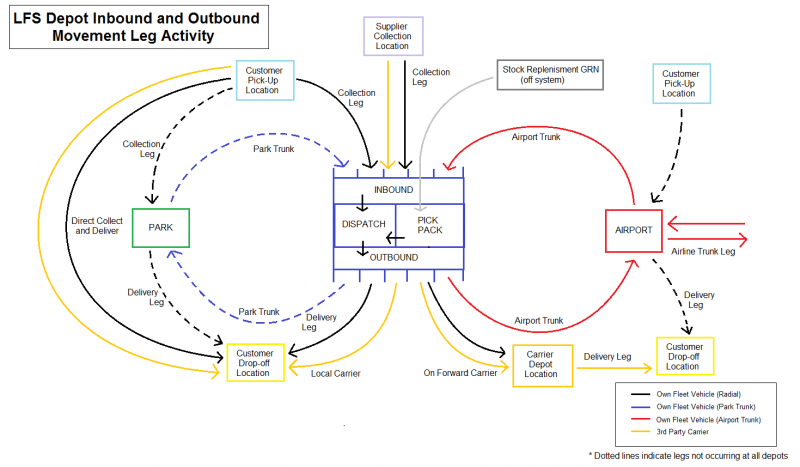
Overview of Network
Inbound
Bulk Collection Run
(Orders collected directly from supplier)
Airport Pick-Up Run
(Orders cross-docked in from another RDC via airport)
Local Radial Run
(Orders requested to be picked up locally)
Park Trunk Run
(Orders collected on Local Radial Run and handed to Park Trunk)
- Outbound
Local Radial Run (Own Fleet)
(Orders requested to be dropped locally)
Local Radial Run (Local Carrier)
(Orders requested to be dropped locally)
On-Forwarder (National/Local Carrier)
(Orders requested to be dropped none locally)
Airport Lodgement Run
(Orders cross-docked out to another RDC via airport)
Park Trunk Run
(Orders requested to be dropped locally - distributed at park)
- Other
- Orders moved via flight leg
(Airport-to-Airport movement)
- Local Work Only - Own Fleet
- Local Work Only - Local Carrier
- Crossdock Work - Own Fleet - Linehaul Carrier - Own Fleet
- Crossdock Work - Own Fleet - Linehaul Carrier - Own Fleet - Local Carrier
- Crossdock Work - Own Fleet - Linehaul Carrier - Local Carrier
- Crossdock Work - Own Fleet - National Carrier
- Crossdock Work - Local Carrier- Own Fleet - Linehaul Carrier - Own Fleet
- Crossdock Work - Local Carrier - Own Fleet - Linehaul Carrier - Local Carrier
- Crossdock Work - Local Carrier - Own Fleet - Linehaul Carrier - Own Fleet - Local Carrier
- On-Forwarding - National Carrier
- On-Forwarding - Local Carrier
Maintenance
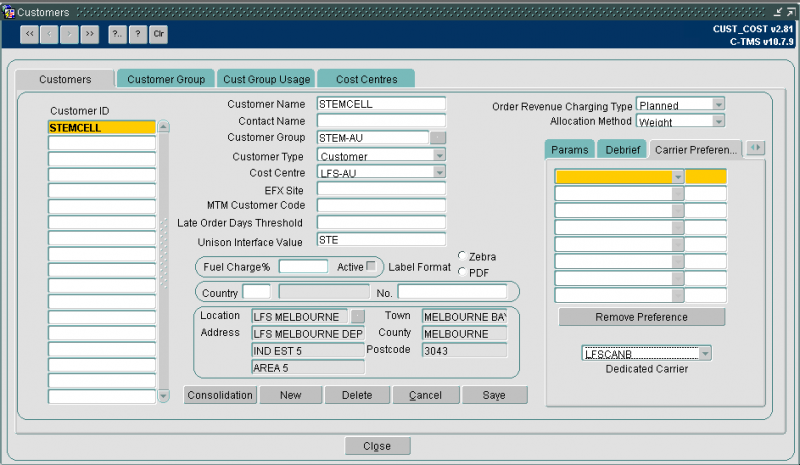
The Customer screen has been amended to include a new field Dedicated Carrier. This allows users to specify a single carrier that a customer order must be scheduled with. When an order is received for this customer it will only be scheduled onto a route carried out by this carrier.
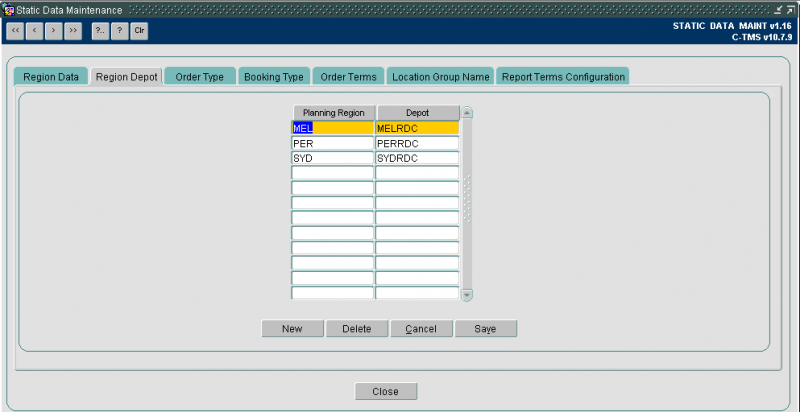
A new table for controlling depot has been created and is maintained in the Static Maintenance screen. The screen assigns a Controlling depot (Warehouse) to each Planning Region. The planning region of the collection location or current location (for partially planned orders) is then assessed to find the relevant controlling depot.
All routes will be assigned to a controlling depot, when the scheduling engine is running routes will only be selected for consideration where they belong to the controlling depot linked to the planning region of the collection location/ current location.
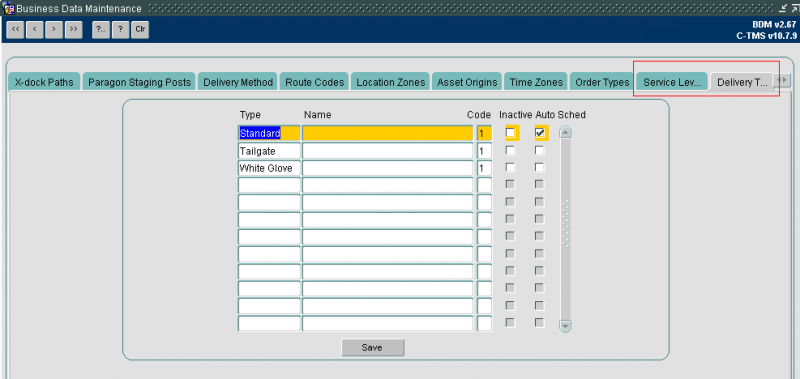
The Delivery types maintenance has been moved from the Contracts screen to the Business Data Maintenance screen. Within this screen, users are able to tick the delivery types which will be considered for the scheduling engine. If an order is assigned a delivery type which has not been ticked for auto scheduling, the order will not be considered for scheduling.
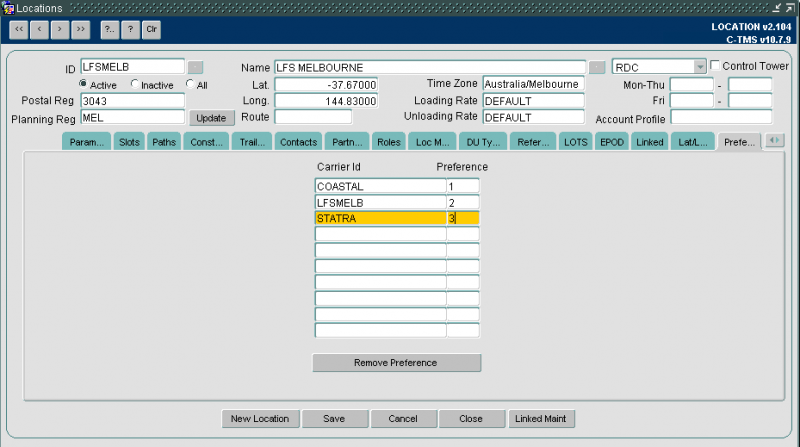
Each controlling depot will exist as a Location in C-TMS. A new tab has been added to the Locations Maintenance screen specifically for the controlling depots. The new tab is preferred carrier and allows a user to list the carriers that work out of the controlling depot with a numeric preference for route selection.
In the example above LFSMELB is a controlling depot which has been assigned 3 carrier preferences. Routes will be created and assigned to a controlling depot. Based on the above data, routes for controlling depot LFSMELB which are carried out by COSTAL will be considered before routes carried out by LFSMELB and then routes carried out by STATRA. Only routes which are assigned to carriers listed above will be considered for scheduling.
Location Zones
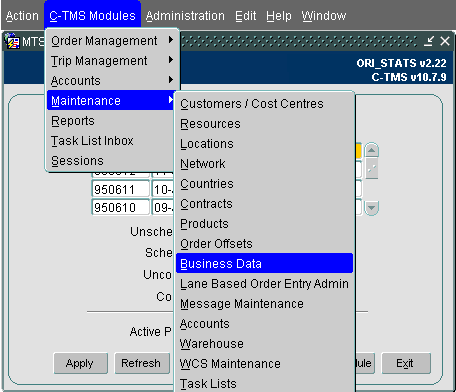
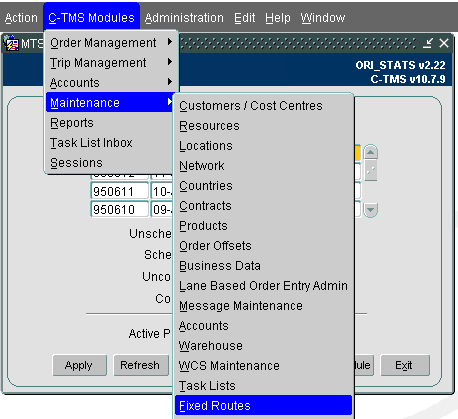
Location Zones are a grouping of locations into areas which make zones. The Zones are created in the Business Data Maintenance screen which is accessed from the maintenance screen.
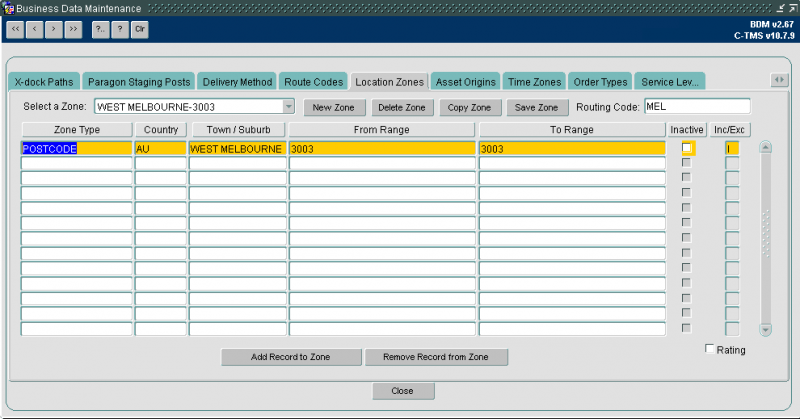
When the screen is opened the user may select an existing Zone to view the details. All existing Zones are available to select from the drop down list.
In the screen below a Suburb Postcode zone has been created. The Zone has been created for the West Melbourne suburb and 3003 postcode. The Zone type is defined as POSTOCE. Country code is always required when creating the lines in the Zones. All lines must be identified as Include or Exclude.
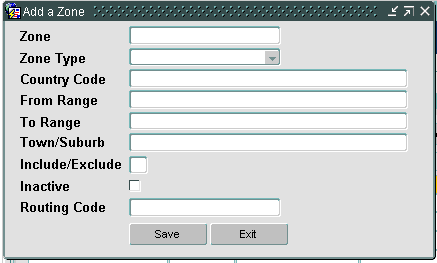
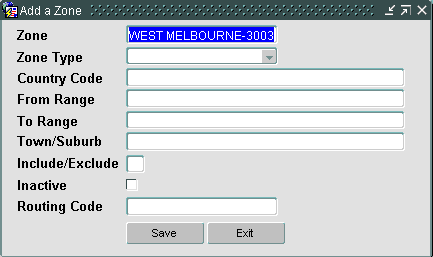
Select New Zone, to create a new Zone, the following screen is displayed.
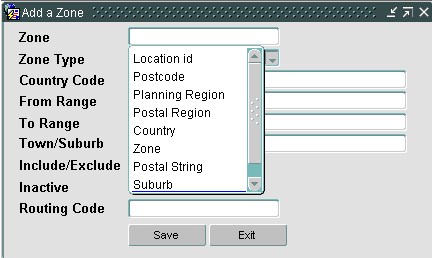
Users are required to enter the information above. The Zone name should be unique and the Zone type must be selected from the drop down list. Country code is required . The Zone types are listed below, the zone type selected will control which fields are required to be populated.
In addition to creating a new Zones, users are able to add new records to existing zones. Select the Zone in the main screen and use the 'Add Record to Zone' button. The selected Zone will be pre-populated in the Zone name
Creating a Network Route
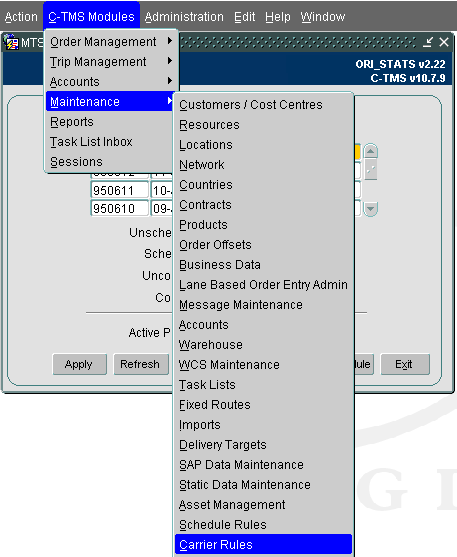
Routes are created in the Fixed Routes maintenance screen, which is accessed from the Maintenance menu.
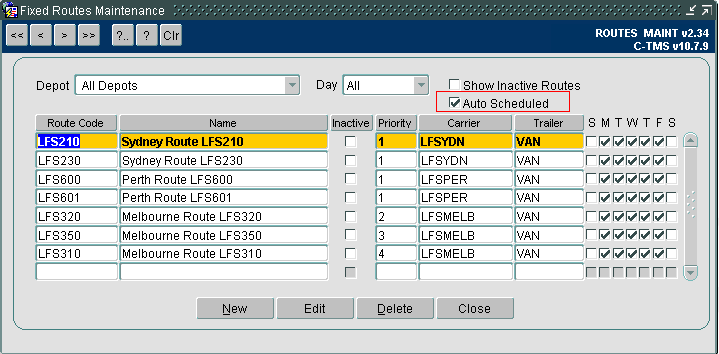
When the screen is selected, the user is shown the existing route headers. There are 2 methods of fixed routes, Scheduling Engine Routes and Fixed Routes. Select the scheduling engine flag will display only the scheduling engine routes.
The list of routes displayed by can further controlled by using the Depot and Day fields, to select all routes out of a depot on a specific day. To view the details of the route, select Edit.
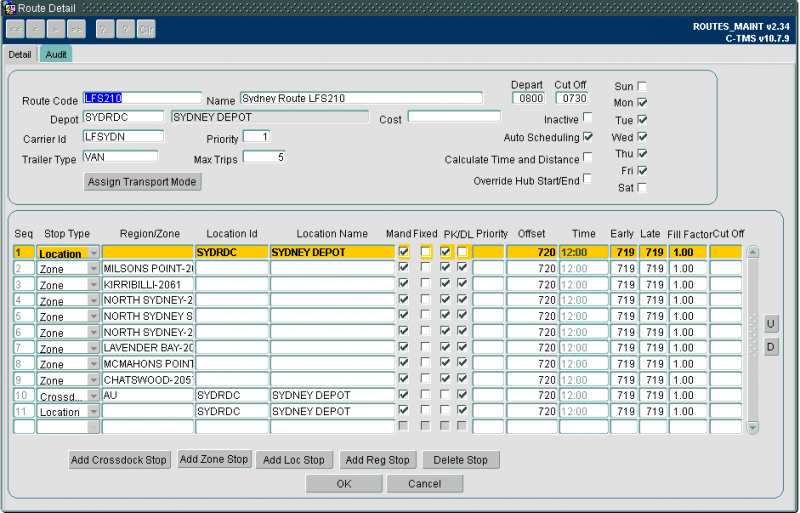
In the header section, the route code and name are defined. Any trip generated from a route is stamped with the route code. The depot refers to the controlling depot and is used to select routes for an order based on the controlling depot linked to the orders collection or current location.
A depart time and cut off time are added to the route, this indicates the time after which orders may not be scheduled on todays route. Tick boxes indicate the days of the week that the route runs. Users indicate by tick box if the route is an Auto scheduling route, if time and distance should be calculated on any trips generated from the route and wether the route should include a start and end stop at the carriers hub location.
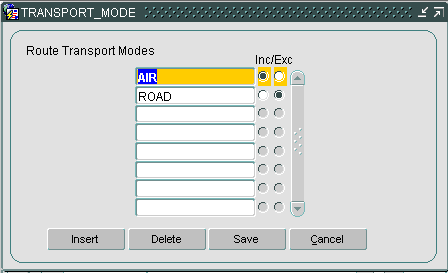
Selecting Assign Transport Mode will display the following screen, where users can include or exclude transport modes.
The details screen shows the header information and the stop details. Each stop is assigned a type, the options available for the scheduling engine are Location, Zone or Crossdock. For a location stop type, users must define a location id and name and leave the region/zone blank. When using a Zone stop users must define a zone and leave the location empty. When using a crossdock stop type, users must define a zone and a locations id and name.
Stops may be defined as PK, DL or both. This indicates if goods may be loaded or unloaded at the stops.
Offset is set to a value of minutes. This value is converted to hours and added to midnight to set the time at the stop. The early and late fields, also declared in minutes are used to set the windows at the stop. In the above screen shot, the stops have been assigned windows based on the full day.
Carrier Rules
Third Party carrier routes and settings are defined in the carrier rules maintenance screen. This screen is made up of a series of tabs where users can define the package constraints for a carrier. Constraints include weight, volume, du types, product type and commodities. The constraint tabs will also be used to define own fleet carriers
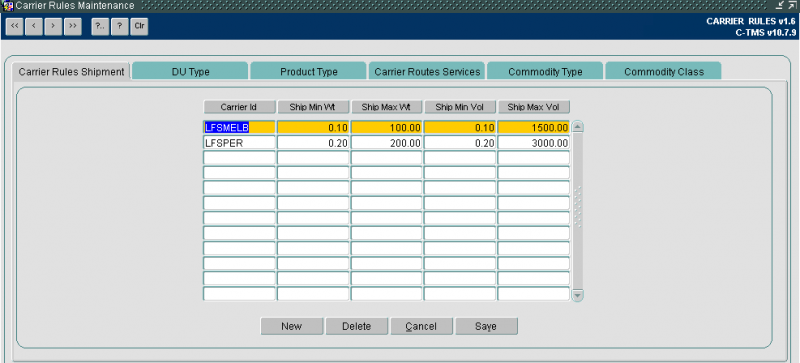
When selected, the following screen is displayed
The Carrier shipment rules define the minimum and maximum weight and volume that a carrier will transport. If there are no limits for carriers, these values must still be entered but set to very low minimum and large maximum values.
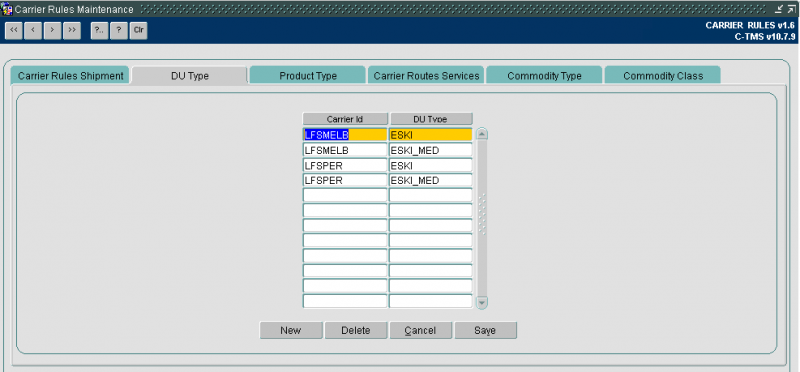
DU types allows users to define those DU types the Carrier will transport. If a du type has not been set up for a carrier, any order with that DU type will not be permitted on a route with the carrier.
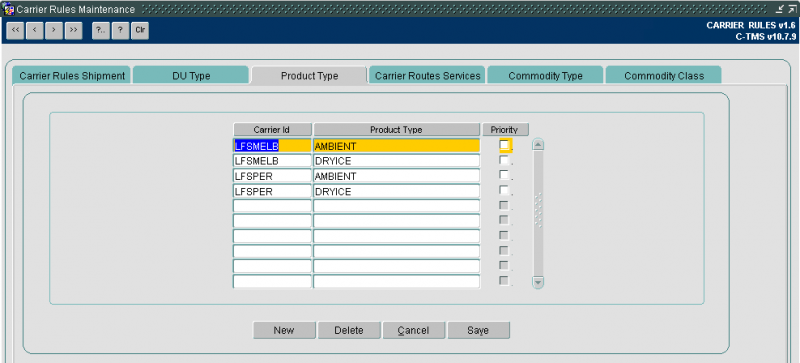
Product Type tab allows users to define which product types a carrier will transport. If a product type is missing on this tab for a carrier, any orders with the product type will be prevented from scheduling on a route with the carrier.
Carrier Routes services details the routes a carrier will provide, header details include the route code and name, days of the week the route will run and the number of trips which may be generated from the route each day.
Double click on a route to see the details of the stops and further header information.
The header information included the controlling depot, which will be used to identify relevant routes. The cut off time will identify when new orders can no longer be added onto the route on the day it runs.
The services block indicates the places the route will deliver to, the destinations types are listed below.
Service level should be set to Standard as this will be checked against the orders. To add a new destination, select the New button at the bottom of the screen, this will move the cursor to the next blank record.
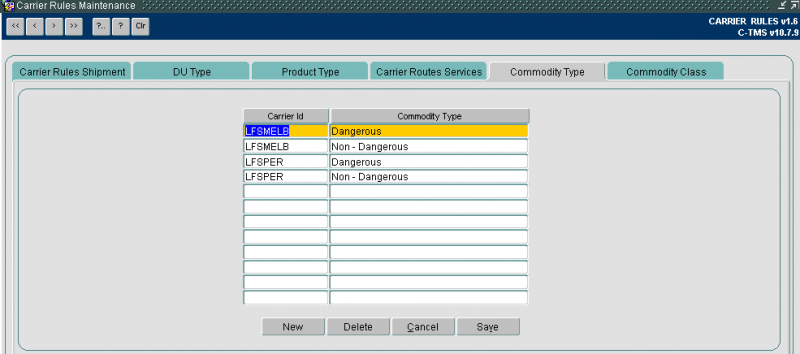
The commodity type allows users to define if a Carrier takes dangerous and non dangerous goods.
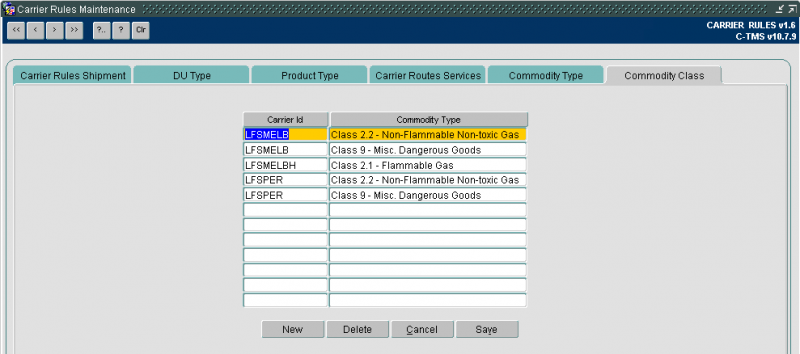
The Commodity Class Type tab allows users to define those commodities that may be transported by a carrier. (See product maintenance for Commodity Class incompatibility)
Controlling the Scheduling Engine
The scheduling engine can be automated to run and is completely under user control. Users are able to control which orders are selected by the scheduling engine (based on both Cost centre and customer) and when the scheduling runs and how often.
A cost centre parameter controls which cost centres use the scheduling engine. Multiple parameters may be created for systems with more than one cost centre.
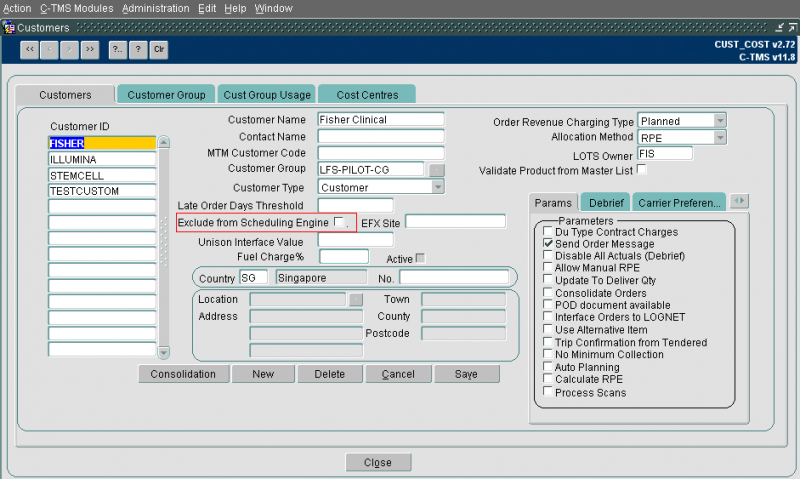
If an order is selected for the scheduling engine, by the cost centre, there is a futher level of control available to the user. Users are able to exclude certain customers from the scheduling engine. This is controlled by a flag in the customer maintenance screen.
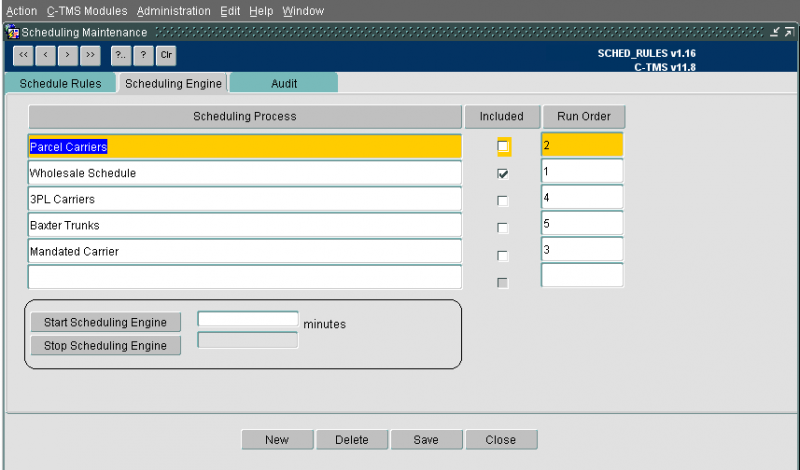
A screen has been created to control when the scheduling screen is run. A specific user name has been created with the ability to start and stop the scheduling engine. Users will be able to access the screen to check when the engine is running.
The engine has been created to run several flavours of scheduling, for carrier selection and 3PL carriers. To run the scheduling rules from the fixed routes maintenance screen , users must select the Wholesale schedule.
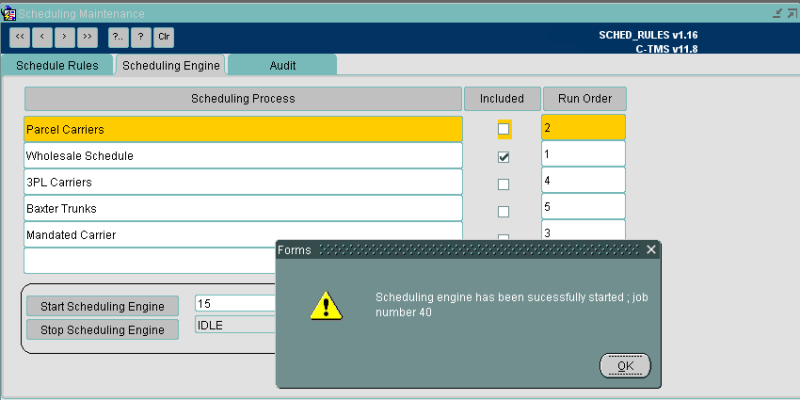
Selecting start will create a database job to run the scheduling functionality. The interval will indicate how often the engine looks for Unscheduled orders and tries to apply the orders to trips. If no minutes are entered, a default value of 15 minutes is entered, to run the engine every 15 minutes.
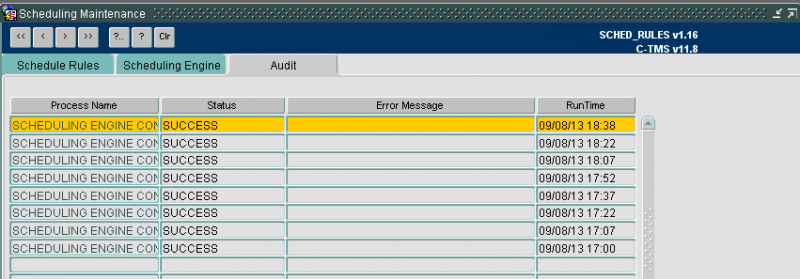
A status is also available to indicate if the engine is Idle or running. The Audit tab will allow users to see when the engine has run and will report any errors encountered.
If an order is selected by the engine, but fails to find a suitable route, a flag will be set next against the order to prevent the engine from attempting and failing to schedule the order every run.
In addition if a user chooses to manually remove an order from a trip, which was applied by the engine, a Manual schedule flag is ticked against the order to prevent the engine from applying the order to the same trip again.
Users are able to manually change the values of the flag to allow an order to available to the engine, or prevent the engine from selecting an order.
