Vehicles
This allows you to maintain fixed vehicles (e.g. vans).

Fixed vehicles consist of a tractor and trailer, linked together. The tractor and trailer will have the same ID. You will enter all details related to tractor and trailer in one screen.
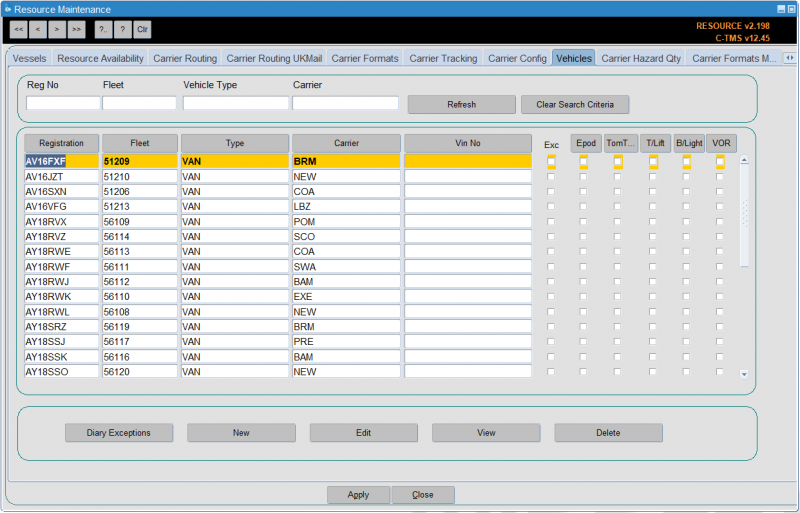
The vehicles tab is used to set up vehicles that are to be assigned to trips. On entry to the tab you are presented with a list of vehicles that are already set up on the system. You can search on registration number, fleet, vehicle type and carrier. All fields have a list of values and pressing the Refresh button will bring back the data you are looking for.
To bring back all the data press the Clear Search Criteria button.
Five buttons are available at the foot of the screen:
- Diary Exceptions
- New
- Edit
- Delete
- Close – To exit the screen
New
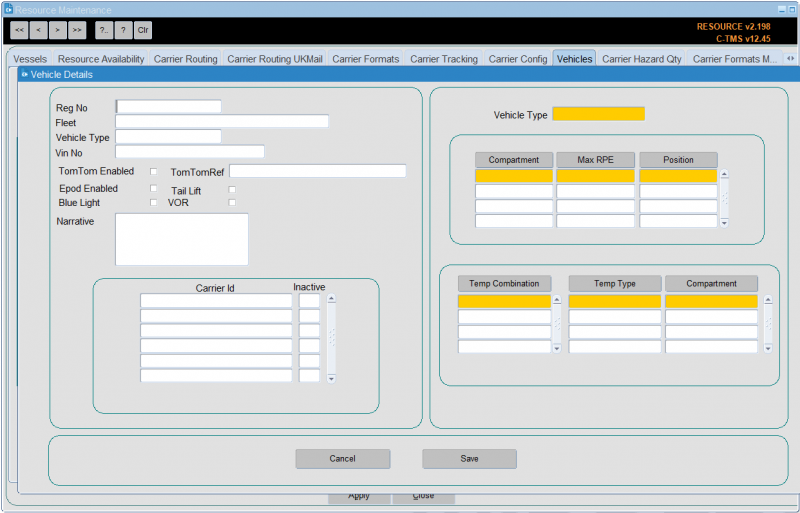
To create a new vehicle press the New button. The following screen is shown:

Enter the data relevant to the vehicle. The vehicle type and carrier are selected from a drop down list. the Blue light, Tail Lift, Epod enabled, TomTom enabled and VOR fields will be a checkbox where checked indicates a positive value. Press the Save button to create the vehicle on the database. You will be returned to the main screen.
The compartments section controls creation and amendment of the compartments associated with the vehicle. The functionality for the compartments mirrors the functionality in the trailer types tab of the resources screen.
Creating records using the Vehicles tab page will also create the associated records in the Trailer ID with compartments, Tractor ID and Trailer to Tractor link.
Two buttons will be included in the footer of the screen:
- Cancel – Display a message asking the user to confirm that any updates made will be abandoned once confirmed rollback any changes and close the window.
- Save – Validate all changes and commit, if any field fails validation display an appropriate error message.
Edit
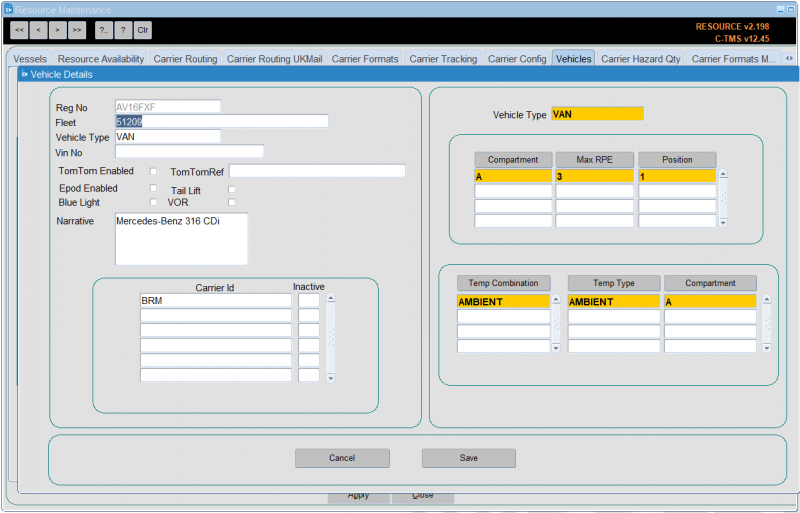
From this screen you can change the details of a vehicle by pressing the edit button. The following screen is displayed . All fields can be changed except for the registration number. The right hand side of the screen is informational data associated with the vehicle type and cannot be edited.

If for any reason the vehicle is going to be unavailable for an unknown period of time you can check the VOR (Vehicle Off Road) tick box. Whilst this box is ticked the vehicle will not be able to be allocated to a trip. Press the Save button to commit the changes to the database or the Cancel button to abandon any changes you have made. You will then be returned to the main screen.
View
From here you can also view the details of the vehicle by pressing the View button. Whilst viewing you cannot change any data.
Delete
To remove a vehicle from the system press the Delete button. A confirmation message is displayed which allows you to either confirm or abandon the delete
Diary Exceptions
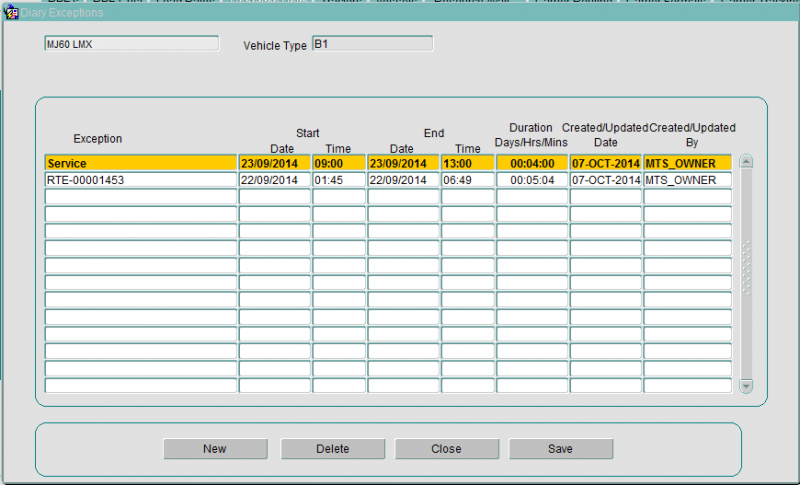
This screen has a Diary Exceptions button. This will display a popup window showing the activity the current vehicle has been allocated to, and so describes periods of unavailability. This activity can be either associated with a trip the vehicle has been allocated to, or manual records entered.

There are four buttons on the screen:
- New will allow a new activity to be entered for the current resource.
- Edit will allow editing of a record. When a resource is off the road, if it has been allocated to any subsequent activity a message will be displayed warning the user they may need to take action to remove resource from trips etc.
- Delete will display a confirmation message and once confirmed will remove the record
- Close will save any changes and return you to the main resource diary page.
To create a new record press the New button and enter the reason for the exception. Then enter the start and end date and time. The duration is calculated automatically. Press the Save button to commit the record to the database. To delete a record press the Delete button.
![]() Note: Exceptions records created by planned trip activity related to the vehicle cannot be deleted.
Note: Exceptions records created by planned trip activity related to the vehicle cannot be deleted.
Pressing the Close button will return you to the main screen.
Imports
You can also import vehicles and associated reference data through Imports: