Maintenance - Locations: Difference between revisions
Middletong (talk | contribs) No edit summary |
(Categorisation) |
||
| Line 172: | Line 172: | ||
[[Category:C-TMS Training Guides|200]] | [[Category:C-TMS Training Guides|200]] | ||
[[Category:Maintenance - Locations|A-102]] | [[Category:Maintenance - Locations|A-102]] | ||
[[Category:Documents]] | |||
Revision as of 15:54, 8 May 2024
![]()
C-TMS
Locations
Training Guide - 10.6
10th Oct 2011 - 3.0
Reference: MAINTENANCE
MAINTENANCE - LOCATIONS
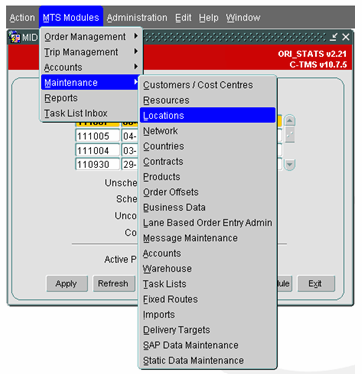
Locations are used to maintain the details related to a specific location such as their Address information, Contacts and Constraints. Location Maintenance form can be accessed from Maintenance Menu as shown below (Fig 1)
Fig 1
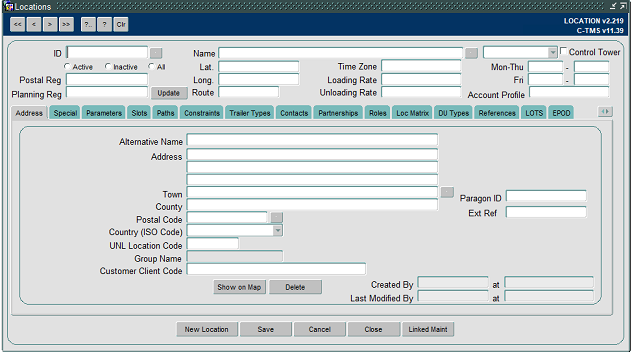
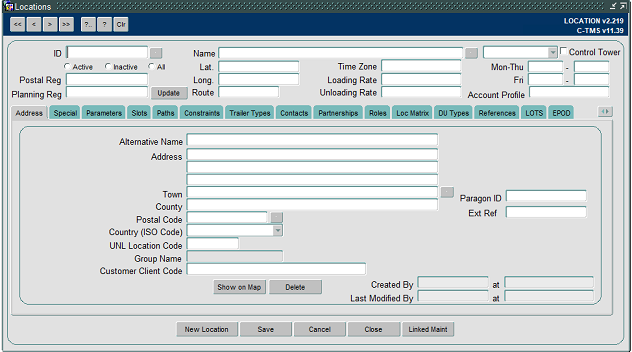
The Location Maintenance form is shown in Fig 2 below:
Fig 2
Query existing Locations:
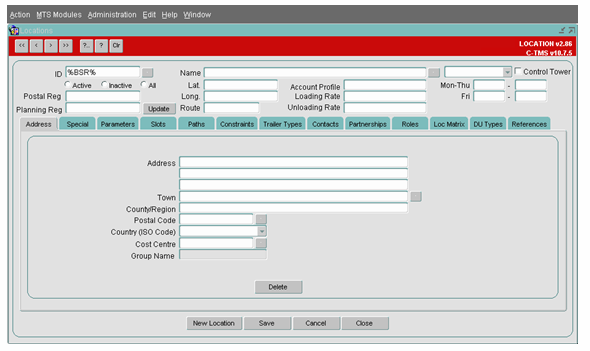
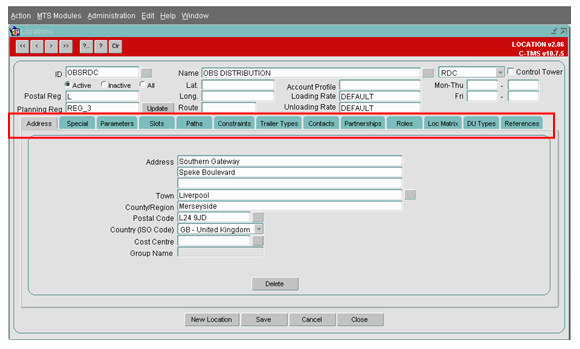
To query for a Location, enter the ID of the location with a ‘%’ as shown and click on the query button. This will provide the details of the Location queried. An example is shown in Fig 3 and Fig 4 below.
Fig 3
You can traverse through the relevant tabs to get details of them. Note the tabs will be discussed later in the document
Fig 4
Creation of a new Location:
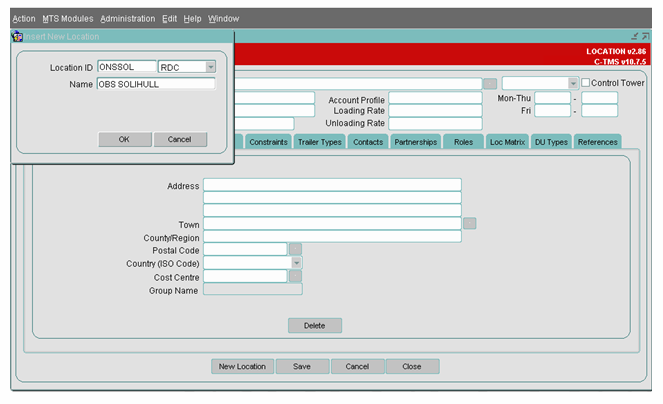
To create a new Location, click on the ‘New Location’ button and enter the Location ID, Location Type and the Location Name as shown in Fig 5 below.
Fig 5
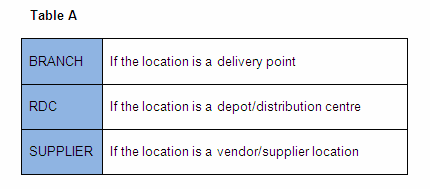
The Location ID should identify the location uniquely. The Location Type can hold one of the 3 types described below in Table A:
Fig 6
In the address tab, enter the address details and the most important fields in this tab are the Postal Code, Town and Country (ISO Code). The ‘Postal Reg’ and the ‘Planning Reg’ will be populated by the system based on the postal code.
The Lat and Long fields will be populated by the system referring to Navteq once the location is used in an Order.
The Loading Rate and Unloading Rate specify the time required to load and unload a truck in the given location. This will be described in the Resources section of the training.
Once you have entered the required information, click on the save button to save the changes that you have made.
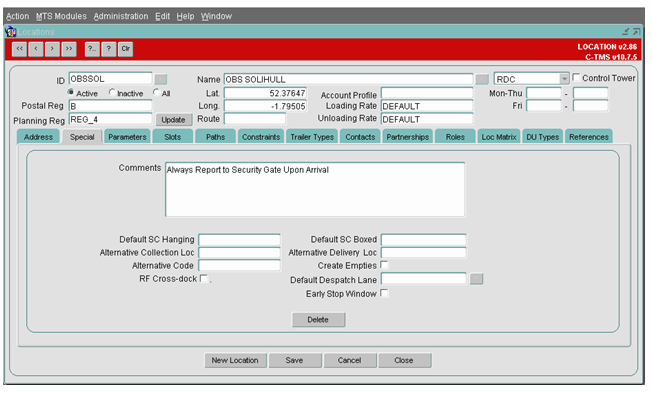
SPECIAL TAB
Additional data such as Alternative Collection/Delivery Location can be attached to a location or comments can be added.
SLOTS
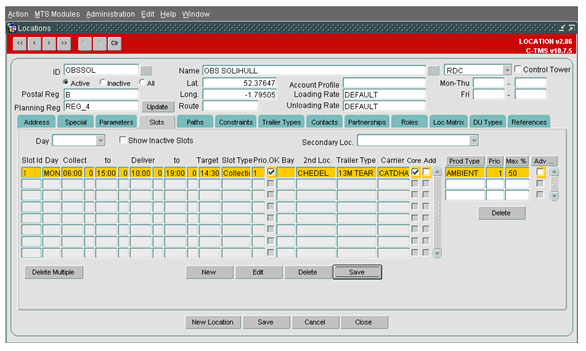
Collection and Delivery Slots are maintained via the ‘Slots’ tab. Each Slot details the collection and delivery windows on a particular day that the collection or delivery of goods from one location to another should be scheduled. Slots can be configured to use a specific Trailer Type and accept specific Product Types. Slots are filled by the Create TI’s process invoked from the Bookings form.
Manual Slot Manipulation
Provides the facility to manually add, edit, delete and inactivate Slots. Only Slots in a Status of Active are displayed by default in the Slots tab as only Active Slots are considered by the system in the Create TI’s process. A function to view Inactive Slots is included. Also provides the facility to add, edit and delete Product Types and a Trailer Type from a Slot.
Slot Import
Slots can be imported into C-MTS Host via an inbound interface. In the case of Sainsbury’s Supermarkets this is the VAST interface that runs nightly. This interface process inactivates all Slots in the system then either reactivates any Slots that exist in both the system and the new interface file or creates any new Slots. The Slot Import functionality on the Slots tab simply allows this import process to be invoked manually if required.
Multiple Slot Deletion
This function allows Inactive Slots to be removed from the system if they have not been activated for a user specified period of time. This ensures a manageable number of entries are displayed in the Slots tab if the option to display Inactive Slots is selected.
Dynamic Day Offsets
All Slots have collection and delivery windows and apply to a particular day. Slot windows are held with actual times, e.g. 10:00 – 11:00, and day offset. The use of day offset minimizes user maintenance as the actual date a Slot is used is not stored, it is implied by the day offset e.g. on Friday 12th July 2002, a Slot stored with a delivery window of 0 23:30 to 1 00:30 will be interpreted as 12th July 23:30 – 13th July 00:30 i.e. the day offset is used to decrement or increment the actual date on which the Slot is being used.
Slot Trailers
Each Slot can be configured with a specific Trailer Type. This allows a Slot to be configured to use, for example, a more maneuverable Trailer if access is restricted.
Slot Products
Slots can be configured to accept one or more Product Types. When Orders are created in Slots by the Create Transport Instructions process, the process is constrained to only fill Slots with permissible Product Types. If a Product Type is not compatible with a Slot it cannot be assigned to the Slot.
Each Product Type in a Slot has a Priority. If the Priority is one then the Product Type will always be assigned to the Slot. However, if the Priority is two, the Product Type will only be assigned to the Slot if it is topping up the Slot i.e. the Slot already contains some Priority one Product Type.
Slot Product Types can also be designated as Advance Only so that only Advance Orders for the appropriate Product Type are assigned to the Slot
CONSTRAINTS
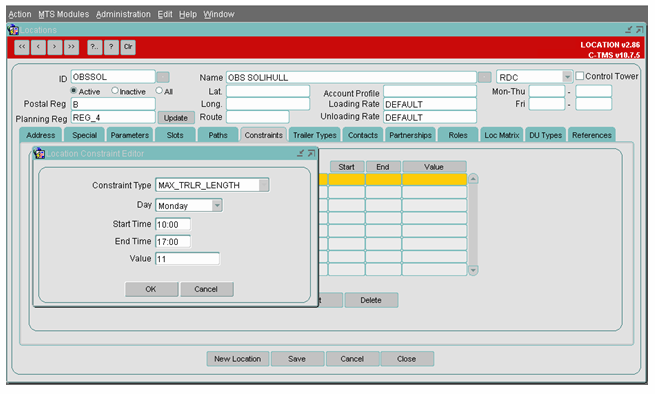
To create constraints for the location, click on the ‘New’ button and enter the details as shown. The Constraint Type specifies the constraint in a specific location such as only an 11 ft truck is allowed on Mondays between 10:00 to 17:00 hours. Once the details are entered, click on the OK button to save it.
Fig 7
TRAILER TYPES
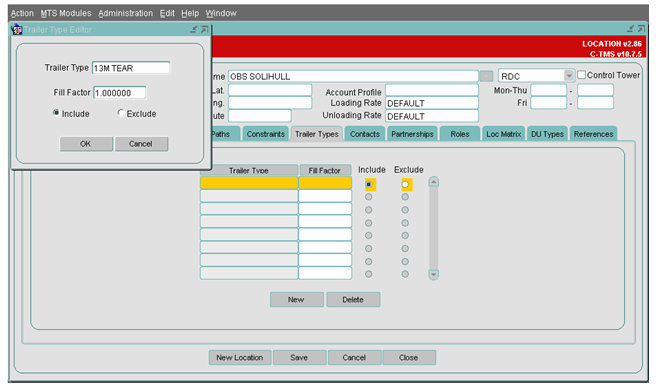
Trailer Types tab specifies the trailers that are compatible with the location. For the example in the discussed in Fig 8, this location can handle only 45ft curtain side trailers, i.e. when the ‘Include’ option is selected then only those trailer mentioned in the list are compatible with the location.
When the ‘Exclude’ option is selected then, excluding those trailer all other trailers are compatible with the location.
Fig 8
CONTACTS
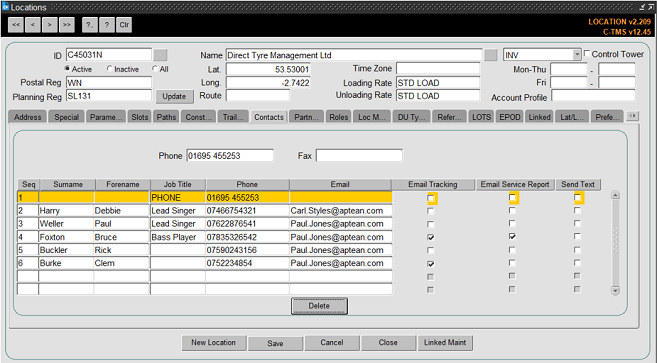
The details of the Contacts for the location can be maintained in the Contacts tab. Example for the same is given in Fig 9 below.
Please ensure that you click on the ‘Save’ button to save all the changes that you have made.
Fig 9
ROLES
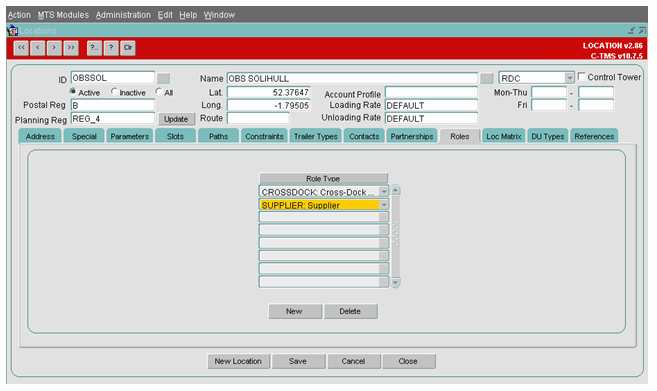
A single location could behave as multiple location types, so that, for example, a Crossdock could also be a depot. This functionality is not currently used.
DU TYPES
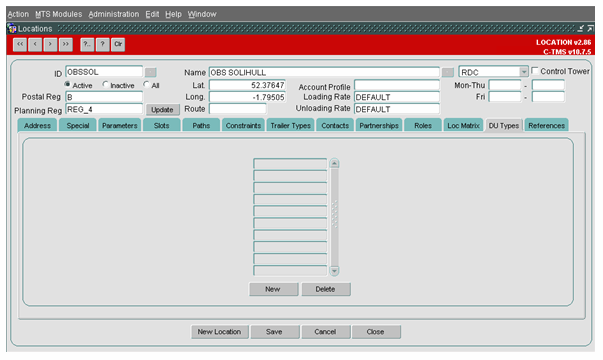
This is a client specific form but it is used in conjunction with a Supplier Portal. In the Portal, when a new order is generated it will default to have an order line for each of the DUs held on this tab.
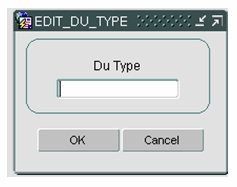
To enter a DU Type select the ‘New’ button and the below screen is populated. Enter a DU Type manually or use the available list of values to find the relevant DU Type
Click ‘OK’ to return back to the main screen
REFERENCES
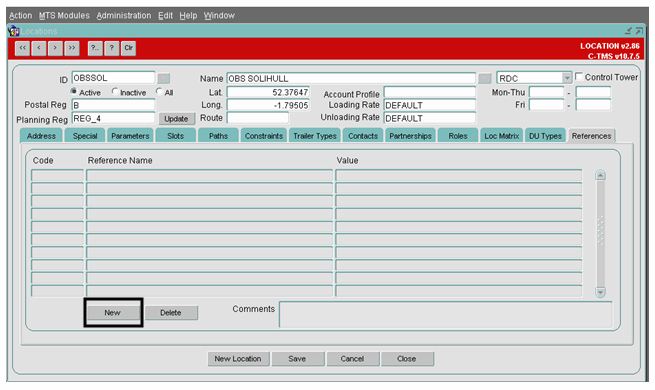
This Tab has been designed to add any additional Location Level references that may be needed for a specific project
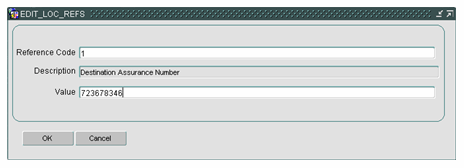
To add a reference the user needs to click the ‘New’ button. The below screen is then populated
Enter a Reference code. If known it can be typed in manually or selected from a list of values. The description is automatically populated and is a read only field. Then enter the relevant value
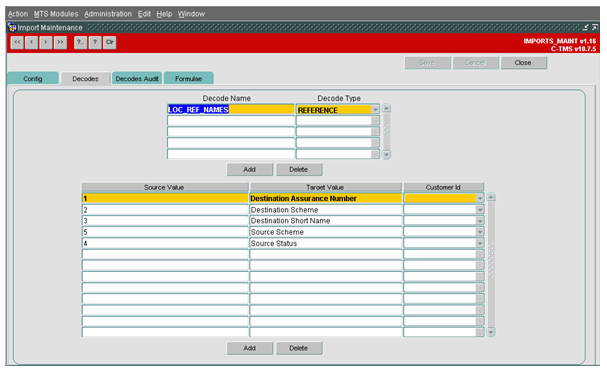
Please note the list of values is maintained in the Imports screen, within the Decodes tab as shown in the screenshot below
