WCS Common Activities Guide
![]()
Aptean
WCS Common Activities Guide
WCS - 3.4
22 July 2011 - 1.2
Reference: APT/WCS/TNG-COMM
Introduction
This document is intended to show many common activities within the WCS, with detailed instructions on how these extraneous tasks may be performed.
This document is intended for technical supervisors or IT staff.
Due to the nature of the subjects covered, this document is necessarily technical in nature.
Remote Data Reporting
The Calidus WCS database can be accessed for client reporting purposes using a Microsoft-standard ODBC data connection.
The suggested mechanism for accessing the data is:
- Create a link database
- Create an ODBC Data Source
- Get the data from the ODBC data source with Microsoft Excel
Set-up Requirements
The Calidus WCS system must be set up for your data.
You must have access to the logging database. This document assumes that this has been created under a network drive X:
Create a Link Database
In order to minimise the impact of the query on the Calidus WCS system, this should be performed on a link database. It is possible to access the database directly, but this is not recommended by OBSL.
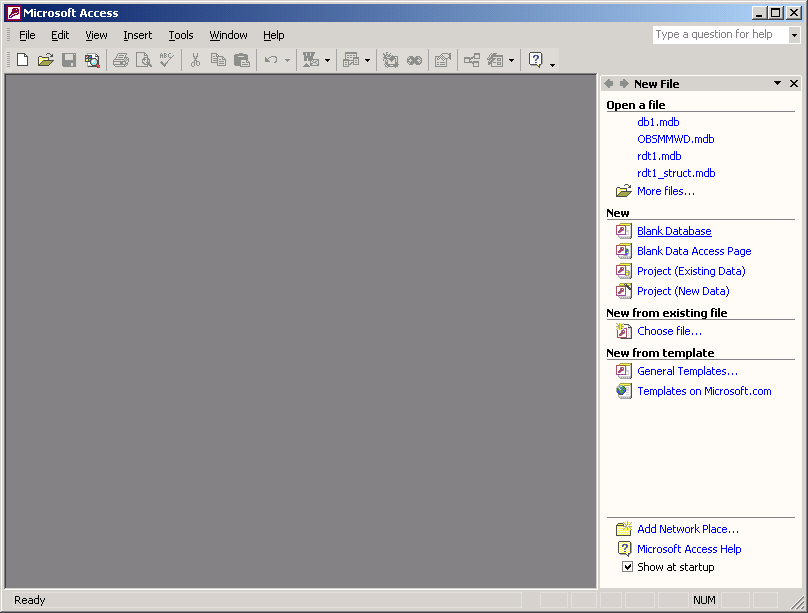
Create a new Access database.
This database can be created locally (or your PC) if this is only being used by you, or can be created on any network machine (for example, the WCS Server) if used by many people.
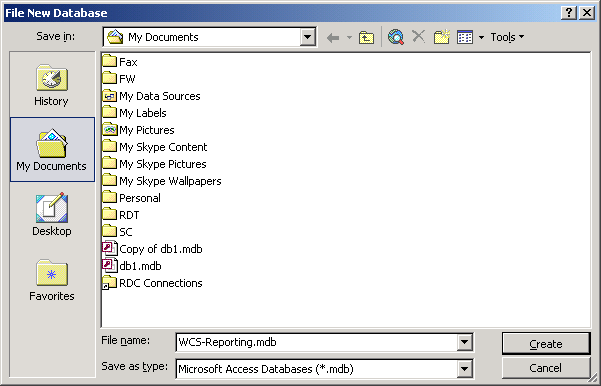
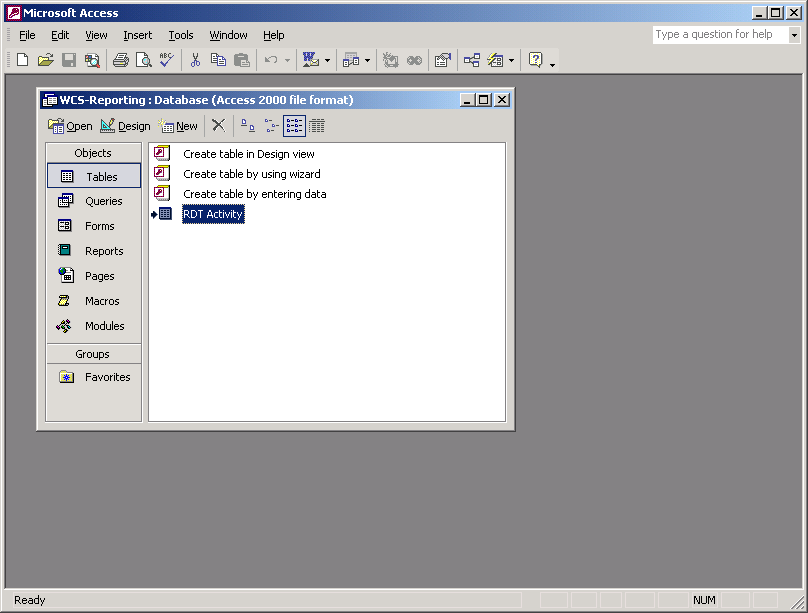
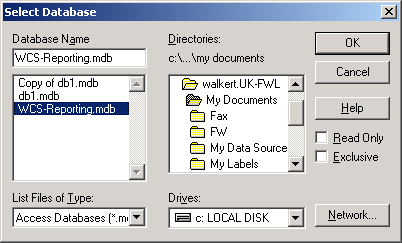
In this case this has been called WCS-Reporting.mdb, created in My Documents
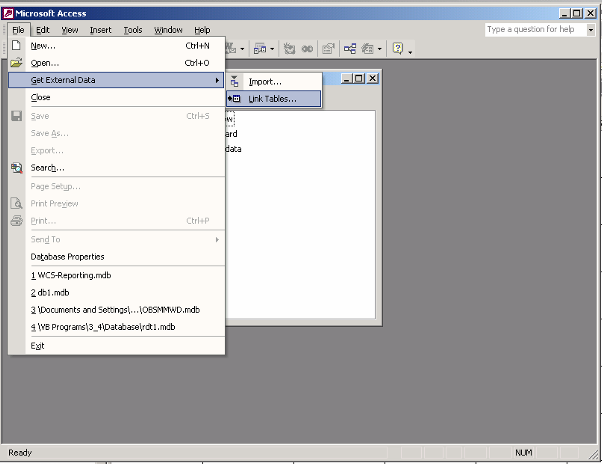
Choose Get External Data/Link Tables from the File menu.
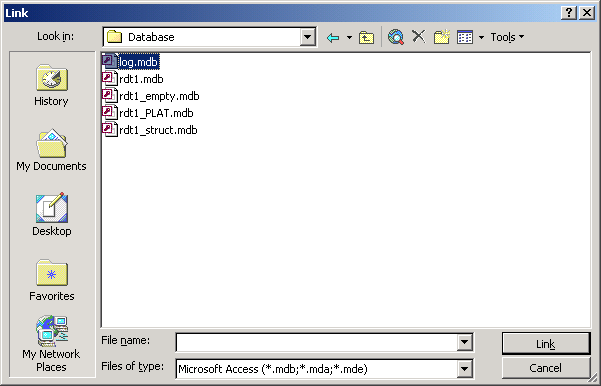
Link to your Calidus WCS logging database. This is normally in X:\Log.mdb or X:\Log1.mdb.
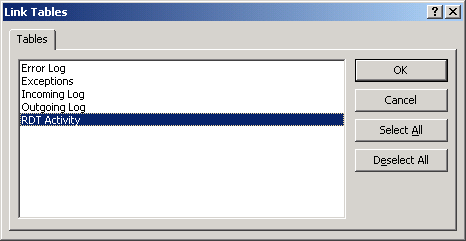
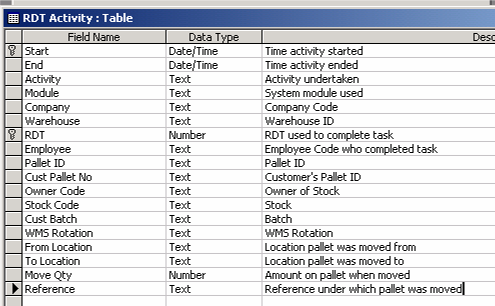
Link the table 'RDT Activity'
Save your new database by closing Access.
Create an ODBC Data Source
Choose Start/Settings/Control Panel/Administrative Tools/Data Sources (ODBC) from the Start menu.
If this option is unavailable on your PC, you must have an Administrator user do this for you.
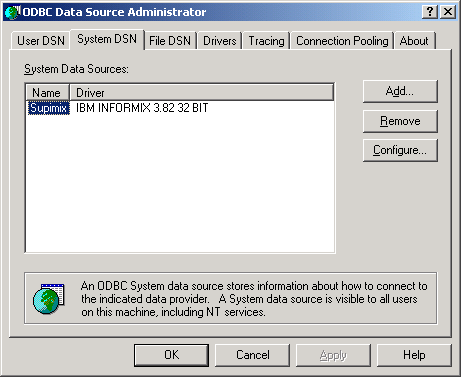
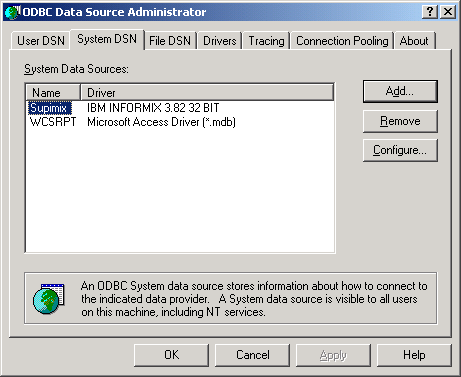
Create a new System DSN
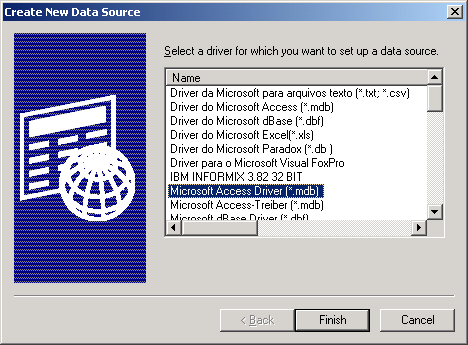
Choose 'Microsoft Access Driver (*.mdb)'.
If this option is unavailable on your PC, the Microsoft Data Access Components (MDAC) must be installed on your PC.
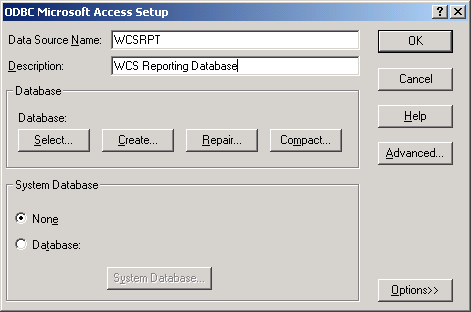
Ensure the Data Source Name is 8 characters or less.
Select your data source using the 'Select…' button.
Click 'OK' to save the new data source
Access the Data in Microsoft Excel
Now that this is set up, you can access the Calidus WCS logging data from external sources. In this example, this is from Microsoft Excel, but could just as easily be from any ODBC-compliant reporting tool, such as Crystal Reports or Cognos Impromtu.
Open Excel and create a new workbook.
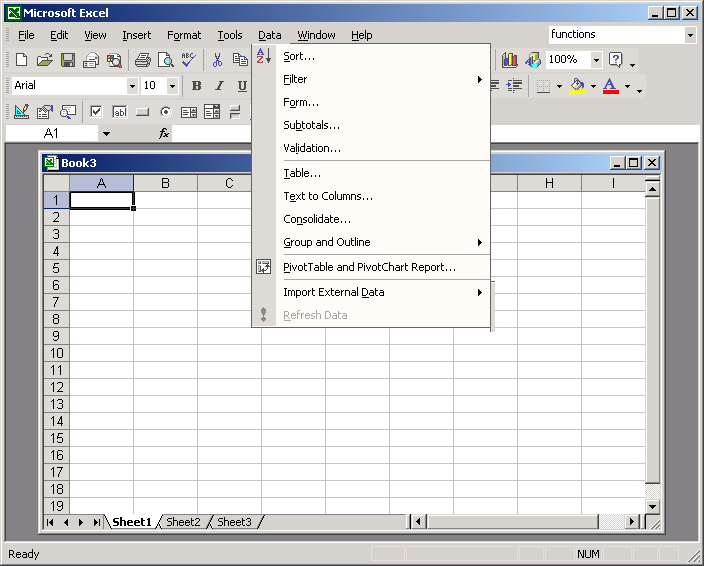
Choose Import External Data/New Database Query from the Data menu.
At this point, you may be prompted to install Microsoft Query for Excel. This may have to be completed by an Administrator.
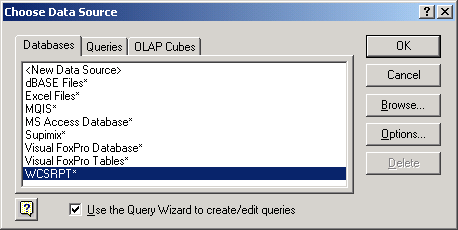
Choose the WCS Reporting Data Source we set up earlier.
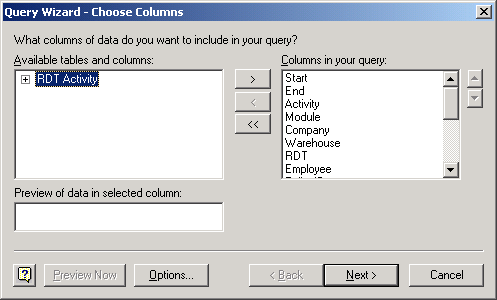
Choose the table to report. In this case, you will want the RDT Activity table.
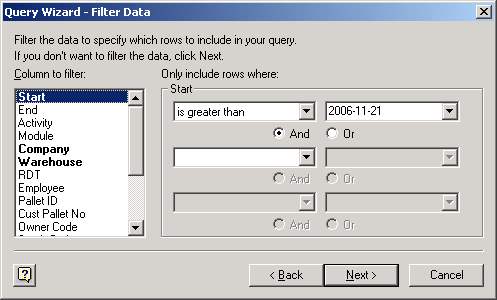
Choose the data you want to filter.
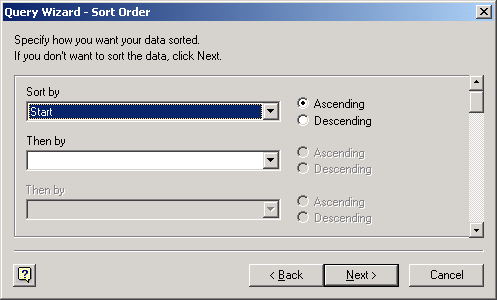
Choose the Sort Order
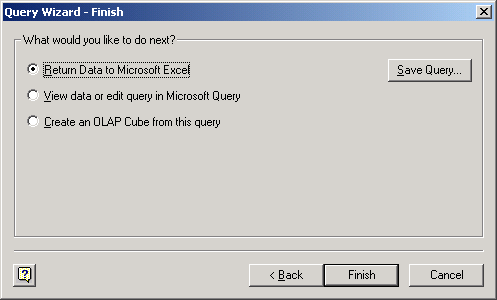
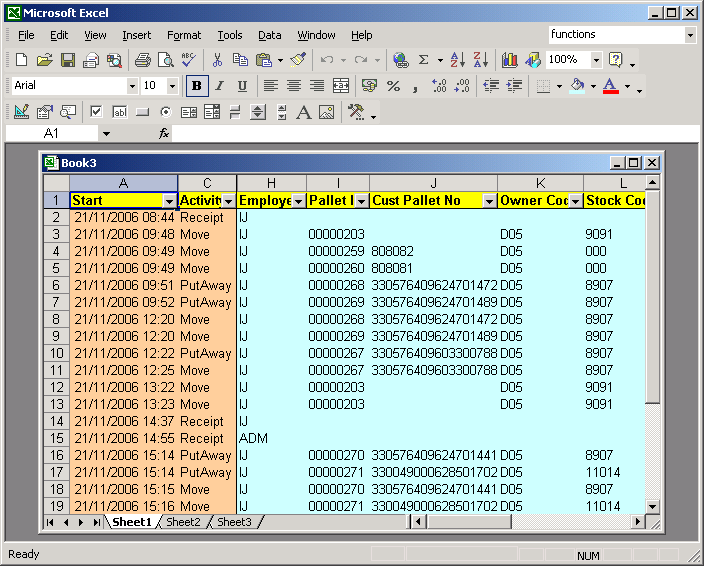
Return the data back into Excel.
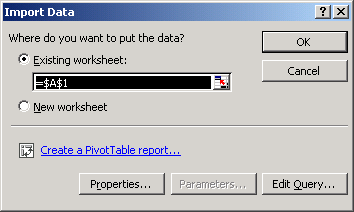
Choose the cell into which you want the data to be loaded.
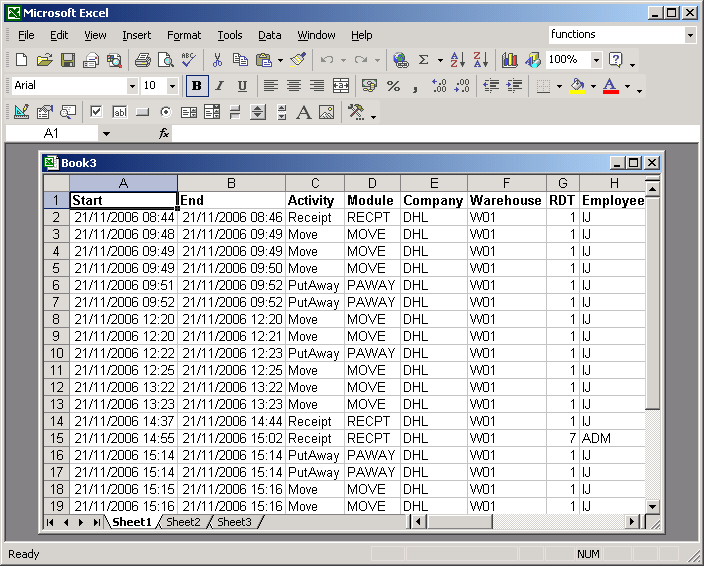
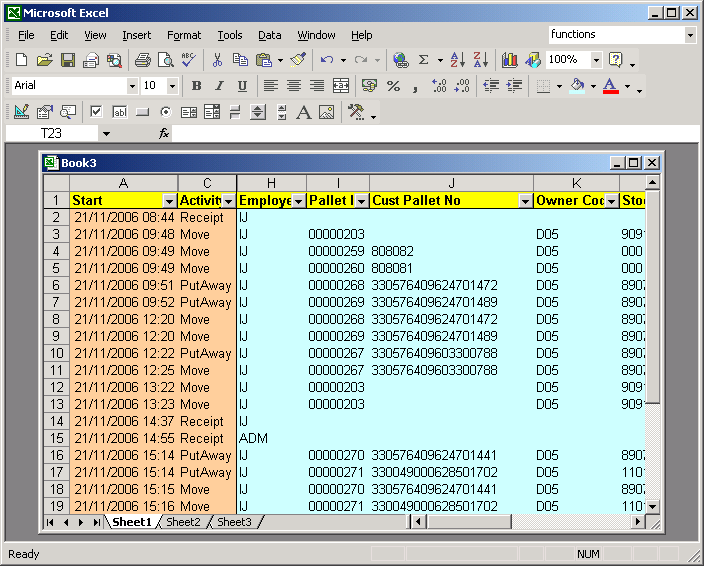
Once the data is loaded in the form, you can filter and format the data in any way you want.
You can refresh the data by choosing Refresh Data from Data menu or the menu shown when right-clicking on the cells.
The sheet will retain its formatting.
You can then save this worksheet for running in the future.
Adding Parameters
Parameters allow you to specify the data to be returned 'on the fly' by saying what you want it to match.
Choose Import External Data/Edit Query from the Data menu.
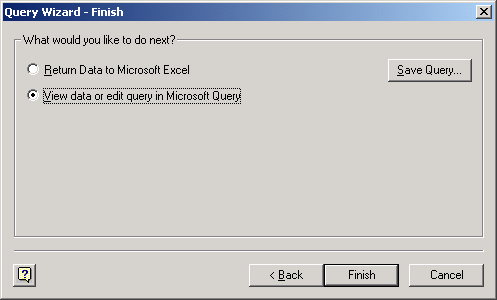
Keep hitting 'Next' until you get to the end of the query, then click on the 'View Data in Microsoft Query' option, before clicking Finish.
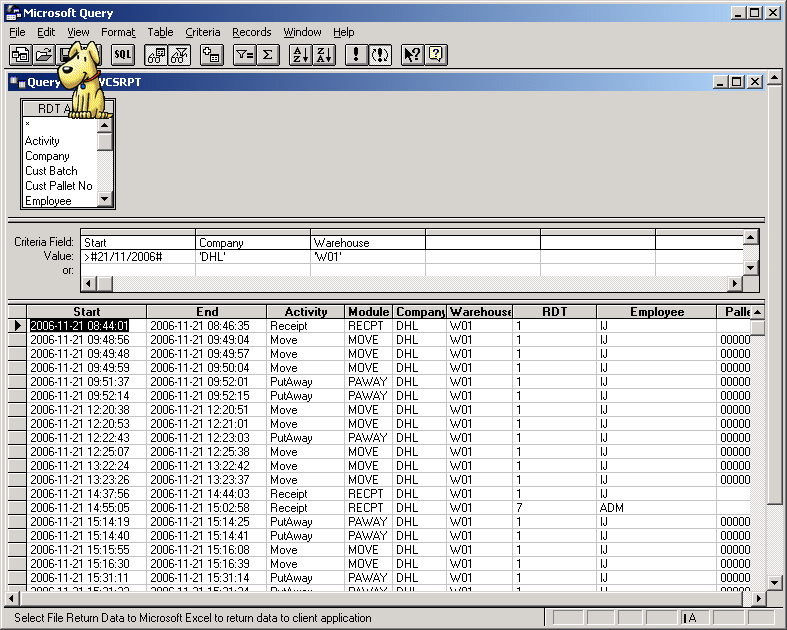
You will be taken into the Microsoft Query application.
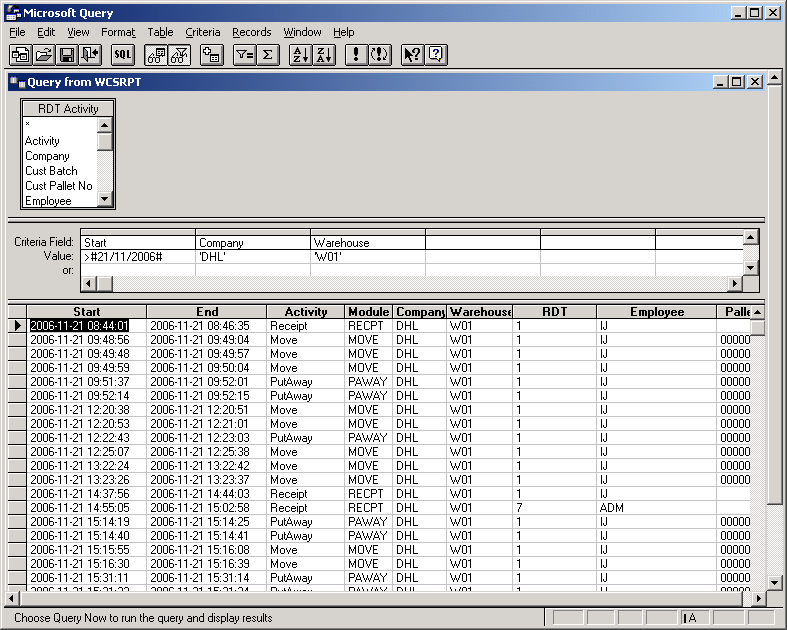
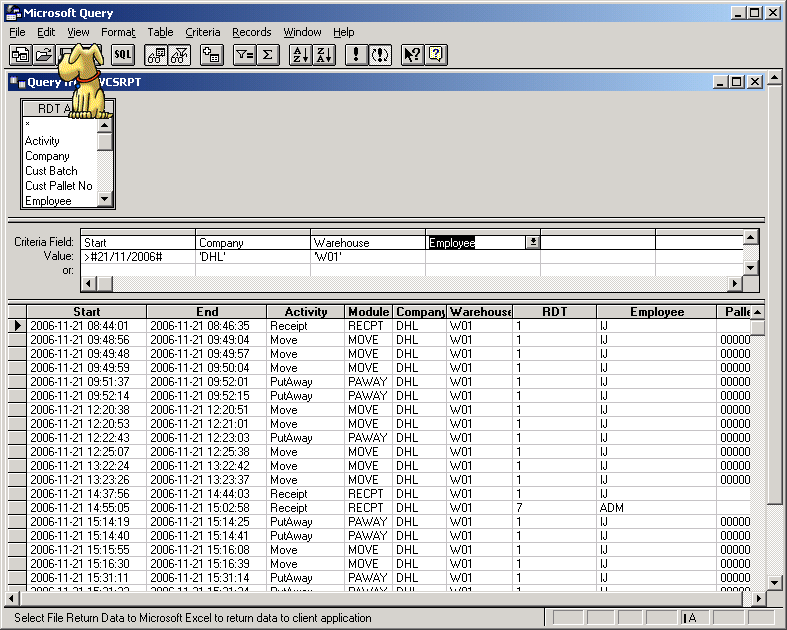
Make sure the Auto-Query button (!) is not pressed in.
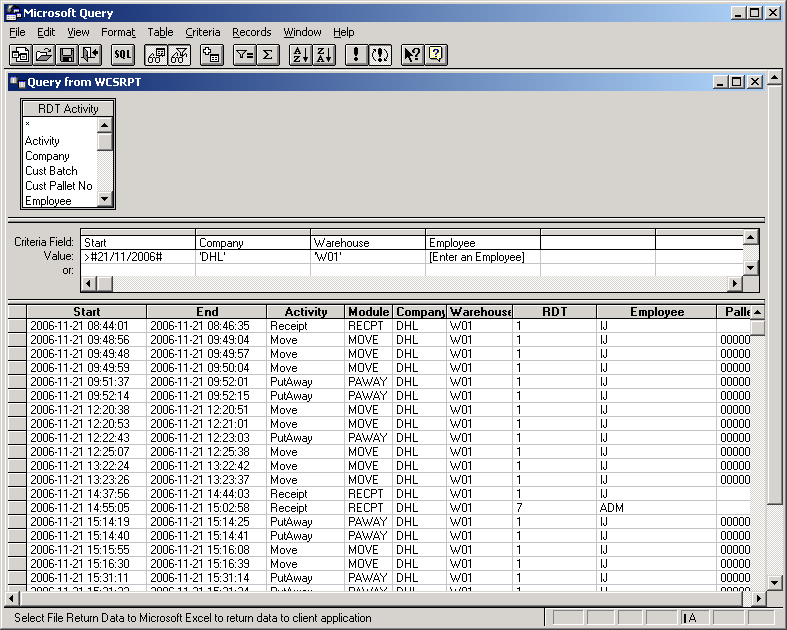
Choose the item you wish to parameterise.
Enter a prompt for the value.
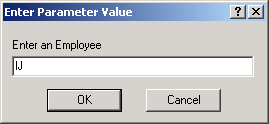
Hit Enter. You will be prompted for an employee code in a popup box. Enter one.
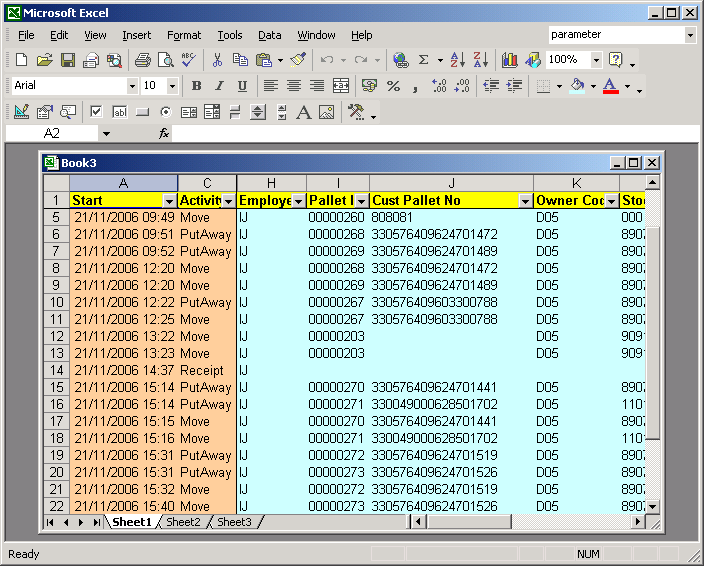
You can now exit Microsoft Query and return the data to the Excel spreadsheet by clicking the X in the top corner.
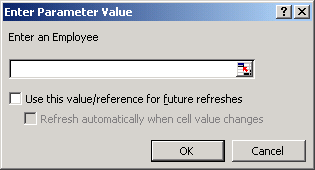
The data is now selecting only the tasks relevant to employee IJ. Whenever you refresh the data, the Employee will be prompted:
You can add multiple parameters to a query. Each will be prompted for in turn.
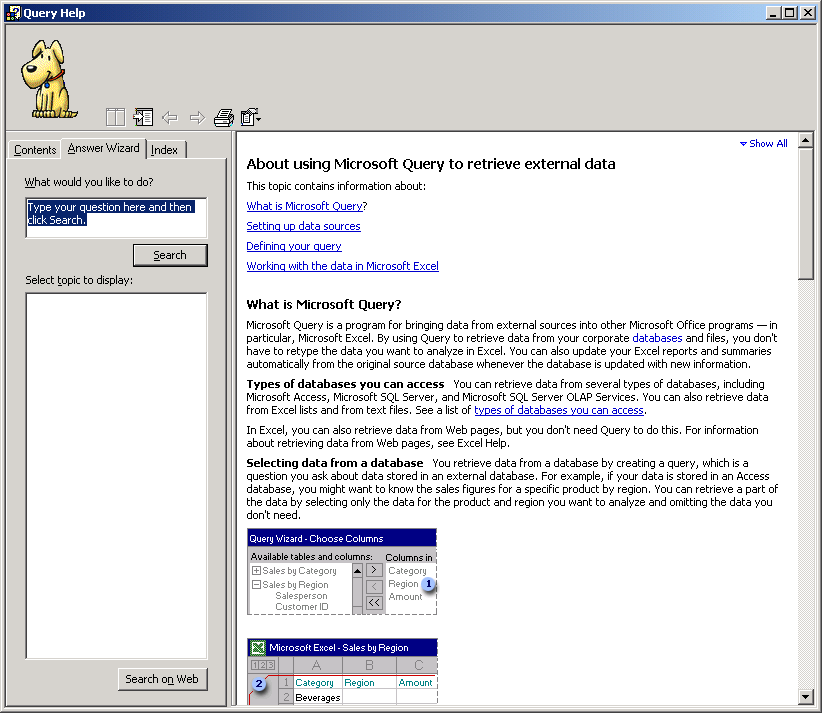
![]() Note: You have full help on how Microsoft Query works, available using the Help button on the Query forms.
Note: You have full help on how Microsoft Query works, available using the Help button on the Query forms.
Clearing Down Data
After use for some time, data may need to be cleared down from the WCS databases.
The WCS generally has two databases:
- rdt1.mdb
- log1.mdb (optional)
As the Logging database contains details of all messages sent to and from the WCS, this is the most likely database to get very large.
You will be warned when starting WCS Maintenance whether the databases are getting close to their maximum size.
The WCS databases can only go to 2Gb in size. If they get to that size, the system will stop working as expected.
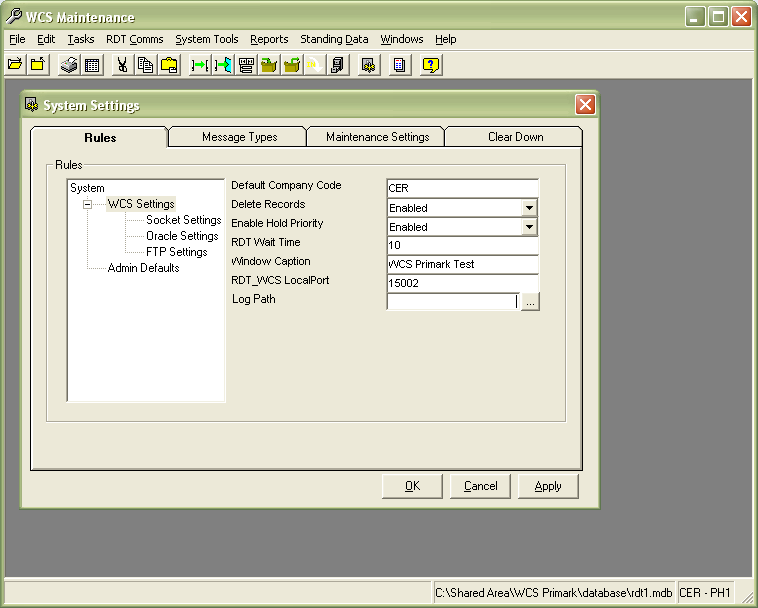
As mentioned, the most likely database to reach 2Gb is the Logging database, if the system has one. To find out where this is, check the WCS Maintenance form System Settings on the System Tools menu. Click the WCS Settings rule group, and check out the value of the last rule, Log Path. If it is set, the system uses a Logging database.
Clearing Logging Information
Renaming the Logging Database
The easiest was to reset the database size is to rename the Logging database, following the procedures below:
- Ensure that all WCS Maintenance users are logged out.
- Stop the WCS Server (RDT users do not necessarily have to be logged out, but it is best practice to do so).
- Rename the logging database to a suitable name (for example, log2.mdb or log1_<date>.mdb).
- Re-start the WCS Server. This will create a new, empty logging database as it starts.
Clear Logging Files
Alternatively, run the clear-down options on WCS Maintenance:
- Clear Out Error Log
- Clear Out Incoming and Outgoing Logs
Both of these are available on the System Tools menu. Full details of this Cleardown process can be seen in the following section.
![]() Note: Once this is done, you need to compact and repair the logging database. Either:
Note: Once this is done, you need to compact and repair the logging database. Either:
- Stop and Start the WCS Server - it should compact the database automatically, if no WCS Maintenance users are logged on.
Or:
- Ensure that all WCS Maintenance user are logged out.
- Stop the WCS Server (again, RF users do not necessarily have to log out, but it is best practice to do so).
- Run Database Utilities from the Start/WCS Utilities menu.
- Choose Compact Database from the Tools menu. Find the database and wait.
- When DBUtils comes back with a message that the database is compacted, re-start the WCS Server.
Cleardown
The cleardown settings control how the database is cleared of old or redundant data.
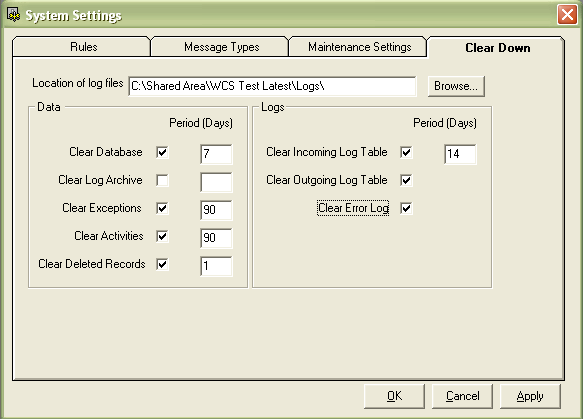
Cleardown Settings
In normal circumstances, the main WCS database will never accrue redundant data as, when it is completed, it is deleted from the database. The Log files (incoming, outgoing and Error) can be cleared down to a smaller time, as they are really only needed for support.
The Activities and Exceptions files are there for your analysis of the work done and exceptions made by employees. It would normally be expected to want to keep between 1 and 3 months of data in these files
Reasonable general cleardown settings are:
Running Cleardown
The cleardown process is a manually run process, as and when you want to run it.
It leaves behind the days' amount of data in specified files according to the settings. The process can be scheduled instead, using the standard Windows scheduler.
When the process runs, it creates a new cleardown database in your Logs area (also a parameter set in this form), containing all the data that has been removed from the database. Each time cleardown is run, a new archive database is created, so I suggest that this process is run infrequently (perhaps once a month or less).
The data in from each cleardown run (in each archive database) is still accessible (for enquiry purposes) and the process for doing this can be seen later in this mail.
This process should only be set up and run on the Maintenance session that runs on the WCS Server machine, as the Cleardown database will be created on the machine that ran the process.
The process can be run in several ways:
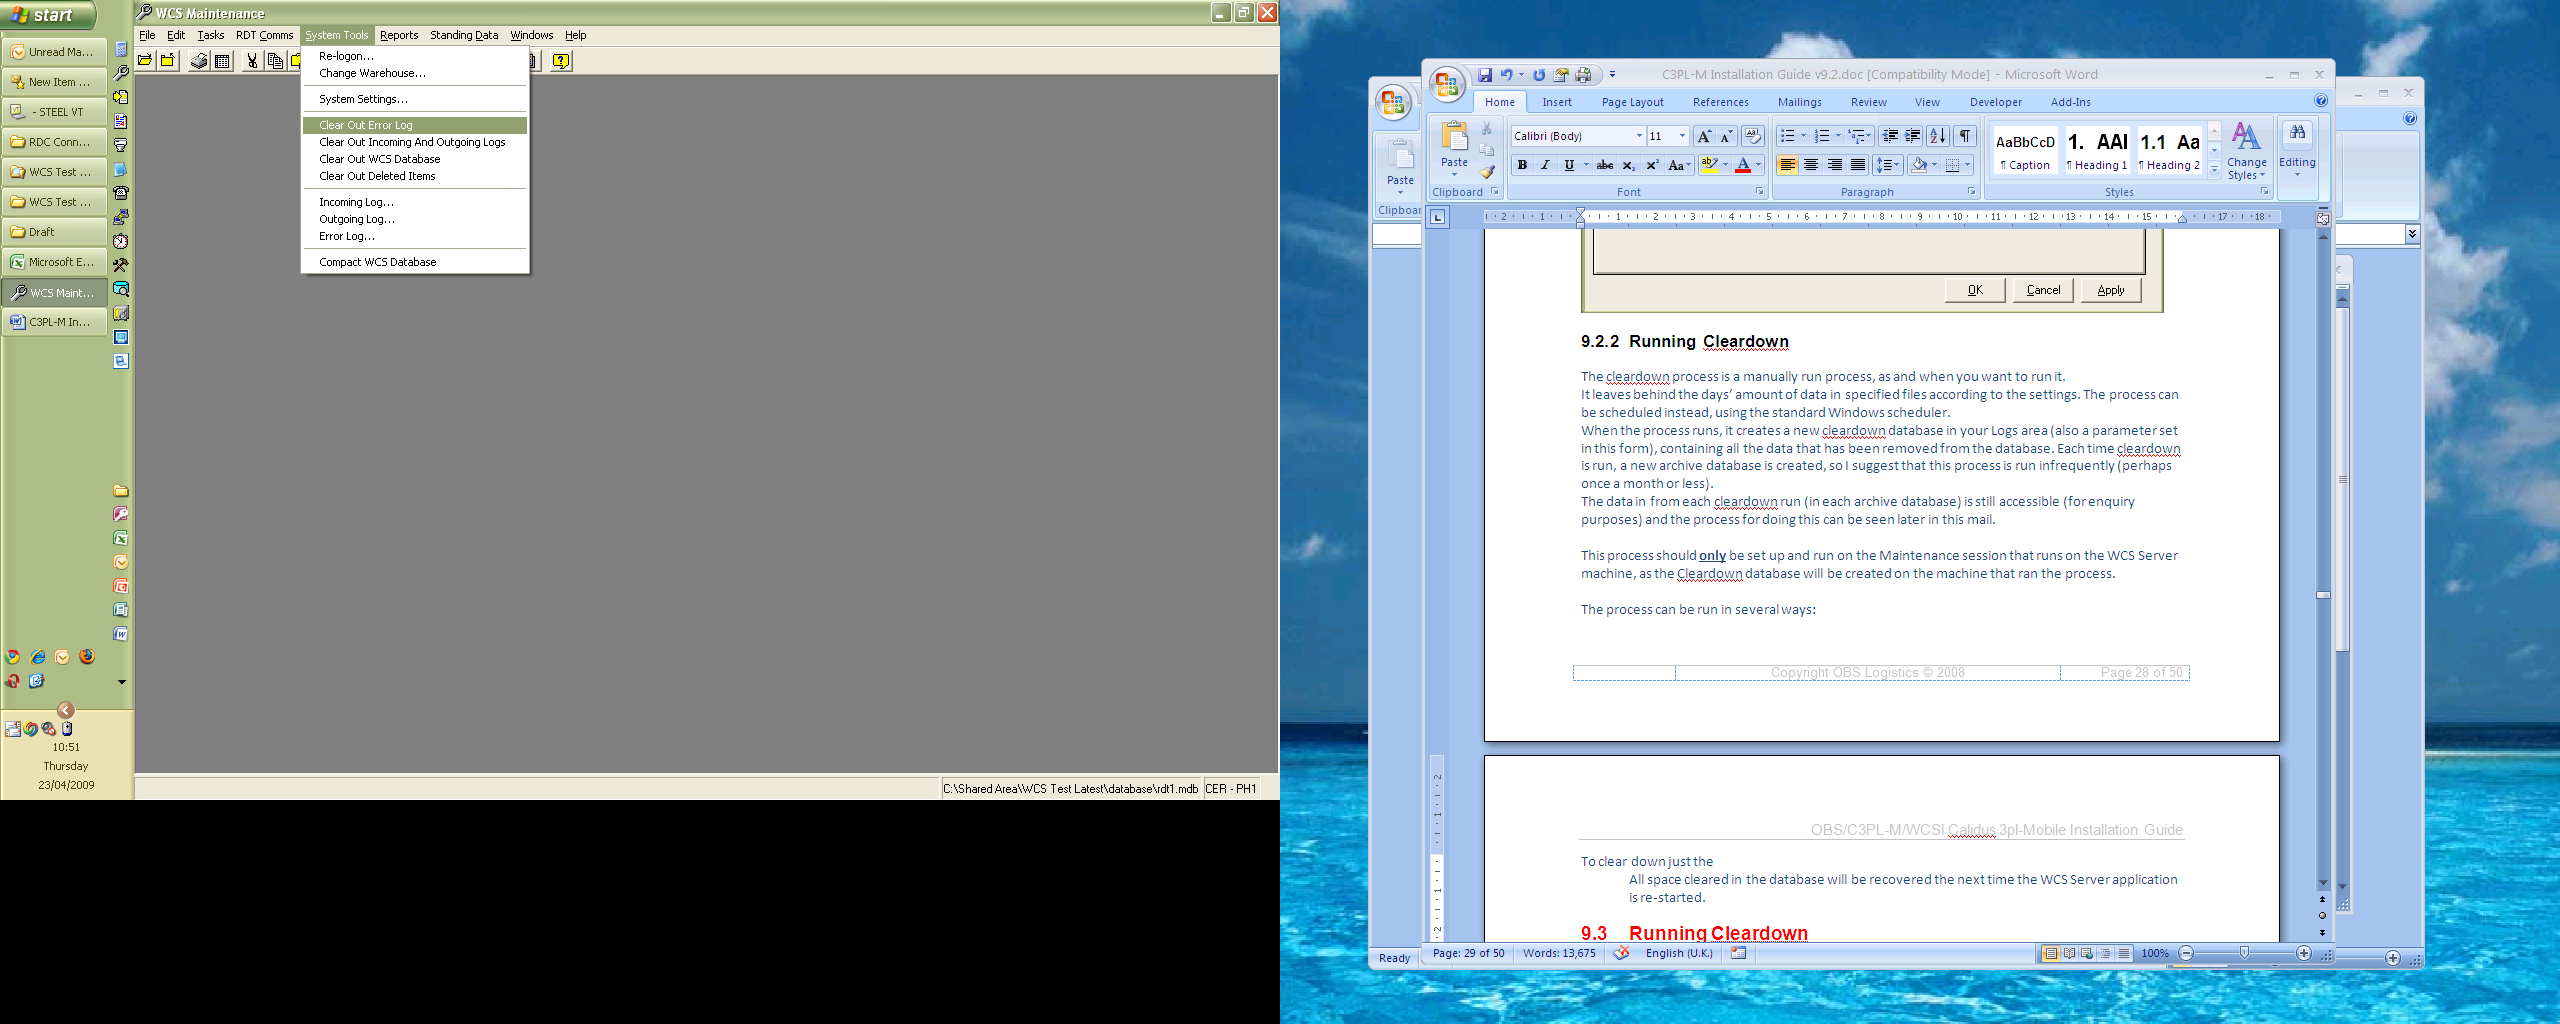
- To clear down just the Error Log, choose the option Clear Out Error Log from the System Tools menu.
- To clear down just the Incoming and Outgoing logs, choose the option Clear Out Incoming and Outgoing Logs from the System Tools menu.
- To clear down just data marked for deletion in the database (i.e. data deleted by WCS Maintenance users), choose the option Clear Out Deleted Items from the System Tools menu.
- To clear down the all the WCS databases according to the Cleardown Settings, choose the option Clear Out WCS Database from the System Tools menu.
All space cleared in the database will be recovered the next time the WCS Server application is re-started.
Archive Database Queries
When you create a logging database copy or clear down data from the logging database, the users may need to enquire against it. The easiest way to set them up for this is to create an Archive database. This can be done by copying the existing WCS database rdt1 to a name like rdt1archive.
To access archive logging databases:
Start WCSMaintenance as normal.
Do not open the normal database (rdt1) but instead open the new database rdt1archive.
Log in as normal.
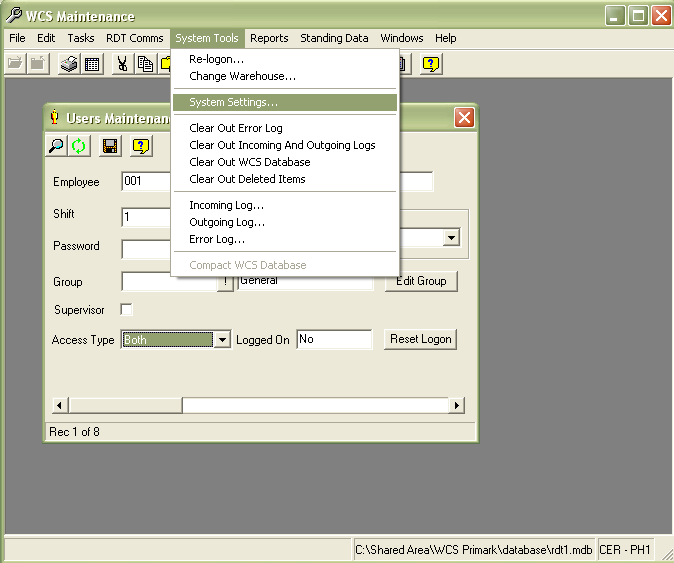
Click on System Tools'/'System Settings from the menu.
Click on the Rules tab and the WCS Settings group.
Click on the Log Path rule and enter the full file specification of the archive logging database you want to enquire on. Alternatively, use the Browse (...) button to the right of the Log Path rule to search for the archive logging database.
Click Apply and/or OK to close the form.
Close the database by choosing Close WCS Database from the File menu.
Open the Archive database again by choosing Open WCS Database from the File menu and choosing the archive database from the pop-up browser.
This Archive database will now show the logging data from the archive logging database chosen, allowing users to enquire and report against this information.
Restricting WCS Maintenance User Access
Setting User Access
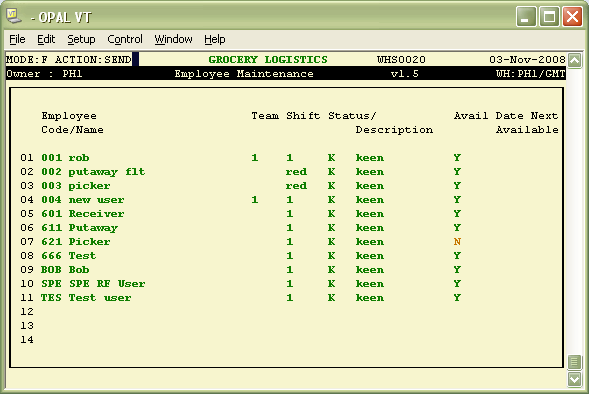
The first stage is to ensure all employees are sent across to Calidus 3pl-Mobile from Calidus 3pl. The procedure for this can be seen in the RDT Training Guide WMS v4, section 4.1.
This basically comprises typing SEND from the Employees Maintenance screen in WMS:
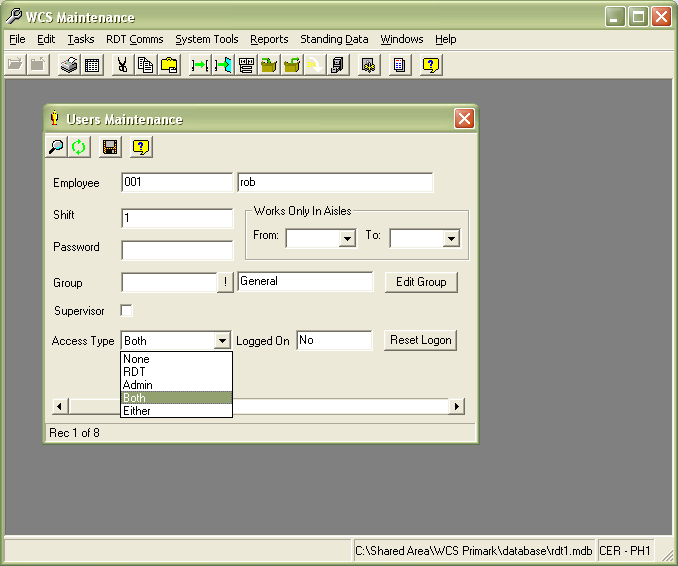
Once sent across, all users will be set by default to be RDT users. For any users that require WCS Maintenance access, the access type of that user must be modified, as below:
For users who require access to WCS Maintenance ONLY, choose type "Admin".
For users who require access to WCS Maintenance OR RDT functions, choose type "Either".
For users who require access to WCS Maintenance AND RDT functions at the same time, choose type "Both".
Click the save button when you are finished.
If a user is set to any of the options listed above, the menu options allowable for them are then limited by the group or, if they do not have one, by the system defaults (see section 5.2).
To set a Group, they must first be set up by the Groups Maintenance form (see section 5.3).
Setting System Defaults
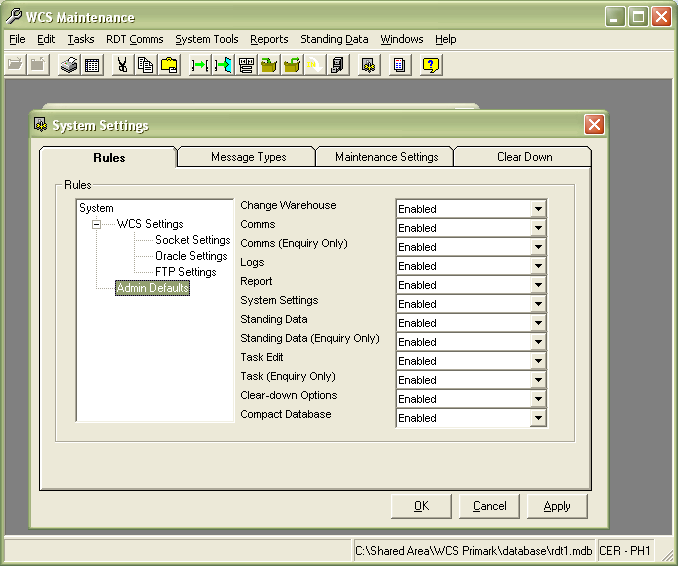
The system defaults are maintained on System Tools/System Settings.
Click the Rules tab, and then the 'Admin Defaults' group.
Each rule affects the menu items that can be seen and used within maintenance, if the user does not have a group.
| Rule | Description |
|---|---|
| Change Warehouse | If enabled, allows the user to change the default warehouse they can see. |
| Comms | Allows the user full access to the RDT Comms menu. If this is enabled, the following option need not be. |
| Comms (Enquiry Only) | Allows the user Enquiry-only access to the top 2 items on the RDT Comms menu. |
| Logs | Allows the user access to the Logs Enquiry screens in the System Tools menu. That is: Incoming Log; Outgoing Log and; Error Log. |
| Report | Allows the user access to the Reports menu |
| System Settings | Allows the user access to the System Settings option on the System Tools menu. NOTE: This option should only be enabled for super-users, and even then should only be enabled sparingly. |
| Standing Data | Allows the user full access to all items on the Standing Data menu. If this is enabled, the following option need not be. NOTE: This option will allow users to see other users' passwords, and should therefore be limited only to those users who require it. |
| Standing Data (Enquiry Only) | Allows the user access to the Enquiry screens only on the Standing Data menu. That is all the items on the menu in the second group on the menu list. The top and bottom groups will not be enabled. |
| Task Edit | Allows the user full access to all the screens on the Tasks menu. If this is enabled, the following option need not be. |
| Task (Enquiry Only) | Allows the user access to all the screens on the Tasks menu, but for enquiry purposes only. |
| Clear-down Options | Allows the user access to the Clear-Out options on the System Tools menu. NOTE: This should only be available for super-users. |
| Compact Database | Allows the user access to the Compact Database option on the System Tools menu. |
Setting Group Defaults
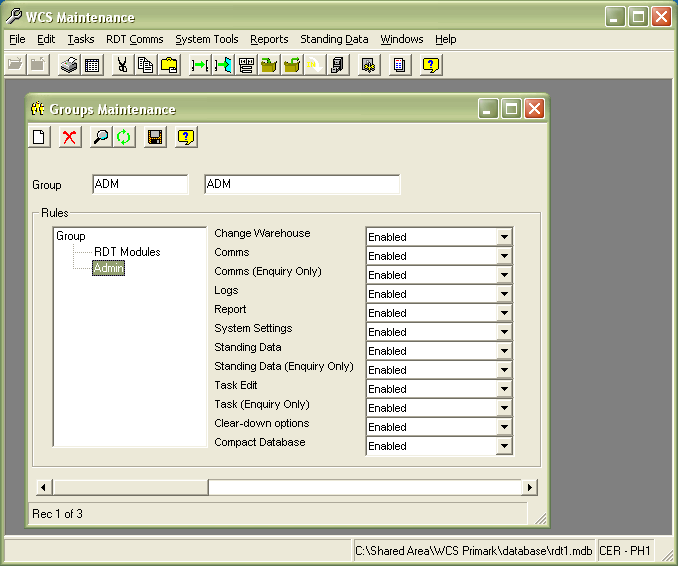
Groups are maintained by the Groups Maintenance screen, accessed from the Standing Data Maintenance menu.
Full help for maintaining and creating Groups can be found in the on-line help and the WCS Maintenance user Guide.
Click the Admin group to see the settings that affect the WCS Maintenance options available to users assigned to this group.
Each rule affects the menu items that can be seen and used within maintenance, if the user does not have a group.
| Rule | Description |
|---|---|
| Change Warehouse | If enabled, allows the user to change the default warehouse they can see. |
| Comms | Allows the user full access to the RDT Comms menu. If this is enabled, the following option need not be. |
| Comms (Enquiry Only) | Allows the user Enquiry-only access to the top 2 items on the RDT Comms menu. |
| Logs | Allows the user access to the Logs Enquiry screens in the System Tools menu. That is: Incoming Log; Outgoing Log and; Error Log. |
| Report | Allows the user access to the Reports menu |
| System Settings | Allows the user access to the System Settings option on the System Tools menu. NOTE: This option should only be enabled for super-users, and even then should only be enabled sparingly. |
| Standing Data | Allows the user full access to all items on the Standing Data menu. If this is enabled, the following option need not be. NOTE: This option will allow users to see other users' passwords, and should therefore be limited only to those users who require it. |
| Standing Data (Enquiry Only) | Allows the user access to the Enquiry screens only on the Standing Data menu. That is all the items on the menu in the second group on the menu list. The top and bottom groups will not be enabled. |
| Task Edit | Allows the user full access to all the screens on the Tasks menu. If this is enabled, the following option need not be. |
| Task (Enquiry Only) | Allows the user access to all the screens on the Tasks menu, but for enquiry purposes only. |
| Clear-down Options | Allows the user access to the Clear-Out options on the System Tools menu. NOTE: This should only be available for super-users. |
| Compact Database | Allows the user access to the Compact Database option on the System Tools menu. |
Failsafe WMS/WCS Recovery Process
In the event of failure of any portion of the systems, a full-restart of all processes associated to RF processes will normally resolve the problem. The full process normally takes less than 15 minutes.
Summary of Steps
- Check running WMS Update Processes
- Check WMS Interfaces
- Re-start all WMS Update processes
- Re-start WCS-Server application
- Re-start WCS Server machine
Check running WMS Update processes
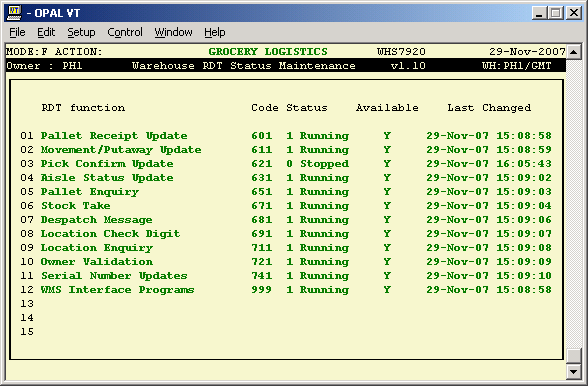
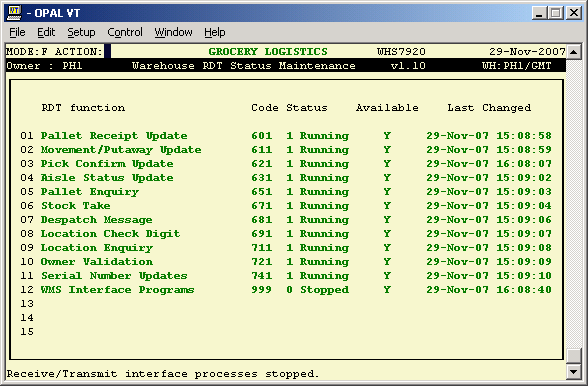
On the UNISON RDT Menu, run the RDT Start/Stop screen:
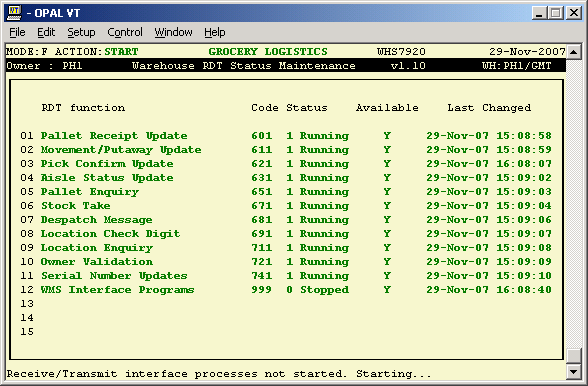
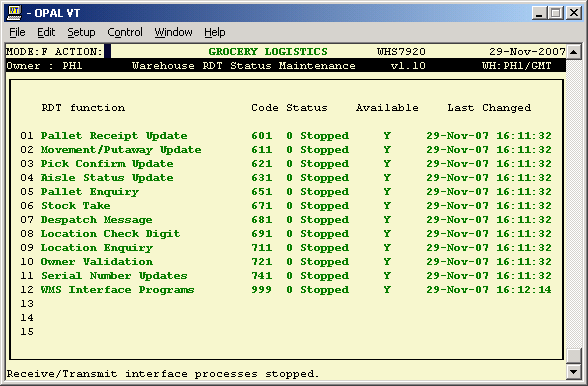
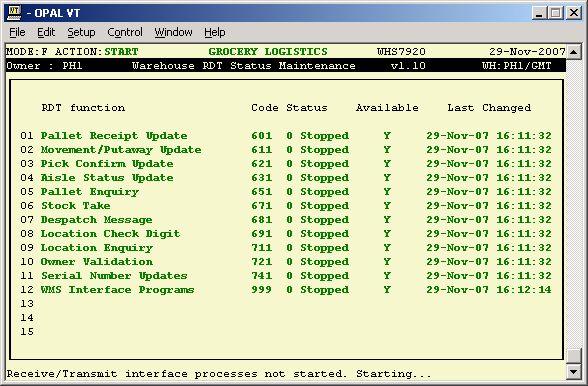
Should any of the processes be stopped, start them by entering START from the action prompt.
At this point, check with the operation that the problem has resolved. If not, move on to the next stage.
Check WMS Interfaces
On the UNISON RDT Menu, run the RDT Start/Stop screen:
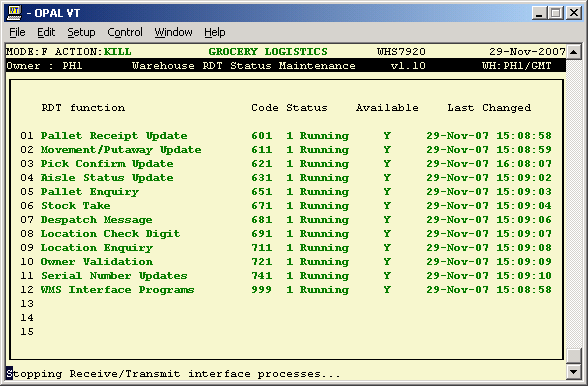
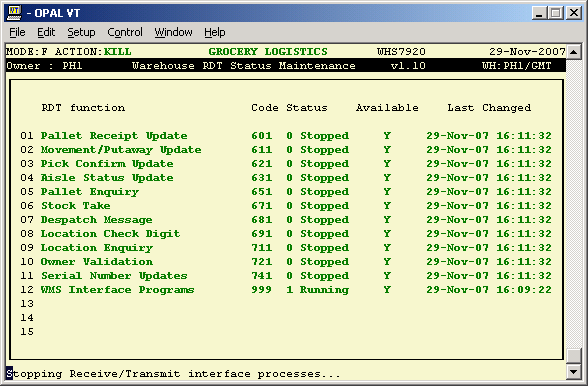
Stop and start the WMS Interface processes by first entering KILL:
Re-start them by typing START.
At this point, check with the operation that the problem has resolved. If not, move on to the next stage.
Re-start all WMS Update processes
On the UNISON RDT Menu, run the RDT Start/Stop screen:
Stop the Update processes by entering STOP
Stop the WMS Interface processes by entering KILL:
Re-start them all by typing START.
At this point, check with the operation that the problem has resolved. If not, move on to the next stage.
Re-start WCS-Server application
Log on the WCS Server machine and locate the WCS-Server application:
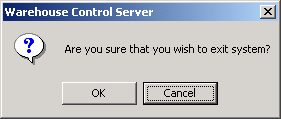
To stop, click the X in the corner:
Enter the password.
Click OK
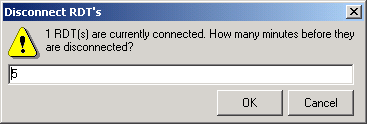
If any RDT users are connected, you will be prompted how long to wait before logging them off:
If you enter 0, the WCS-Server application will exit immediately without informing any connected RF users.
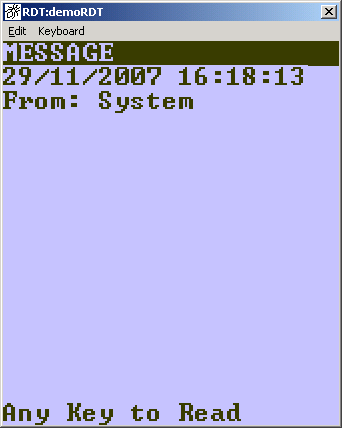
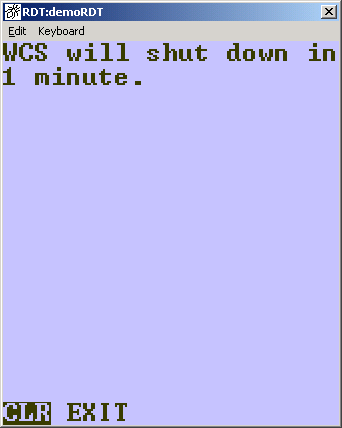
If you leave a positive number of minutes in here, the WCS-Server will commence a countdown on the screen, and will send each connected RF user a message, to exit the system immediately.
To restart the WCS-Server application, choose the application from the Start menu/Programs/Warehouse Control Server/WCS Server shortcut.
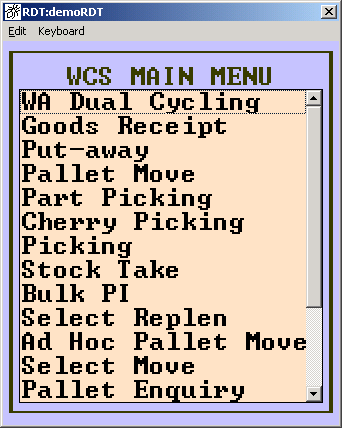
When the server restarts, the WCS will reconnect to any RDT users when they next press a key:
![]() Note: If you are quick enough stopping and starting the WCS-Server application, the users will not know that the application has been re-started - they will simply continue to work as usual, as long as you get it re-started within 30 seconds.
Note: If you are quick enough stopping and starting the WCS-Server application, the users will not know that the application has been re-started - they will simply continue to work as usual, as long as you get it re-started within 30 seconds.
At this point, check with the operation that the problem has resolved. If not, move on to the next stage. Also, contact OBSL support.
Re-start WCS Server machine
Ensure all users have logged off the system, including RF users and WCS Maintenance users.
Reboot the WCS Server machine.
When the machine has re-booted, restart the WCS application.
Changing WCS/WMS Connectivity
It is sometimes necessary to change the connectivity settings on the WMS and/or WCS (for example, a site move). The following is a standard process covering this procedure.
![]() Note: If the WCS IP address is being changed then a new authorisation code may be required. This can be requested from OBS Logistics.
Note: If the WCS IP address is being changed then a new authorisation code may be required. This can be requested from OBS Logistics.
Requirements
Before this process is started, you will need to know:
- The WMS IP address.
- The port number used to send messages from the WMS to the WCS.
- The port number used to send messages from the WCS to the WMS.
Stop the existing WMS - WCS Interface
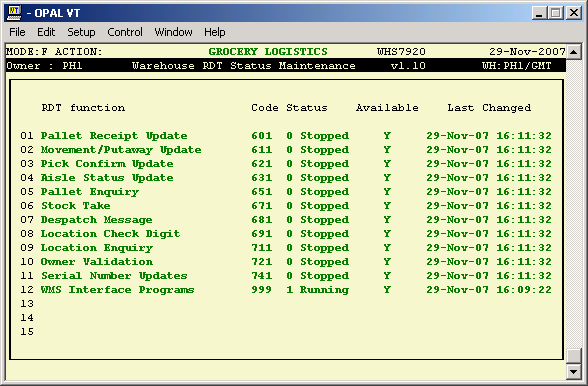
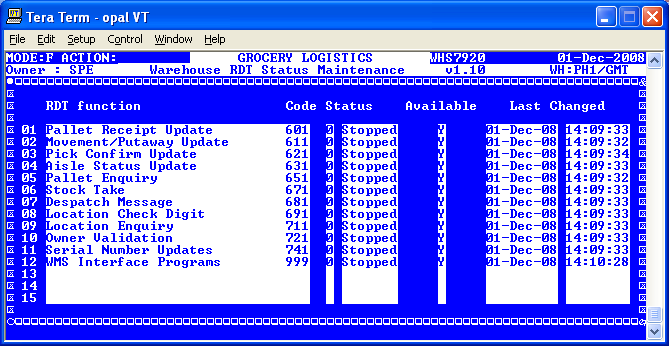
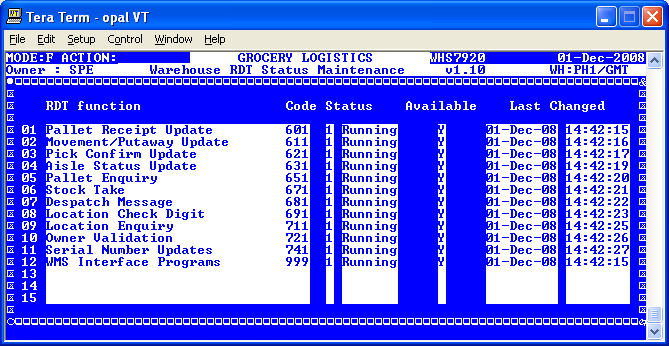
Stop the existing WMS/WCS interface using the 'RDT Start/Stop Screen' (WHS7920). This is done by entering 'STOP' at the action prompt to stop the RF processes followed by entering 'KILL' at the action prompt to stop the interface. Once the RF processes and interface have been stopped, the screen should display all of the processes as status 0 (stopped). An example of this can be seen in the screenshot below:
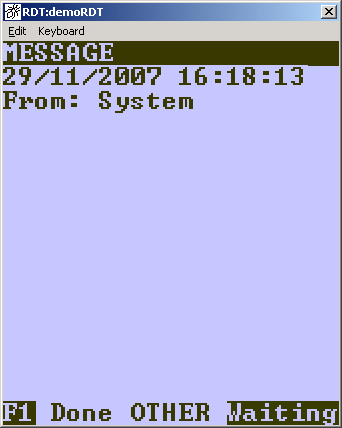
The WCS should also display a message showing that there is no connection between the WCS and WMS:
Update the WCS Connection Settings
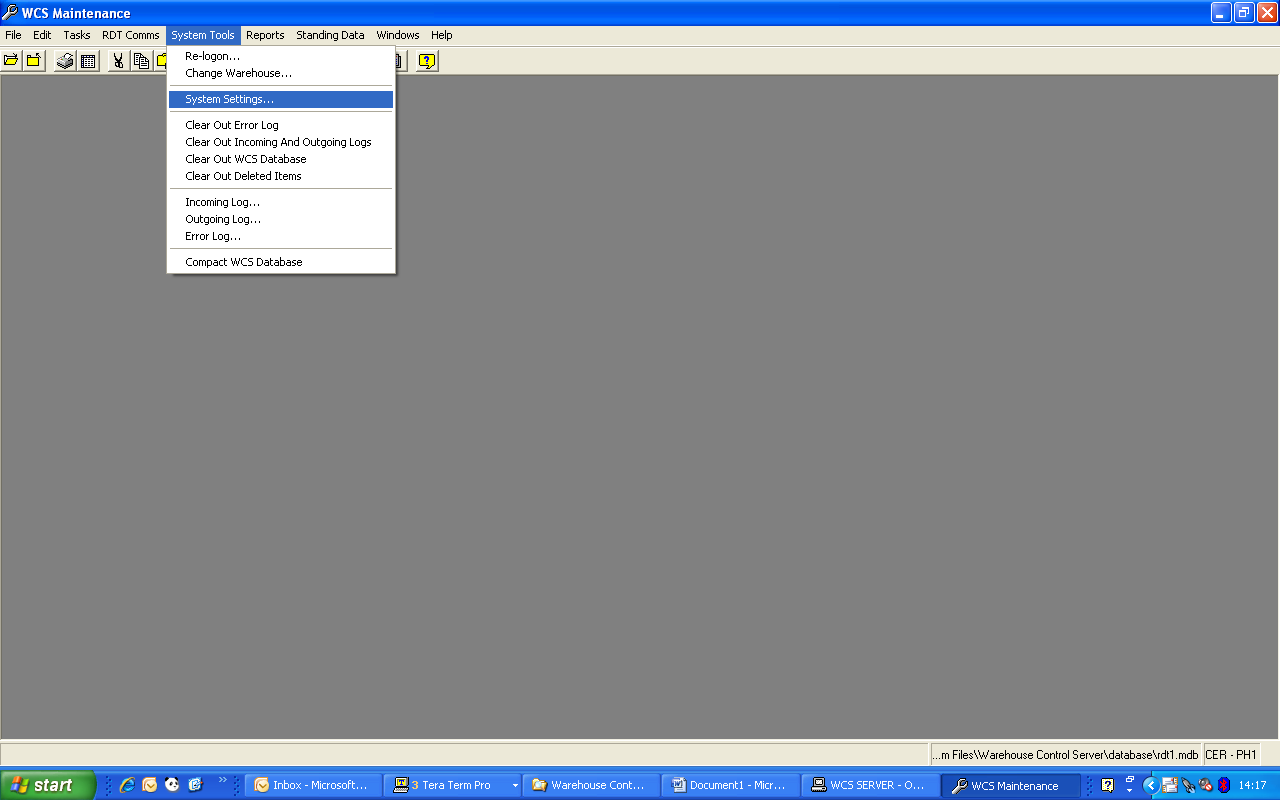
Stop the WCS Server application. Start a WCS Maintenance session and open the 'System Settings' screen which can be done by selecting the 'System Settings…' option from the 'System Tools' drop down list. This can be seen in the screenshot below:
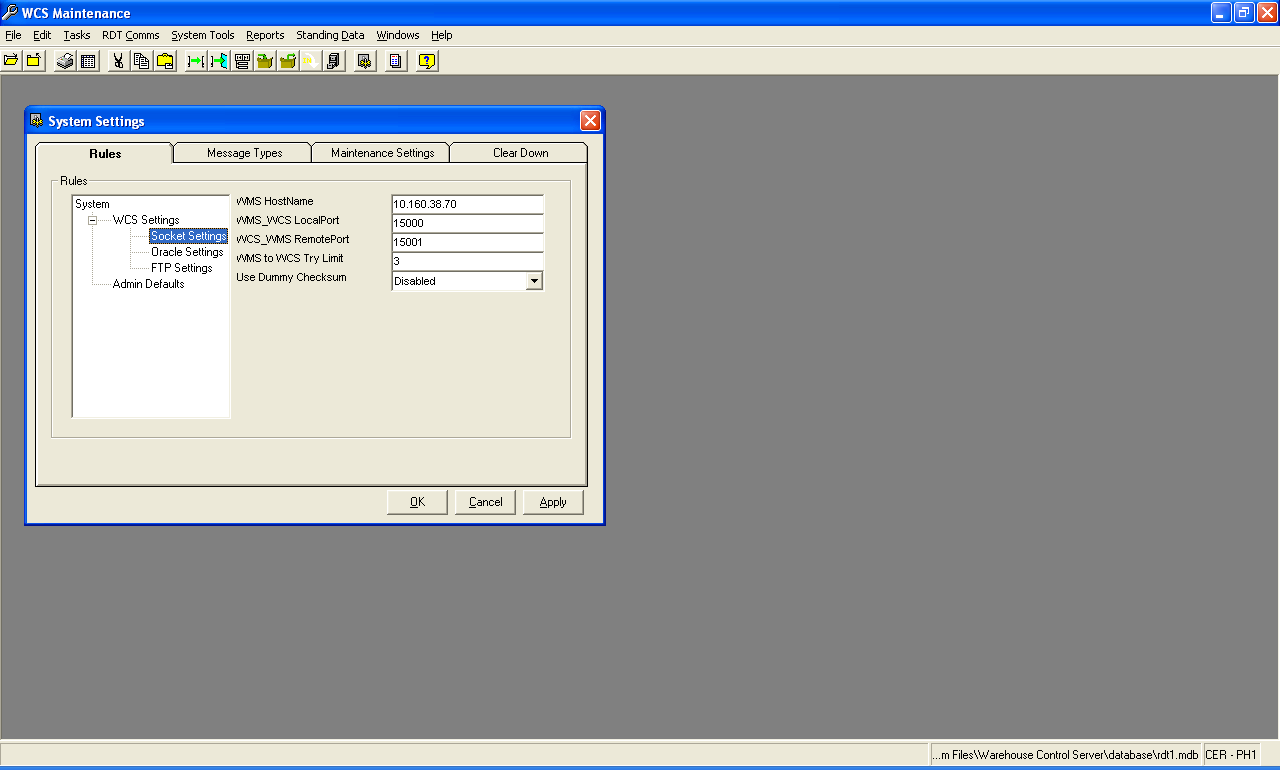
Once the 'System Settings' screen has opened, select the 'Socket Settings' option before entering the WMS IP Address (WMS HostName), the WMS to WCS port number (WMS_WCS LocalPort) and WCS to WMS port number (WCS_WMS RemotePort) with the relevant values. An example is shown in the screenshot below:
Update the WMS Connection Settings
If the IP address of the WCS PC has changed then follow the steps below:
At a UNIX prompt on the WMS change directory to the RDT directory using the following command:
cd $RDT_LOCATION
Once in this directory, open the 'start_int' file. Once the 'start_int' file has been opened, locate the lines of code that contain the connection settings. An example of the code is displayed below:
nohup $RDT_LOCATION/wms_xmit3 $WMSWCS_MBX 1024 15000 10.43.0.124 0 1 1 0 60000 0
$RDT_LOCATION/ >>$RDT_LOCATION/wms_if_msgs.log &
nohup $RDT_LOCATION/wms_recv3 $RDT_LOCATION/rmp.ctrl 15001 1 0 5 $RDT_LOCATION >
>$RDT_LOCATION/wms_if_msgs.log &
Ensure that the IP address of the WCS PC (highlighted above in blue), the WMS to WCS port number (highlighted above in green) and the WCS to WMS port number (highlighted above in red) are populated correctly. If they are not correct, amend the values before saving the changes.
![]() Note: If the RDT directory ($RDT_LOCATION) or the 'start_int' program does not exist then contact OBS Logistics support.
Note: If the RDT directory ($RDT_LOCATION) or the 'start_int' program does not exist then contact OBS Logistics support.
Start the WCS and Interface
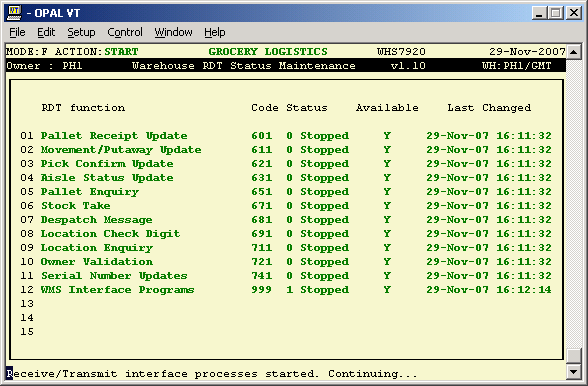
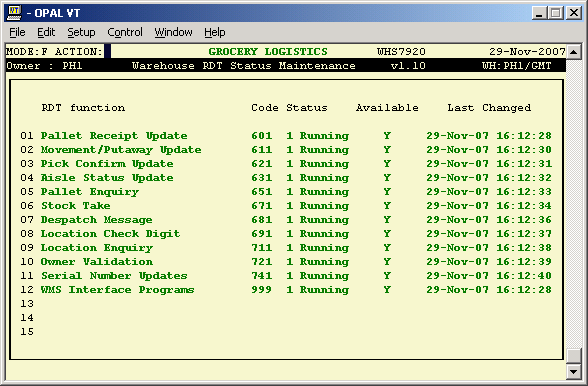
Start the WCS Server application, it should still show as no connection to the WMS. Start the WMS/WCS interface on the new machine using the 'RDT Start/Stop Screen' (WHS7920). This is done by entering 'START' at the action prompt. Once the RF processes and interface have been started, the screen should display all of the processes as status 1 (Running). An example of this can be seen in the screenshot below:
The WCS should also display a message showing that it is connected to the WMS:
The WCS should be available to use now.
Appendices
WCS File Layout
RDT Activity table
