Configurable Screens
Configurable Screens User Guide
The following document details the set up of the configurable screens. The configuration screen allows the user to define what data columns are shown and in what sequence.
1 - Defining Data Columns
2 - Adding a new Data Field
3 - Removing a Data Field
4 - Changing the Order of the Data Fields
5 - Sorting
1 - Defining Data Columns
The example screen used is from Stock Movement Enquiry. In order to be able to define the data fields / columns, the user must first select the data that is to be enquired on (see screen shot below).
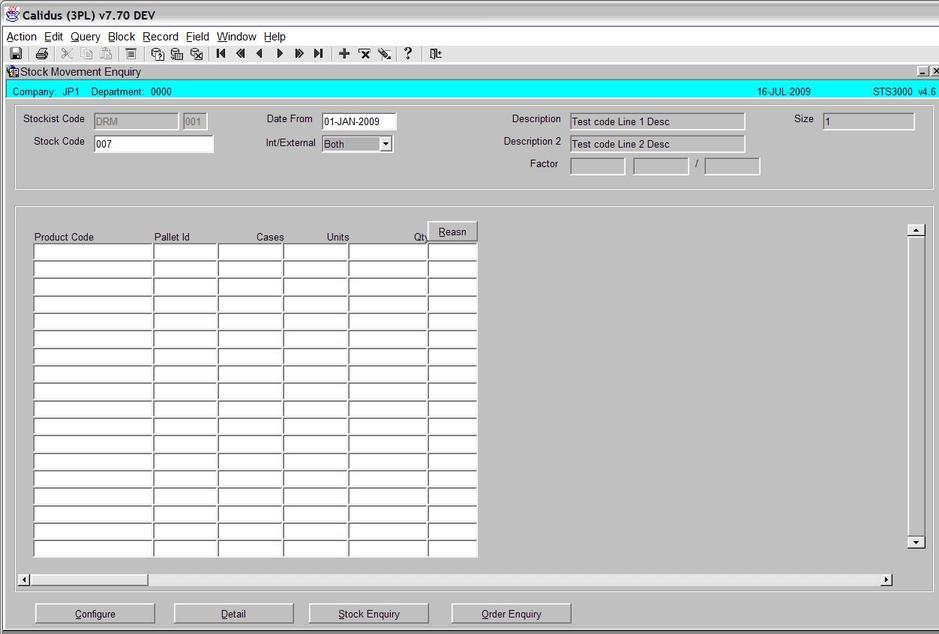
In the example above, the Stock Code, Date From and Int/External data must be entered. Once, entered the user will execute the query as per normal.
In order to define the data columns the user can now press the ‘Configure’ button (see screen shot below).
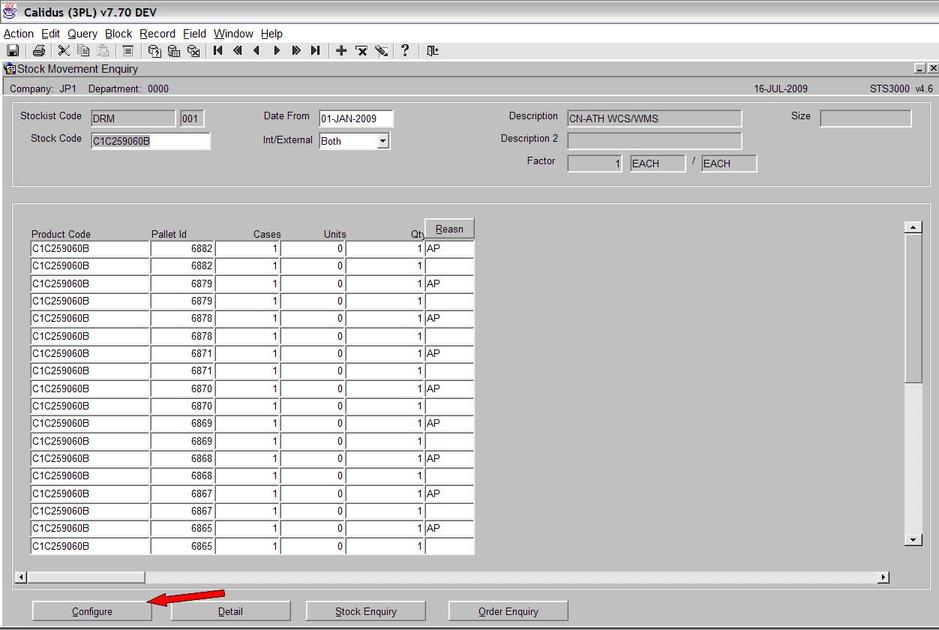
The Configure screen will now be displayed (see screen shot below)
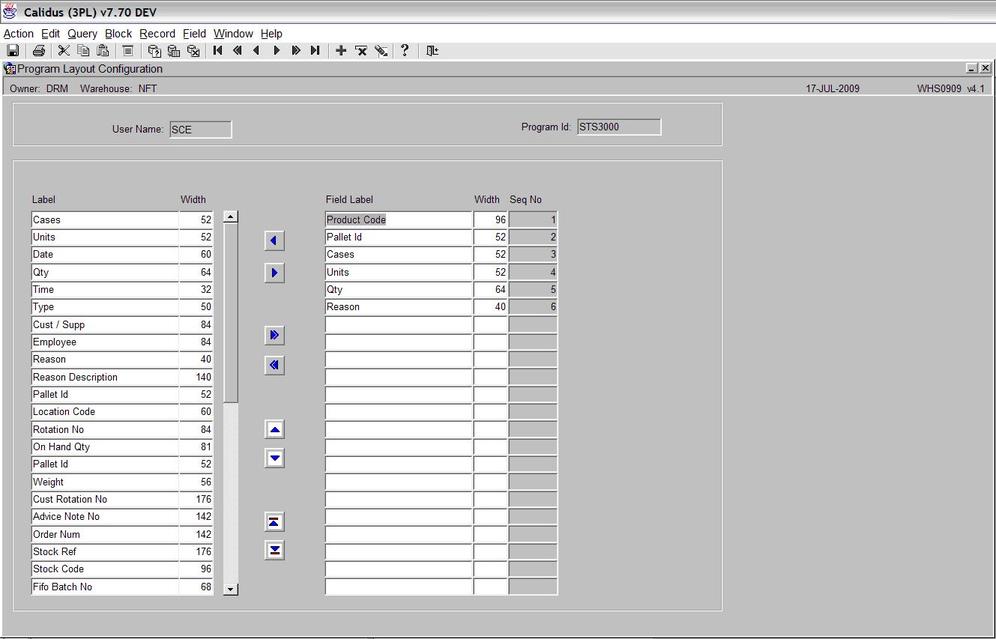
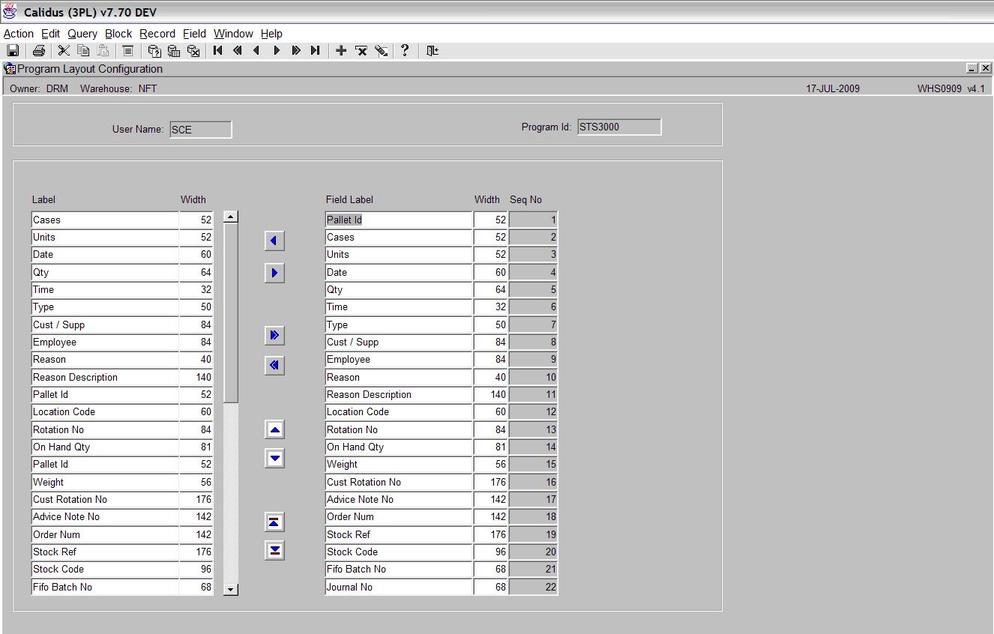
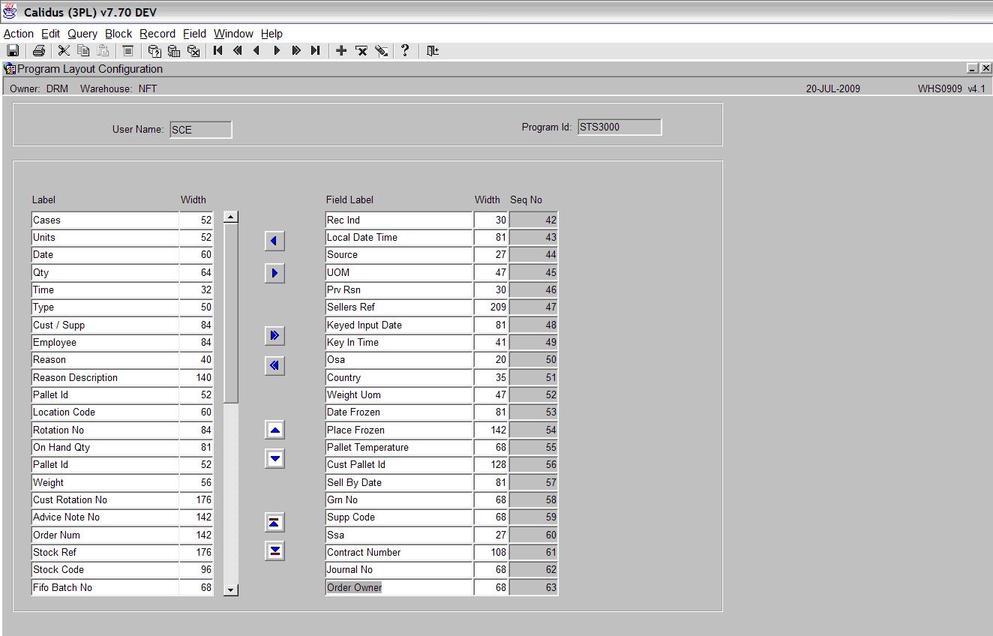
The main purpose of the screen is to allow the user to choose the data fields that they require. The available data fields are shown in the left hand side of the screen (see screen shot below):
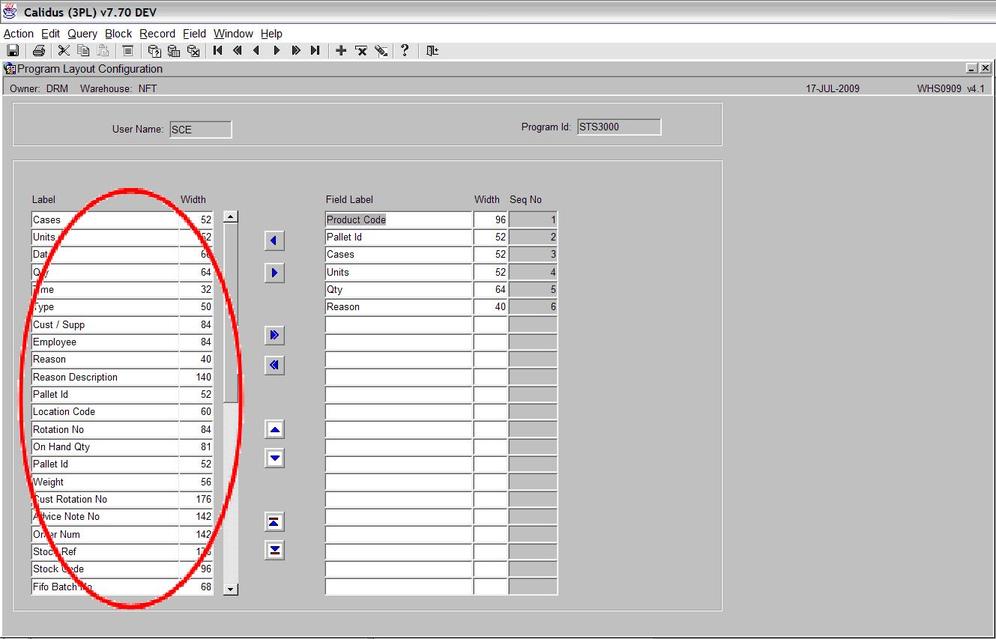
The data fields in the left hand side of the screen are the fields that are currently being used (see screen shot below)
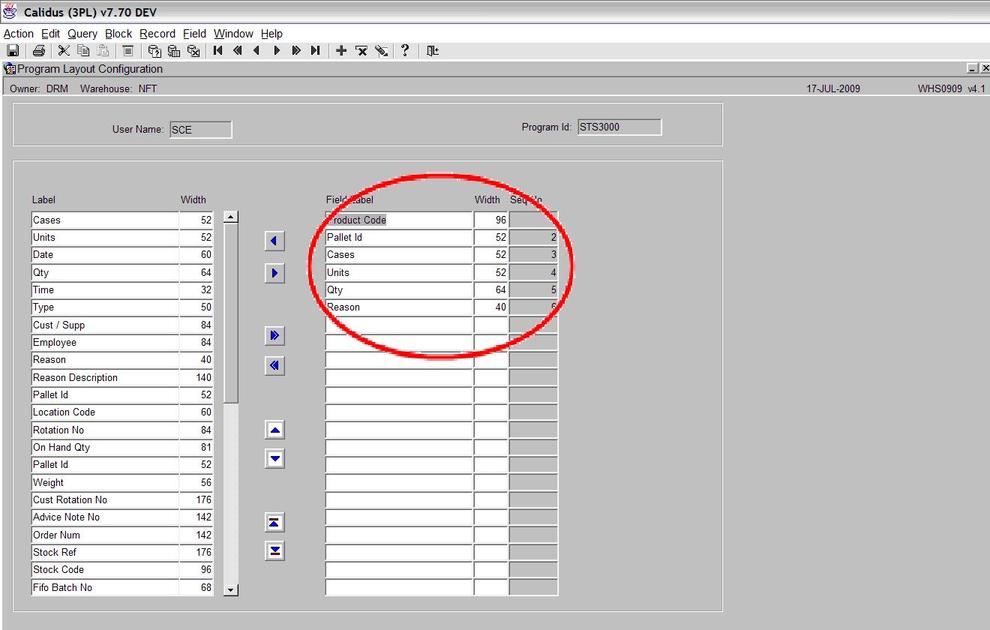
2 - Adding a new Data Field
To add a new data field, first select the field you wish to add by clicking the field name in the left hand column. The field will now be highlighted (see screen shot below)
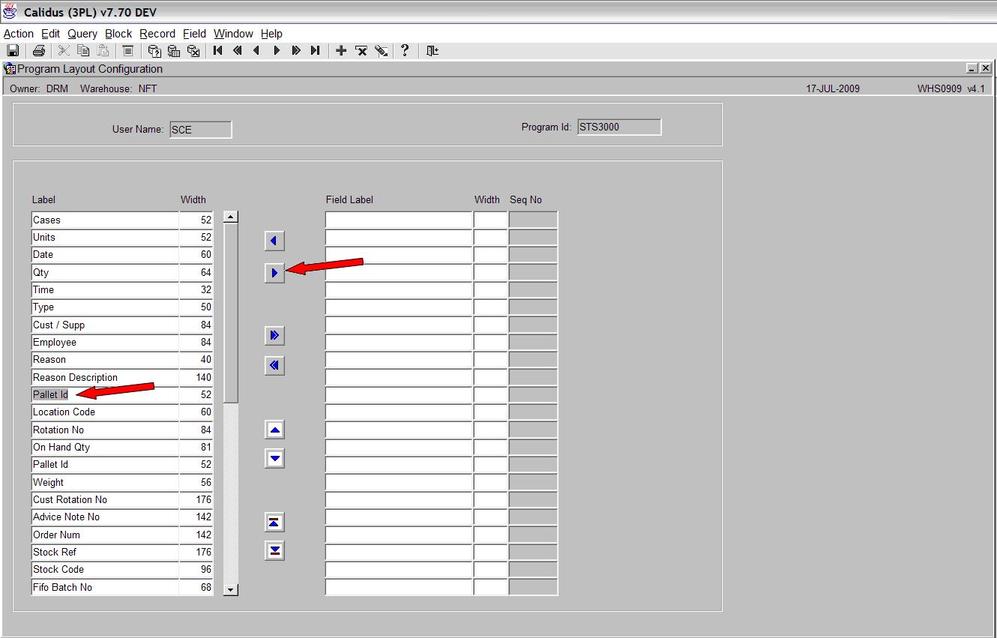
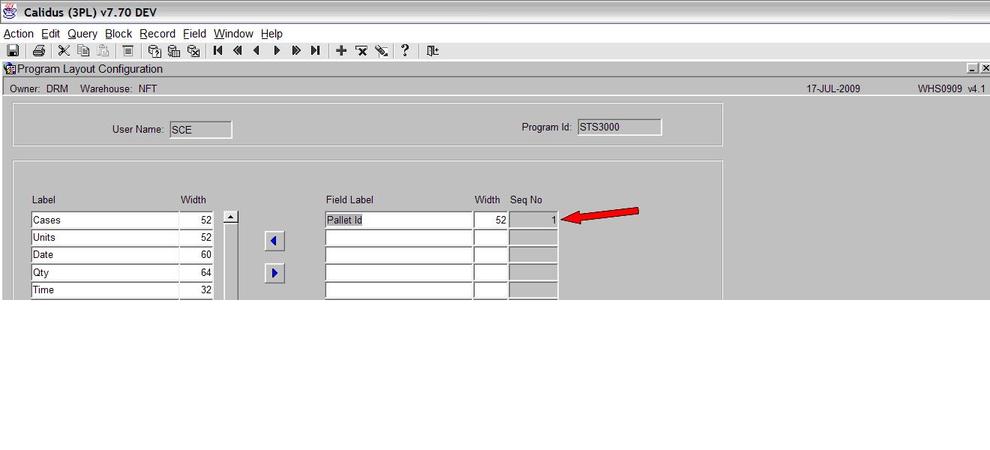
To add the data field press the ‘right pointing arrow’ button (see above). The data field will now appear in the right hand column (see screen shot below)
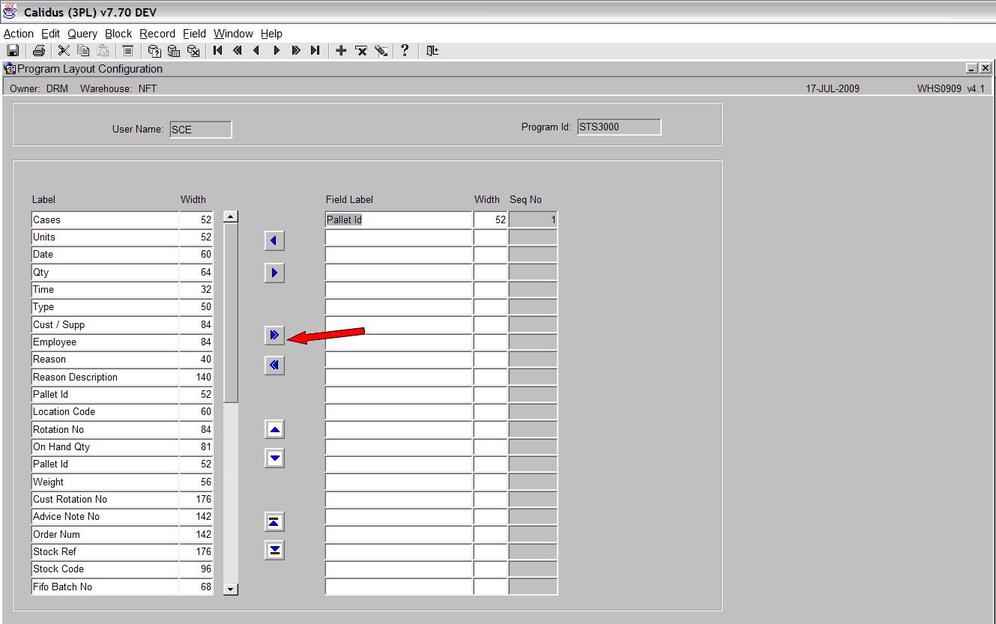
If you wish to add all the data fields then the ‘double’ right pointing arrow. (see screen shots below)
3 - Removing a Data Field
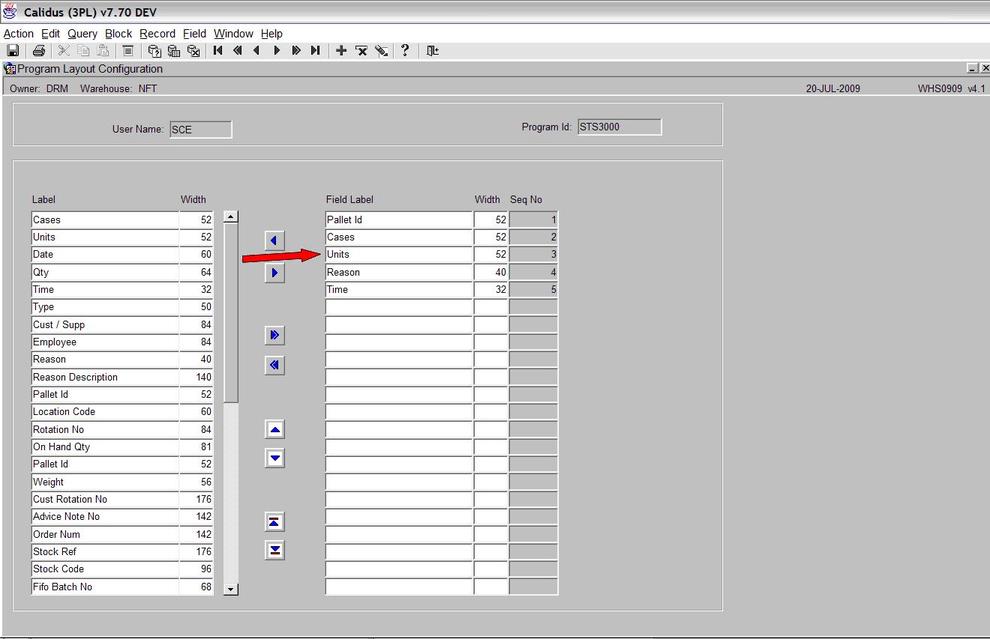
If you wish to remove a data field, left click on the field you wish to remove in the right hand column (see screen shot below)
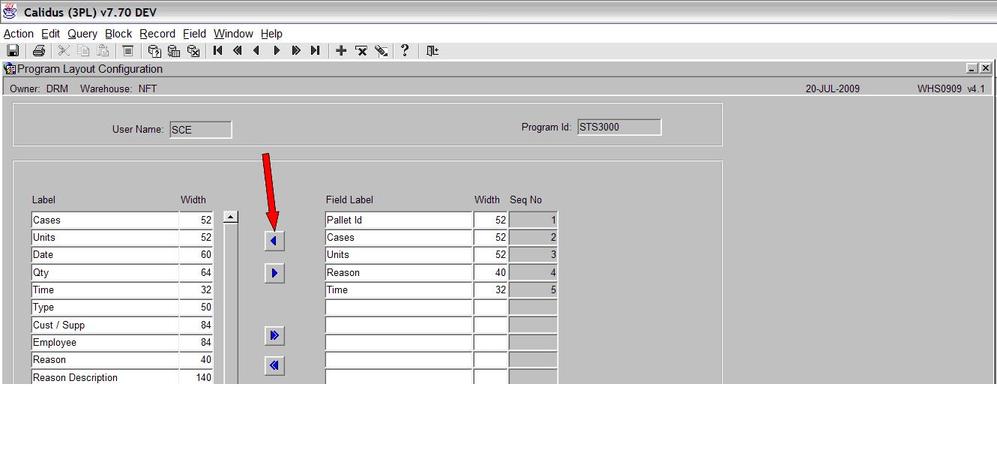
Press the left pointing arrow to remove the data field (see screen shot below)
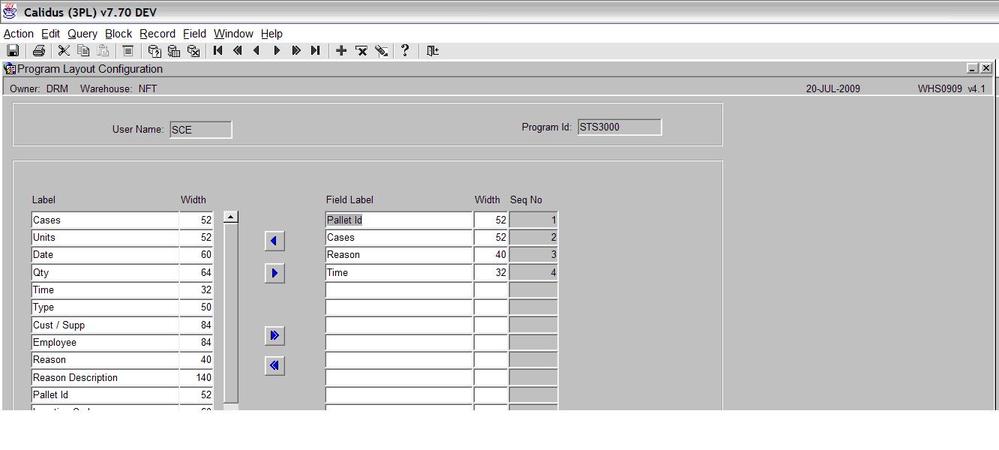
The ‘Units’ data field has now been removed (see screen shot below)
If we now press the ‘Exit’ button we can see the four data fields with the relevant data showing (see screen shot below)
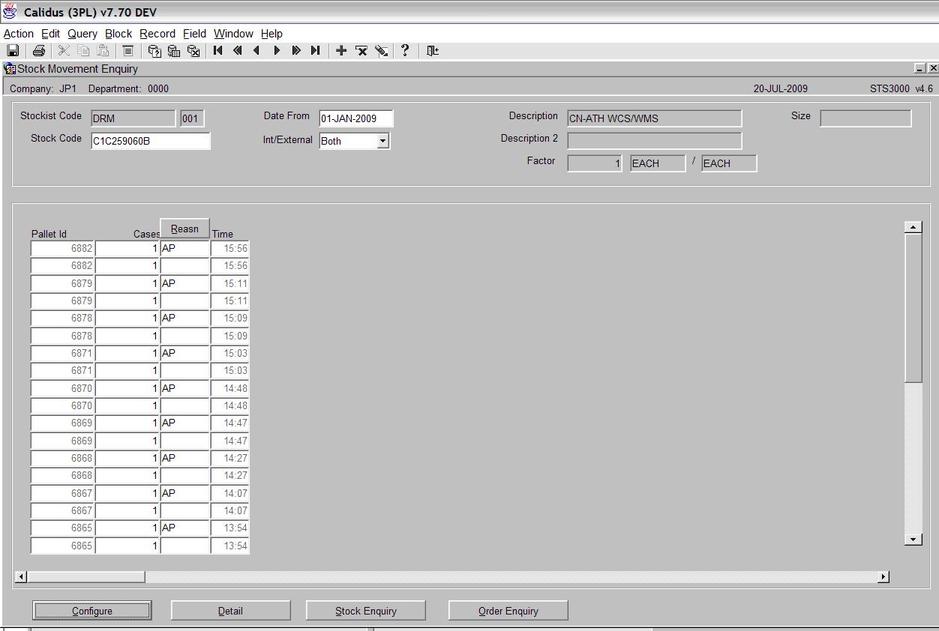
4 - Changing the Order of the Data Fields
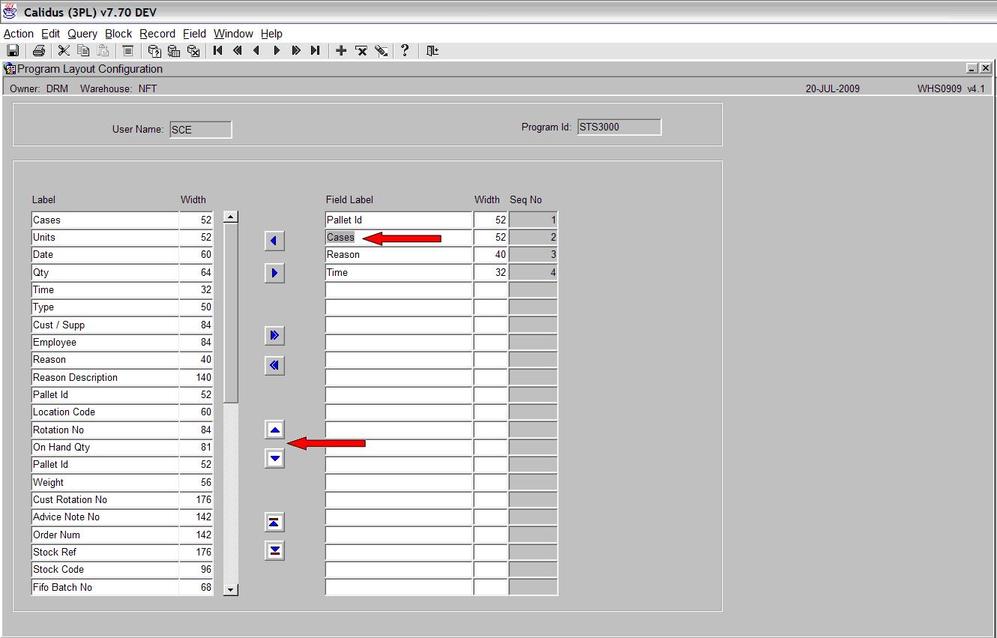
The data fields can be arrange in any order you wish. To do this go to the configure screen. Select the field you wish to change using the left mouse button. Now press the either the up or down arrow key to move the column where you want. In the example below I moved the cases to appear in the first column.
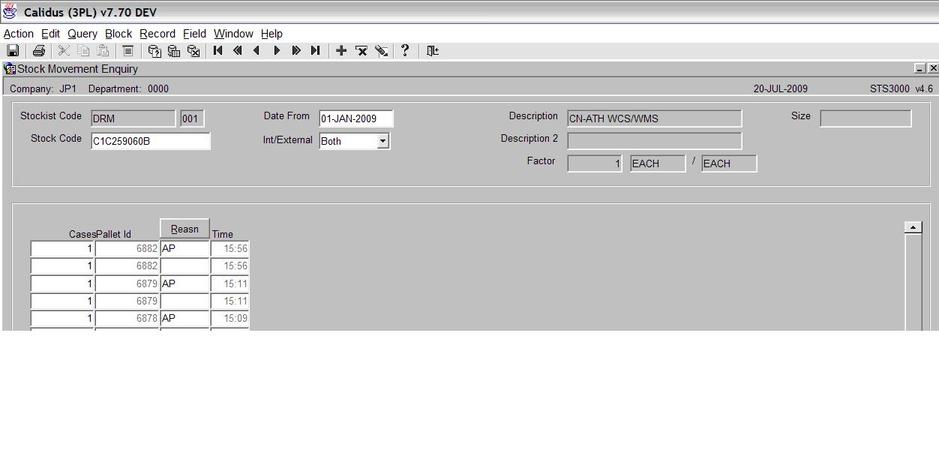
If you exit the screen you will now see that the ‘Cases’ are in the first column (see screen shot below).
If there is already a long list of data tables and you wish to move something to either the top or bottom, use the sequence buttons (see screen shot below)
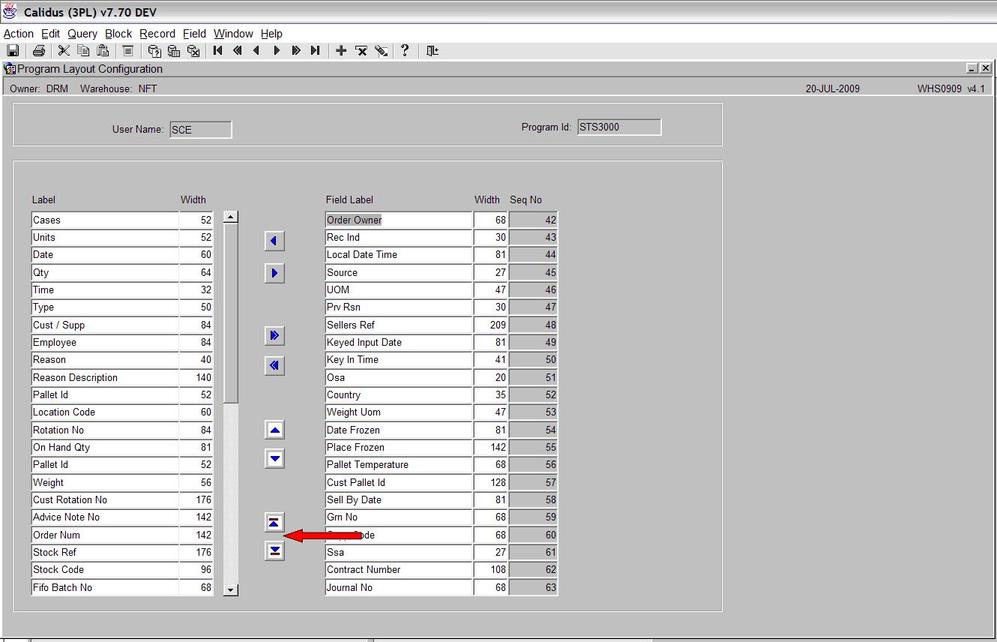
In the example above, you can see that ‘Order Owner’ is the first data field in the sequence, if you press the ‘down arrow’ sequence button then the ‘Order Owner’ field will move to the end of the list (see screen shot below)
5 - Sorting
Once you have configured the data fields you require and the sequence you wish them to appear, it is possible to sort certain data fields. This is done is the main screen (see screen shot below)
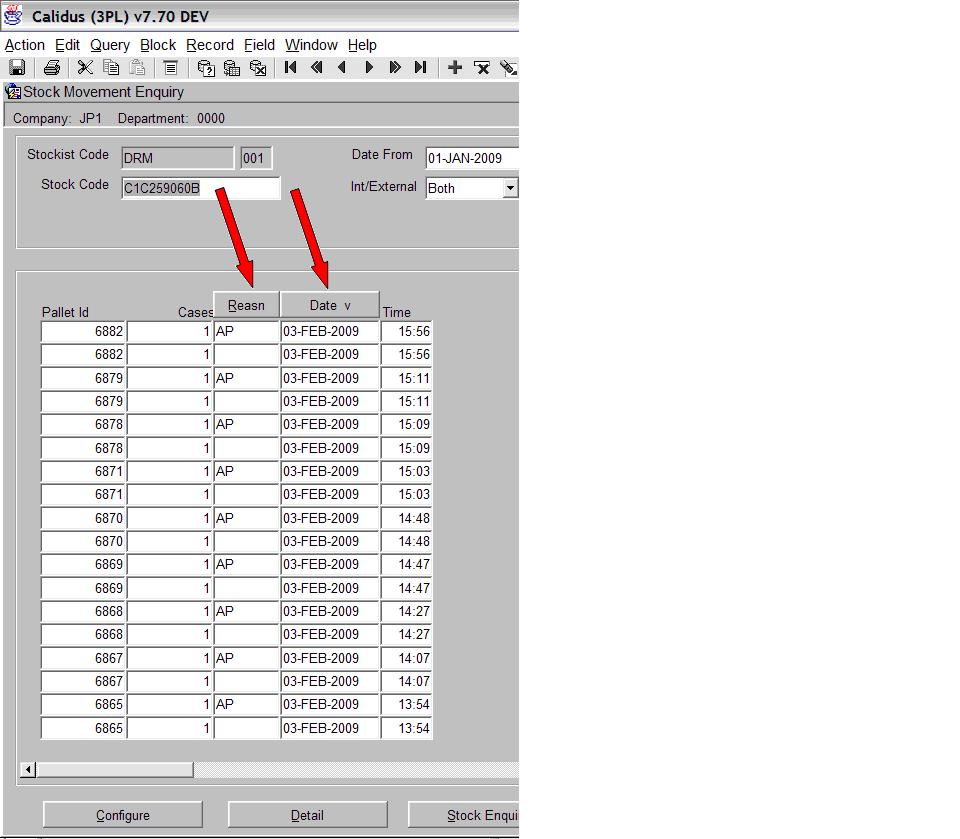
By pressing the buttons above the columns, the data will be sorted.