Quick Pick Wave Maintenance
<br\>
Goods Out – Pick Wave Maintenance
The Pick Wave Maintenance screen is used to group together multiple sales orders, place them on routes/loads and release for allocation and picking.
The Pick wave Maintenance screen can be found in the Sales Allocation and Picking folder.
The following section covers how to create a pick wave containing multiple orders. This is split into 3 sections, Route/Load creation, Allocation and Pick List. <br\>
Route/Load Creation
<br\>
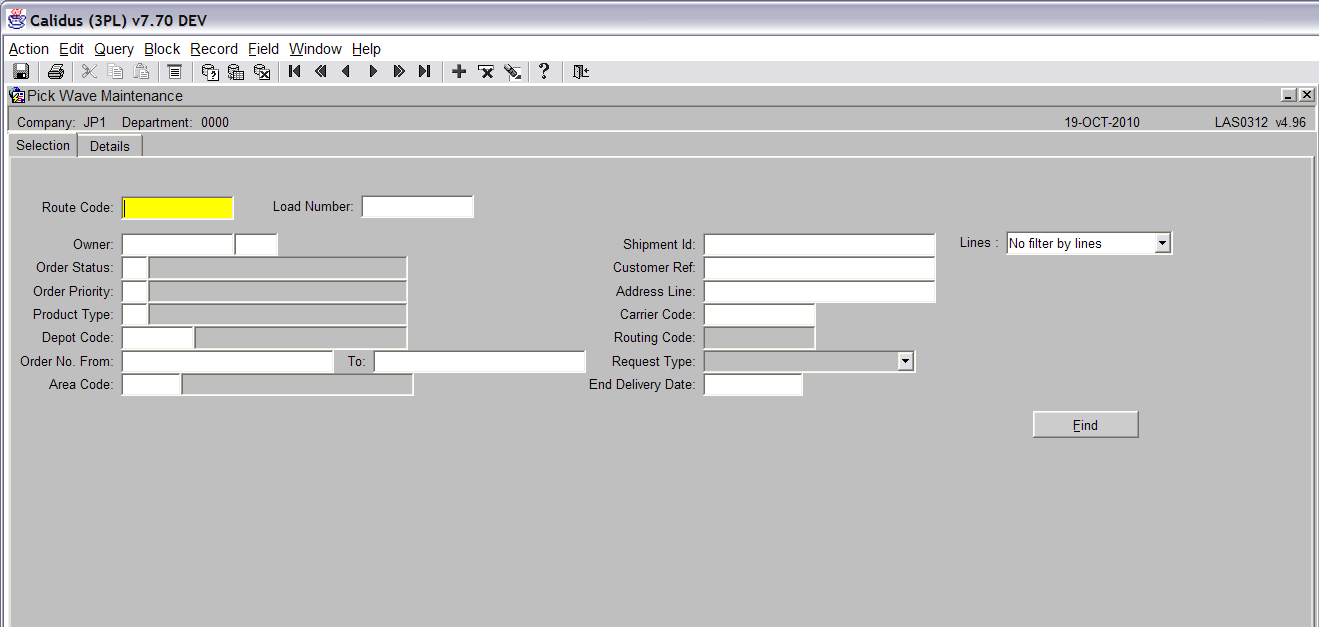
Note: Even though the screen is not light blue, it is actually in ‘Query Mode’.
The following data should be entered:
Route Code – These are Route Codes that have previously been set up. Use the list of values icon to bring up a list of available route codes.
Load Number – This will be created later.
Owner – Press tab and all owners will be the default. Alternatively you can enter a specific owner.
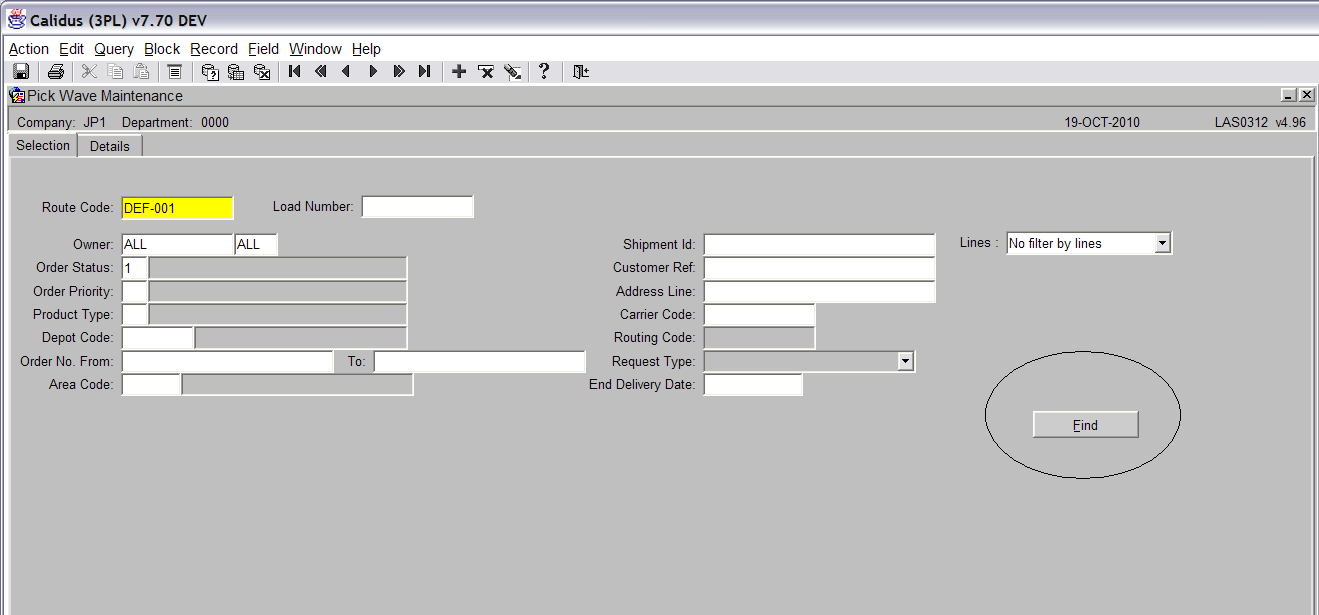
Order Status – Orders that are waiting to be placed on a pick wave will be at status 1 (commited). Enter 1. <br\>
To retrieve all orders that are at status 1, press the ‘Find’ button (see screen shot above).
<br\>
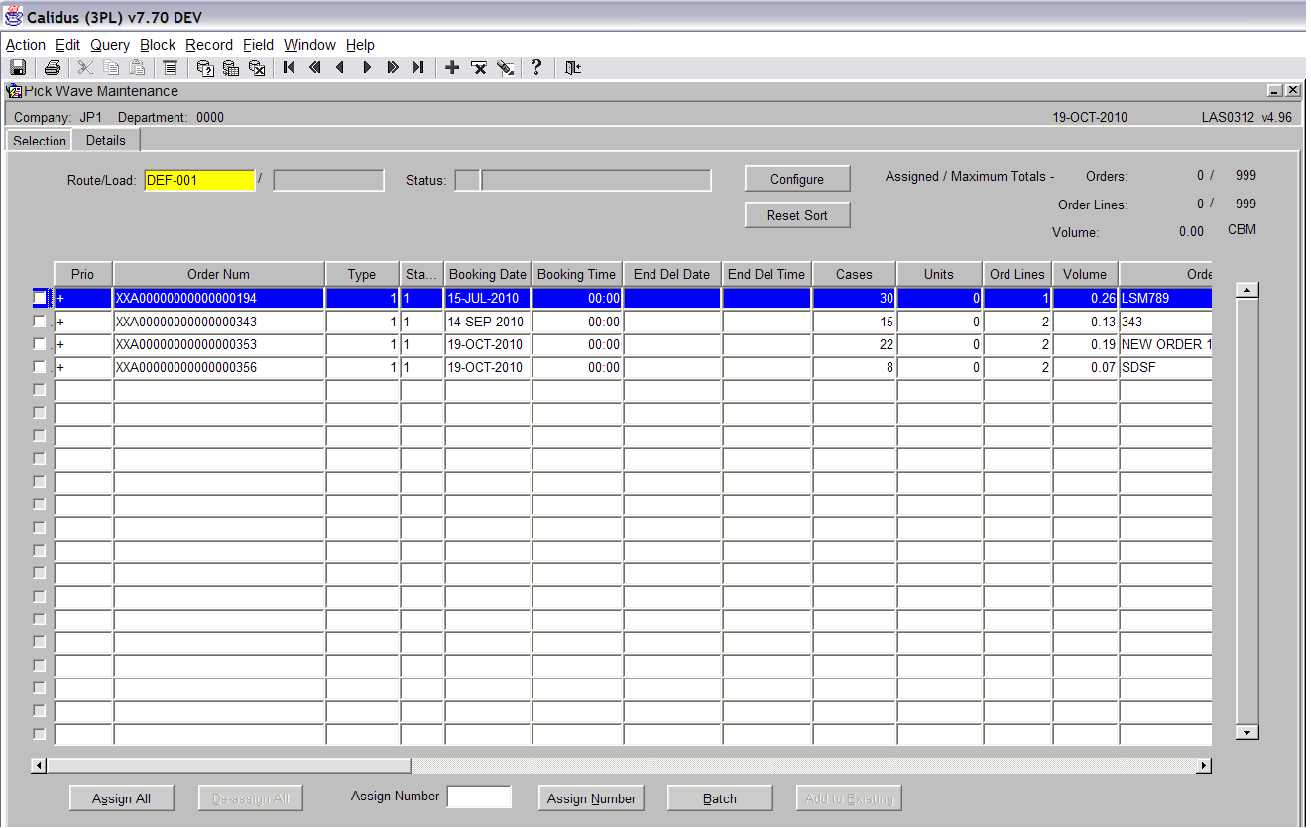
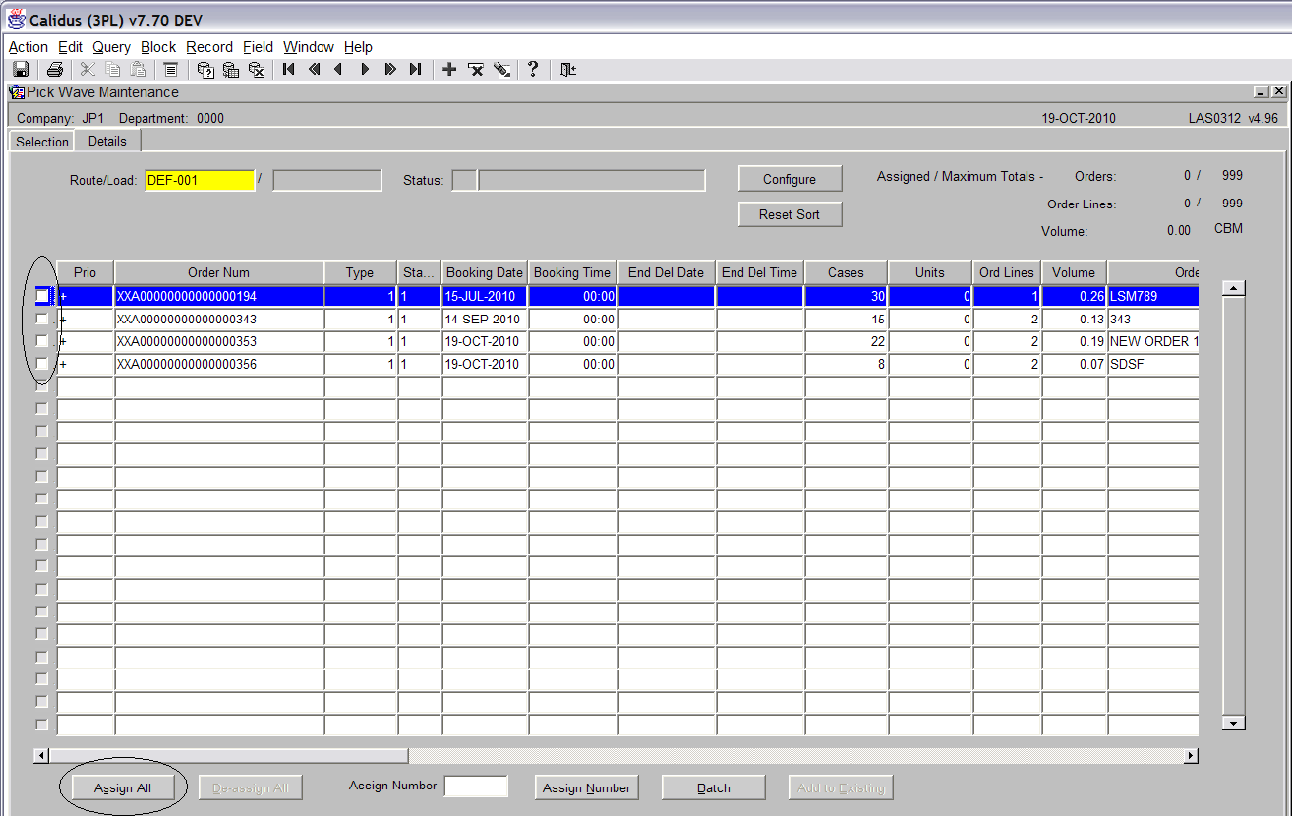
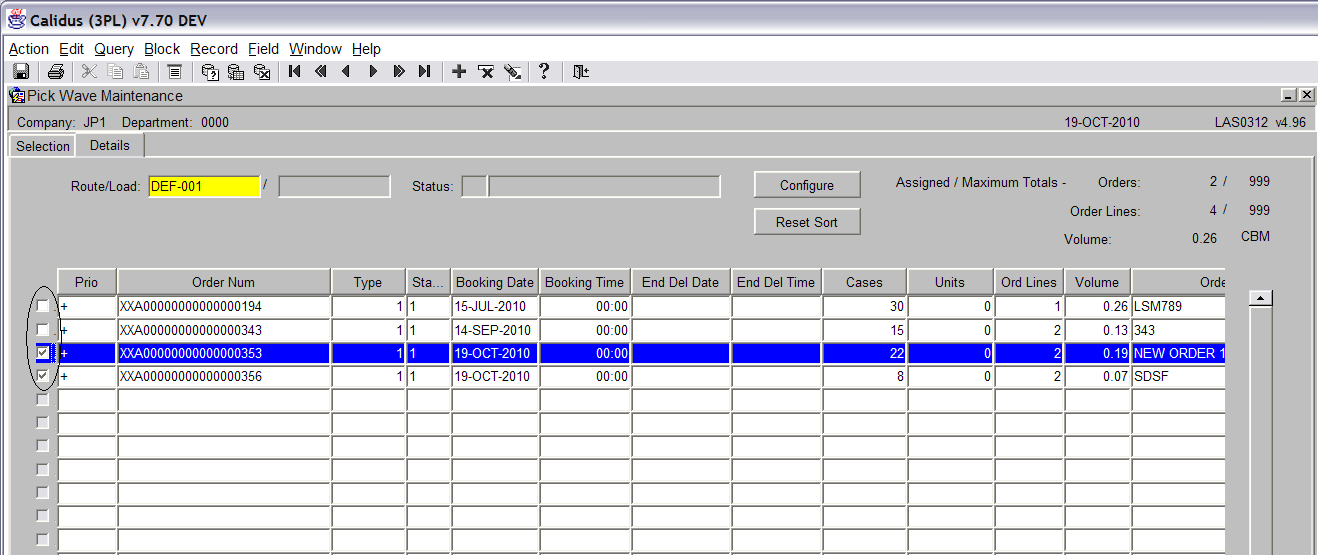
You can select the order you wish to place on the route either by pressing the ‘Assign All’ button, or by clicking in the check box if you only want to select specific orders (see screen shot below).
<br\>
In this example we are going to pickwave 2 orders (see screen shot below).
<br\>
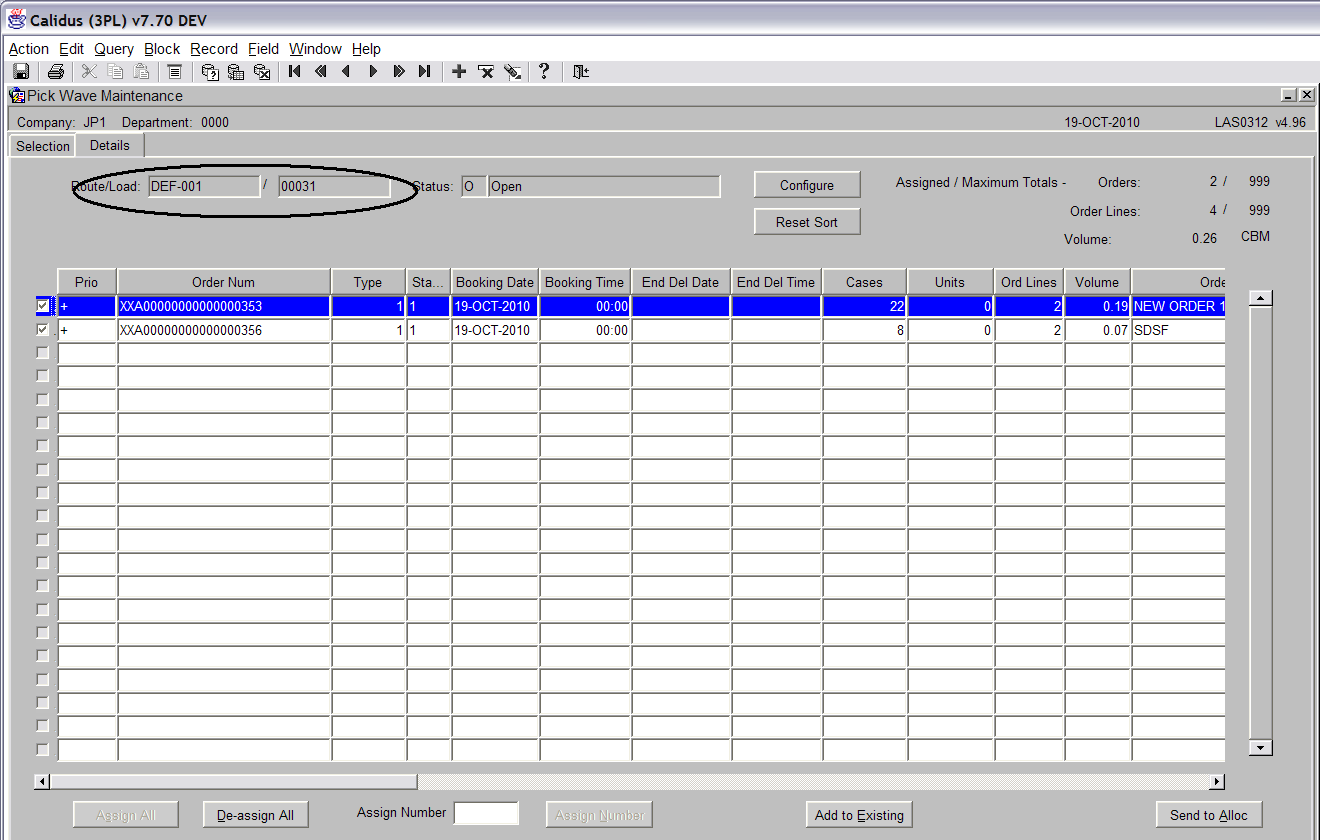
Press the save button to create a load number.
<br\>
As you can see in the example above, load 00031 has been created on route DEF-001.
Note: Now that the route is created, it is possible for the user to leave the screen and find the route at a later time when it requires allocating and sending to pick. <br\>
Allocation
<br\>
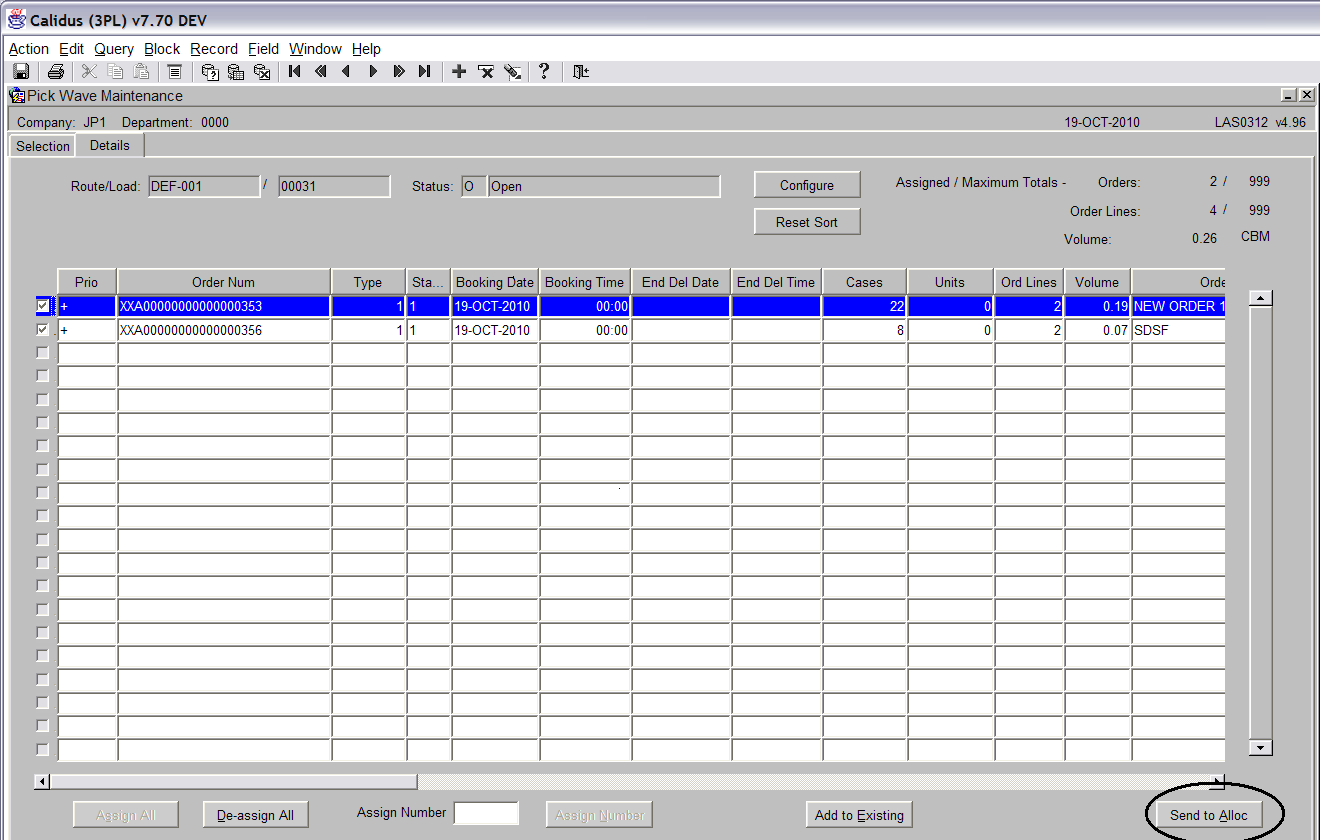
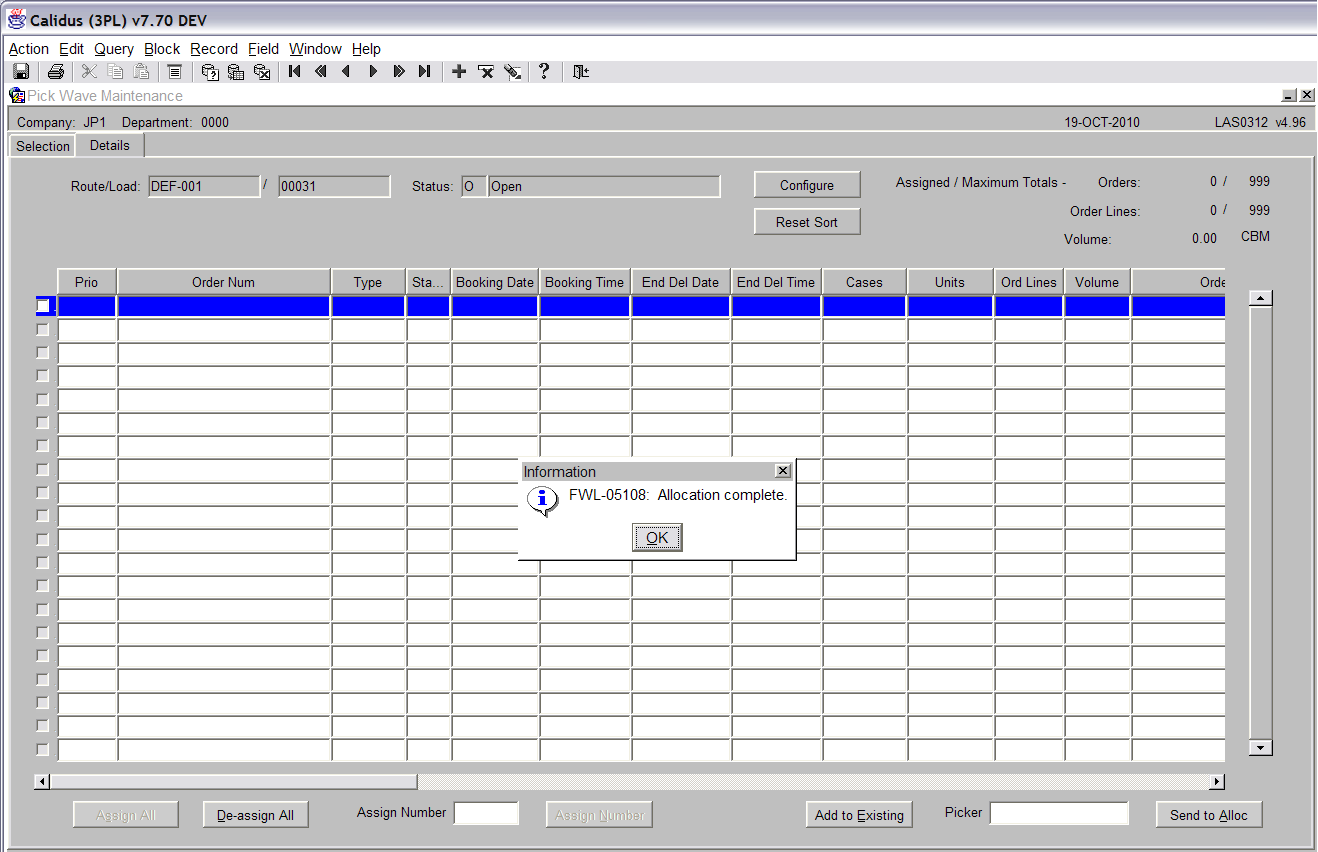
To send the Route/Load to allocation, press the ‘Send To Alloc’ button (see screen shot below). <br\>
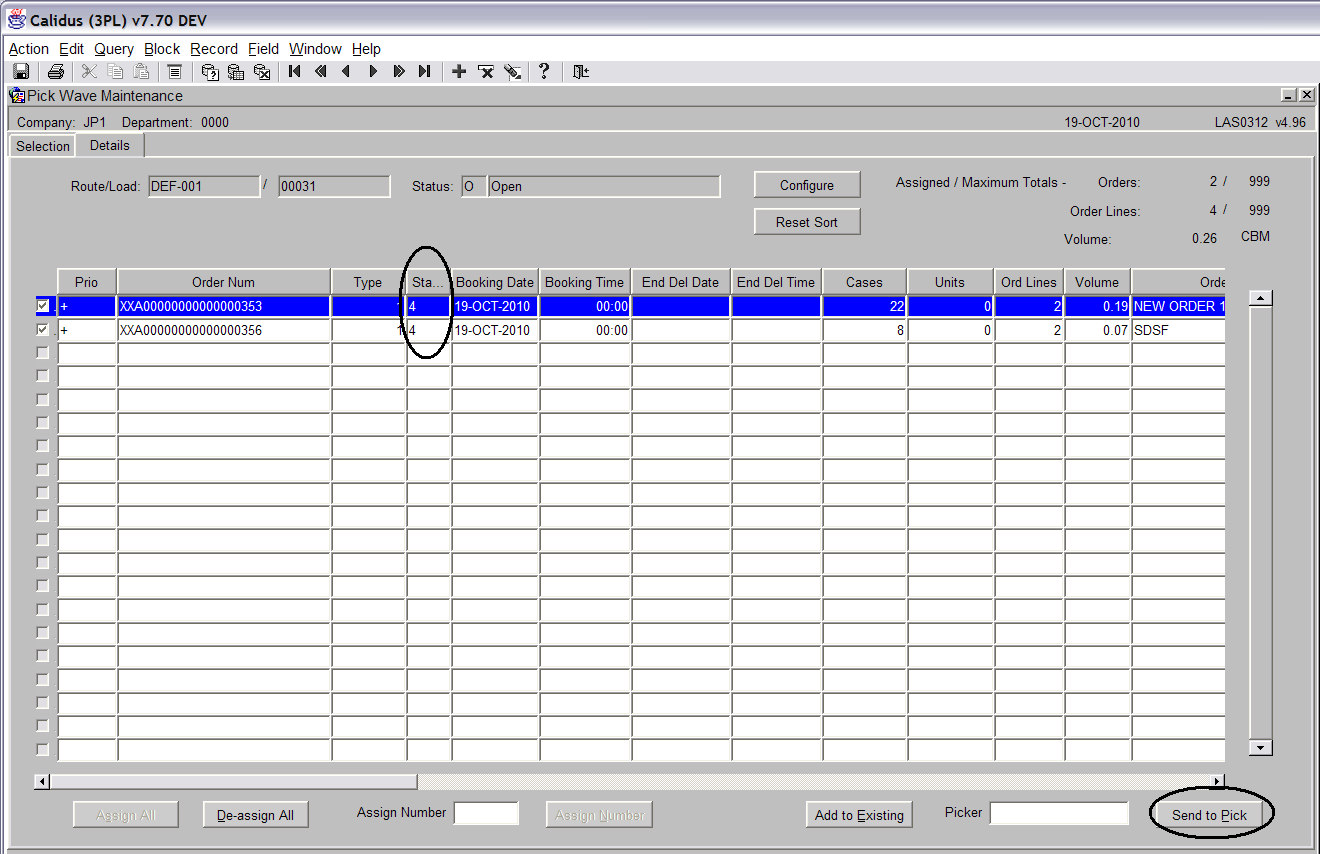
Send To Pick
<br\>
Once the Route/Load has been allocated, the orders will now show at status 4 and the orders will be ready for sending to pick (see screen shot below).
<br\>
You will notice that the ‘Send to Alloc’ button has now changed to ‘Send to Pick’ (see screen shot above).
<br\>
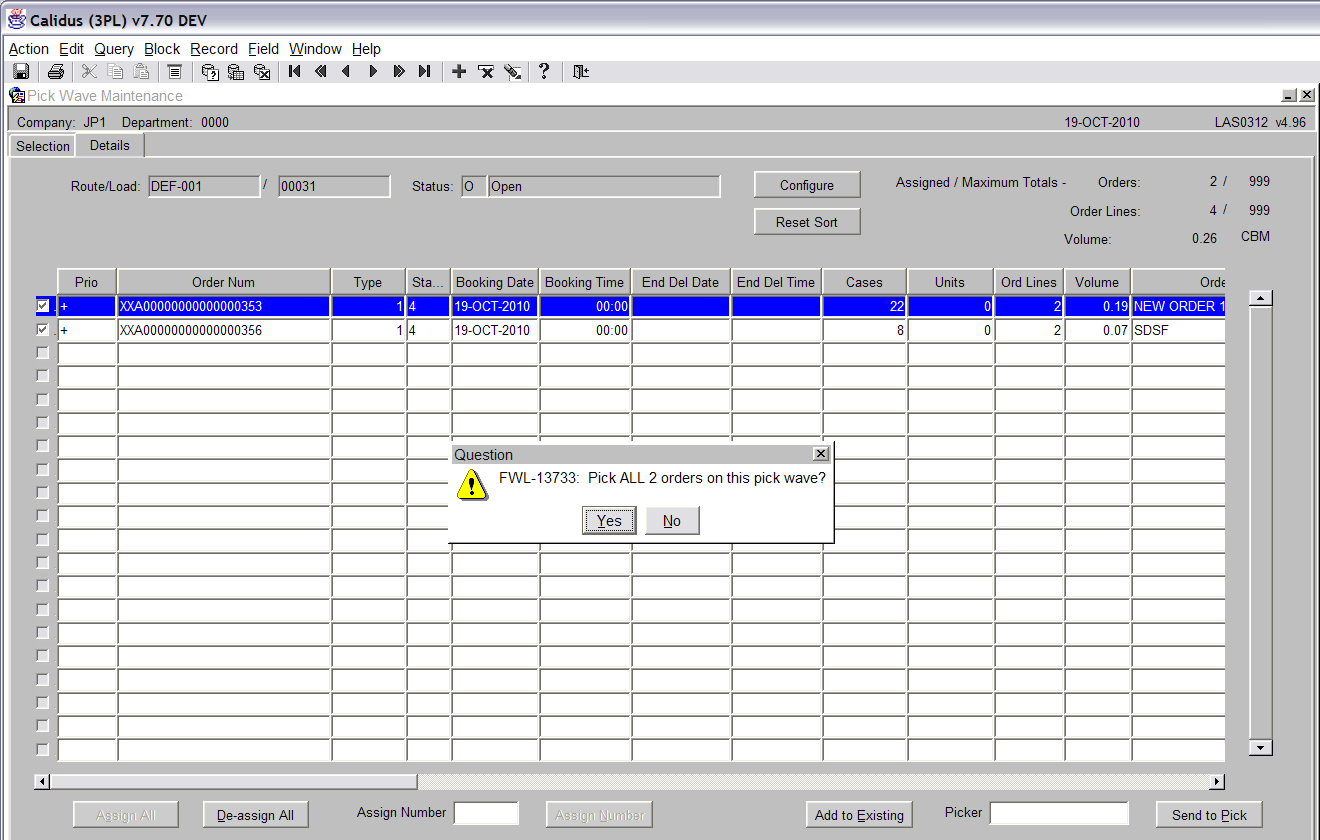
Press the ‘Send to Pick’ button to produce the picking list. <br\>
Click the ‘Yes’ button when prompted whether you wish to pick all the orders on the pick wave.
<br\>
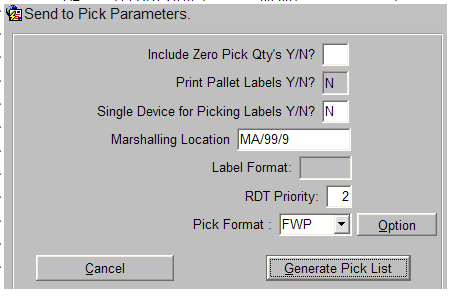
The following details can be entered:
Include Zero Pick Qty’s – If some items are out of stock, by selecting ‘Y’, these will be displayed on the pick list. If this is left blank or ‘N’, then shorted lines will not be printed.
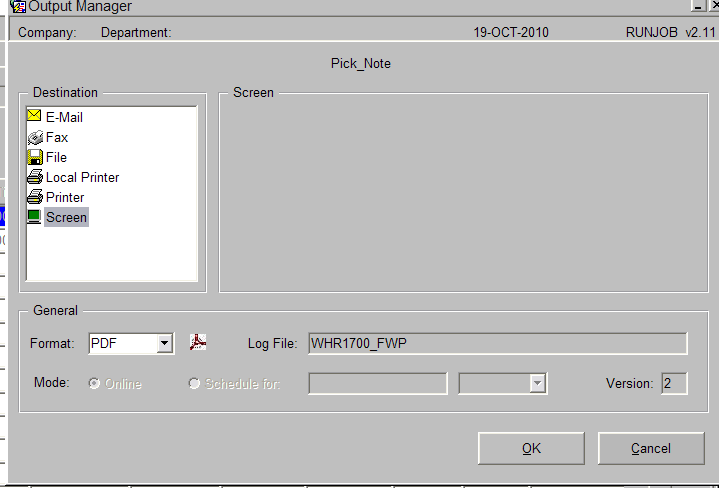
Marshalling Location – If there are multiple marshalling lanes available you can select the marshalling lane that you require by using the list of values icon. Press the ‘Generate Pick List’ to bring up the Output Manager.
Press the screen button in the Output Manager Box (see screen shot below) <br\>
Press OK to produce the picking list. <br\>
Document History
Copyright Aptean © 2008
The information contained herein is the property of Aptean and is supplied without liability for errors or omissions. No part may be reproduced or used except as authorised by contract or other written permission. The copyright and foregoing restriction on reproduction and use extend to all media in which the information may be embodied
