Sales Order Process
SOP Flow Within the Warehouse - Order Statuses
The Sales Order Process goes through a number of stages.
Each stage is represented by a different status, and must be followed in order:
- 0 - Entered (Order header entered only – no detail lines). This does not affect stock on the system.
- 1 - Committed. The product will be flagged as having a committed quantity, this may affect availability for future orders.
- 4 - Allocated. This is where the system will specify a particular pallet in the warehouse determined on the order type (see Order Entry).
- 5 - Pick List. The next status after allocation. Shows that the order has had a pick list printed.
- 6 - Pick Confirmed. After pick list, the pick confirmation process ‘moves’ the stock virtually from its allocated location to a predefined marshalling location. The user can change the location at this point.
- F/G - Awaiting Customer POD Confirmation/ Depot POD Confirmation. (set against Partners/ Customers.) The stock moves from the marshalling location to a POD location if setup in Default locations.
- 9 - Complete. At this point, the stock has been ‘removed’ from the system (if you have setup to downdate at despatch rather than pick confirmation) .
Other Statuses which are not as commonly used are:
- I – Awaiting Invoice
- 3 – Back Order
- H – Held
- S – Suspended
- C – Cancelled
- E – Enquiry
Sales Order Entry (SOS1110)
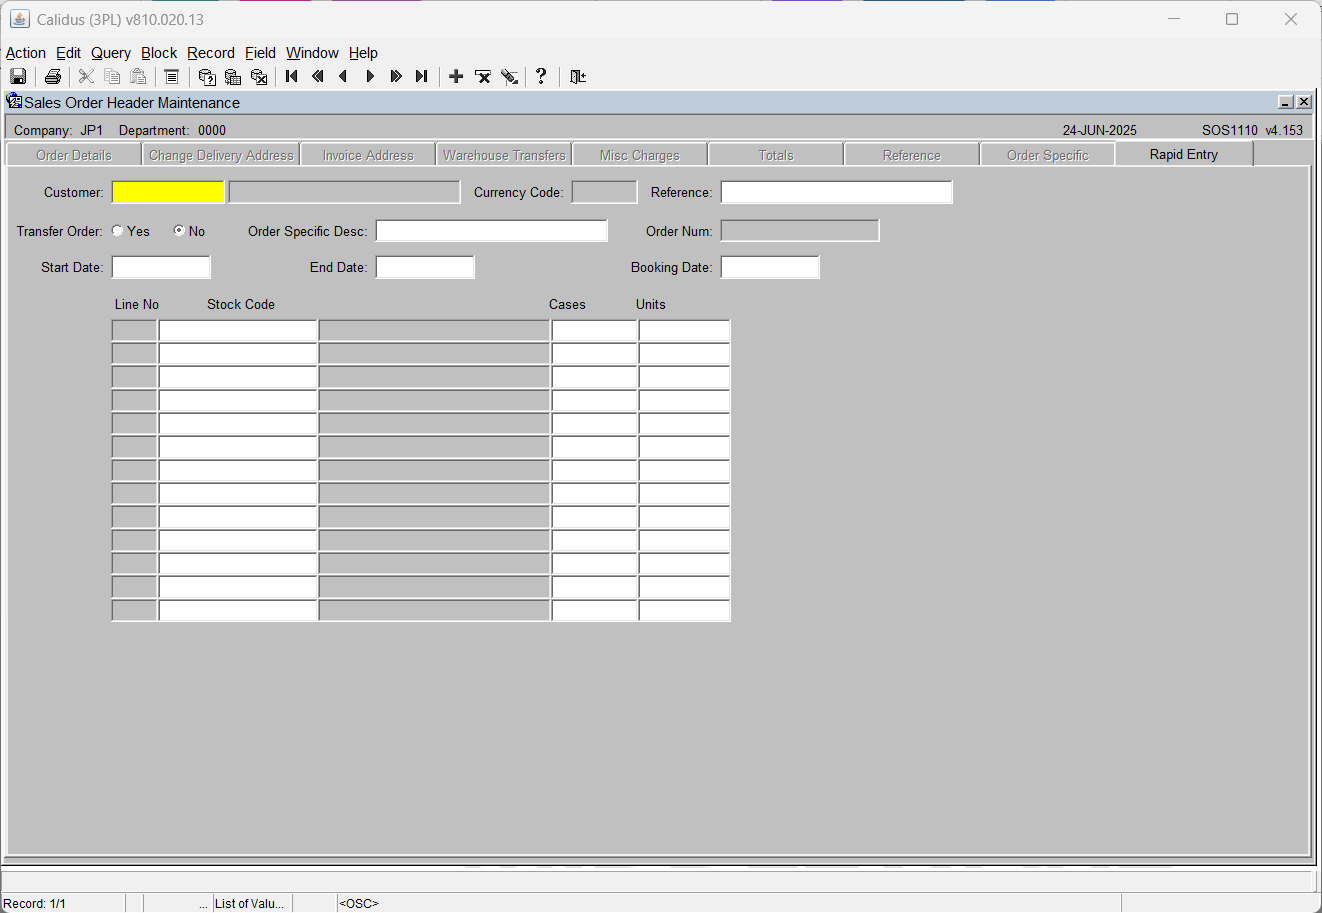
Rapid Order Entry (SOS1110_RO)
As an alternative to the standard order entry screen there is also an option of using the Rapid Order Entry Screen, which allows for an order to be created with the minimum of data entry.
All orders will automatically be created with a Line Type of '1' by default.

Fields Information -
- Customer Code
- Reference
- Start Date, End Date and Booking Date will all default to the current system date but can be over written.
Once the header section has been completed then the user must enter in the stock details, Stock Code, Cases and Units as required.
Once complete the order will then be moved through the system via the normal processes.
NB It is only possible to create orders in this screen, to amend or view existing orders then the standard Order Entry Screen must be used (SOS1110)
Additional Functionality within Rapid Order Entry
Placing orders automatically on Hold dependent on customer authorisation

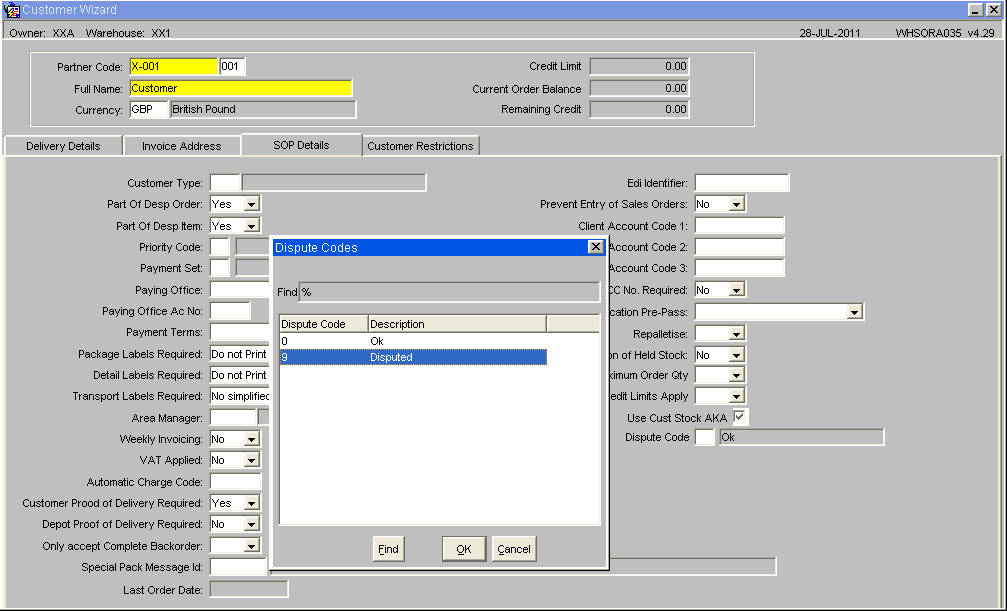
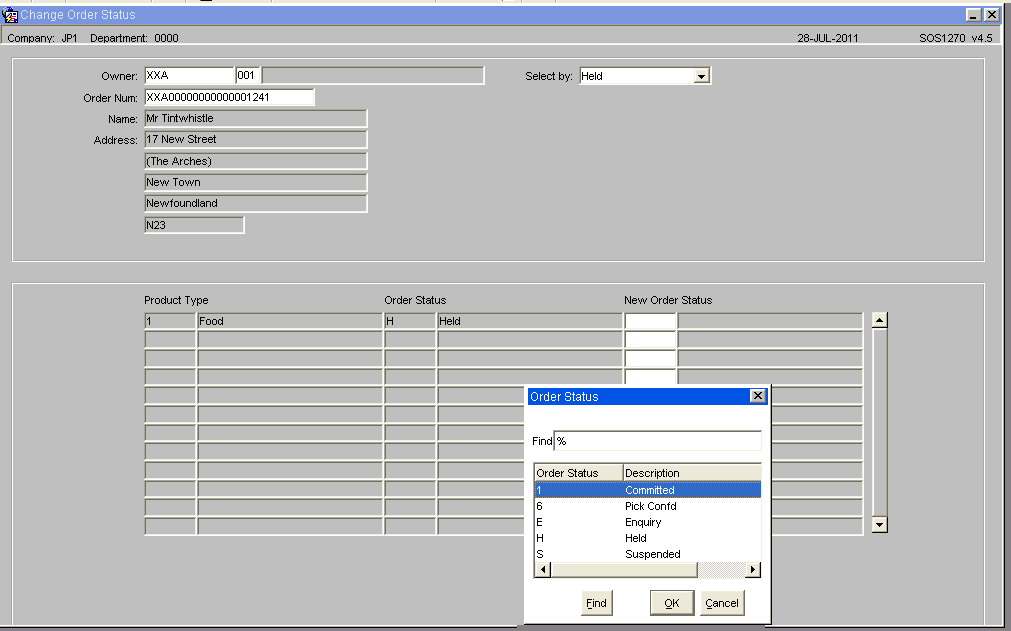
By setting the Dispute Code to '9' Disputed then all orders created for this customer will automatically be placed on hold. To release orders for allocation the user will need to use the Change Order Status Screen(SOS1270)
There is also the option to create an internal job that will automatically delete any orders at status Held after a pre-determined number of days. See EDI Setup and Processing
NB The Hold function will only work when using the Rapid Order Entry screen this functionality has not been built in to the standard order entry screen.
Sales Order Allocation (WHSORA010)
Pick Wave Maintenance (LAS0312)
Pick List Report (WHSORA020)
Pick List Reprint Report (WHSORA025)
Pick List Confirmation (WHS1714)
Despatch Confirmation (WHS1910)
POD Confirmation (??)
Order Packing (WHS1945)
Order Packing Maintenance (WHS???)
Change Order Status (SOS1270)
The Change Order Status screen allows the user to Hold or release an order dependent on its status.

Document History
Copyright OBS Logistics © 2008
The information contained herein is the property of OBS Logistics and is supplied without liability for errors or omissions. No part may be reproduced or used except as authorised by contract or other written permission. The copyright and foregoing restriction on reproduction and use extend to all media in which the information may be embodied