Finance - Payments Guide
![]()
Aptean
Finance - Payments Guide
Calidus TMS - 12.45
24th May 2024 - 1.0
Reference: FINANCE
Payments
To view all payment details, go to CTMS Modules, Finance, Payments.
Alternatively, Payments can also be accessed directly from the following forms:
Note: selecting "Both" all finance related lines will be displayed (both costs and revenues).
There are various filters available for selection if you want to select specific payment charges, dates, debit accounts or credit accounts for example.
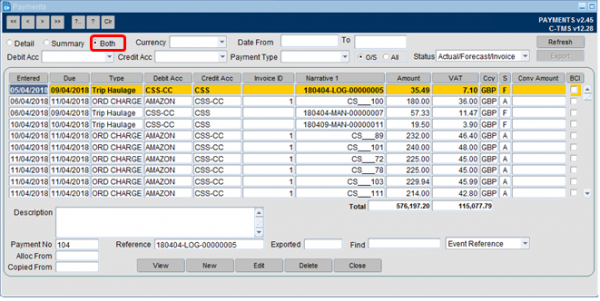
It is possible to amend the details of a line by highlighting the line, selecting Edit and then overwriting the "amount" field followed by selecting the Save option.

To determine the trip a specific line relates to:
- Drill into the relevant line by double clicking into it.
- Copy the "Order ref" number:
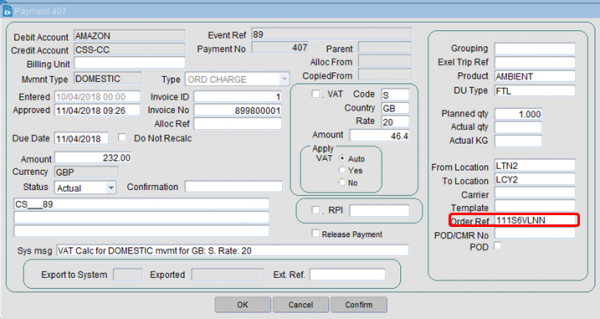
- Go to C-TMS Modules, Orders, New Order
- Input the order ref into the "customer ref" field and select Refresh.
 Note: the "event ref" can also be used - this relates to the OMS ref in the search field.

- This will bring up the associated TMS order where you can view the specific details:

Allocating a cost to a trip (Payment)
The set up of account charges, is covered fully in the Accounts module. This section will show you how to allocate a cost to a trip within the trip manipulation or Planning screen after all the set-up has taken place.
There are two ways that the cost of a trip can be allocated. These are either manually, or automatically, both of which are covered below.
To allocate a cost automatically (assuming that rates and contracts have been set up), all you need to do is to allocate the relevant carrier to the trip in question, recalculate the trips times and then set the trip status to "TENDERED". You should then select the "Finance" tab from within the trip detail section of the screen. You should notice that the cost of the trip has been automatically assigned to the trip below. In this example the cost of £100 has been allocated to the trip.
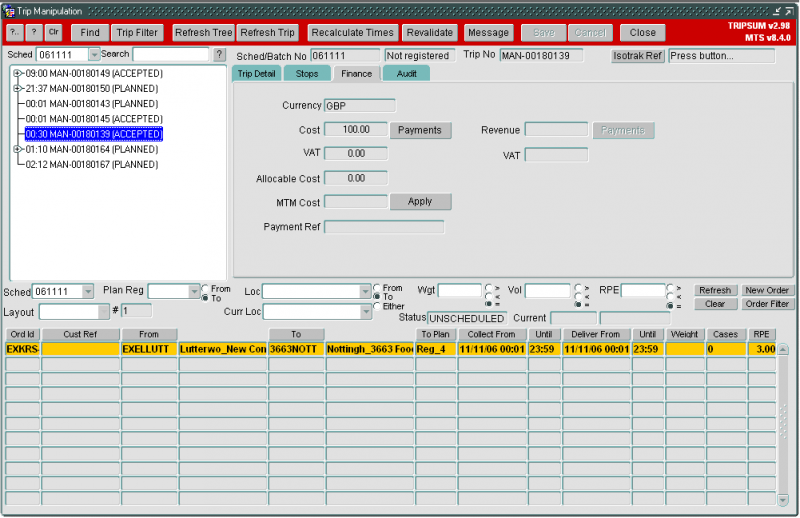
This automation has been possible because a contract and rate matrix have been set up for this carrier. If you do not have this set up, you are still able to enter a cost against the trip, but again the relevant set-up must have taken place beforehand. To do this, select your trip and allocate the relevant carrier to that trip. Re-calculate times of the trip and save your changes. Next, switch to the finance tab and press the ‘Payments’ button. This will bring up the "payments for trip" screen which details all the payments that have been allocated to the trip so far. At this point this screen will be empty as you have not entered any payments yet.
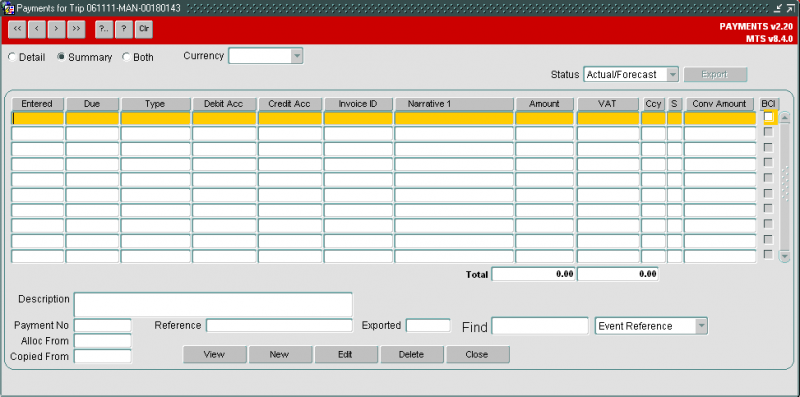
To enter a payment press the New button at the bottom of the screen. This will take you into the "Create payment" screen.
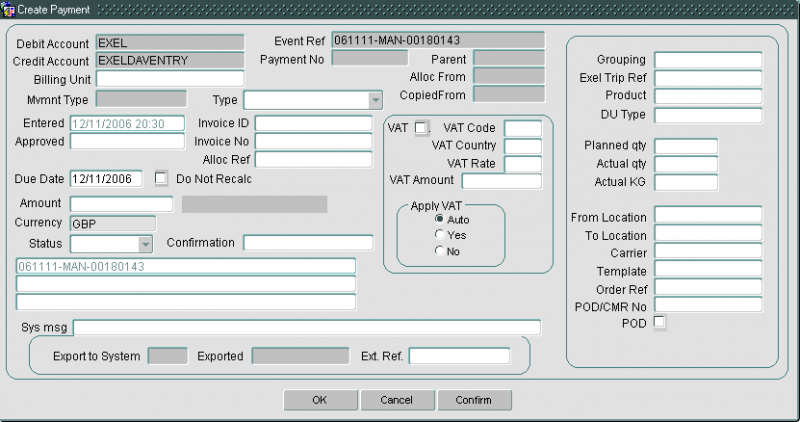
First enter the payment type. This will usually be "Trip haul ma" (as in the example below), but may also be payments such as fuel surcharge. Next, enter the cost of using the selected carrier for doing this trip (the example below has a cost of £100 entered). Lastly enter the status of the payment as "forecast".
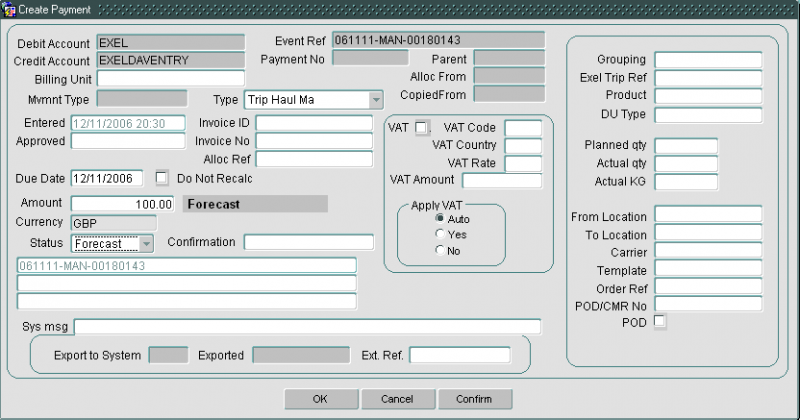
Once you have entered those three pieces of information you can press the OK button to create the payment. This will take you back to the "Payment for trip" screen where you will see your newly created payment. When you close this screen you will see the payment assigned to the trip. If you want to add further payments against the same trip, you will simply need to repeat the process detailed above. If you chose to add a manual payment, the system will no longer calculate the cost from contract, recognizing that you have chosen to overrule the cost.
VAT Calculation
VAT rates are reflected in individual payment lines:


Any account can be set up to generate payments with VAT, and payments manually or automatically generated can generate VAT. Different payment types can be created which either generate or do not generate VAT. See Accounts for details of setting up payment types.
To set the appropriate VAT rate, go to C-TMS Modules, Maintenance, Accounts Maintenance and select the VAT Codes tab.
Set the appropriate VAT code:

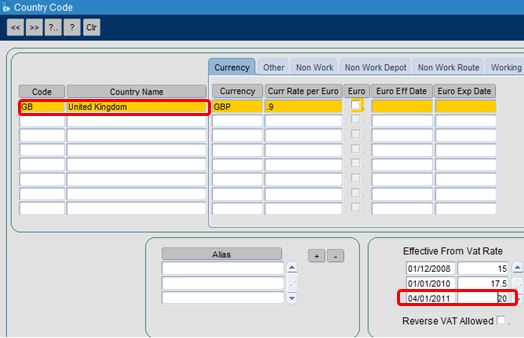
VAT rates can be set up against payments generated in any currency, from/to any country, as long as a common currency between the payer and the payee is determined. VAT rates and effective dates are determined by the country. See Countries for details of setting up VAT rates against countries.
This is found in C-TMS Modules, Maintenance, Countries:
In the example of GB, set the VAT rate and effective date as illustrated below:
If VAT is determined to be required against a payment, it is calculated when the payment is calculated, based on the valid rate at the point of the payment calculation. CTMS determines the calculation point of the payment through settings, when it is actualised or fixed is dependent upon these settings. For some customers, that might be at the point of raising the job, collecting the job, completing the job or manual. See Customers for details of setting up customers.
VAT is calculated against the individual payments and then totalled. All VAT calculations are to two decimal places, and are rounded through normal rounding rules (i.e. round up for 5 or higher, down for 4 or lower). All payments and VAT amounts are rolled up onto an invoice for that period. The VAT amount against an invoice is the sum of the VAT amounts on the payments for that invoice, also to two decimal places. See Invoices for more details on invoicing.