New Order: Difference between revisions
(Expanded copy order) |
(Added details of the Schedule right-click option) |
||
| Line 59: | Line 59: | ||
* ''Reset NEW'' | * ''Reset NEW'' | ||
* ''Abort'' | * ''Abort'' | ||
* ''Schedule'' | * ''Schedule'' - you can use this to quickly add an order to a trip across schedules. When you select this option, you will be shown a list of all trips that the order can be scheduled on - select one and confirm with the '''OK''' button, or cancel the scheduling with the '''Cancel''' button. Like any lookup, you can also find and filter the data shown here. | ||
* ''X-Dock'' - See "Cross Docking" below | * ''X-Dock'' - See "Cross Docking" below | ||
* ''Unschedule'' | * ''Unschedule'' | ||
| Line 233: | Line 233: | ||
=== Non Conformance Tab === | === Non Conformance Tab === | ||
The "Non Conformance" tab details any non conformances associated with the order. These will generally be applied from the "[[Trip Debrief]]" form and will be reasons for early or late despatch or delivery, discrepancies etc. Non conformance is covered in the [[Debrief]] page. | The "Non Conformance" tab details any non conformances associated with the order. These will generally be applied from the "[[Trip Debrief]]" form and will be reasons for early or late despatch or delivery, discrepancies etc. | ||
A record of the reason for rebooking can be viewed in the Non Conformance tab if this is a rebooked order. | |||
Non conformance is covered in the [[Debrief]] page. | |||
[[Image:new_order_noncon.jpg|800px]] | [[Image:new_order_noncon.jpg|800px]] | ||
| Line 262: | Line 266: | ||
A more complex version of the rebook order screen exists, for entry of more details against | A more complex version of the rebook order screen exists, for entry of more details against the rebooked order: | ||
[[Image:new_order_new_rebook.jpg|400px]] | [[Image:new_order_new_rebook.jpg|400px]] | ||
| Line 271: | Line 275: | ||
If the order has actuals against it then the status of the order remains unchanged. The order will also remain on the trip. | If the order has actuals against it then the status of the order remains unchanged. The order will also remain on the trip. | ||
A record of the reason for rebooking can be viewed in the | A record of the reason for rebooking can be viewed in the Non Conformance tab of the rebooked order. | ||
| Line 286: | Line 290: | ||
[[Category:C-TMS User Guide|BA-100]] | [[Category:C-TMS User Guide|BA-100]] | ||
[[Category:C-TMS_Key_Functionality|130]] | [[Category:C-TMS_Key_Functionality|130]] | ||
<noinclude> | <noinclude> | ||
Revision as of 14:30, 28 May 2024
Introduction
Orders, or Transport Instructions, can be created, modified, viewed and deleted from the Order Management module. This is invoked by selecting Orders or New Order from the main menu.
![]() Note: The New Order screen is covered here in detail. The old Orders screen is no longer developed, but contains extremely similar information, but much more compact.
Note: The New Order screen is covered here in detail. The old Orders screen is no longer developed, but contains extremely similar information, but much more compact.
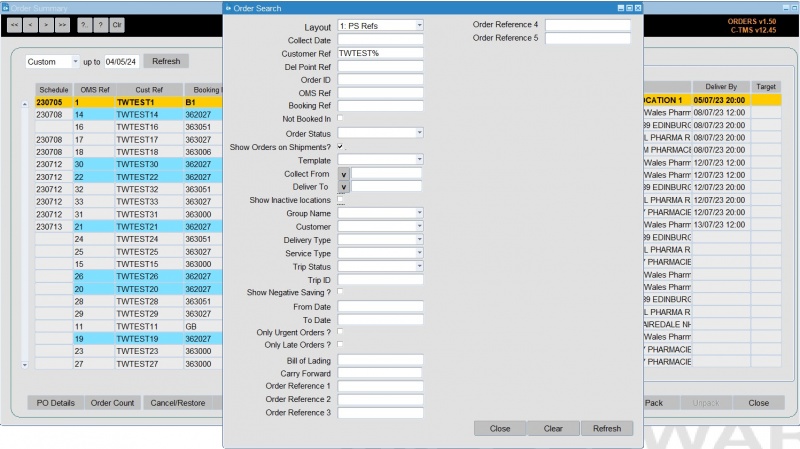
Upon selection the primary Order Summary screen will open accompanied with the "Order Search" screen:
Order Search
The "Order Search" screen enables you to query orders by a variety of criteria that can be made as specific as required. For example, by only entering the schedule date the query will extract all orders for that schedule currently within the C-TMS software. Once data has been entered or changed it is highlighted in red, as are the Refresh buttons on both forms.
The Orders Search panel can be configured to your needs by right-clicking on the orders results and selecting Configure Search Criteria. This allows you to select criteria. Note that any order references configured in the system can also be selected as search criteria.
Clicking the Refresh button executes the query and populates the Order Summary screen. An example of how these queries extract data is shown below where only those orders in a status of "SCHEDULED" on the schedule of "061026" are shown:
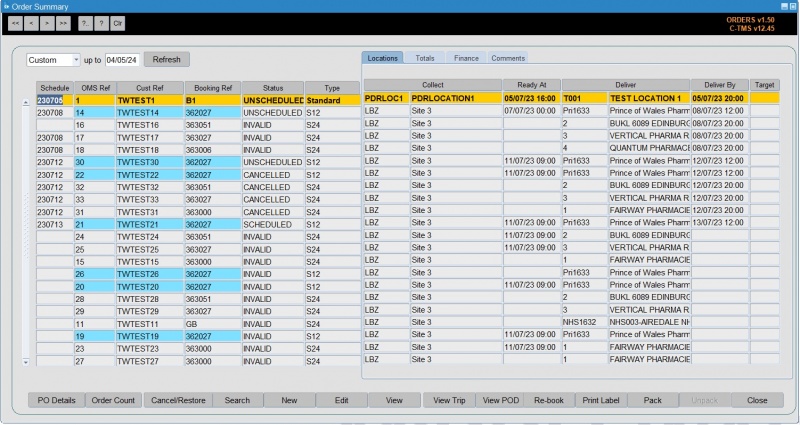
Order Summary
The screen displays the core data on the left of the screen, plus a tabbed list of different additional details in a tabbed display on the right of the screen.
- Locations
- Totals
- Finance
- Comments
All fields are populated with data from the "Order Details" form and therefore blank fields infer missing data from the order.
Once the Order Summary form has been populated the order(s) can be viewed and edited as required and also sorted by the column headers as required (this is done by clicking on the column header by which you wish to sort).
Other options available from buttons on this screen:
- PO Details
- Order Count - This button totals the number of orders shown in the current Order Search range. This is particularly useful for calculating averages in conjunction with data from the "Totals" and "Finance" tabs.
- Cancel/Restore - Orders can also be cancelled from this screen by using the Cancel/Restore button with the benefit of them being able to be restored if required.
 Note: When cancelled, the order is set to CANCELLED status - if the order was already planned onto any trips (status SCHEDULED, SCHED_COL, SCHED_DEL), it will be automatically removed from those trips. If the order is restored, the order will return to UNSCHEDULED status.
 - Search - re-show the order search popup form.
- New - create a new order. See "Creating a new order" below.
- Edit - view an existing order for editing. You can also edit or view an existing order by double-clicking the order in the list. See "Order Details" below.
- View - view an existing order. You can also edit or view an existing order by double-clicking the order in the list.
- View Trip - This button shows the trips on which the order has been planned in the "Trip Debrief" form.
 Note: Orders in a status of ABORTED, CANCELLED, INVALID and UNSCHEDULED will not have any trip details, as they are not scheduled on to a trip.
 - View POD
- Re-Book - see "Re-booking Orders" below.
- Print Label
- Pack
- Unpack
- Close - close the form
Options available from right-clicking an order on this screen:
- Edit - view an existing order for editing. You can also edit or view an existing order by double-clicking the order in the list.
- Send to Paragon - required only if using a manual Paragon interface, and not required when not using Paragon or using the seamless Paragon API.
- Show Trips - show all trips for the order selected.
- Show Shipment - show all shipments for the order selected.
- Revenue
- Payments
- Check Status
- Reset NEW
- Abort
- Schedule - you can use this to quickly add an order to a trip across schedules. When you select this option, you will be shown a list of all trips that the order can be scheduled on - select one and confirm with the OK button, or cancel the scheduling with the Cancel button. Like any lookup, you can also find and filter the data shown here.
- X-Dock - See "Cross Docking" below
- Unschedule
- Unschedule Order from Trips
- Configure Search Criteria - as described above.
- Split Orders - split the order. You will be prompted through a popup how many orders you would like. You can process the split with the Process button, or any other button to exit. This works only when splitting pallet orders. To split an item order, do this by editing the order, then using the Split functions in the Order Items tab.
- Copy Orders - copy the order. You will be prompted for the number of orders, and the new orders' collection and delivery windows. You can process the copy with the Process button, or any other button to exit.
- Set Order to On-Hold/Release from Hold - set or unset the order status to ON HOLD
Click on the New button on the Order Summary screen to start entering a new order manually. Then you can start entering order details through the tabs below.below.
You can edit an existing order once found in the screen using the tabs below in exactly the same way.
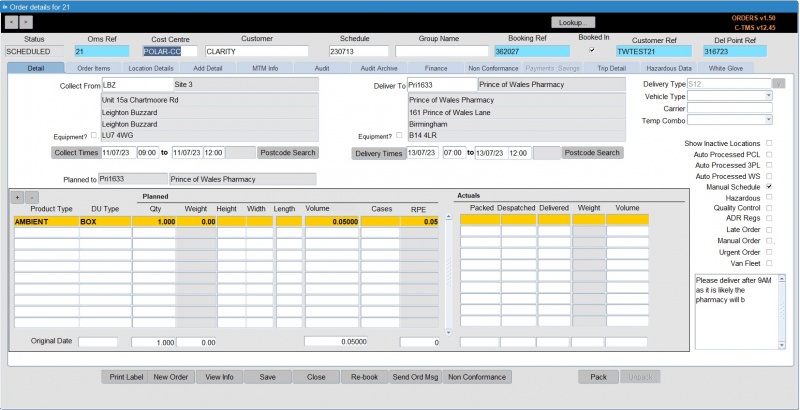
When creating, viewing or editing an order, the "Order Details" form shown below will open.
Order Details
Order Details will open showing the Details tab initially. For a new order, this is where you will be required to enter most of the initial information required to create the order.
The various tabs are covered below.
Details
New orders will be partly populated by defaults set up against the user; the "Cost Centre", "Customer", "Product Type" and "Qty" may be predetermined.
In the absence of defaults set against the user, defaults from the "System Parameters" will be used, although this will only apply to the "Cost Centre" and "Customer".
Each time a new order is created the "Oms Ref" is populated by default to the next numerically sequenced number and the status will default to "INVALID".
The "Cost Centre" and "Customer" fields must be populated and the "Schedule" field can be populated manually if the schedule already exists, however, if it does not exist this field should be left blank and the application will calculate the schedule from the collection and delivery windows. Attempting to enter a schedule that does not exist will result in a drop down menu of existing schedules being presented.
![]() Note: The Schedule is calculated from the earliest collection date and time or latest delivery data and time depending upon the setting of a system parameter and therefore if an order crosses schedules (typically midnight), you may need to check that the schedule is correct and as required.
Note: The Schedule is calculated from the earliest collection date and time or latest delivery data and time depending upon the setting of a system parameter and therefore if an order crosses schedules (typically midnight), you may need to check that the schedule is correct and as required.
The "Delivery Type" is either specified against a user ID or from a "System Parameter", it can also be changed manually.
"Vehicle Type" may be set to limit the vehicle types (trailers) that can be used for this order.
"Carrier" can be used to set an expectation of which carrier should be used for the order.
"Temp Combo" can be set to determine the compartment type that can be used for the order.
"Booking Ref" , "Customer Ref", and "Del Point Ref" can be added as required and are available regardless of which tab you have selected.
The required location should be selected either by double clicking with the mouse or by highlighting and left mouse clicking on the OK button. This will then populate the field on the "Order Details" form. The "Deliver To" location can be populated in the same way and then the time windows entered manually; date first and then time. Note that for orders driven by a delivery time the latest collection time should always be the same as the latest delivery time and for orders driven by the collection time the earliest delivery time should always be the same as the earliest collection time.
Rather than key in four dates and times there is also functionality that allows the time windows to be created either by the target collection or target delivery time. Select the "Delivery Time Target" option and this will grey out all of the fields apart from the "Target" fields to the left of it. Click "Save" and the collection and delivery windows will automatically be populated
When saving, you may see a validation message, which will generally be saying that the earliest collection time for the order is already in the past. This is a sense check and provided there is no issue with this click "OK": The order time windows have now been populated by the pre-set values associated with the location types as shown in a later section. The "Collection Time Target" works in a similar way, by creating the windows from the Target collection time rather than delivery. You will notice that the order status has also changed to "UNSCHEDULED" as all of the required details have been entered and the "Schedule" has been automatically populated, it should be noted that this is calculated from the earliest collection date and time and therefore if an order crosses midnight you may need to check that the schedule is correct and as required.
A number of additional checkboxes are also present and can be edited:
- Show Inactive Locations
- Auto-processed flags - show whether the order has been through and been scheduled by a scheduling engine process. When ticked, these orders will not be processed again. Untick them to send the order back through the indicated process.
- Auto-processed PCL
- Auto Processed 3PL
- Auto Processed WS
- Manual Schedule
- Hazardous
- Quality Control
- ADR Regs
- Late Order
- Manual Order
- Urgent Order
- Van Fleet
General order comments can be entered here.
You can enter lines - summaries of product types and DUs to be collected or delivered with this order.
If the product type is not set up to populate automatically it can be selected in the same way as the other data but the "DU Type" will populate automatically with the default value associated with the product, this can be over-typed if required. "Weight", "Volume" and "RPE" will be calculated automatically from defaults set against the product and DU types therefore only the "Qty" (Quantity) value needs to be entered. The totals for all lines is displayed at the bottom to prevent excessive volume being placed on a single order. The "Special Flag" field can be used to represent particular classes of order such as "Advance" or "Left Off"; this will be populated automatically if the "Booking Entry" form has been used to create the order.
In general, entry of details on this tab will result in an order that can be scheduled. However, your operation may require more information, or be using a different order profile (for example, service levels, specific order items, etc), so additional information may be entered through the following tabs.
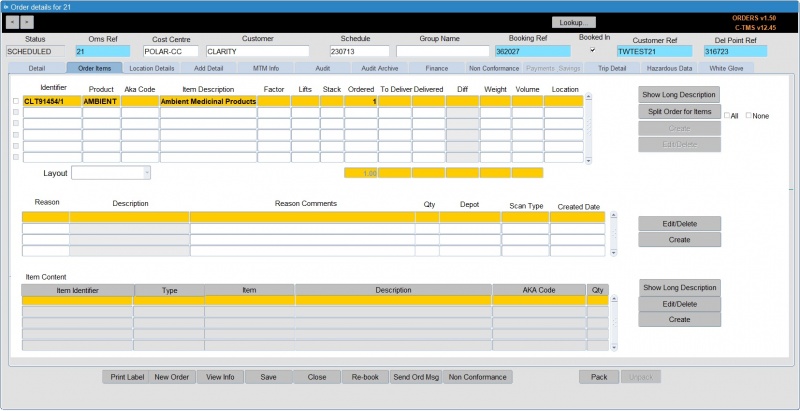
Order Items
All order items are shown for the order. This layout is configurable.
Actions available:
- Show Long Description - shown in a popup window.
- Split order for Items - you can split the item to a new order.
- Create - the screen will show a popup window to enter item details.
- Edit/Delete - the screen will show a popup window to edit item details or to delete the item.
- You can split a total quantity of selected items onto new split order. You cannot use this functionality to split an item into a split order – you must achieve that manually, by creating your own new transport order for the split, and then manually changing the quantities on the existing order.
- When splitting, any split transport order created will have the customer reference appended with "_S1", indicating a split. This will likely impact communications between CTM and any externally connected systems.
For each item selected, the screen shows a history of actions against that item in the table below.
Actions available:
- Create - the screen will show a popup window to enter item history details.
- Edit/Delete - the screen will show a popup window to edit item history details or to delete the item history.
For each item selected, the screen shows any content against that item in the table below.
- Show Long Description - shown in a popup window.
- Create - the screen will show a popup window to enter item content details.
- Edit/Delete - the screen will show a popup window to edit item content details or to delete the item content.
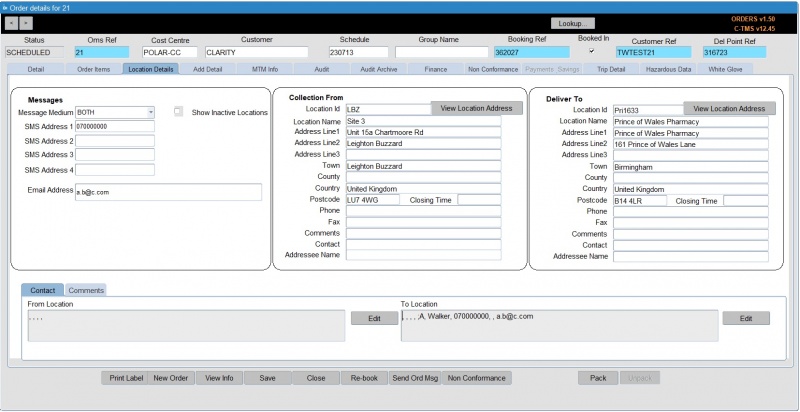
Location Details
This screen shows
- Message medium - you can enter or view any SMS or email details against the order, and select how messages are sent to the contact (SMS, EMAIL, BOTH, NONE).
- Locations - the from and to locations are shown for the order. You can view the location itself in all details with the View Location Address buttons provided.
- Contacts - the Contacts tab shows the contacts against the order for the from and to locations. You can add, edit or delete them using the Edit button, which shows an Order Information popup for this purpose.
- Comments - the Comments tab shows the comments against the order for the from and to locations. You can add, edit or delete them using the Edit button, which shows an Order Comments popup for this purpose.
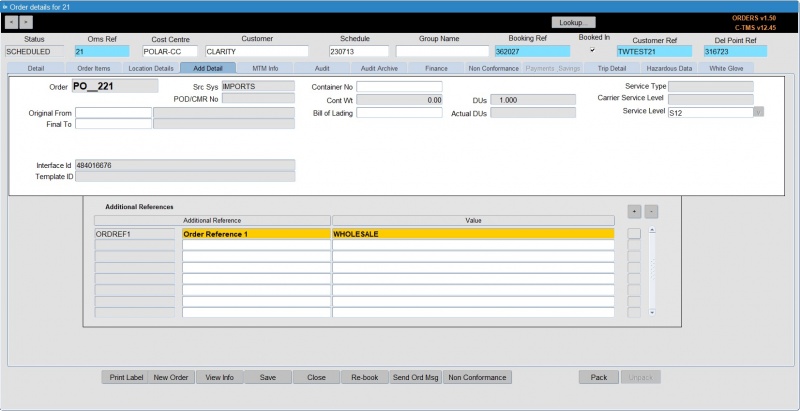
Add Details Tab
The "Add Detail" tab of the order form allows extra details to be added if required:
The "Order" expresses details of how the order is received and is automatically generated. This is configurable and bespoke.
The "Src Sys" shows the origin of the order, in this case "MANUAL" as the order has been create manually rather than from a Lane or Template etc.
The "POD/CMR No" (Proof Of Delivery) is entered from the Order Tracking or Trip debrief form upon confirmation of delivery,
"Container No" is a free text field to record container numbers
The "Cont Wt" or container weight is taken again from another field.
"DUs" and "Actual DUs" is a simple measure of planned against actual and is taken from the information on the "Detail" tab.
The Service Level is a basic service level and informs the collect and delivery windows if configured to do so.
The Carrier Service Level is populated if configured against that carrier and service level.
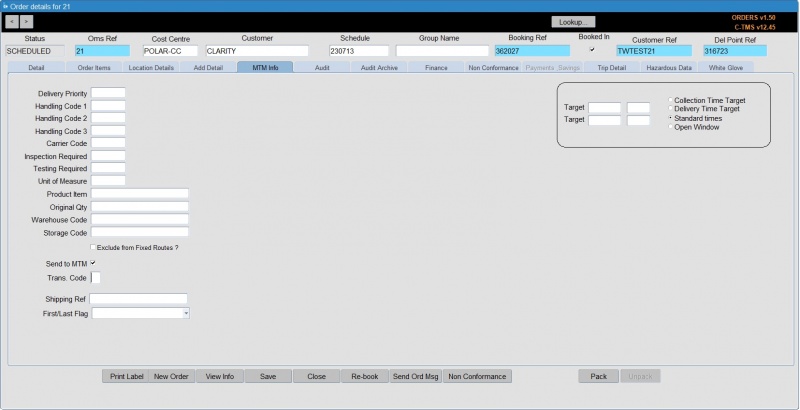
MTM Info
This tab displays MTM interface specific information.
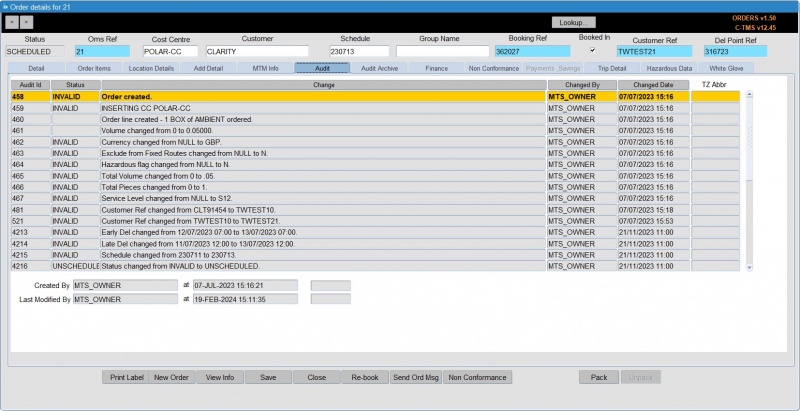
Audit Tab
The "Audit" tab details the original user that created the order along with the date and time of creation and also the last user to update or amend the order along with a history of changes made to the order. This tab maybe restricted by user:
Audit Archive Tab
The "Audit Archive" tab displays the information previously held in the "Audit" tab which has been deleted after a pre determined number of days. A system parameter setting determines for how many days the order audit information will be retained against the order. After this period has expired the data will be moved to the archive tab, for a further pre determined number of days.
Finance Tab
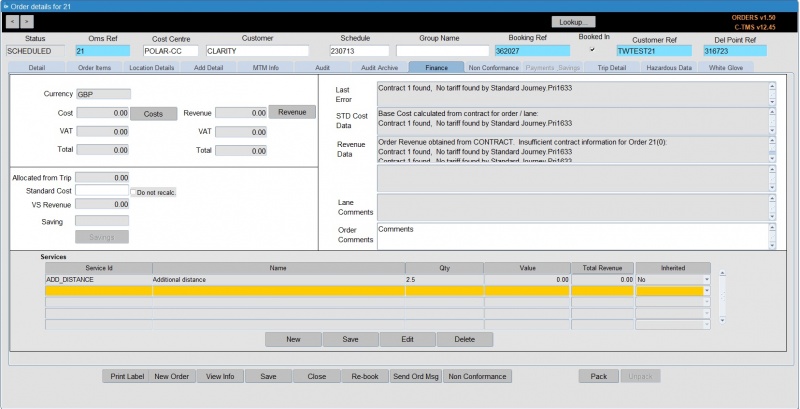
The "Finance" tab displays information calculated from base data set up within the software as part of freight payment:
Generally either the "Cost" or the "Revenue" will be used, the "VAT" will be shown separately and then the "Total" displayed. The "Allocated from Trip" field will display costs that have been allocated from the trip on which the order is scheduled. The "Standard Cost" of the order is calculated either from a contract, from a value set against a lane or through "Combinations" which are linked to the lanes. By checking the "Do not recalc" box this value will be fixed. "VS Revenue" is calculated from the trip on which the order is scheduled and, if there are two or more orders on the trip, will be a proportion of the trip cost.
Additionally, comments are shown here:
- The "Last Error" field will display the last error, which occurred when saving the order, in this case it is a contract error linked to the way freight payment is configured.
- "STD Cost Data"
- "Revenue Data"
- The "Lane Comments" is read only and is only populated when orders are created by Lane based order entry. The "Order Comments" field is a free text field to record any information not incorporated at this point.
- You can also enter some general "Order Comments" here, for your reference.
You can view and enter additional order services here, if configured in the system.
Non Conformance Tab
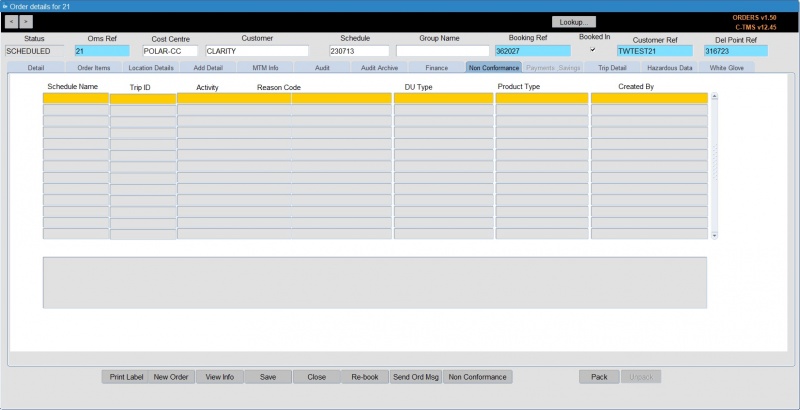
The "Non Conformance" tab details any non conformances associated with the order. These will generally be applied from the "Trip Debrief" form and will be reasons for early or late despatch or delivery, discrepancies etc.
A record of the reason for rebooking can be viewed in the Non Conformance tab if this is a rebooked order.
Non conformance is covered in the Debrief page.
Trip Detail Tab
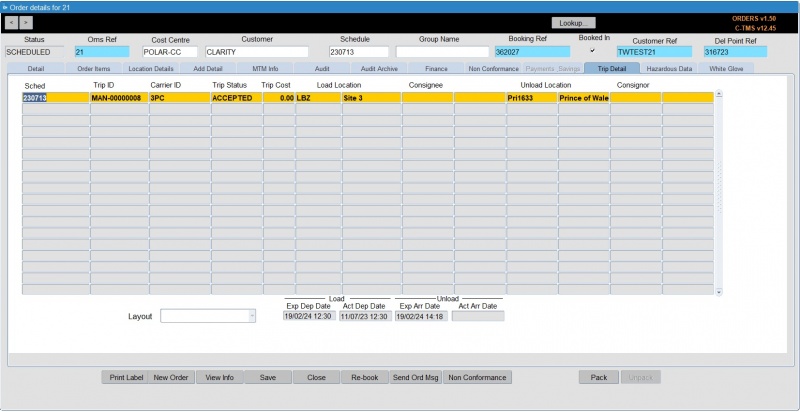
The "Trip Detail" tab is a view only form. The order needs to be scheduled on to a trip for the fields to be populated. This gives the user an alternative way to view trip and find information.
This layout is configurable.
Hazardous Data Tab
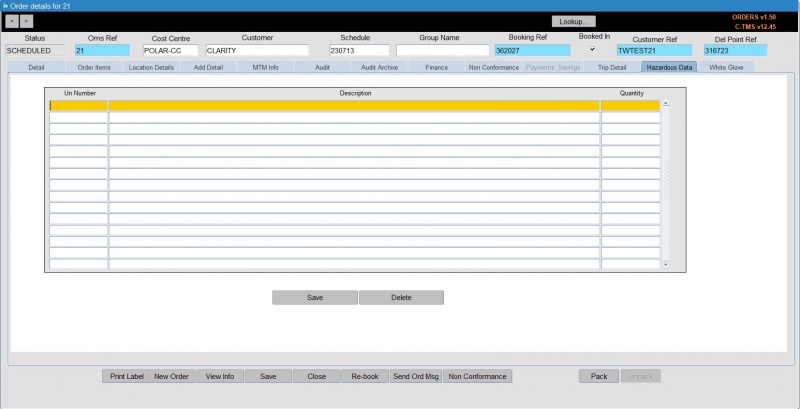
You can view and enter hazardous details here.
Re-booking Orders
To Re book an order click on the Rebook button at the bottom of the order form.
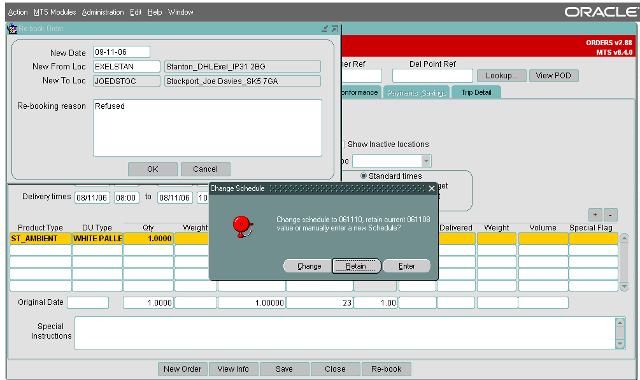
A pop window will appear, you will need to input the new delivery date and give a reason for re booking the order. Once the "New Date" and "Re booking reason" have been entered click OK. You will now be asked if you want to change the schedule to that of the earliest collection window of the rebooking, to retain the same schedule as the original order or enter a different schedule completely.
The re booked order is now created. Note that "_R1" will be added to the "Customer Ref" field, any re-books of this _R1 order will become "_R2" etc.
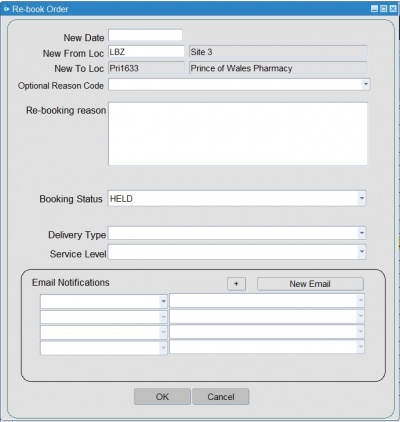
A more complex version of the rebook order screen exists, for entry of more details against the rebooked order:
![]() Note: Orders that have no actuals against them will be set to a status of "aborted" and cannot be edited. If the order is on a trip then it will be removed, and the order status set to "aborted", if it is the only order on the trip, then the trip will also be deleted.
Note: Orders that have no actuals against them will be set to a status of "aborted" and cannot be edited. If the order is on a trip then it will be removed, and the order status set to "aborted", if it is the only order on the trip, then the trip will also be deleted.
If the order has actuals against it then the status of the order remains unchanged. The order will also remain on the trip.
A record of the reason for rebooking can be viewed in the Non Conformance tab of the rebooked order.
Cross Docking
Crossdock or x-dock - means of delivering an Order via one or many additional locations.
Tips & Tricks
RPE stands for Regular Pallet Equivalent and provides a standard measure for comparing DU Type size and thus how much space a DU will take up on a Trailer. For example, a Standard Roll Pallet may equate to 1 RPE, a Large Board may equate to 2 RPEs.
