Admin User Maintenance
This document is designed to be a help guide for creating and maintaining users in WMS. Further detailed documents are available which tailor to the specific modules within the WMS system
Toolbar
The following toolbar functions are referred to in this walkthrough guide:
- Save (Green)
- List of Values (Purple)
- Enter Query (Red)
- Execute Query (Blue)
- Add Record (Yellow)
- Delete Record (Orange)
- Exit Screen (Grey)
User Records
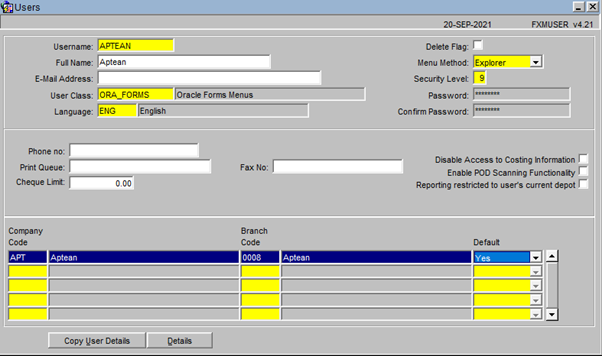
User records are setup in FXMUSER (Maintenance User Maint WMS Admin Users)
The key items that determine the level of access that a user has are:
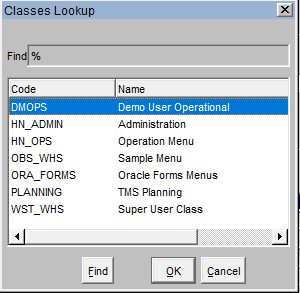
User Class -
This determines the menus that a user can see when they log into WMS
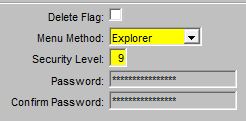
Security Level - Each screen and submenu is graded with a security level. Users can only see the screens and submenus that are at or below their assigned level. The level can be set at 1 through to 9
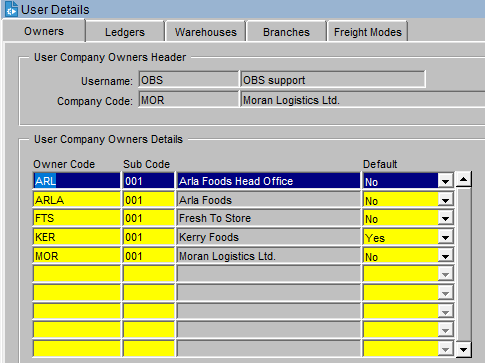
Company Details (highlight line and press Details)
Details - This determines which Owners, Ledgers (PL1/SL1), and Warehouses the user can access
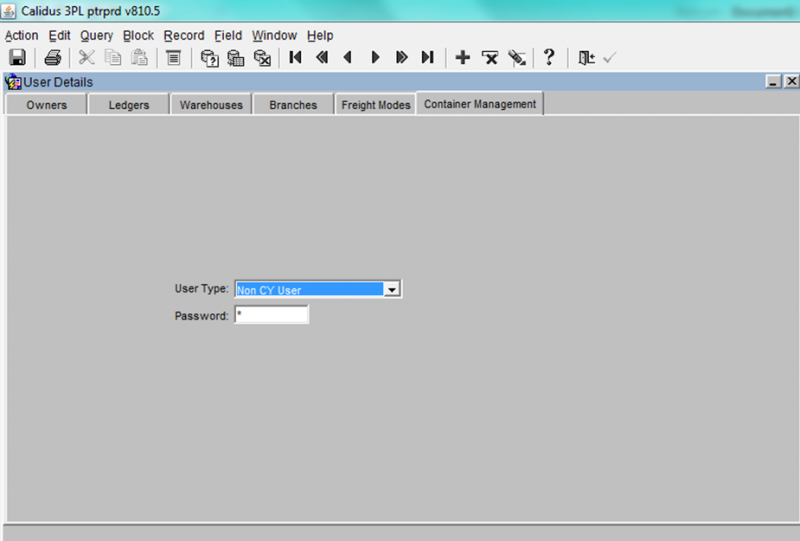
Container Yard Management
Note that the Owner under which you are configuring the user must be configure for Container Yard Management, through Owner Rules (CTMG).
Users are of a specific type
- Non Container management user (no access at all)
- Admin (access to all container management functions)
- PDA (access to device screens only)
- Customer (access to customer screens only)
Security Levels
Screens
Each screen in WMS has a unique Screen ID. This can be seen in the top right hand corner of the screen (SOS1110 in the below example)
The security level that a screen is assigned can be seen by accessing FXMSCR (Maintenance User Maint FXM Screens)
To search for a screen first enter Query mode, then enter the Screen ID in the Name field and Execute the query
To amend, change the Sec. Level accordingly and then press Save
Submenu security settings are set by accessing the menu they belong to. Each menu has a name which can be obtained by accessing the right click menu that is available when hovering over a menu name
Select Properties and the Menu name will display (SGB_ORAOPS in the below example)
Security Levels that have been assigned to a Submenus can be seen by accessing FXMOPT (Maintenance User Maint FXM Menu Options)
To search for a menu first enter Query mode, then enter the Menu Name and Execute the query
The submenus belonging to this menu will list in the detail grid. To amend, change the Security Levels accordingly and then press Save
Menu Class
Adding / Editing Menu Classes
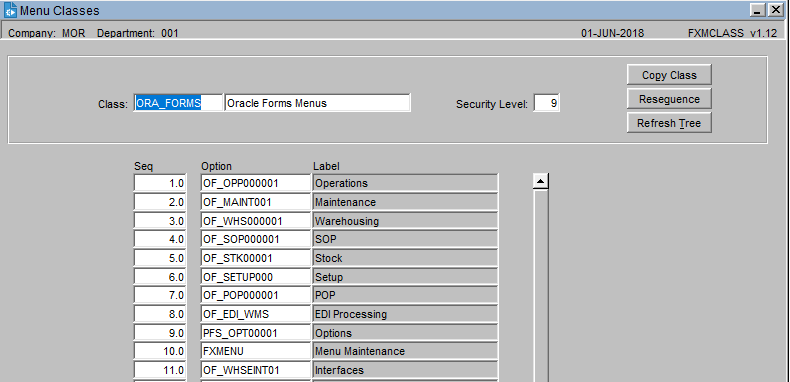
Users are required to be assigned to a Menu Class which determines which menu's they can see when they sign into WMS. Menu classes are setup in FXMCLASS (Maintenance User Maint FXM Classes)
To search for a screen first enter Query mode, then enter the Class that has been assigned to the user profile and then Execute the query
The menus belonging to this class will list in the detail grid. Menus can be Added, Deleted or edited. The sequence (Seq) determines the order that the menus will display in. To search for a new menu use the List of Values. Once all changes have been applied press Save
Adding / Editing Menus
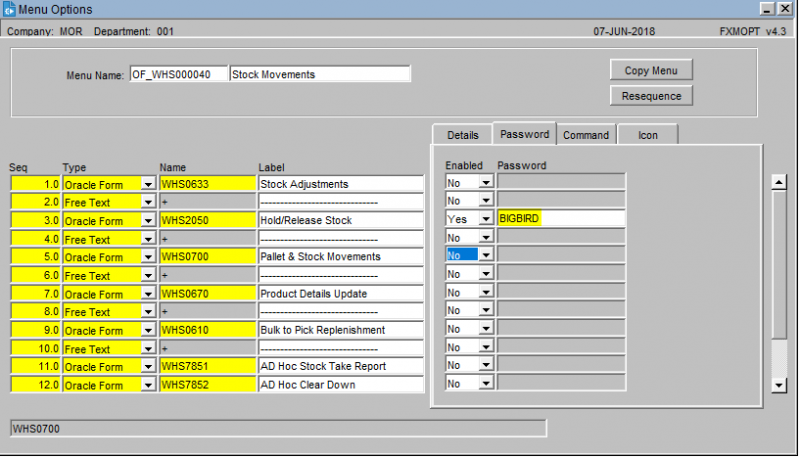
Should you require to edit or create a new Menu then this is completed FXMOPT (Maintenance User Maint FXM Menu Options)
The screen will load in Add mode. Should you wish to add a new menu fill in the fields using the List of Values where required and then press Save
To edit a menu first search for the menu first enter Query mode, then enter the Menu Name and press Execute the query
Submenu's can be added, removed or edited. To search for a new menu use the List of Values. Once all changes have been applied press Save
Passwords can be applied to a submenu / screen by enabling the appropriate line, entering a password and then saving the change
Restricted Reason Code Maintenance
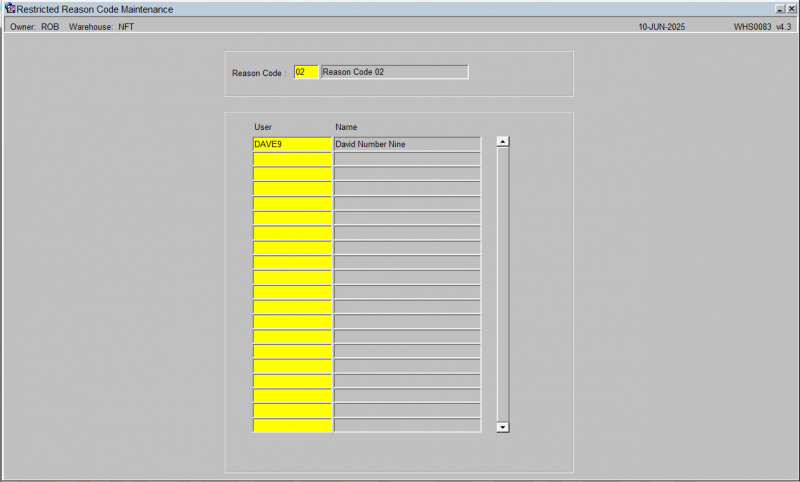
Hold/Release reason codes can be restricted so that only certain users can apply them. To apply restrictions navigate to WHS0083 (Maintenance WMS Maint Restricted User Maint)
The screen will load in Query Mode. Locate the record you wish to change and Execute the query. Alternatively, to add a new reason code restriction use the Exit Door to switch from Query Mode to Add Mode. Then enter the reason code you wish to restrict and the names of the users who have access to use the reason code. Press Save to apply the change.

